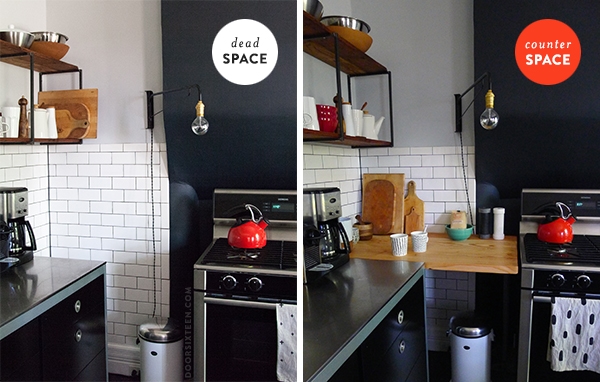
For as long as we’ve owned this house, I’ve been lamenting the weird, dead corner space to the left of the stove. My decision years ago to use pre-fab, freestanding IKEA kitchen units rather than fitted cabinets meant hoping for the best in terms of maximizing the usable space in the room. I got really lucky on the sink side of the stove, which just happens to be exactly 1/2″ wider than a single UDDEN unit, but the 42″ space on the left has just been a waste all this time. I did have a cart there for a long time, but the position was awkward and it really didn’t get much use.
Looking back on this post from January (THAT WAS EIGHT MONTHS AGO, UGH!) you can see that I planned to put a piece of butcherblock there to fill the whole space. Time passed, seasons changed and we never managed to figure out how to wrangle a giant slab of IKEA butcherblock into the car, so we just kept putting it off.
And then…
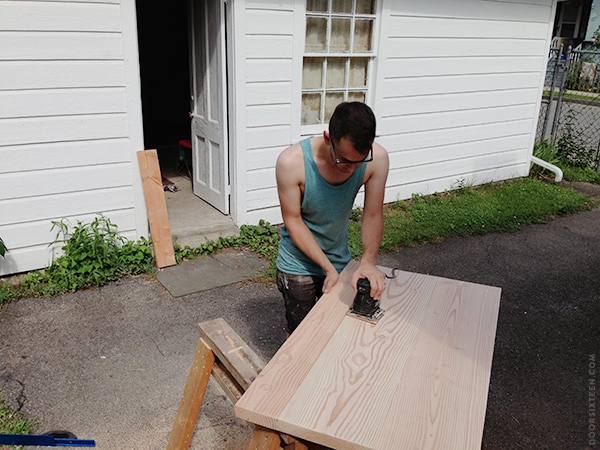
HEYYYY. Who’s that fine young thing in the tank top sanding down what looks like a 42″ piece of wood countertop? Why, it’s Daniel! When Daniel told me he was planning to make his own countertops out of fir framing lumber, I hopped on that bandwagon real quick. I dropped a few subtle hints like, “gosh, I really wish someone loved me enough to make me a piece of countertop,” and the next thing I knew, there it was!
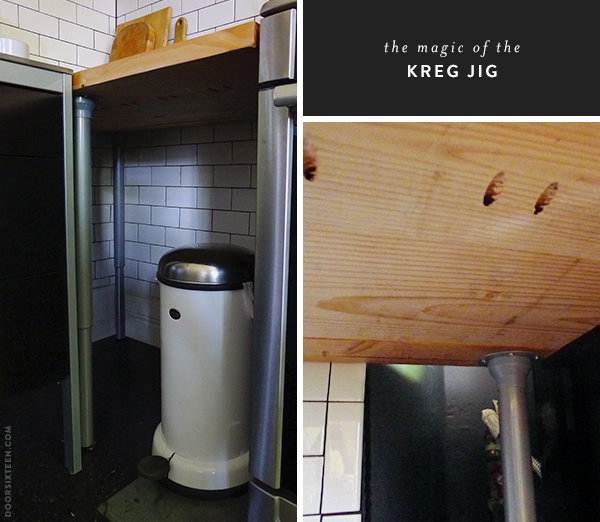
I had absolutely nothing to do with the making of the countertop at all, but Daniel has written up a great post explaining exactly how he did it using nothing more than a circular saw, a Kreg jig, screws and good looks. (His own kitchen is looking totally amazing, by the way, and uses much of the same materials, finishes and colors as my kitchen, but in different ways. I’m so impressed!) (Have I mentioned how great it is to have Daniel and Max and Mekko and Linus as neighbors not only in Brooklyn but now also in the Hudson Valley? So great.)
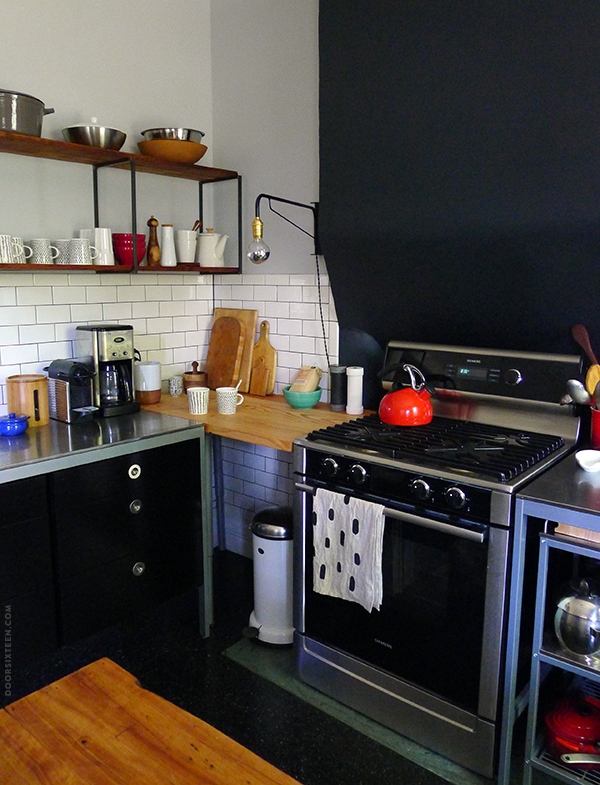
I had a hard time getting a good shot of the underside, but hopefully you can tell what’s going on there. Ideally the counter would be bracketed to the walls for support, but because I don’t want to drill into the tile (I want to have the option of changing this kitchen around in the future, which is why I tiled all the way down to the baseboard moldings), I opted to use four adjustable VIKA KAJ legs from IKEA. They extend to a maximum height of 34″ and have a 165lb weight limit per leg, so they’re perfect for this kind of use. Three of the legs are set at the corners of the countertop, and the fourth leg is positioned back about 20″ so that the front right corner (next to the stove) appears to float. The legs really aren’t visible unless you’re looking for them, but I might spray paint them black at some point just so they blend in even more.
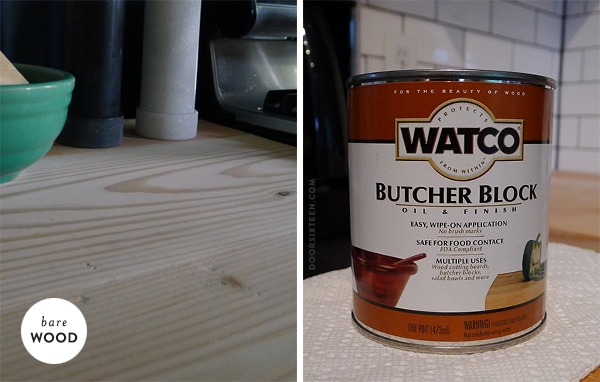
When it came to finishing the countertop, my first thought was to stain it black with India ink (!) and then apply a marine varnish for protection, but once it was in place I really liked having more wood tones in the room. My favorite kitchens are ones that look like they’ve come to where they are over a long period of time rather than being a brand-new matched set of parts, so the less uniformity of natural materials the better. Bring on the knots and wood grain!
If I’d had any mineral oil on hand I probably would have just used that, but I used it all up when I was refinishing the giant island. I’ve read good things about Watco Butcher Block Oil (basically tung oil and solvents) on woodworking forums, so decided to give it a shot. A pint-sized can was about $15, which seemed kind of steep, but because of the solvents it’s nowhere near as viscous as straight oil — it goes a long, long way. I’ve only gone through about 1/8 of the can. Also unlike mineral oil, this stuff is flammable, so you do have to be careful about disposing of your rags (I used cheesecloth). The other thing to be aware of with products like this is that they need to cure for a full 72 hours before the surface is considered food-safe. I don’t plan to use this countertop like a cutting board because fir is too soft, but it’s still something to be conscious of.
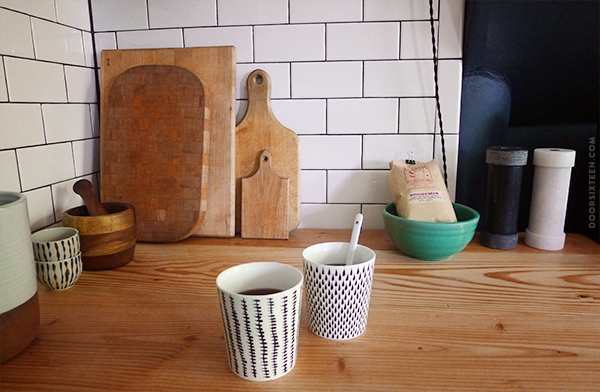
So far, I’ve done three coats (waiting six hours and sanding lightly between coats) of Butcher Block Oil, and the finish looks great. There’s a slight sheen to it, but it’s definitely not SHINY. I don’t like shiny wood in kitchens. I poured a little water on to test its durability, and after 30 minutes it was still beaded up on the surface. Good sign! I’ll probably do a couple more coats just to be on the safe side, and then maintain the finish periodically with mineral oil going forward.
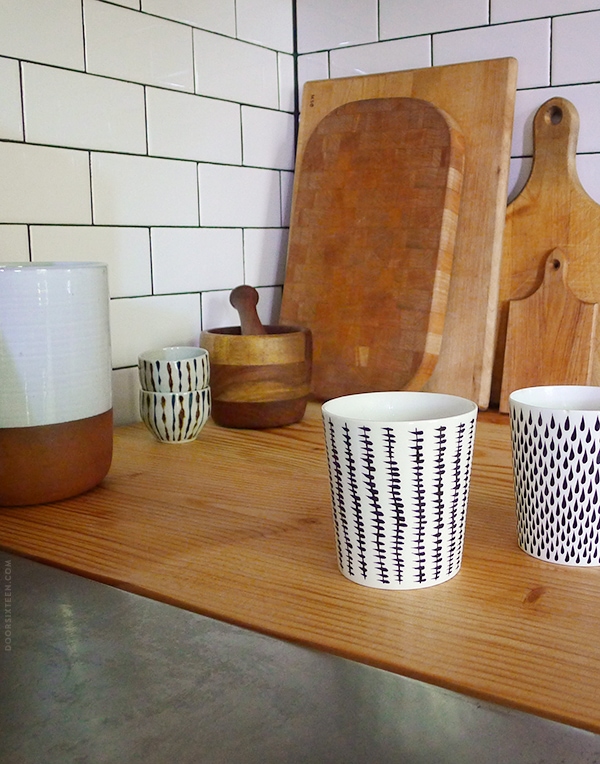
I’m so happy about this combination of materials. Stainless steel gets a bad rap for being “clinical,” but I actually think it can look very warm — it’s all about how you use the material and what you combine it with. See how great it looks paired with natural wood and white tiles? The thing with stainless countertops is that you have to stop caring about scratches and other visible wear and just let it do what it’s going to do. The first few scratches we got on the counters looked terrible, but now that we’ve been using them for seven years and the steel has developed an overall patina, I don’t worry about damage at all. Stainless countertops are pretty indestructible.
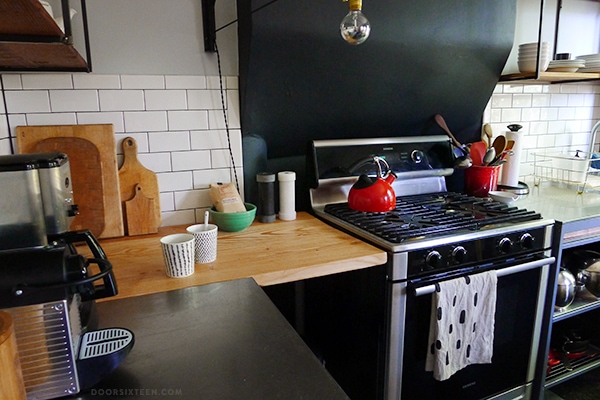
It’s no small thing to have counter space on BOTH sides of the stove now, let me tell you! Being able to use one side for chopping and another for keeping spices and oils handy while I’m cooking (plus the island behind me for organizing ingredients) makes a huge difference. It’s great. I can’t believe I went for so many years without anything on the left side of the stove! It looks so much more visually complete, too.
Speaking of things being complete, the kitchen still is not. We’ve had a very difficult time trying to get a plumber in to disconnect the radiators (that might sound like an easy job, but the steam pipes need to be cut, re-threaded, capped at basement-level and eventually extended and re-routed, which is beyond our level of DIY-ness), but we FINALLY have a plumber booked for next Wednesday. YAY!!! Once he takes out the radiators, I can resume tiling the remaining two walls and ripping up the floor. It’s going to be a VERY busy August! Evan and I have both taken vacation days, and we’re determined to get all of the work done before temperatures drop…otherwise we’re going to be without heat in the kitchen during the winter, which wouldn’t be good news for our feet or our pipes. Time to get moving!!



43 Comments
It’s crazy how that one little piece of wood can just make everything so much more polished and tied together. It looks great!
This is AWESOME!!! Much more space is what we all need. Great job!!! I love your open shelving, too. Where did you find it? Is it sturdy? I’m in the process of a tiny kitchen redo and I did away with all upper cabinets. I’ve been scouring around for ideas. I would love to know if you read this.
love, love love When my stove died, I replaced it and a stretch of my old laminate kitchen counter that was between it and the refrigerator with butcher block!
Genius. Beautiful. Functional. I’m so happy for you! And your things look really good on it.
jbhat
Such a simple idea wonderfully executed – it makes a world of difference!
i am totally loving the way your kitchen is turning out! the little bit of warmth that the wood brings really looks nice with your other choices!
Thanks, Eliza!! I’m happy about how it’s all coming together. 🙂
I’m impressed…and I am not easy to impress
Every time you comment, part of me really wants to believe that my dog Fritz has learned how to type.
the only problem with that is I am Fritz The Cat…LOL
I love this! It’s so simple but it makes a huge difference. A minor detail but I really like the cutting boards stacked on the wood. And the floating corner is great.
I don’t know if it’s tacky for me to say this, but I will anyway…IT LOOKS SO GOOD. Maybe I’ll use that butcherblock finish on my counters, too.
I still can’t believe that me in my hooker suit is published on the internet.
Do you like how I just skipped over the whole scene of you installing the countertop while Max, Evan and I stood there saying, “IT’S NOT LEVEL, WHAT ARE YOU DOING? BACK LEFT, NOT FRONT LEFT!!!” and complained about how hot it was in the kitchen? I felt too guilty to include that part.
You can have the rest of the can!! It’s enough for your counters, too.
I was WONDERING where THAT part of the story went!! Hahahahahaha.
I love how your guilty conscience caught up with you and you added that bit to the comments.
I should probably also add that I was also wearing a tank top when this happened, which for me is basically like running around nude in public.
it looks amazing! what a great friend to have 🙂 I so agree with you about kitchens looking best when they look like they settled in their place & not like they were dropped in, from a height, all at once.
If you are looking at butcher block counters I have one word for you. Waterlox. It is pretty much impervious to water, and can even repair some mild water damage. I originally was just oiling my counters with mineral oil and over time they developed a black ring where I set down my soap bottle and the wood was really dark by the faucet for the sink. Within a week or so of putting on the Waterlox the black ring and darkness around the sink was gone, and the wood was restored to its beautiful glowing self!
Gabrielle, I like Waterlox for floors, but it’s too high-sheen for my taste on countertops. The stuff I used is basically the same thing, though (tung oil + solvents), but it dries with a more matte finish.
I love how the b/w and natural wood all work together!
Nicely done! I love the cutting board display~
Anna, have you ever stained anything with India ink? I ask because I fell in love with a Parsons table stained with, yes, India ink that I saw in a gallery. It came with a $200 price tag. While I love supporting contemporary artists, I did think, “hmm, wonder whether I could get an unfinished table from IKEA and stain it?” So, just wondering whether you’ve done that.
The stainless and wood together look fantastic. Wonder if I could do a mini-counter to ‘extend’ our kitchen island (which is topped with my favorite impervious countertop: White Corian!). Hmm.
Judi, I haven’t tried staining with India ink yet, but it’s in my near future! I have a project in mind…
Looks fabulous! I love butcher block. Whenever I see those DIY shows and people scoff at butcher block, I go off on a rant because they are very clearly wrong. How lucky to have someone custom make this counter for you!
What a nice friend Daniel is! I hope one of my friends would help me like that if I needed it.
Perfect!! What a nice friend you have.
Hi, Anna! When you have a moment, could you provide the link again for those black-and-white ceramic cups? I swear you did a blog post about them, but I just scanned through the Art & Design archives and didn’t find it. Hmmm… Looks great!
Oh no, never mind, I just found it, it was under Food & Drink… 🙂
Oh, that was fast!! 🙂 In case anyone else is looking for them, they’re from Design House Stockholm:
http://www.designhousestockholmusa.com/tabid/210/productid/109/default.aspx
Love the eccelectic look.
I love the contrast in the counters, it looks great!
Looks perfect as always. Now weird question; I noticed you have a nespresso machine. Do you like it? I am debating with myself wether I should get one or not. I am afraid the coffee capsules are expensive, non ecological and that. I will get tired of only drinking the nespresso kind but I am attracted to the simplicity of the product. Thanks for your help!
Amelie
I took a woodworking class a couple years ago and the instructor (a Swedish woman, incidentally) recommended leather dye to get a true black finish. One of the other students tried it and it turned out great. Not sure if it’s cheaper or easier to work with than India ink, but it might be worth looking into.
Rita, the only thing I’d be concerned about with leather dye (and any type of stain or dye, really) on a countertop would be the possible toxicity and whether it could potentially leach into food it comes in contact with. India ink is non-toxic.
Such a great idea, I hate the dead space in my kitchen! Will definitely have to see about doing this, Thanks!
Just read through your “happy 5th birthday posts”. Oh my word… your fireplaces are absolutely stunning and I love, love, love the little sink that you kept in the one bathroom. Turning out great.
Did you make those shelves to the left of the stove, or buy them somewhere? Dying to rip down all our gross cabinets and put up shelves just like those. Sorry if you’ve covered this in an older post–I just started reading your blog. Also–I’m right across the river in Peekskill! So cool to see the insides of one of those Newburgh houses!
Hi Elena! The shelves were made to fit the space — there’s a whole post about them here:
http://www.doorsixteen.com/2013/03/12/the-kitchen-shelving-is-up-yayyyy/
I loved it….. Where did you find The wood?……
My friend bought the wood at a lumber yard. It’s just fir framing lumber.
Great article, Anna! Kudos to you and Daniel for a wonderful job on the genius butcher block counter – it looks awesome! I also love your writing style – fun to read! 🙂
Thank you so much for writing this and keeping it online even after a couple years. I built myself an island with unfinished wood as the countertop. I’m using the Watco Butcher Block Oil/Finish to seal it. The instructions on the can say put first coat on and wait 6 hours before putting on a second coat. Then it says to wait 72 hours before use. I want to put 6 coats on, but couldn’t figure out if I needed to wait 6 hours or 72 hours between coats 2, 3, 4, 5 and 6. (I thought it might be 72 because it wasn’t soaking in as much.) So glad to know 6 hours between coats works.
Quick follow up question – now that it has been a couple years since you installed the countertop, have you had to reapply the Watco oil/finish? If so, how frequently do you reapply it?
Hi there! I haven’t lived in this house for almost a year now, but prior to selling, no, I never needed to reapply. I imagine your results would depend on how much wear and tear your countertop gets, though—I don’t know that my experience is a good barometer.