When last we checked in on the kitchen floor, things were not looking pretty. Once the VCT and the ant-riddled plywood were removed, we discovered the original pine plank subfloor was not salvageable. We knew we still wanted to have a wood plank floor, though, so we planned to buy cheap pine tongue and groove and paint it.
But then the next weekend rolled around, flooring still unordered, and we really wanted to get started…and then I started thinking…
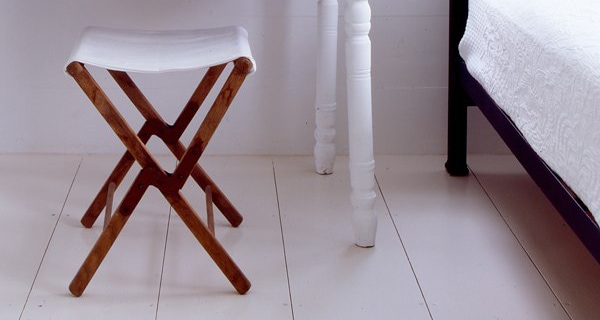
Years ago, we went to look at an 1890s cottage that was for sale in the Delaware River Valley. The whole thing had been totally renovated and painted entirely white inside and out (it was soooooo dreamy — the photo above is from the real estate listing), and we got to talking to the sellers about the work they’d done. The floorboards appeared to be original wide-plank pine, but it turns out they’d actually used 3/4″ plywood cut down to 10″ planks and face-nailed in place. They painted them with a white, high-gloss marine paint, and the result was gorgeous. Even though we didn’t wind up buying the house, those cost-saving white plywood floors stayed filed away in my mind for future reference. Also in the file? Daniel and Valeria’s bedroom floor at Hindsvik.
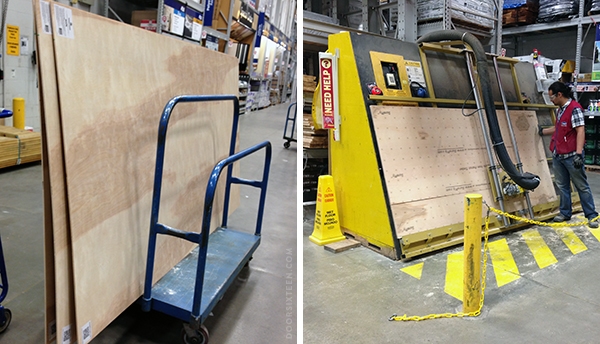
While we were walking around Lowe’s pricing out various plywood types, I had an epiphany: Since the existing subfloor was still structurally sound, couldn’t we get away with using really thin (and really cheap) plywood to make our planks? Why use something thicker, which would be much more expensive, not to mention a huge pain to transport to our house? Is there any reason why inexpensive 1/4″ plywood wouldn’t be totally fine?
ANNA, YOU ARE A GODDAMN GENIUS. Except I’m not a genius, because as soon as I looked this totally original and unique idea of mine up online, I discovered about a million (or at least four) people who’d done it before me. I am not a genius, I am not a genius, I am not a genius and I am not a genius. Oh well.
We loaded up the 7 best-looking 4×8′ sheets of 1/4″ maple plywood we could find, then asked the wood dude at Lowe’s to rip them lengthwise into 6″ strips. No can do, wood dude replied, because for safety reasons they’re not allowed to go smaller than 12″. We figured we’d take what we could get and loaded our 12″ planks into the car. Daniel drove down from Kingston to assist, and Ilenia saved us all from cutting our hands off.
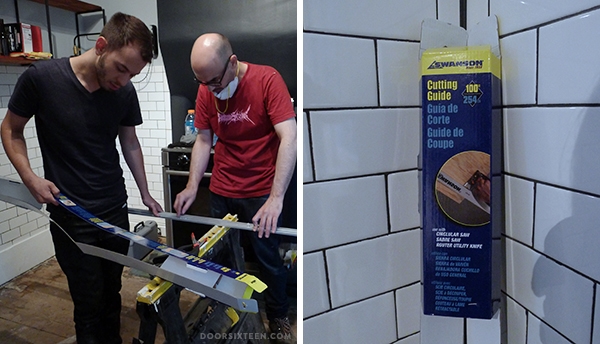
12″ wide floorboards would have looked ridiculous in our little kitchen, so we did still want to cut them down to 6″. We don’t have a table saw, though, so we used a circular saw with this magical Swanson Cutting Guide. I know it doesn’t look like much in the picture, but basically it’s an adjustable (up to 100″) straightedge that attaches with two C-clamps onto whatever you’re cutting with a circular saw to function as a jig. It’s a fabulous thing. We also bought a big bag of cheap plastic spring clamps so we could cut through several boards at once.
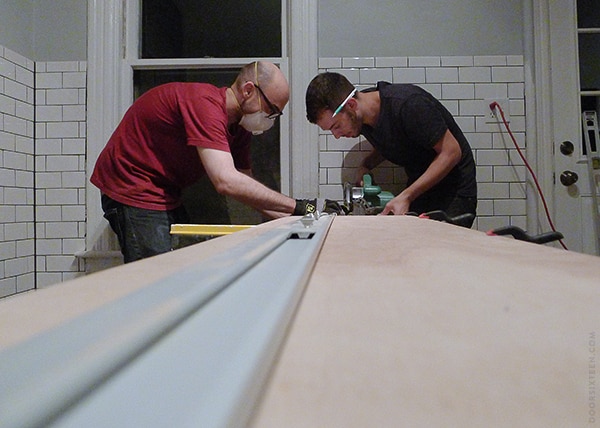
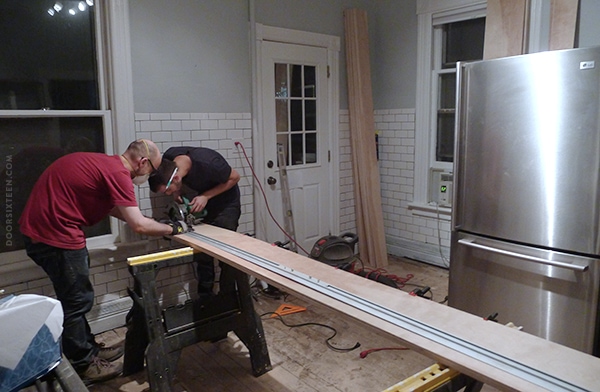
Here are Evan and Daniel setting up the jig and adjusting the blade depth on the circular saw. To keep everything from going haywire (i.e., the board falling off of the sawhorses and/or the saw opening up someone’s brain), one person manned the saw while three of us held onto both sides of the board. I kind of wish I had a video of the whole thing, because the choreography involved with cutting an 8′ long board in a 10′ long kitchen was pretty impressive.
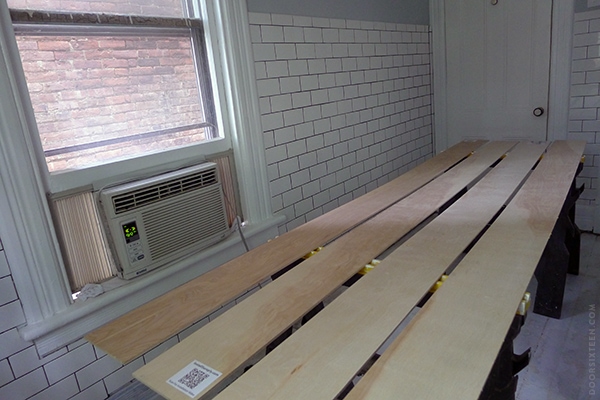
The next morning, I primed the back and edges of each plank to prevent warping. Annoyingly, the plywood sheets had all had several stickers (including a stupid, pointless QR code that NO ONE WILL EVER USE, EVER) on the GOOD side, and no amount of picking, scraping, Goo-Gone-ing or kerosine-ing (!) could remove them. I gave up and decided it was OK to let the printed side show on a few boards. Obviously that’s only OK if you’re ultimately going to paint your floor, but hopefully I don’t need to say that.
Here’s the part of the post where my only camera battery died and I discovered I’d somehow managed to lose the charger! Sorry for the crappy iPhone photos…
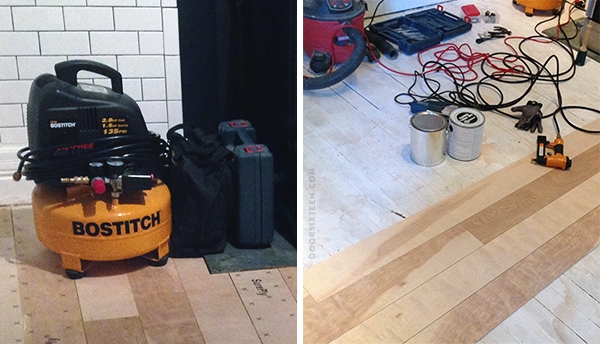
I LOVE YOU, POWER TOOLS. We borrowed a compressor and a nail gun, and Evan and I had the entire floor down in about 6 hours — and that’s including the time-consuming stuff like using a jigsaw to cut out shapes for pipes. It went really, really quickly.
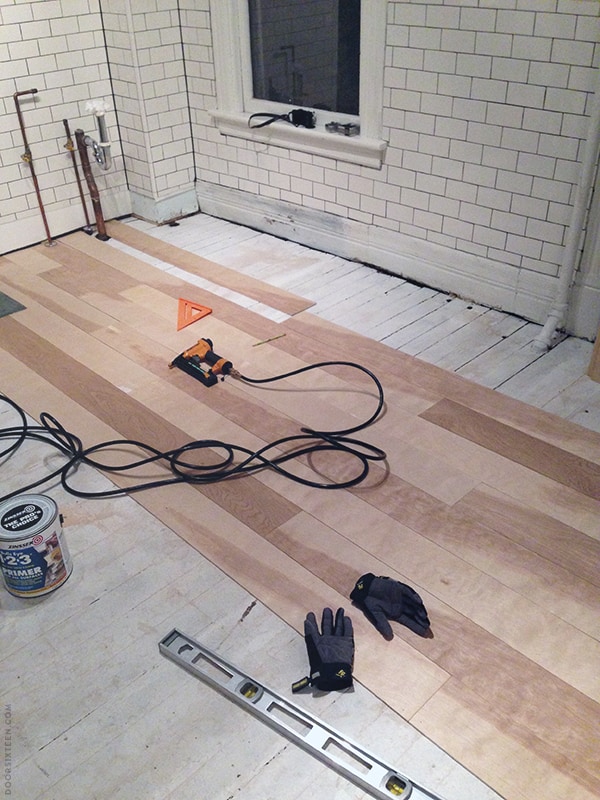
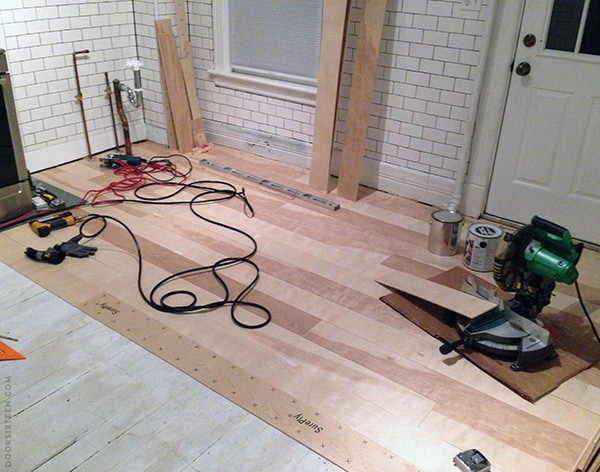
We made sure to stagger all of our boards so there are absolutely no patterns at all. Laying a wood floor is a little like doing a puzzle — we considered the length and placement of each plank as we were going along, and in the end, we wound up with only 1/2 a board in waste.
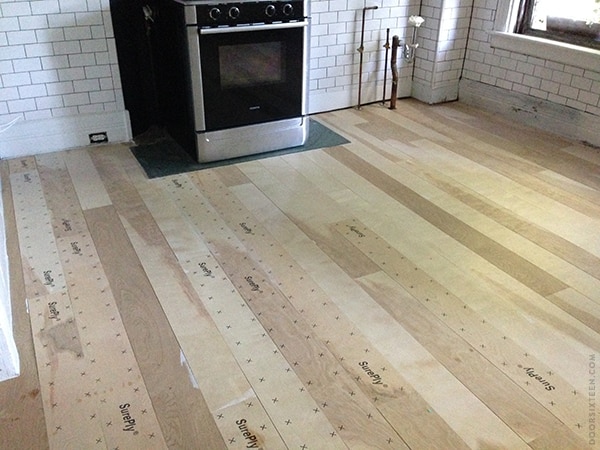
DONE! Boom. The total cost for the plywood (maple, finish grade) was about $140. Yes, the entire floor cost $140 — less than $1 per square foot. Not bad for a wide-plank wood floor!! Pretty great, in fact.
I’m sure there’s bound to be some concern about the durability of the floor, but I honestly don’t think that’s much of an issue. I don’t care about dents and stuff, and I’m not going to need to refinish it down to bare wood. For my time and money, this is a great solution. I’m super excited about how it came out.
Just wait until you see it painted!! (Give me a few days, haha.)


94 Comments
So cool!!!! YOU ARE A GENIUS.
A hairdryer blown on those pesky stickers will loosen the gummy glue on them if you get it hot enough and with patience it will pull off stickers.
oooh! love it! can hardly wait to see the finished painted result.
way to go, genius!!
MIND BLOWN!
I want to fly you out here to renovate my condo. 🙂
It was done up by a developer, so some of the details are a little too….”urban professional” for me. I stink with reno, so I am trying to distract visitors with furniture and tchochkes.
YESSS. I wonder how they will hold up, or heck who cares its so inexpensive.
Eh, they’ll be fine! It’s an old house, it’s OK if they get banged up. 🙂
We did the same (see comment below), and the wood finisher guy said with the super strong sealant (which stunk up the house for 3 days – no joke), it can last about 5 years. He didn’t recommend for high traffic areas, only reason being the finish is so thin that you’ll have to refinish often, or, since it’s so cheap, replace. We noticed that the wood did scratch easily, but only had one bad scratch overall. The worn look will look weathered and great in an older house.
Stunning!
Just make sure you clean the crap out of the floor before you paint…and wait for it to dry longer then you think you need to. My office got their floor painted white…the guy didn’t clean thoroughly so the paint peeled up after a couple of years. It was also from moving furniture around in the same spots. Right under my desk I used to stare at this paper clip that was embedded into the paint, it still bugs me to this day and I don’t even work there anymore. haha.
Anyway, moral of the story, choose a quality paint and clean well before hand! Good luck, I know it will be amazing!!
Looks great, Anna! I suppose you could apply the same concept to wall paneling? I’ve been looking for a cheap option for the bathroom walls. This has to be cheaper than tongue and groove
Scott, yes, you could, but price it out. In my downstairs bathroom I used 1/4″ T&G paneling, and was really cheap — I went up 8′ on walls, and the total cost was only $120:
http://www.doorsixteen.com/2009/12/15/my-downstairs-bathroom/
I actually used inexpensive pine T&G flooring on my bathroom walls because it had to be thick…that was more expensive, but still pretty cheap:
http://www.doorsixteen.com/wp-content/uploads/2011/01/BAupstairsbath3.jpg
This is an example from a blogger who used 1/4 inch melamine boards (cut at the big box store) for her mudroom walls: http://littlegreennotebook.blogspot.com/2013/08/diy-plank-walls-and-painted-mudroom.html
Anna: it looks wonderful!!
I LOVE it! Great job!
Oh this is so going to be all over the interwebs. Looks fantastic — can’t wait to see the finished product. WELL DONE!
Wow- what an amazing solution. Bravo!
Amazing. Brilliant. 100% genius. I think you deserve a cute black Smeg for your troubles and sensible cost savings…
If only every accomplishment could be rewarded with fancy Italian appliances!
So excited to see this because this is exactly what I have in mind for my glassed-in porch. I’ve been debating what to use for paint or stain, so looking forward to the follow up 🙂
Looks great! We did this in the bedroom of our last house and I loved how it looked – our friend laid the boards in a great pattern with brass screws, and we had a super-shiny finish applied. It made the room GLOW – it made a bungalow bedroom look like a million bucks, and it was mere hundreds of dollars for 400 square feet versus thousands for other type of flooring. Here’s a crappy picture from when we sold the house: http://www.fsbomadison.com/picture_detail_t.asp?pic=pics/16332/16332_11.jpg&addrs=42+WIRTH+CT&pNum=11&pMax=13&ID=16332; http://www.fsbomadison.com/picture_detail_t.asp?pic=pics%2F16332%2F16332_12.jpg&addrs=42+WIRTH+CT&pNum=12&pMax=13&ID=16332; http://www.fsbomadison.com/picture_detail_t.asp?pic=pics%2F16332%2F16332_13.jpg&addrs=42+WIRTH+CT&pNum=13&pMax=13&ID=16332. I can’t recommend it enough to others!
Looks great, Marlena!
Dang, folks! That’s gonna be amazing.
Oh I really like the wood, but I’m sure it’ll be great painted. Can you do this over a concrete floor? I imagine nailing into concrete could be a problem.
Jaimie, you could definitely do it over concrete with construction adhesive, but you’d really need to know what’s going on under the concrete and whether moisture could be an issue. I don’t know much about concrete subfloors since I’ve always lived in old houses, but I think you need to do stuff like use vapor barriers, right? That might not work without T&G joints…
Ok I need to see this painted! Looks so good. I say you are a genius.
You may not have thought of it first, but you are a genius. Looks insanely good, and is a crazy smart use of budget dollars. Question(s): did you use an underlayment? and, what did you use for spacing, or did you just but up your joints against each other? Wondering if your black primer is going to show, and if you have something black underneath to show through any gaps that might peek out over time.
No, we didn’t use an underlayment. We actually bought (and later returned) a couple of rolls of that really thin foam stuff thinking we would, but once we started laying the boards down we realized it wasn’t necessary. I also didn’t use anything for spacing — slight irregularities in the board cuts are enough to force slight gaps that look very natural.
I used white primer, not black, so I’m not sure if I understand the last part of your comment, but I’m not worried about what shows between the gaps. I can caulk anything that’s wide enough to be an issue.
For some reason the photo looked like there was a thin edge of black primer (I’m pretty sure I’m just seeing an actual shadow). For some reason it made perfect sense to me that you would want to enhance any shadow line to create the look of old, worn, antique boards. I guess I just perceived you as a mad, crazy genius, rather than just a savvy, smart, normal genius. 😉
Boo-yah! Nailed it!
I really like the idea … I am renovating my home and your blog is truly inspiring!
What a great idea. I have concrete floors with a floating laminate floor on top.
I HATE the laminate floor colour
Do you think I could lay the 1/4 plywood over the laminate and nail into it?
Looking forward to bingeing on your posts for the next while . Dying to see how the apartment stairs turned out 🙂
Zola, I guess that depends on whether the laminate floor is thick enough to hold the nail? I don’t really know anything about that, but my biggest concern with going over a floating floor would be whether anything could shift over time…but I don’t know.
The apartment stairs still look exactly the same! I haven’t had time to do anything with them at all. 🙁
hmmmm. I’ll have to do more interwebs research…… I dont have heavy traffic through my flat and its only 600 sq feet so it could work ………. ( I just hate the fake orange wood laminate with a passion and dream of pale maple floors sigh)
I know this is years later Zola but I’ll put it here for any future readers. Yes, you should remove the floating laminate floor first. You want to make sure the sub-floor is solid, flat and secure to nail into – not floating. Otherwise you won’t have a solid base to nail to and the floor will be spongy.
BTW, you have an awesome blog Anna. Came here because of your book designs and found you blog 🙂
they look gorgeous and quite reasonable. are you going still going with painted patterns or just plain white/ dark?
cant wait for the final reveal
You’ll just have to wait to find out! 😀
ok but you still might be a genius. can’t wait to see the finished product!
This sounds really interesting, curious to see it painted.
When I lived in house that were “temporary” I used to put hardboard on the floors cut into long 30cm strips. I would paint them with transparant paint (because I liked the structure) it holds up pretty good. It really depends on the quality of the paint. I stuck them to the concrete floor with glue (don’t know the english name, sorry) but I have also tried double sided tape. It looks very good, especially if you pay attention to how you lay them and where you get your seams. All in all it (hardboard) will last about 2 to 4 years. But it is easy to do and affordable, and it beats laminate.
Have a wonderful day!
Wow this came out amazing, I saw the picture on instagram and was all like “worst idea ever”, then read this and was all like “wow she did everything most people would have done wrong right”. Good job. your house look amazing.
Looks great!
You are a genius. You are a genius. You are a genius. That floor looks amazing and I can’t wait for the post-painting post!! Keep the pics coming!
Looks great, Anna! I put this exact same floor in the studio here in 2011. Same plywood (also from Lowes). The only things I did differently are my planks were 7″ wide and I glued and nailed them down. I did a sort of a washed paint look where I watered down grey paint and then rubbed it on with a sponge. It was awesome until I sealed it and the sealer yellowed and it went from grey to mint. Ah, well…live and learn.
The planks themselves have stood up remarkably well. The edges are still square and there’s been no movement. There are some scratches from the claws of the 100lb dog but that is to be expected on any wood floor. The paint has worn away a bit where my stools sit and scrape the floor all day but the veneer of the plywood beneath the missing paint is still in great shape. I’ll eventually repaint but I’ve been really happy with the material and still can’t believe how inexpensive it was.
Good to know, Angie! Do you have a picture? I looked at the studio photos on your site, but I can’t see the floor. I’m so curious!
Here’s a photo of the floor. And the dog. http://on.fb.me/1f8soXt
wow that floor looks great …… Im amazed plywood holds up so well
Perfect timing! We’re in the midst of a kitchen remodel and have been stuck on what to do to our floors. In one area we have a slope that drops off 1 inch in 3 feet. There is also a ton of flex in our floor. Before doing anything we are going to stabilize our floor from below, however, we are still very limited on our flooring options. We had a tile guy come out and said he wouldn’t put ceramic tile, VCT, or Marmoleum in. He said our best option is vinyl tile. I cringe at the thought of putting vinyl tile in, especially since the rest of our home has hardwood, ceramic, and slate flooring. Not to mention that sh*t is expensive – $6 a square foot!
Now, a couple of questions. I assume you face nailed the boards. Are you going to go back and fill/sand the nail holes before painting? What is your take on people saying it will only last a handful of years? My gut doesn’t buy it. Especially if you use the right products.
Thanks for sharing your process! I can’t wait to see the finished product…(and selfishly) learn your tricks.
Kate, I think this could work well on floors with a lot of flex, but you might need to use screws instead of nails…or a combination of construction adhesive and screws, maybe. What’s the substrate?
Yes, we face-nailed the boards, and no, I’m not going to fill them in. If anything, I think the nail holes will keep the floor from looking too even and perfect, which was my biggest concern putting brand new, smooth wood in an old house.
I feel the same as you about the potential longevity. We don’t wear shoes in the house, so I honestly don’t even really see wear on our floors at all. (Of course, we didn’t even refinish our floors when we bought the house. I’d guess the last time they were refinished was easily 30+ years ago.) When we painted the floor in the room above the kitchen white, everyone said it would need to be repainted in a year or two, but now it’s almost 5 years later and we’re still totally chip-free! And I do think it comes down to the products and preparation as well, yes.
Thanks for responding!
Our subfloor is two layers of 3/4 inch plywood. We’re hoping that once we stabilize the floor we can forgo the extra step of adding adhesive. However, we are thinking about adding a moisture barrier. Our kitchen is right above our garage. I’ll do a little more research, but I’m thinking it might be worth it.
Did you ever have a problem with the nail gun blowing right through the 1/4 inch ply? My husband is a little worried about that.
Happy painting!
This is beautiful. I’m really excited to see how it turns out!
I did this exact same thing in my whole house! the thin stuff! It looked exactly the same as in your pics! I painted them white and they still look amazing, they are never gonna go anywhere! such an awesome idea..
It looks awesome, and should look great painted.
How does it sound to walk on? My issue with the laminate floors is that they sound thin when you walk on them, but that may be due the fact that their usually floated and not nailed. And did you use cut nails?
Wow, this looks great. I would’ve never thought of this idea.
O.M.G. Awesome! Can’t wait to see the finished room! And, yes, genius!
I love this! We bought a mid century house last year, and we’re very slowly renovating every inch of it. I want to honor the era in which the house was built, and we’re only removing elements that aren’t true to the house (removing terrible partition walls that were added over the years etc). We ripped out carpet and tile and now need new flooring on top of the subfloor in the kitchen, dining, and living areas (all one giant, open space). Do you think this look is passable for a mid century house? I love the look and the price, but the wide painted floorboards immediately make me think of old homes.
Sooo impressed by your DIY chops!
X
Anna you are, at minimum, Genius-Adjacent.
Beautiful results so far!
Can’t wait to see how it looks after the paint job! We also used plywood planks during our remodel two years ago. We love them. One of the best decisions we made during the whole process.
http://www.goodgumption.com/post/20052959616/lookout
Amy, that looks gorgeous!! I love the canvas dropcloth bedspreads.
We have a stained plywood floor at the boutique that I work in. Over the past 8 years, it’s held up beautifully to tons of foot traffic, lots of wetness from Portland rain, furniture being scooted around, etc. I’m sure yours will do the same. Looking forward to the painted floor photos.
Wow! I cannot wait to see the “after” photos!
Brilliant!
Flippin’ heck! we may just have to do that when we get around to the kitchen floor. You are a genius girl! there may be nothing new under the sun but I first saw this idea HERE on D16! so it counts as genius! 😉
just curious about spacing the boards. you said you didn’t space, but what about food/other things getting into the spacing?
gorgeous.
Impressive!
And I guess the plywood is thin enough that you don’t have to worry about changing the height of the floor where it meets the molding.
Looking great!
We did this in our bedroom a couple of years ago inspired by the Hindsvik bedroom, but also cutting the plywood boards to plank and painting them white. It is still looking great after 3-4 years – just a couple of dents (my husband has this custom of letting his iron fall sometimes when he irons his shirt early mornings and I sometimes forget to take off my 10 cm heels in the room, argh), but other than that, just perfect. And great to walk on barefooted!
Is it weird that I find the detail you always provide kind of soothing ? And I’m not an organised or fastidious being at all. Can’t wait to see the finished floors !
I did the same (white painted 1/4″ ply, except 4″ wide oak) throughout my third floor a couple of years ago. It’s held up really well so far. I used BM porch and floor paint in White Dove and sealed it with satin Varathane Diamond, and cleaning with a steam mop is pretty easy.
http://www.flickr.com/photos/31622796@N00/5630551610/in/photostream/
http://www.brickrow.ca/wp-content/uploads/2013/10/br3-941×519.jpg
I loved it so much that I used the exact same technique (different paint) on the walls in my bathroom in a follow-up DIY a month ago:
http://www.brickrow.ca/wp-content/uploads/2013/10/br4-941×519.jpg
http://www.brickrow.ca/wp-content/uploads/2013/10/br9-941×519.jpg
I thought I was a genius, too 🙁
ArmorSeal Rexthane I MCU, this is an excellent flooring coating. I use this in my commercial jobs and for houses with a lot of foot traffic.
Isn’t there hardwood floors already in place? Under the plywood there?
There’s an unsalvagable pine subfloor underneath:
http://www.doorsixteen.com/2013/09/05/kitchen-floor-demolition-derby/
I was talking to a friend about what to do with our ugly kitchen floors and she mentioned this post. I’m so glad she did! I’m loving this cheap and (somewhat) easy flooring idea. Thanks for being you, Anna!
Hi, your floor looks great!. I’m planning on doing the same to all of my old carpet covered floors since my budget doesn’t have room for hardwood floors. When I took up the 40 year old carpet in my sewing room, I found out that what I thought would be 3/4″ thick plywood is actually 1/2″ thick. Can I still use the 1/4″ thick as a top plywood layer to whitewash, or would I need to buy 1/2″ thick plywood? Also, if I need to get the 1/2″ what grades from the least expensive – to most expensive would look good white-washed & marine varnished?
Sorry for so many questions. It is just me doing my diy home fix-ups and I am learning as I go.
Lyn McCoy
Hi Lyn, I wish I could answer your questions, but I’m afraid I don’t know. My best suggestion would be to buy a few scrap pieces and test out the finishes you’re planning to use. Then you’ll know for sure. 🙂
Good luck!
hows clean up on the floors? i have old hard wood in my apartment and they are ridiculous to clean. crumbs trapped in all the tiny creases. i feel like i sweep three times a day and still find things all over.
Vacuum! No problems with crumbs.
A year later, how are you feeling about the condition of the floors? Are they bowing? Did they not stay firmly attached the subfloor in certain areas? I’m in a kitchen floor crisis exactly like the one you had, and can’t find many good options.
They’re pretty much exactly the same as the day they were finished, David. The boards are face-nailed to the subfloor, so I can’t imagine we’ll have any trouble with them bowing or otherwise loosening.
We have a stained plywood floor at the boutique that I work in. In the course of recent years, its held up delightfully to huge amounts of foot activity, heaps of wetness from Portland downpour, furniture being hurried around, and so on. I’m certain yours will do likewise. Anticipating the painted floor photographs.
Hiya, Im about to give this a go and i noticed in your pictures you laid the ply planks in the opposite direction of the the existing floorboards was this for a particular reason i.e for more stability? or would laying the plywood planks in the same direction as the existing floorboards be fine?
Many thanks for sharing your experience.
Humble New Zealander.
Yes, laying them perpendicular was for strength.
I really want to do this but I am concerned….the thickness actually varies from one sheet of plywood to another, did you find this to be a problem when you laid your floor?
Since this is only 1/4″ plywood, I don’t see much room for sanding to ensure you have a smooth floor.
Hi Debbie, no, I didn’t notice any kind of difference in the thickness that I would have considered an issue. (I would not recommend sanding veneered plywood regardless of thickness, fwiw.)
Hi there I’m curious of what the floors look like now, and if you painted them or stained them!?
Here’s part two:
http://www.doorsixteen.com/2013/11/14/installing-a-plywood-plank-kitchen-floor-part-two/
At first I wanted to find out that this was possible, because my brother had told me about 10-15 years ago it probably wasn’t for some reason I don’t remember. But now I have the same feeling of “I’m not a genius” but still, it is nice to see everyone’s take on it, because I hope by reading enough posts that I will finally get brave and just do it! I really like how yours turned out. Thanks for posting this.
Do you need a moisture barrier for your plywood plank floors like a laminate floor needs underneath?
Hi Melissa, moisture barriers are not needed in homes with wood subfloors over basements.
Hi Anna… your floors look so amazing! We’re planning plywood floors for our new home reno & I’m wondering how the 1/4″ thickness has held up for you since installation? I’m seeing so many other posts recommending 1/2″-3/4″ & would hate to incur the extra cost if 1/4″ does the trick. Do you have any recent photos? We’re planning to whitewash and poly only- not stain or paint. Thanks for your insight!
Hi Stevie, we sold this house last year, but the floors looked the same when we moved out as they did when we installed them.
We are about to remodel the house we just bought. I’ve been thinking about doing this throughout, did yours holdup well? Thanks
Yes! We moved over a year ago, but the floor still looks great.
If I want to stain instead of paint, should I lay the floor first like you did or stain the planks first then place them down?
I would stain it first, since you’d need to do both sides in order to prevent warping.
Thank you SO much for this post! I almost made a silly mistake and re-reading your post helped me swerve BEFORE the accident! How often does that happen in construction!? 🙂