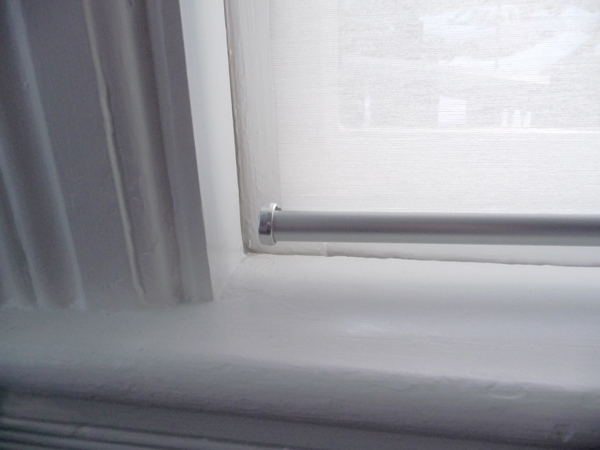
I sort of feel like this has been done already (um, probably because it has—see the links at the end of this post!), but so may of you have asked me for a tutorial on cutting ENJE roller shades from IKEA that I figured I’d try to document the whole process from start to finish as best as I can. I swear it’s REALLY EASY, even though I have an unfortunate knack for using a lot of words to describe very simple things (I was really annoying in college, but you probably guessed that already).
If you, like me, have 40,985,934 windows in your house that are all odd, non-standard sizes, you’ve probably discovered that custom shades are ridiculously expensive. Like, $100-300 per window. Multiply that by 40,985,934, and you’ve got…um…empty pockets. Enter ENJE. They look really good, function well (even the ones I’ve opened and closed several times a day for more than a year still roll smoothly), filter light beautifully while providing privacy, and they’re affordable. And you can cut them to fit, which is why we’re all here today.
Supplies:
• An ENJE shade (you probably guessed that)
• A metal ruler/straightedge
• Pliers or a wrench or really strong fingers
• A sharp pencil
• An X-Acto knife
• A decent pair of scissors (preferably fabric shears)
• Painter’s tape
• A jigsaw with hacksaw blade or a manual hacksaw or a Dremel with a metal-cutting blade*
*Don’t fret about the saw. You can get a manual hacksaw for less than $10, and you’ll use it all the time. If you already own a jigsaw, though, spring for a hacksaw blade.
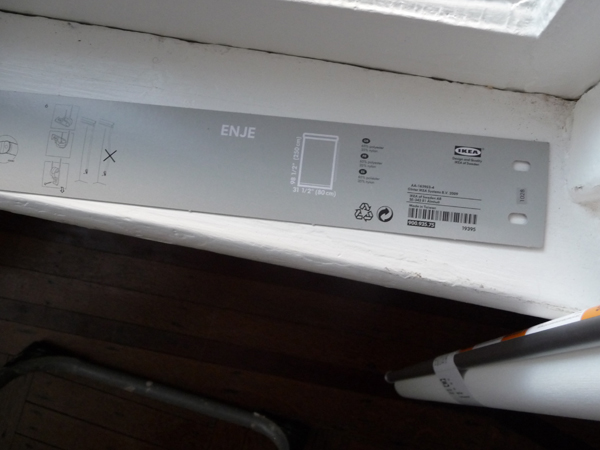
When you open up the package the shade comes in, you’ll find a long strip of cardboard with the product information printed on it. Don’t throw it away. It’s a template (see those holes at either end?), and aside from functioning as a guide for drilling mounting holes, it’s very handy for determining exactly how much to trim off of your shade in order for it to fit nicely in your window.
First of all, don’t take the measurements on the IKEA website and the ENJE packaging as gospel, especially if you’re in the US (or another non-metric country). They’re converted to inches from centimeters, and the numbers are usually rounded up or down a bit. 1/32″ isn’t a big deal when you’re talking about a sofa, but window frames aren’t flexible! Instead of going off the printed info, measure the cardboard template yourself and make note of the number.
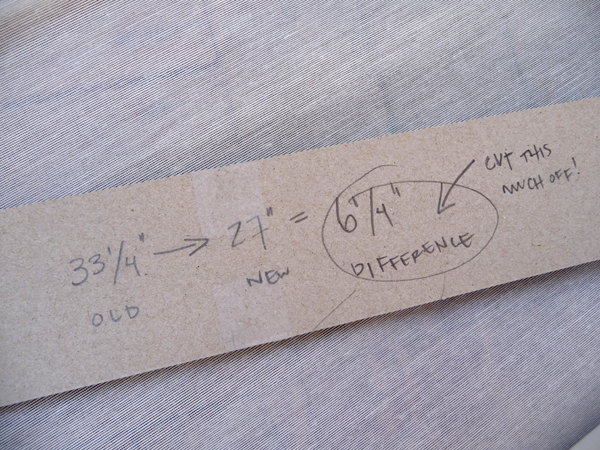
I’ll bet you’re wondering if I went to MIT, right?
Here’s me doing basic math. Snicker all you want, but I have to write everything down (and use circles and arrows), or else I get all confused and make mistakes. In case you can’t figure it out, the first number is the measurement of the cardboard template (i.e., the actual width of the entire ENJE fixture, including the mounting hardware), and the second number is the interior space of my window frame. The third number is the difference between the two—in other words, that’s the amount I need to cut off of the shade in order for it to fit perfectly.
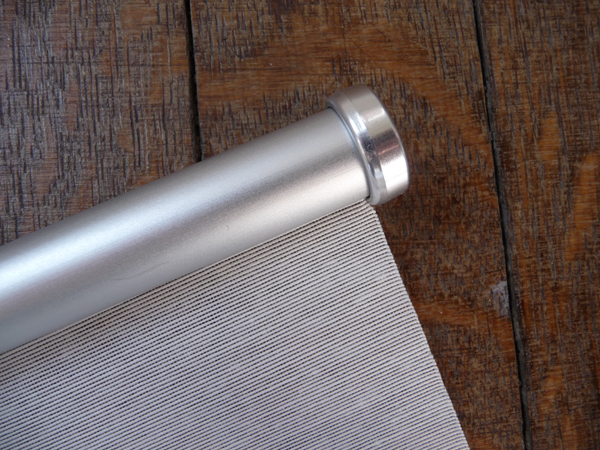
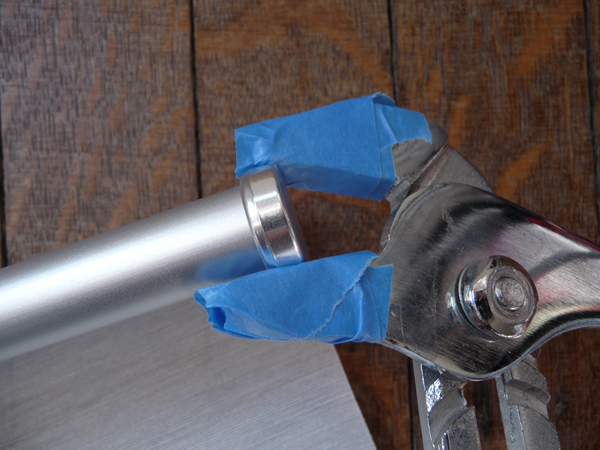
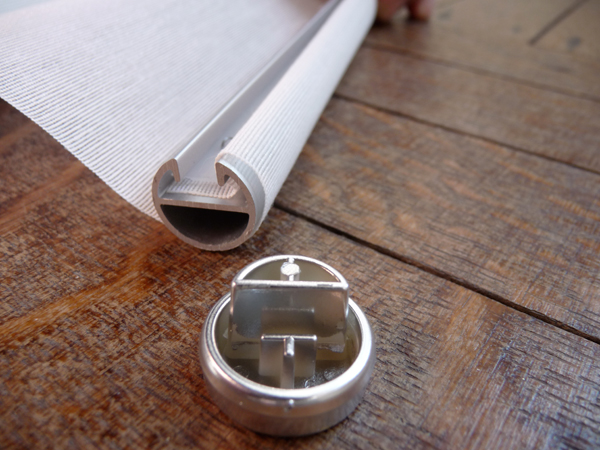
See what I mean about my tendency to over-explain? I probably didn’t need three photos to show you how to remove the cap at the end of the bottom rod, but there you go. If you can’t pull the cap off with your fingers (sometimes they come off more easily than others), pliers or a wrench will do the trick. Just make sure you wrap it up in some tape first, or else you’ll scrape the crap out of the cap and then you’ll be sad.
Also, make note of how the blind sits in the rod before you slide it out. It’s not complicated—it’s just a strip of plastic at the bottom that slides into a channel inside the rod—but sometimes you need to see how stuff comes apart in order to put it back together again, right?
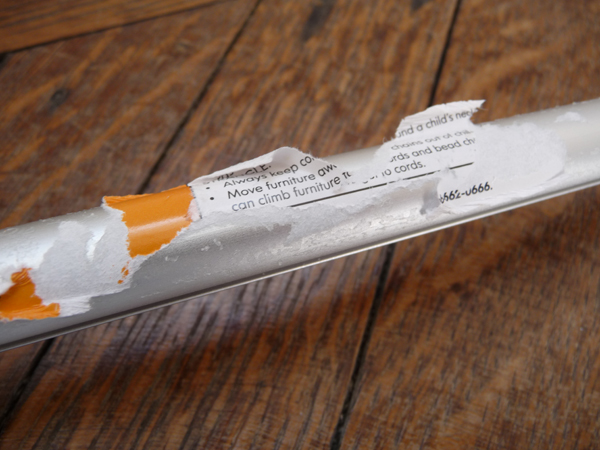
Supposedly there was a pseudo-recall on these blinds last year, but as far as I can tell, the extent of it was that they made the choking hazard warning sticker on the rod REALLY REALLY hard to remove instead of just being really hard. At this point in our project, I highly recommend that you pass the rod off to someone with more patience than you (Daniel was sitting right next to me when I was doing this, so he was the lucky de-stickerer. It took him about 20 seconds, whereas it takes me 30 minutes and half a bottle of Goo-Gone, so this was a smart choice on my part) so you can get on with the rest of the blind-trimming rather than wasting half the day fussing with these stupid stickers.
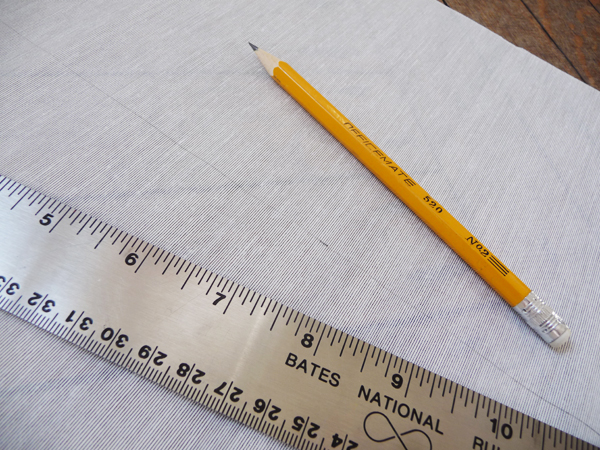
Time to start measuring! This is not a complicated operation. Yes, the blind is a little unwieldy because it’s so lengthy, but as long as you don’t, like, kneel creases into fabric, it’s okay to roll it up and fold it in on itself as you go. Remember that 6¼” measurement I wrote down a couple of steps ago? That’s where I drew my line. Just make little marks every few inches, then connect them with a sharp pencil using your straightedge. Don’t worry about the pencil line showing when the shade is up—it really won’t. Just don’t go using a fat, dull lead or a Sharpie or anything like that and you’ll be fine.
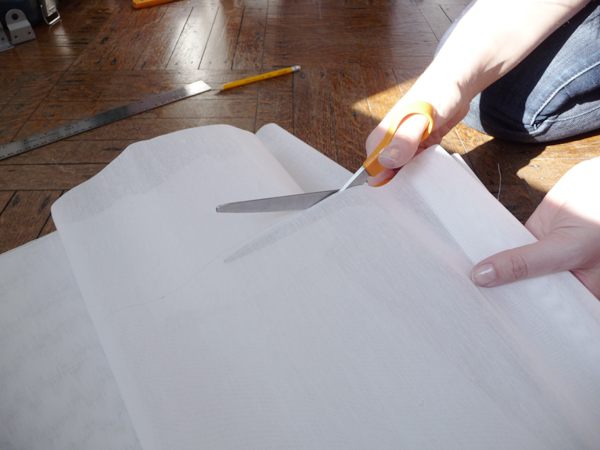
Okay, I’m going to be totally honest with you here. If you need a photograph to show you how to operate a pair of scissors, this project is probably not for you. Normally I would have left this visual out, because how do you take a photo of yourself cutting something without growing a really long, third arm? Okay, with a timer, sure, but really? Anyway, Daniel was nice enough to snap this “action shot” of me cutting the fabric (he had to take three, actually, because I was convinced my cutting motions didn’t look natural enough—I’m really not comfortable being in front of the camera!), so I figured I’d post it.
Note that I am not heeding my own advice to use good fabric shears and am instead using a pair of 30-year-old, glue-encrusted Fiskars that I inherited from my mother. That’s because my fabric shears are MIA (I blame Fritz), but you should do as I say, not as I do. I’m pretty good with scissors (hey, I went to art school) so I was able to get a nice, clean line, but if you’re less steady, fabric shears really do make a HUGE difference when it comes to cutting textiles.
Seriously though, don’t panic about the actual trimming. It’s no big deal. The ENJE fabric is really stiff, so it’s almost like cutting paper. Even if you waver from the line a little, it’s not going to show. (I bet you could also use one of those fancy rotary cutters, too, but I don’t have one, so I can’t speak from experience.)
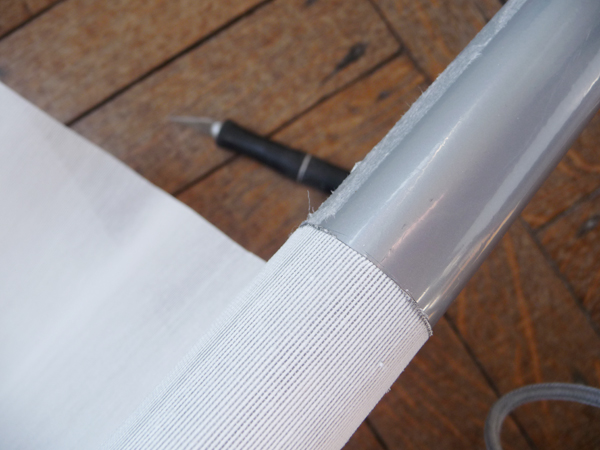
When you reach the top rod, it’s time to pull out your X-Acto knife. Trim around the circumference of the rod, then peel off the excess fabric. The glue used here is much less stubborn than that used on the sticker, so it should come off really easily.
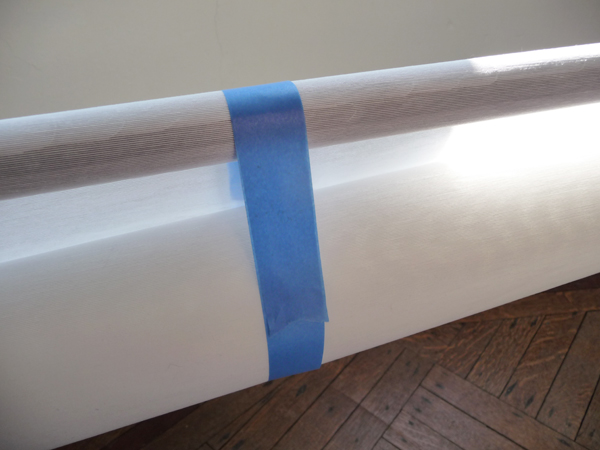
Here’s a tip you’ll thank me for later: Instead of just letting the shade flop all over the place while you cut the top rod (especially if your tools are in the basement and your basement looks like this), roll it up loosely and let it hang down a few inches from the rod, secured in place with a loose loop of tape.
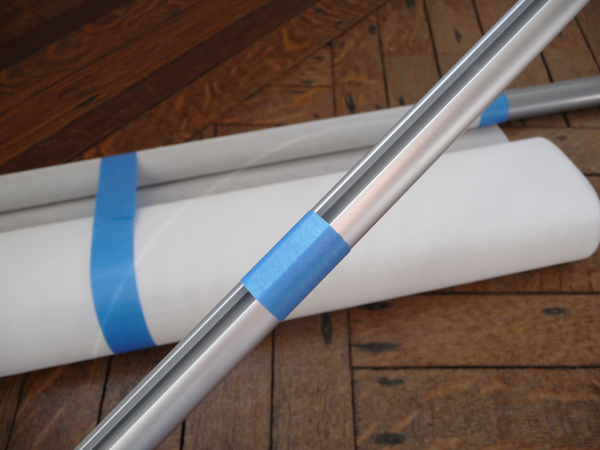
Measure the amount to cut off of the top and bottom rods (this should be the same number as the one you used to trim the fabric—6¼” in my case), and use tape to mask off the good side—in addition to giving you a guideline for cutting, the tape will protect the metal from getting scuffed by your saw.
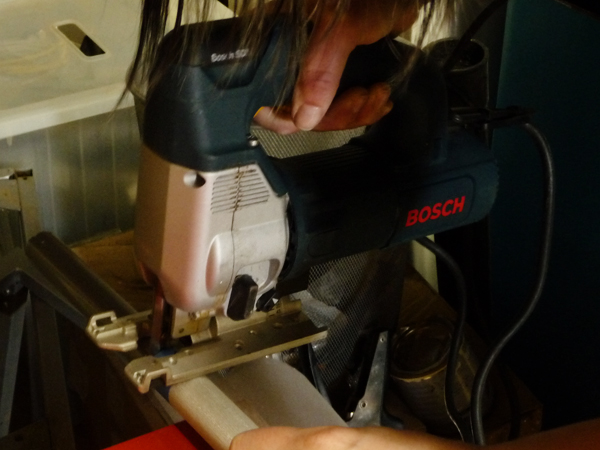
I find this photo absolutely mortifying. I tried my best to crop out the basement, but you can still see the squalid conditions in which I operate my jigsaw. Also, I’m pretty sure you’re not supposed to let your hair hang down like that when you use power tools, right? Sigh. Again, do as I say, not as I do. This is why I usually don’t take pictures of the process! I don’t want anyone scalping themselves or losing digits.
If you’re using a manual hacksaw, cutting the rods will take a minute or two. A jigsaw will go through them in seconds. You could probably also use a chop saw with a metal-cutting blade, but mind the position of your fabric!
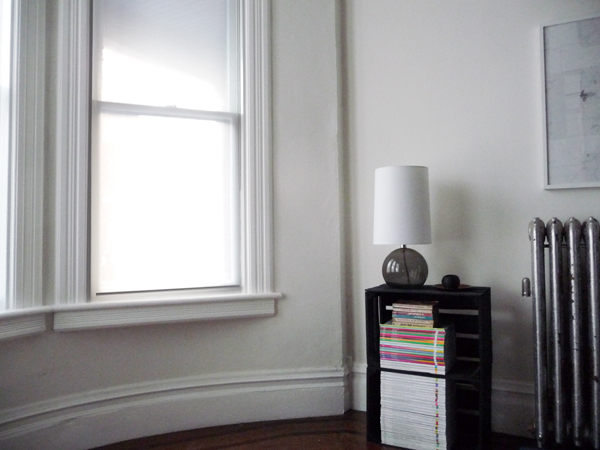
So…you’re done! Put everything back together, and mount your shade. It’s easy! (Really!) I know I make everything seem more complicated than it actually is, but I promise it’s not scary.
See also:
1. Morgan’s post from September 2008
2. My post from April 2009
3. Nicole’s post from June 2010



140 Comments
But, see, you’re wordy in a good way.
Excellent guide, makes me wish (again, sigh) that our new rented flat in London had come without any window treatments. Wooden Venetian blinds aren’t pretty.
Can’t you just take them down, put them in the closet, and put them back up again when you leave?
I can’t imagine living with the shades that come with an apartment. I’ve rented a lot of apartments, and I’ve always put up my own shades/curtains!
I’m hoping to do that in the longer term, but they actually won’t fit in the closets at the moment (we’ve moved from a 2-bed house to a 1-bed flat and suddenly seem to have an awful lot more stuff than we realised!)
DARN! I wish I’d had this 3 weeks ago. We got ENJE curtains that were just a little too wide (the fabric was fine, but the metal rod wouldn’t fit). We ended up just cutting the metal rod free of the fabric and painting the edge with clear nail polish so it wouldn’t fray. Looks good, but I would really have preferred the nice shiny metal finish.
Hi, new reader here! I’ve looked around for the past couple of days and if your basement is the scariest part of your blog, I think it’s safe to say I’ll hang around in the future, too 😀 You write in a wonderfully inspiring way and your photos are gorgeous; loved the view from your bedroom! I can’t imagine how long it must take to slowly make your house feel better, but I’m sure yours loves its current owners. Have a great weekend! -Nina-
i’ve found that heating stubborn stickers with a blow dryer really helps them peel right off…
Yes, but then you have to go and get the hair dryer. It’s so much easier to just ask someone else to do it for you! 😉
Haha Anna, I like the way you think 🙂
What a great tutorial. Fantastic really!
Quick question about the privacy the shade provides. I am on the first floor and say it’s evening and i have the light on inside, would a someone walking by be able to see in?
Thank you.
They could definitely see shapes/light/shadows (and more than with objects within a few feet of the window), yes. I’m comfortable with the level of privacy they provide on my first floor, but I don’t walk around naked or anything like that. If you want total privacy, you’ll have to go with a heavier shade or pair them with window frosting film.
Looks terrific! Now that you’ve had them elsewhere for some time now, any signs of fraying on the ones you installed previously?
Nope! The fabric has some kind of stiffener/sizing in it that seems to make it fray-proof.
We have that same jigsaw–isn’t it wonderful?!
I’ve had a pair of enje’s sitting in our bedroom waiting to be trimmed since (cough, cough) August–thanks for the reminder!
I actually did something similar recently with bamboo roman shades, and it wasn’t as bad as expected either!
Your photos are actually really helpful, for me at least its easier to scan 3 photos and understand what is going on than read a paragraph about the same thing.
(Just found your blog through apartment therapy and really enjoying it. I just moved to an old house across the river in Beacon, and am renovating with no end in sight.)
I did this a couple of weeks ago and my boyfriend thought it was hilarious that I kept clicking between you/Nicole/Morgan before I started the project.
btw, I totally know what you mean about that horrid warning sticker. after making a total sticky mess, I finally figured out that the best method was to coat the sticker with goo-gone and then shave it with a razor blade like you were peeling a carrot. comes off in easy, curly strips. then clean off residue w/more goo-gone.
Or just pass it over to Dan, because he apparently oozes some kind of chemical from his fingertips that removes the stickers with NO residue!
Why is it that Dan has about a billion magical qualities? I’d hate him if he weren’t so darn likeable.
This is a great post, and not long-winded at all. The worst is using a tutorial and finding out part way through that a step has been missed. And there you are adrift in a sea of DIY misery.
I’m thinking of using these in my studio space and have hemmed and hawed over them FOUR times at IKEA and am still unable to decide.
I need to cover a set of sliding doors, which would mean two blinds/hardware within one sash.
My questions is/are:
Is that weird? Will there be strange gaps? Will it be annoying and/or ugly to have the cords for two blinds hanging down?
thanks!
I guess I’d need to see the door frame to know for sure, but yeah, I think you’d probably wind up with a big gap in the middle that’s going to make you unhappy. Have you considered any of the sliding panel curtains instead? They hang from a track and slide back and forth independently of each other. They seem much better suited to sliding doors than roller shades, I think!
I might have to do this for the window I can’t figure out what to do with.
Ha! If you think your written down basic math is bad, you should see the entire sheet of paper I covered figuring out the length and height of some hypothetical bookshelves. It was pretty ridiculous.
oh man…wicked tutorial and it looks amazing! we have some shitty apt-regulated blinds on our windows now, but looking forward to updating when we move!
excellent tutorial! you explained it perfectly.
great tutorial! i think you have the perfect amount of wordiness. i have two of these puppies that have needed to be trimmed for an embarassingly long time. you have inspired me (yet again) to get it done.
Perfect tutorial. Thanks.
I’m a visual person and this has really made me want to buy those blinds now, seeing as every window in our house, front and back is overlooked by about 14 other houses!
I too can spend forever getting sticky labels off, I have no patience. My dad swears by liquid lighter fuel, even takes horrible price labels off lovely books.
Yep, I was just going to say: Ronsonol lighter fluid in the yellow and blue bottle. It works in a way Goo Gone only wishes it did. Yeah, you’re using lighter fluid and so you have to have some common sense and it doesn’t smell like oranges. But it works like a charm.
Eucalyptus oil will also remove price tags from books. Seven years in a bookstore and I can stand by that.
J’aime ta maison, j’aime ton blog.
Kisses from France 😉
Just wanted to let you know that you had me laughing with “Supplies: An ENJE shade (you probably guessed that)”
Thank you for you nicely detailed tutorial making it easy to understand the steps. An good humour helps a lot when DIY.
Well, I am sorry to say that my second-hand set did not include the template… and I thought I would use two on a very large window, made of 3 panels. The middle one slides.
Now I guess that even if I cut the rods to fit the space, I still will have a gap in the middle.
That’s it. I’m forwarding this post to my brother. He claims he can’t DIY, but you make it look so easy! He just moved into a new apartment with his lady, and they need shades like this for mild privacy/light control in the living space. This tutorial ought to seal that deal.
i was just looking at the ENJE shade for our bedroom, but was saddened when i took measurements and realized it was too wide for our window. it’s now going back on my shopping list. thank you SO much for making this look doable! really appreciate it.
I love how much more sophisticated your method is from mine. Mine is so caveman – I just take a miter saw with a metal blade to the whole thing, fabric and all. Chop chop.
Also, the way I got that sticky horrible sticker off was soaking it in warm soapy water and then scrubbing it with one of those scrubby green sponges and Palmolive. Takes all that gross stuff off. (I didn’t have any goo gone)
Enje’s rule.
Even though I have no plans to carry out this piece of DIY at the moment, I was totally engrossed by this post!
I’m writing the screenplay version right now!! 😀
“If you need a photograph to show you how to operate a pair of scissors, this project is probably not for you.”
You always make me laugh! I love it.
ps This shade looks great!
I love that you write all your numbers down with explanations and circles and underlines etc.! I do the same thing- or else I forget how I got to that number in the first place and end up doing it over about five times because I am neurotic!
We have lived in our house for two years and we still do no have a single window treatment up. I have been agonizing about what to do. We have casement windows (open in) with built-in roller shutters and the frame isn’t big enough to allow installation between the sash and the lintel. Maybe I will just have to breakdown and screw into the sash. Not something I am thrilled about doing. Anyway, I love the look of the ENJE and the idea of having all the windows treated the same way. It always bothers me to go by a house and see every window treated differently.
Great tutorial!
Hey Anna!
Just wanted to let you know, because of your love of Enje, that if you have remaining windows that you haven’t purchased them for do it now. They are going away. The roller blinds are going to be redesigned without cords, but there isn’t a guarantee that they will be the same style when they come back.
cheers!
Are you speaking as someone “in the know”, or are you referring to the recall from last year? Just curious. 🙂
I am indeed in the know (shhh). There is legislation that will be going into effect, and those will no longer comply. I believe the date is March 3 (if memory serves). I don’t know if this affects any stores outside the US.
this is the most perfectly timed post ever! i have 6 enjes sitting in the corner of my room… 3 too large, 3 too small… had you not posted this at the start of my weekend, it is very possible they would have stayed in the corner for quite some time. now it’s project time! wish me luck!
So, I return to report that I was able to cut the bottom rod, reattach the bottom rod (which I had cut off) to the fabric and rehang my curtains. They look great in my kitchen!
The fabric is attached to the bottom rod by the ingenious means of a strip of plastic and some staples. So after cutting the rod down to size, I was able to restaple the edge of my curtain to the plastic strip, and reinsert the strip into the rod. Woohoo!
Unfortunately, in the living room, we discovered that we are going to have to build an anchor into the wall in order to hang those curtains. Blegh.
Oh, awesome! I assumed when you commented earlier that you’d thrown away the rod/strip already, otherwise I would have suggested doing just that!
Actually, I’d hung onto it thinking it would make a neat picture rack to hang on the wall. I’m a little bit of a hoarder – not the TV kind, but the cardboard and styrafoam packaging from my new bookshelves will hang around for a bit in case they prove useful/inspiration strikes.
Your posts are always so inspiring, and totally fun to read. I love how positive you are. your enthusiasm is infectious and motivates me during my own brooklyn renovations. (and I write this AFTER just totalling up the 2010 receipts….wondering why I don’t own stock in Lowe’s, Home Depot and various lumber yards and plumbing supply shops). thank you, and your windows (and entire house) look fabulous!
Oh, thanks!! It’s funny, because in reality I am SUCH a procrastinator and SUCH a complainer, and I always have a vague sense that I’m doing everything completely WRONG. 😀
I just cut a couple of these down. I would add that you should cut the side that doesn’t have the clutch, because that side has grooves for the clutch. Also I used an exacto with a self healing mat to trim the fabric, which worked really well.
I’m not sure what you mean, Heidi…I’ve never noticed a difference between the two ends! I actually switch the clutch to whichever side I want the chain to be on. I don’t think mine have grooves?
Hmmm. I have to cut a couple down tomorrow, and I’ll pay closer attention then. 🙂
Interesting, I was originally going to switch the side of the clutch on mine (which I bought about a month ago) but then I noticed that on the clutch side there are 4 thicker grooves (I assume to help the prevent the clutch from slipping). They only extend about an 1″ deep into the tube. I figured it would be better to cut the opposite side. Maybe it is a new “feature”.
Hi, Anna! Thanks so much for posting this! I have two Enje blinds waiting to be resized and hung in our guest room but I’ve been too chicken to do anything about it even with the other “how to” posts out there.
I COMPLETELY appreciate the detailed directions and abundant photos. Makes me feel much more confident about attempting it myself. Next weekend will be the weekend of the Enje!
ps. I think you are doing beautiful things with your house and I really enjoy watching the progress. Thank you for sharing.
Thanks for posting this, Anna, I’m going to be doing this very soon because I, too, have a gazillion non-standard windows at home and I appreciate the details!
Thanks!
Thanks for showing this Anna! Just did this on our kitchen window today and it looks so good.
Any ideas for a window that is 94.5″ wide? I want to diffuse the light somehow, but obviously can’t find anything that wide besides the ugly blinds that are already on them…
I love the tutorial, actually it was the last time you posted about trimming enje’s that presuaded me to go get some.
I’m glad you posted that pic of how the blind goes into the rod at the bottom, since mine are all in the wrong way, and all my staples are showing.
I too cut mine down with a straigtedge and an exacto (new blade for each blind) on a cutting mat, perfect edges. i trimmed the the metal parts with a $4 hacksaw.
You’re much more patient than I am! I thought about cutting the whole thing with an X-Acto, but it seemed too tedious. 🙂
I’m a new reader here… thank you so much for this! I found your site by googling Enje shades. I love your blog – your house is so, so beautiful. The aesthetic is similar to what I hope to achieve in my home. I’m going to have to read your back entries for inspiration 🙂
thanks for this post. morgan was telling me how. but now to see all your visuals on top is that much better! i gotta do this soon. i am inspired!
most helpful tutorial ever! when i got them out of the package and looked at them, this task seemed quite daunting. the photos are super helpful!
I’m doing this project as we speak and I’m hoping that maybe Daniel can do a guest post about how to remove the stickers! I’ve been at it for 15 minutes already and the progress looks bleak. I’ve passed it off to husband – we’ll see if he has better luck. Seriously, what do they glue these stickers on with!
Emma, I handed the rod to him and in about 45 seconds, he handed it back to me without a single trace of adhesive on it! He didn’t have any tools or chemicals, so I have to assume he secretes some kind of solvent from his fingertips. He may not be human…
My husband did the same thing. His answer – man nails! I guess they’re just stronger and bigger. By the way, our blinds turned out great. Thanks for the step by step tutorial. So happy, I only spent $60 on them instead of oodles of cash for custom blinds.
Oh, yay! I’ll be sure to hand the next batch over to Evan. 😉
Thank you for posting this – I just cut down 2 of these; the second was much easier than the first.
Do the bottoms sort of hang at a diagonal or did I do something wrong?
And yes, the stickers are the biggest pain of all.
?
Do yours hang kind of at a diagonal on the bottom? I just cut two and they seem to have a bit of sway to them, wondering if I did something wrong.
Apologies, if multiple comments.
If the bottom is at a diagonal, the top of your window frame probably isn’t square. Check the top mounts with a level — you might need to do some shimming if your window frames are out of alignment.
I just saw your tweet about the Enje being discontinued and redesigned w/ out a cord. How do you think the shade is going to be raised/lowered w/ out a cord? I can’t seem to wrap my mind around it.
I imagine it’ll be raised & lowered with tension, much like the roller shades you can buy elsewhere…but maybe the fabric will have to be a bit thicker/stiffer.
Hi Anna-
Thanks so much for this tutorial-we’ve been furiously ripping out the mini blinds in our rental and installing these bad boys. They look fantastic! One question-have you experienced having a shorter window where the chain dangles below the sill b/c it is too long? If so-what is your remedy? Thank you!
Sarah, no, I haven’t…all of my windows are large enough that that hasn’t been an issue. Could you cut the chain and just have two free ends?
FYI in case others were hoping for instant ENJE gratification- these have been recalled again, at least according to the IKEA in South Philly. The cords were apparently a choking hazard for youngsters, so IKEA is “re-making them” as traditional roller blinds w/o the cord. Coming to an IKEA near you in August. Yay for child safety, boo for my 4 naked windows.
Another time for ENJE. These blinds are quite long, much longer in length than most people’s windows. The other day while doing a major spring cleaning, I noticed (that once again) the pups had stained up the bottom half of the blinds with paw prints. I detached the bottom rod, trimmed off a foot or so of the length, re-attached the bottom strip with a stapler to the fabric and slid the rod back on. Done! Just like new, clean blinds!
Great job words or not, you just saved me throwing away another wrongly measured piece of kit. Thank you.
You’re a lifesaver, just when I thought the task of finding correctly fitting blinds was impossible, I stumble across this. Excellent tutorial, I am a sucker for detail so thought all the photos and explanations were magnificent! 🙂
Excellent help, thank you. Was just about to give up on finding a way to remove the ends to enable the blind to be cut. Cant thank you enough for the time and effort you put into doing this help guide.
I bought two of these Enje shades from Ikea 3 years ago and now regret not having bought more (dozens more!) since they’ve discontinued them. I have 3 more windows in our apartment (different room) that I want to cover with similar shades but can’t find anything comparable in look or price. Any suggestions? Many Thanks!
Rebecca, I’m pretty sure IKEA has them back in stock now. They were only discontinued temporarily while they were redesigned to meet new US standards for blind safety.
can I buy these at Ikea in the US?
Dank je voor de goede uitleg en de duidelijke foto’s.
Ook in Nederland zijn de Enje-gordijnen te koop.
Goede prijs en kwaliteit
Marvellous! Thank you sooo much for this information- it means I can now sort out these blinds for my lovely new kitchen, and I will have learned a new skill- bonus, thanks again.xx
Thank you so much for this. I picked up some Enje blinds based on your experience and just today followed your instructions. It worked! Thanks again, Janice.
Hmm….I purchased mine at about the same time, but mine are the retractable kind (the newer version). I’m afraid if I tackle this project that the blinds will no longer operate correctly.
See below….
So I would love to know if Janice had the kind with the ball chain or the retractable kind!
Valerie
To all of you current Enje-owners out there: can anyone tell me the ID (inner diameter) of the metal tubes at the top? I’m plotting DIY motorized window shades for some hard to reach transoms in my bedroom since the custom retail ones are in excess of $300 each…
Cheers!
V
Hi Anna,
I’m in a bit of a tight spot and was hoping you could help. I want to fit these blinds in my new flat however I haven’t bought them yet and I need to get some measurements straight before our plasterer arrives tomorrow morning! Eek!
As you are the confirmed Enje roller blind guru my thoughts immediately turned to you for advice. Please can you help?
Are your blinds attached to the ceiling? If so, when they’re rolled up completely how far do they hang down (i.e. the measurement from the ceiling to the bottom rail when the blind is completely rolled up?)
I just need to make sure we can still open the window freely when the blinds are rolled up.
Would really appreciate any help you could offer! Thanks so much.
Hi Natalie, I’m afraid I can’t answer your questions. The ENJE blinds have been totally redesigned since I wrote this post, and I have no experience with the new style. Sorry!
Hey Anna, thanks for your mega-quick response. I’m in the UK and the Ikea stores here are still selling the old style (lucky us!) so they should be identical to yours.
Thanks again – really grateful for your help!
Hi Natalie, I just measured the old version with ball-chain, from the top of the metal anchor to the bottom of the rod, so it is the measure from your ceiling to the bottom of the blind.
It is 8 cm.
Hope it helps. My previous reply says Feb 2011 but it is now Sept 2012, so I don’t know if you could wait a whole year for an answer!
hi Anna, thanks for your blog.
Did you have any problems getting the blinds to retract? I just installed my first one and it pulls down but doesn’t go back up… harumph.
thanks again…
I don’t have any experience with the new tension blinds, sorry. Mine are the old style with the chain.
Cara, are you able to roll up the blind just by using the chain?
I just purchased and installed mine (the US / newer version) and while I see that you use a drawing rod to pull them down, I can’t for the life of me figure out how to make them go back up without having to climb up on my kitchen counter and manually roll them. This couldn’t be the intended design, could it?
The new ENJE shades are, in my opinion, worthless garbage. They barely function.
hello team! i love these blinds but have a “little” issue here, instead for my windows i really want to use them for my sliding doors wich measures 96 inches long.. any idea on how to “extend” the fabric? what kind of fabric are they made of? thxs a lot for any input! 🙂
very helpful, thanks a lot !!! 🙂
Very nice post, thanks !
Argh… I went out and got Enje after seeing this tutorial. I wish I read the comments first. Now I got to figure out how to cut the top part with springs inside… hmmm….
Hey Anna, since this a good tutorial but maybe add something on the top that warns your reader that the tutorial is outdated. I’m having the same problem as Cara. It rolls down but it doesn’t roll back up. Once the spring is taken out, it lose the tension. Pretty useless unless you want to leave the roller down.
Ben, sorry, I don’t know anything about the current IKEA stock. I have nearly 800 posts on my blog, and it would really be impossible for me to keep all of the information within up to date.
Ben, did you managed to shorten your Enje?
Same question here! Anyone succeed in shortening the redesigned Enje?
I’m a monkey, and a happy one since I stumbled upon your blog. Great instructions, lovely visuals, and fun writing to boot.
Thanks. I will be returning after I am done wrestled with my blinds.
Are these the Enje roller blinds with the plastic clip in the middle at the bottom? I didn’t think they could be shortened. I might go back and buy them now. Does the edge look nice after you cut them?
Any ideas as to how to do this with the new Enje? Is it safe to cut the top rod?
I just finished resizing couple of new ones – its very simple. The directions in the website are still good. Just make sure that you cut the side with the white cap on the top rod. The other metal end has the spring for retraction and you wouldn’t want to mess with that end!
Good luck!
Interesting post. I saw these in Ikea yesterday and didn’t buy them as Ikea advised me that the Enje blind could not be cut as they would fray. They advised that the blackout ones could be cut. I will go back and buy them now.
The wood mounting edge on ALL my windows is only 1/2 an inch. I’m having a very hard time finding anything that will work for mounting inside the frame. Outside wont work for many reasons. Is a half inch enough, it’s solid hard wood for more than an inch deep.
Thx, Linda
Thanks for last year’s how-to. I want to buy the newly redesigned Enje roller blinds. My question is: Are they customizable? I know the old Enje blinds were easy to cut down to an exact size, but unsure if the new, cordless ones are. Thanks
I have no experience with them, sorry.
I just tried this with the new spring retracting blinds, it still works. You just have to pull the white plastic out and cut the metal on top, then place the plastic back in, the spring still works fine! (you might have to manually roll / unroll the blind to get the spring at the right tension)
Thanks, Hooman!
Thank you for a great post. Just cut my blind using your instructions and now ready to hang. I have the new Ikea spring loaded fitting but your instructions still work – the adjustments just need to be at the non spring loaded side. I bought a Bosch jigsaw as well (as always finding myself needing to saw something when DIYing and the cut is normally a bit jagged with a saw). Now think I need something to give me a bit more stability when using the jigsaw – any advice welcome :-)) A mitral block and body weight dont seem to do the trick.
Thanks so much for this – I just fitted two Enje blinds using this as my trusted guide. Much appreciated!
Hello! I’ve been saving this page for … mmm… 3 years. But today I did it! And … because my husband is the son of a plumber … we had a pipe cutter in the house … which we used instead of a saw and it worked great! No muss no fuss. Thank you!
Hi, just got them, perfect, they fit the window, however the pull cords is too long to be fix on the side of the windows frame. Do you have some tip on how to sort it? I do not want to destroy the cords. Thanks in advance for your assistance
S
I have no idea, sorry!
I installed 2 of 4 Ikea Enje shades today. They look great. Problem is neither one pulls up. Any recommendations on what I should do?
Great instructions. Saved us in returning them. Thanks!
Marc & Sjurlie
Just a quick thanks! Just finished fitting 2 enje shades, had already done another a few months ago, following your instructions! Thanks especially for the measuring warning, even in cm the size mentioned on the packaging was wrong…
BTW, seems like we still have the old, no -spring version in Belgium
That’s great, Jiel! And yes, apparently it’s only in the US that the older model is discontinued. It’s too bad, because the new ones are awful. 🙁
I want to get these roller blinds but my windows are 74.5″ in length and ikea’s website states the length is 64″… is that the true length? any idea on how to lengthen them or mount them maybe a bit lower on the window to make them fit?
Thanks for the guide. I needed to fit 4 blinds across a 3 meter wide set of windows so needed to trim about 5cm off 2 of the blinds to make it work. The guide worked perfectly for me. One comment would be on removing the end off the bottom rod. I found that I couldn’t pull it straight off by hand but by wiggling it off by pulling on side a teeny bit and then the other side a teeny bit they came off by hand pretty easily.
hey
thanks for this – took a while but saves a lot of money 🙂
Andreas
Wow, what amazingly detailed and confidence building instructions. I love these shades and was so disappointed when they were 2 inches too wide. The photographs were excellent as well. Has taken me most of the afternoon though, b ut I knew the result would work so I persevered. T H A N K Y O U
You’re welcome! Glad to hear these old instructions still apply for the new shades. 🙂
to get the sticky labels off i held the rods over a steaming kettle….carefully!! then they scrapped off easily
can i ask if any one knows how to shorten the chain length as they hang to far past my sill?
Thanks for the detailed instructions. It worked a treat!
Very helpful as the blinds do not come with any instructions. Any advice on how to shorten the chain?
Noticed in photo 5 where you have the end cap off, there looks to be a staple holding the fabric to the rod?
I’m guessing you took these out, cut the fabric and then re stapled afterwards?
Nope, the fabric is stapled to a plastic strip that slides into the rod.
Thank you so much for these instructions. I have now put up four shades successfully. I have the newer versions without the cords. There were no stickers on the rods so I did not have to overcome that hurdle. Because of some concern about cutting the newer shades and the potential fraying problems with the fabric I applied Dritz Fray Check to the edge that I cut. I hope that will slow any fraying. They look great, and while I don’t anticipate that they will last forever, I hope they do for awhile.
Things to look out for and mentioned above:
1. Make sure you cut the side of the upper rod without the spring action. On the newer shade, this was the end with the plastic prong, not the metal prong..
2. I used a hack saw, and the result was not pretty. If you have access to one of those fancy saws, use it! That said, the blinds look and work fine with the hack saw treatment.
Yay for IKEA.
Hi, you mentioned you have the new version? Are you located in the US? If so, are you able to get the blinds to retract and go up without having to manually roll them? I have the LISELOTT roller blinds, which should be the same, just with a pattern, and I can’t get them to go up!
Thank you thank you thank you for these easy to follow instructions.
My heart sank when I realised that 2 out of 3 blinds were too big for my bay window – weird angles at the wall – so imagine my joy at finding just what I needed on your blog.
They fit perfectly now and I’m very happy. : )
A tip ahead of time? My husband has this little tool that cuts plumbing pipes. It fits in the palm of your hand, and you just spin it around the pipe until it snaps off. It takes all of 2 minutes. Just in case someone isn’t comfortable with power tools to cut the top rod, or simply doesn’t have any – this tool costs about $12.00. We actually bought it to shorten the seat rod on our son’s bike – not for plumbing at all (my husband is a graphic designer, and should not be allowed near any type of power tool :).
Can’t wait to buy these blinds!!! We currently rent and the “trim to size” paper blinds that we put up a year ago, which were just “temporary” are still there. Ugh.
Now, the next logical question… who honestly goes to Ikea on a Saturday… 🙂 You are taking your life in your own hands by shopping there on a weekend!
Ahoy there,
Anthony from Wales here.
I’ve just bought the same ENJE blind and I notice that the blind is stapled to the bottom rod – did your model have the same or was it glued or just rolled and clipped in?
The assistant in the store I went to in London explained that the ENJE blind was not suitable to be cut to size as it had not been treated?
Then I came across your web page – so a bit hopeful but still apprehensive with regard to the staples as they’re tricky to reach and I wouldn’t be confident about what kind of stapler to use as opposed to an office one.
All the best,
Anthony
Anthony, the fabric is stapled to a plastic strip which slides out of the rod. You can see the strip (and a staple) in the photo above where I’ve removed the end cap. Just slide the strip out along with the fabric before you cut the components.
I’m not sure what you mean about the staples being tricky to reach, but if you follow the steps in the post, you’ll understand how the pieces come apart! And you shouldn’t need a stapler at all. 🙂
Thank you so much from London for these instructions – without them we would have been completely lost! it still took us an entire afternoon…… We have the original type with the chain at the side.
Glad the post was helpful, Marcia. 🙂
Thank you I have now fixed my blinds awesome
Hey Anna, So – I agree that your instructions for modifying these blinds are simply the best. But the real reason I felt compelled to comment here is that I really need to tell you how much I LOVE your parquet flooring. It is so, so gorgeous. Just wanted te let you know. Cheers.
Wondering if anyone knew the diameter of the tube…
Ahoy here
8 years have past and the blind was still in its box but no template! Anyway if you ever get this you’ll have a giggle because I gave up mounting it (yes, no fabric cutting).Now wondering pieces needed (got 2), tks good read