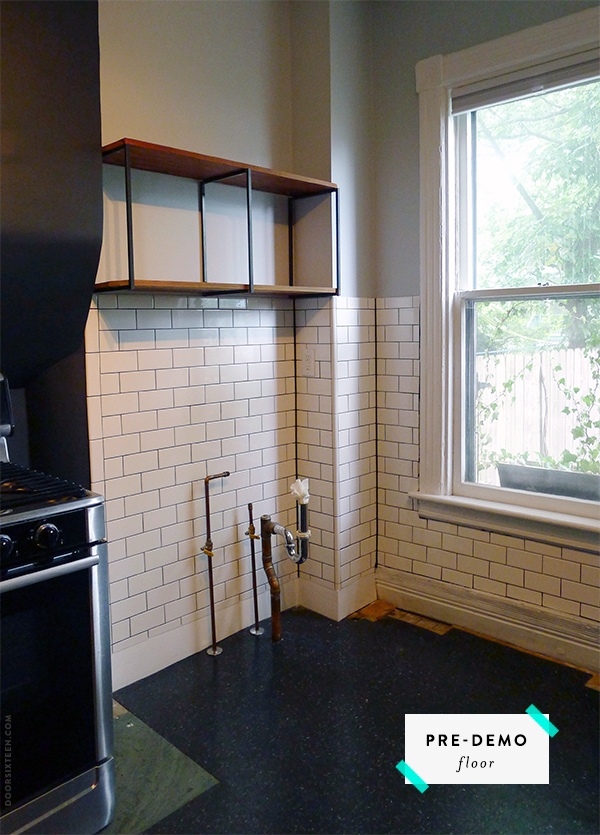
Remember how nice the kitchen was looking just a week ago, with the tile all finished and one yellow stool set ever-so-carefully askew? Well, that day ended as soon as it started, because the floor was awaiting demolition.
We disconnected the sink, stacked up all the dishes and moved everything but the shelving, stove and refrigerator out of the kitchen and into the dining room. We also resigned ourselves to washing dishes in the bathtub for the next month or two. And just like that, the kitchen was out of commission (as was the dining room).
I felt a little sad to say goodbye to the black VCT. We installed it almost eight years ago right after we bought the house, and it was our first real renovation project. We knew at the time that it probably wasn’t going to be a “forever floor,” but we needed something that was super-cheap (I think it was about 90¢ per square foot), easy for people with zero experience to install and that could go over the existing plywood subfloor, which wasn’t in great condition, but was good enough to put off replacing. We would up really loving the VCT, both in terms of looks and durability. The only reason we’re ripping it out is because carpenter ants were having a party in the plywood.
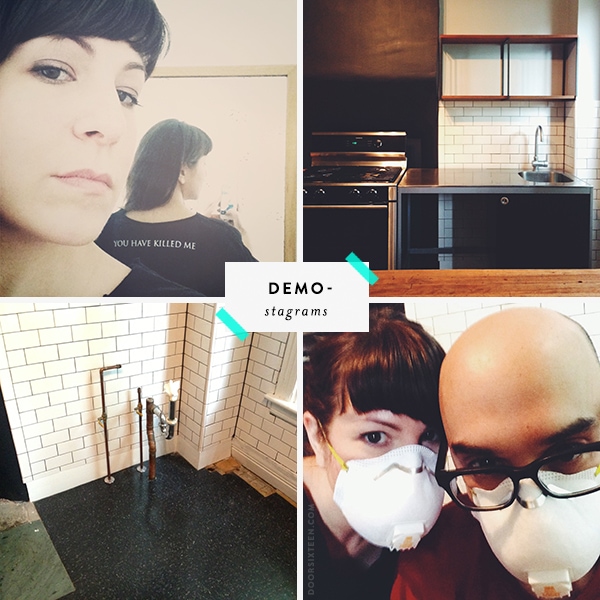
Face masks were donned, floor demolition-appropriate Morrissey t-shirts were selected. Not pictured, but very present: Our dear friend Ilenia, who, it turns out, is a wild demolition BEAST. I don’t know if it’s the Italian blood or what, but that woman can pry a screwed-down sheet of plywood off the floor like nobody’s business. It’s a good thing, too, because my back and neck were still in AWFUL shape from dragging radiators around the weekend prior and we really needed an extra set of hands. Thank you SO much, Ilenia!!
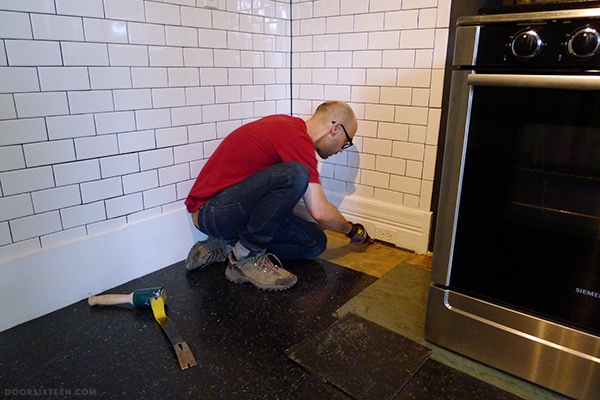
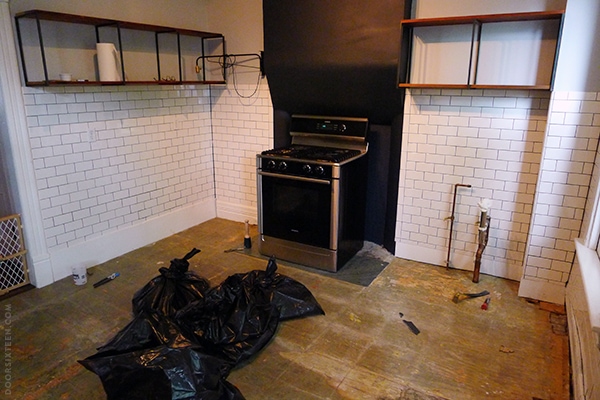
Thanks to the carpenter ants and the shoddy subfloor, the VCT came up really easily. I think it took the three of us about 15 minutes to do the entire room, most of which was spent bagging everything up. It was weird and sad to see the room looking like that, and I admit I did have a few moments of panic (which I kept to myself for the sake of those around me) where I thought maybe we should’ve just re-glued the VCT and moved on, but I knew that would be stupid. With the radiators out and the pipes being re-routed, this was our chance to fix the floor for real.
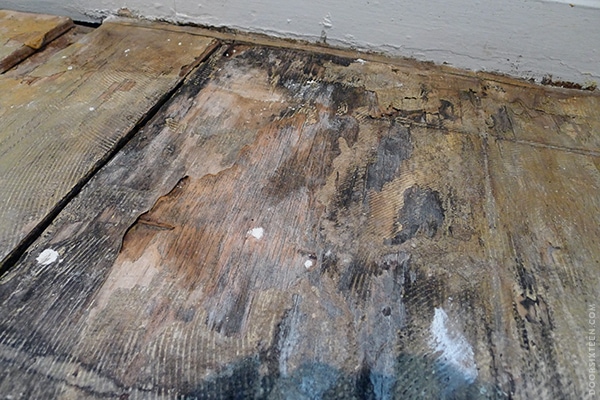
Here’s a close-up shot of the rotting plywood and the carpenter ant damage. Yeah, this was the right thing to do.
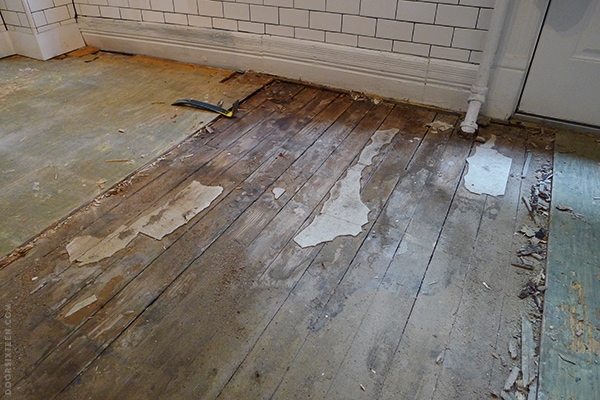
And then the real demo began — the lifting of the 1/2″ plywood. Because the screw heads were buried under a cement skimcoat and tiling adhesive, it was necessary to use a pry bar, a mallet and brute force to rip up the plywood. I kept myself full of ibuprofen and ignored the searing pain in my neck while I followed Evan and Ilenia around the room with a drill, a wrench and as much energy as I could muster. I still feel badly for not being able to do more, but I tried my hardest to be helpful!
I was feeling really encouraged when the first sheet came up. There were some bits of old white VCT (not linoleum) that came up pretty easily, and the original pine subfloor — which I’ve been hoping would be salvageable with some patching and paint — didn’t look too terrible. We kept going until it was dark out and we were all exhausted and in need of showers and Chinese food.
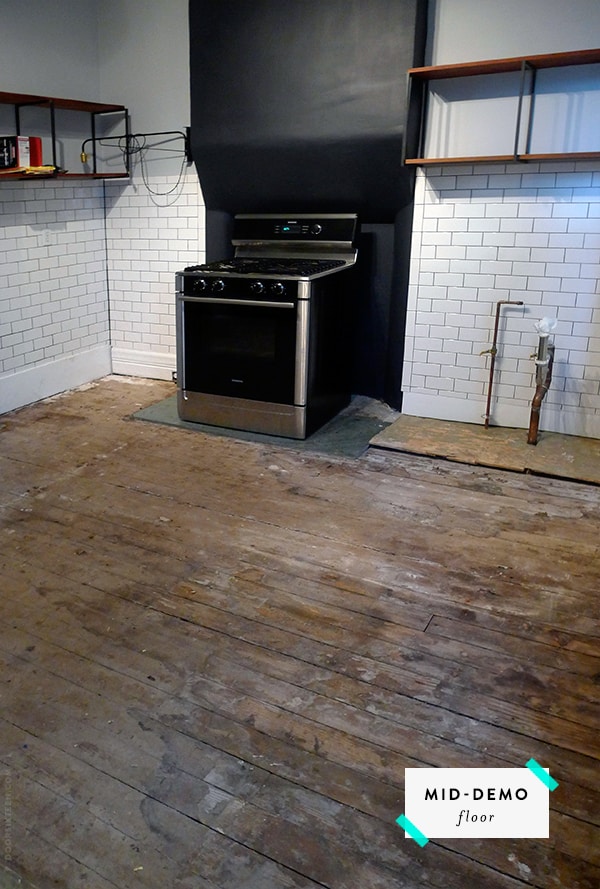
I took this photo right before I went to bed, and I definitely fell asleep that night thinking I’d be able to carefully soak the paper off the floor, fill in the rotted parts with Bondo, paint the whole thing gloss black…Zzzzzzzz.
Then morning came, with fresh eyes and aching muscles and a large dose of realty.
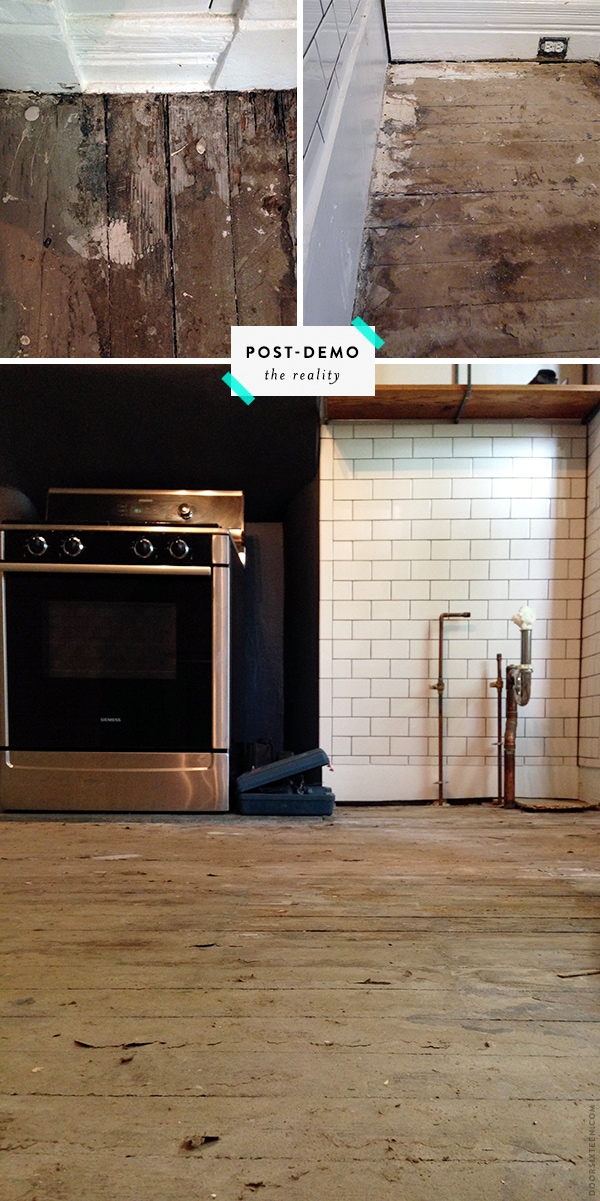
Yeah. That’s not good.
I can deal with the water damage and rot, but see all of that papery-looking stuff? That’s backing paper and cloth from old linoleum. There are 1–3 layers of different kinds of it in varying thicknesses all over the floor, and I don’t need to send off samples to a lab to know that at least one of those layers is chock full of asbestos. Linoleum is made in part from linseed oil, the flammability of which was sometimes countered (at the time) by putting asbestos into the tiles — and also often into the backing cloth/paper and the adhesive. Basically, until the late 1970s, life was just a giant asbestos party.
When you decide to renovate an old house, you accept a few hazards: There will be lead paint, certainly. Possibly lead pipes, too. You might discover mold. It happens, and you deal with it. You start doubling up on dark leafy greens to stave off lead poisoning, you get rid of what you can as safely as you can do it, and life goes on.
The thing about asbestos is that if you leave it alone, it’s not going to hurt anyone. The trouble arises when you damage asbestos — breaking shingles off of siding, pulling insulation off of pipes and, you guessed it, sanding it off of floors. Friable asbestos, the stuff that crumbles, is bad news. Mesothelioma has never sounded like much fun to me (go figure), so I’d like to avoid it. Yes, it’s true that most people who develop asbestos-related illnesses are people who work with the stuff and are exposed to it over a long period of time, but I’m keeping in mind that there’s also probably asbestos in the plaster of my walls, in the dust on the floor of my basement, in my 1940s-era office building and so on and so on. It’s everywhere in tiny amounts, really. Do I need to increase my risk of getting sick for the sake of being able to paint this subfloor? Is it that important?
Nope. It’s not. It’s really, really not. Yeah, I could be super-careful and try to remove all of the paper and adhesive with wet methods to keep dust to a minimum, or we could save up a bunch of money to have professional asbestos abatement done. Again, though, is it worth it? Again, I say NOPE. Time to move on and put in a new floor.
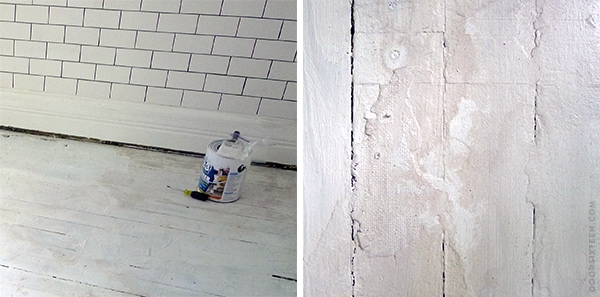
Before we went any further with the floor plans, though, I decided to coat the entire mess with a good coat of primer. I did the same thing when we found a similar situation waiting for us in the downstairs bathroom, and it made me feel a lot better. I don’t want to be crawling around on a bunch of crumbling asbestos while we put the new floor in. I used a big brush and a heavy hand to go over the whole mess and seal in all of the dirt and dust.
I feel so much better now.
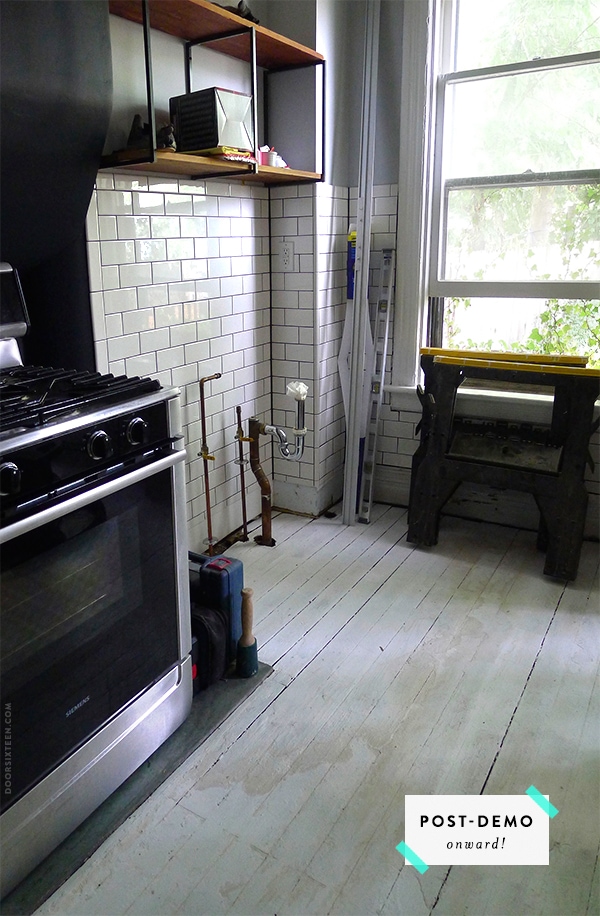
I know, it kind of looks like it could still happen, right? It’s just the photo, trust me. Under that coat of primer is a whole bunch of lumpy, flaky paper and glue that’s waiting to kill us all. It’s just not meant to be. Goodbye, original subfloor! Thanks for hanging in there. You’ll still be with us, we’re just not going to ever look at you or touch you again.
So what’s next, then? We’re still trying to figure that out. Our original plan was to install inexpensive new pine tongue & groove and paint it, but we’re giving ourselves a little time to think about it. I’m going back and forth between grand visions and budget realities, hopefully eventually finding a middle ground that will work. I have some ideas, but I’ll save that for another post!





48 Comments
Poor you (and the others) – I hope you can find some moment to rest your bones and muscles.
Regarding being “torn” between big vision and budget realities, my advice is GO WITH THE GRAND VISION. Floors are something to last and can’t be easily replaced or “done later” or only with the pain you are going through right now. Everything else can. After all the love, effort and elbow grease you poured in (and thus saved a lot of $$$ – you (and the house) deserve to go with the vision. Looking forward to seeing what are the choices and what will be your final vote. I wish you all the best, strength and recovery.
OMG. It’s a good thing you knew that was so dangerous. For what it’s worth we slapped pine tongue and groove over our similar mess of a floor (asbestos? I had no idea) and glad we did because neighbours in the terrace report that stripping right back to the original boards means freezing air blasting up all winter. The second floor acts as a great insulator. It was cheap and looks fine though after 15 years could do with another sanding.
We actually have two subfloors! The asbestos-laden pine planks (about 5/8″-thick) are on top of 1″-thick diagonal wide planks throughout the entire house. I briefly and crazily thought about stripping the kitchen floor down to the diagonals, but between the freezing air you mentioned and the neverending dust situation (not to mention ketchup inevitably winding up in the basement at some point), I quickly changed my mind. I grew up in a very old house that had no subfloor, and that draft was no joke!
…I normally just look at pictures but I seriously read this entire post in suspense, i’m so emotionally invested in your floors! I feel like this post ended with a huge cliff hanger. Cant wait for the follow up!
I have a floor like that, and I know the pine isn’t going to be salvageable after all the linoleum layers over it. However, my understanding (and I could be wrong) is that linoleum did not ever have asbestos. Vinyl tile, however, did, and the two obviously often look very similar. It’s usually the tiles (not the sheet stuff) that has asbestos, regardless. I sent mine off to a lab and the linoleum had no asbestos. We’re talking the original layer from the 30s and then some from around 1980, so you may want to test anyway.
Hi Leslie, there’s no linoleum for me to send off to be tested! The stuff on my floor is the paper, felt and cloth that was used to line the floor and as backing on flooring (mostly likely both linoleum and vinyl over the years) for many decades. All of the actual flooring is long gone, so I have no idea what was there. I have had numerous reliable folks tell me that asbestos was indeed used as a component of true linoleum — in varying amounts and not in all lino — but that’s really neither here nor there. It is almost certain that the backing and lining materials (not to mention the adhesives) contain asbestos, and that’s what I’m not going to mess with. Even if there were complete tiles with asbestos in them over a bare floor I wouldn’t be to concerned, because again it’s an issue of whether or not it’s friable — a tile is relatively encapsulated and tends not to crumble, but the paper and cloth are just waiting to be airborne.
What about marmoleum?
What about it? Are you asking about asbestos risks? If so, no, that’s not a concern! Contemporary lineoleum/Marmoleum is a very safe flooring option. 🙂
I feel dumb now because it just occurred to me that you were probably suggesting a Marmoleum floor for my kitchen. Duh! Sorry. Yeah, Marmoleum is very nice, it’s not really what I want in my kitchen…it’s also wayyyyyyyy out of the budget (about $8/sf = $1200 for the whole kitchen = YIKES).
I have been looking forward to this post: my kitchen floor is in the same state!!
Holly cow! That’s some scary stuff. I look forward to reading about the potential solutions. I didn’t know that about the linseed oil and asbestos connection. A big ole’ asbestos (mesothelioma inducing) party indeed!
Yeah, it’s interesting stuff! There’s some stuff here about the US Navy phasing out classic “battleship linoleum” in the early ’40s because of the flammability factor:
http://www.nachi.org/linoleum-inspection.htm
Also, since kitchens often had hearths or wood stoves and were sometimes right above coal stoves in the basement, asbestos was used abundantly in flooring to prevent fires. It would be great stuff if it weren’t so lethal!
Hi there! I don’t comment nearly enough, so I have to take a minute to tell you that your posts are always so consistently well-written, entertaining, informative, funny…I could go on and on, but the gist is, they’re really great. Thank you for all the sharing you do here on the blog!
That being said, kudos for all your hard work. You’re probably already aware of it, but there’s a sort of ‘sealer’ you can buy that you basically paint over the asbestos to seal it all in. I’m sure your primer will do the trick, but if you ever run into say, asbestos insulation in your basement and you want to take care of it w/o spending buckets of money on removal by trained professionals, google this stuff. I don’t know the name offhand, but we have some leftover from our own insulation mess and it really did the trick – and gave us peace of mind.
Can’t wait to see what you end up doing with the kitchen floor!
Hi Danielle, thank you so much for the nice words! 🙂
Yeah, I’ve heard about that encapsulating paint — someone mentioned it to us regarding the small amount of asbestos insulation that’s on some of our pipes in the basement. I’m definitely going to look into getting a hold of some when we tackle that project. I didn’t bother taking the extra precaution with the floor since we’re going to be completely covering it up and it won’t be disrupted once that’s done. The primer is enough to keep stuff from becoming airborne while we work, assuming we’re not dragging tools across the floor or anything!
Anna – great post. Thank you for writing it!
I’m excited to hear about the future floor options that you’re mulling. I trust your taste and am excited to hear your take on possible cheap/elegant solutions.
Thanks for sharing. You guys are just so rad, I’m looking forward to seeing your solution.
When we moved into our fixer-upper a couple of years ago, we put down VCT tile in the entire upstairs (comprised of our boys’ room connected via catwalk to a large playroom and bath). We did black and white checkerboard and I love it. It’s so easy to clean, not precious, and the kids zip around at high speed on their coaster cars up there.
(looks like this: http://sugarsugarhouse.com/2013/08/22/boys-room/)
Your floor looks great, Amber!
Scary stuff! My mother ran into asbestos tile throughout her house when she redid the floors – ended up getting a professional abatement team in. It was really intense …
I can’t wait to see the finished product, though! The VCT was surprisingly beautiful, I’m considering something of the sort if/when I redo the floors in my kitchen.
Chances are there is more asbestos in the adhesive that held the flooring down than the actual flooring. That adhesive is still there under the lumpy bumpys. Worst thing you can do is disturb it unless you want to bring a professional in. Just did asbestos abatement on 9 houses prior to demo. This work is not cheap in Iowa. I imagine it’s much more expensive in NY. Good luck and can’t wait to see what you choose.
Hi Tricia, yeah, that’s what I was referring to in the post when I mentioned adhesive — we didn’t remove the actual flooring, it was gone long before we bought the house. We installed the black VCT ourselves within the last decade.
Sorry if that wasn’t clear in the post, you’re not the only one who was confused! 😉
Are the carpenter ants still an issue? How did you get rid of them?
The ants have been gone since January — they’ve been exterminated. There’s no evidence that they ventured any deeper than the plywood, which is good.
Great job so far Anna! It’s looking amazing. Your house is so lucky to have you!
Good call on not dealing with the asbestos, you can never be too careful.
I have pine floors throughout my 1920s bungalow. They’ve been refinished and are pretty but they dent and score quite easily. No high heels at my house! My sweet little dog has definitely caused damage and he only weighs 20 pounds. Drop something? There’s another dent. I’d recommend a harder wood. Good luck!
Hi Annio, that’s the main reason I love painted pine floors. 🙂 Our house is old, and I don’t want a kitchen floor that looks brand new. I’m happy to have dents and wear and dings.
Anna, is the stove sitting on a completely different floor material? If so, what is is, and do you plan to change that out, too?
That’s the original slate hearth, and no, I won’t be removing it — its one of my favorite things about the kitchen!
Wow, I’m amazed at how hard you all worked. I feel like you are leaning towards cleaning up the rotted parts, then pouring some epoxy/resin self leveling flooring in a dark charcoal. If you don’t like that, you can always go back to the VCT. Well, that’s what I would do (unless I scored a deal on some hardwood).
Whatever you decide, I’m sure it will look fantastic. I love to read about your process!
Keep reading the rest of the post! 😉 We’re not salvaging the original floor — it’s too risky. We’re also definitely not doing VCT again. Pine planks are almost as cheap!
You are wise in the way you’re treating the potential asbestos. It’s not really true that you can only get cancer from working with asbestos – that’s just the first wave of cases. A lot of home renovators like to think it can’t happen to them but it can. Here in Australia the current cases are adults who were present as children while their parents did home reno or building work – and home renovation is where the next wave of cases are expected to come from. And let us not forget Malcolm McLaren : ( who demo-ed asbestos tiles in the ceiling of his shop.
Anyway, a thorough and enjoying read as always!
My, my, sad to see that perfectly wonderful and cosy kitchen disassembled.
I once did a renovation of an old building in Cairo. In order to understand the construction we needed to make a hole in the roof to measure things and to make a plan. First there was a thin layer of concrete, then rubble, then another layer of concrete then more rubble etc. It was completely unclear how the roof stayed up. Our construction guy wanted to run away at a certain point, afraid the roof would collapse (I don’t really remember how that turned out.) Your story about this floor and Daniel’s about the one in his new house reminds me of that story. Good luck with everything! Have a wonderful day!
Oh man! I’m excited! Glad you took the safe route and didn’t mess with the abestos. Your health is so much more important than getting down to those original floors! I’m sure whatever you come up with instead will be fabulous anyways!
Every time we discover a new unidentified material while restoring our home I go into panic mode over the possibility of asbestos. Our house has been around since 1920 and I’m dreading the time when we are finally able to remodel the kitchen because I know there are asbestos laden tiles underneath the current hideous linoleum. I think abatement is going to be our only option.
Hi Anna, great post as usual. I dreamed of your floor last night but can’t remember the whole dream!! I’m curious of the options you are weighting in. I live in a rental and we had ugly, forest green carpet in all of the bedrooms and the previous tenants smoked…I still can’t understand why we waited 5 years to change that. Anyway we just use pine plywood sheet whit a mate finish and it looks great. I would see something like hindsvik did : http://hindsvikathome.com/plywood-flooring-and-bed-tutorial/
or concrete, or cork?!
Anyway, we all know it is going to be fabulous! Take care of your back and neck!
Wow, what an ordeal! Asbestos aside, can I just say I love how you still have the hearth of the original fireplace…that you can see it under the stove. Love it!
Just found your blog.
So inspiring, really. Love this photos!
Klemen, Slovenia
Asbestos is such a pain. We put in an offer on a midcentury house that had asbestos popcorn ceilings, which made me nervous enough that it was almost OK when we eventually didn’t get the house (almost). I’m kind of glad we didn’t have to deal with that. Good plan to just paint it all in!
Oh, I’m so sorry that the floors didn’t turn out to be re-usable. But it sounds like you’ve got some great options — I read the other post first — those geometric tiles for the floor are AMAZING — could you really do that with a stencil? It is way too complicated for my pea brain and 3rd grade math skills. I can’t wait to see what you do!
I’m sure you could do it with a stencil, but I still think tape would be easier. 😉
Oooh, it’s looking *amazing*, Anna!!!! Holy crap is it a lot of work getting that old plywood up… We just reno’d the kitchen & bath in our WW2 bungalow and ran into the same issues. It was so tempting to try and DIY the asbestos removal on the bottom layer of linoleum, but ultimately we decided against it.
Have you looked into cork flooring as an option? There are a ton of white options that look almost like super-expensive marble/stone, but they’re warm under your feet. (And yay for not worrying about dishes shattering on the floor if you’re a klutz like me.) We used one from icorkfloor and everyone that has seen it marvels. Pricing wise, it was similar to the crappy stick-down linoleum stuff at the big-box store. We ordered a bunch of samples from different vendors — don’t know what it is about cork, but it looks so much better in person than it does online.
If you’re into painted floors, you could also get the folks at that big orange home store to rip some pine plywood down into planks for you for free, and then pop it down right over that subfloor.
Whatever you choose, I’m sure it will look fantastic!!! Can’t wait to see the finished room.
Hi Anna, I’m addicted to your blog and now know that my 1922 850s.f. bungalow has the potential to become the palace I dream of. Your kitchen is absolutely astounding. When I happened upon your site I was so grateful to the universe because all the other sites/blogs I had seen were never totally about an old house and he down and dirty side of a home remodel/renovation. I visit weekly and get so many tips and ideas that show me i can do this. Keep it up!
Sassy
have you seen this from today: http://www.remodelista.com/posts/remodeling-101-painted-plywood-the-best-budget-wood-floor
Hi Anna —
Congrats on all you’ve accomplished. Am curious because we have/had a very wet basement under our kitchen and have seen the occasional carpenter ant: Is your kitchen floor damp? Why? And the ants have attacked only the plywood but not the subfloor?
Thanks!
No, the floor isn’t damp anymore. I think there was a leak under the fridge. And yeah, apparently ants like plywood…
I still did not get the answer I need. I have ripped out old yucky carpet, and underneath was old linoleum sheeting and tongue and groove. I plan to paint the tongue and groove , but the green paper is stuck to the tongue and groove. I don’t’ want to sand because I don’t think it is asbestos laden, but I don’t want to risk it. Can I it can I not use Kilz over the paper on the floor? Then I plan to paint it and poly it. Let me know. Thanks!
That sounds like it would look pretty terrible, but it’s not my house!
Hi there,
You know your stuff inside out, so it’s possible (likely?) I’m about to tell you something you already know. But on the off chance this might save you money and stress… I haven’t read all your hopes and dreams for the painted floor, but I have used “utility oak” and it really worked for me.
I lovingly wet-sanded an entire story of lead-painted original heart pine (and had my lead levels checked after…I actually managed to do it safely, so you can imagine how completely insane my work process was…) and got to the last room in the project. I didn’t have it in me to do another room, and there were time constraints, and it was a kitchen. I tried Marmoleum but we ordered the wrong thing and blah blah…I needed a reasonably priced floor quickly.
My contractor suggested this utility oak stuff from one of those big discount flooring places. It’s kind of factory seconds, so it has blemishes, knots, and cracks here and there. It’s a buck a square foot, so with the waste required to minimize the knots and imperfections, it’s probably $1.25-$1.50/sq ft. It is new oak so it won’t look rustic and loved the way pine does, but certainly it’ll take paint, which is nice considering the blemishes. I used tung oil, which I love for many wonderful attributes, most of all its non-toxicity and repairability. I thought the oak looked plenty consistent enough for my taste and I like the hard-wearing, many-sandings-left-in-it nature of it. I did sand it to scuff the surface enough to accept oil, but I was following instructions from a rental place that handled almost exclusively poly, so I’m not convinced it needed the scuffing.
Another funny thing about this floor sander rental place, I used this guy twice and both times he urged me earnestly to be extra careful with the sander because I’m a woman. The second time he did this I decided not to dismiss it as old-white-dude whimsy. Turns out his insurance policy was so ancient that it specifically included women as a high-risk user group, so he was kinda-sorta contractually obligated to make misogynistic remarks to me. I made him promise to update it before I rented from him again and he said yes with puppy dog eyes. We’ll see, next time I’m de-ick-ifying a wood floor!
Best of luck with this. It’s a bummer to be down a kitchen!
Hi Stephanie, this post is from last September—we installed a new floor shortly thereafter:
http://www.doorsixteen.com/2013/10/29/installing-a-plywood-plank-kitchen-floor-part-one/
http://www.doorsixteen.com/2013/11/14/installing-a-plywood-plank-kitchen-floor-part-two/