

January–March 2018
Yes, I know it’s April 2020! But everything in this post actually happened a little more than two years ago. I think that might be the best way to approach writing about stuff that’s already happened, because otherwise it’ll seem like it took a month to do two years of work! To recap, this is the full kitchen before any renovation started at all, and this is the basic plan we came up with to work off of.
Even though I knew from the get-go that much of the planned renovation was going to have to wait, it was really important to me completely repaint the cabinets (inside and out) right away. I knew if I waited that it would become harder and harder to make it happen—the longer you live in a house, the more settled you get and the more stuff you acquire, especially inside of closets and cabinets. It’s also one of those things that’s just no fun—it’s tedious, and it takes way longer than you think it will. So it’s best to do just it first and get it out of the way.

So many hinges. So many handles. So many screws. My initial plan was to do the old crockpot trick on the hinges to get the paint off, but so many of them were either bent or rusted that I decided to just buy new ones. This took approximately eight trips to and from both Lowe’s and Home Depot during which I somehow managed to buy the wrong hinges seven times despite having one of the original hinges with me for comparison. Ugh. Anyway, these turned out to be the right ones. Eighth time’s the charm!

HOT TIP: If you’re removing your cabinet doors to paint them, be sure to label as you go so you know where they belong. This is especially important in an older house, where cabinet doors were often made on-site and it may not be obvious which door goes where later on. I was pretty proud of myself for remembering to do this. I just moved the tape to the opposite side of whatever I was sanding or painting, and that made re-hanging the doors so much easier.

After giving all of the cabinet parts a good scrubbing inside and out, I patched all of the screw holes—as well as any dings, dents, and gouges—from the original handles with wood filler. I don’t really have good process photos. It remains a mystery to me how people are able to stop and take photos while they’re doing this kind of work! Anyway, I then sanded EVERYTHING: Both sizes of all of the doors, the drawers inside and out, and the cabinet boxes and shelves. The existing paint finish was really lumpy with a lot of embedded fuzz and crud, and obviously you don’t want to just paint over that. The final pre-paint step was an additional scrub-down with TSP substitute, which I swear by for making sure that surfaces are totally free from any dirt or grease residue that could interfere with paint adhesion.


Next up, priming! I still swear by Zinsser Bullseye 1-2-3. Again, I apologize for not having photos of me actually doing the painting, but I think you can probably imagine (I was wearing old jeans and a white t-shirt, if that helps). Normally I recommend painting all trim and woodwork with a good brush, but I chose to use a small foam roller for the doors because they’re so large and so flat. If they had panels or any kind of routed details, I definitely would have used a brush. Using a roller gave me an extremely uniform, very slightly textured finish, and that’s not usually what you want on woodwork. In this case, though, it helped to even out a lot of surface imperfections that would have been really obvious on this type of door. (It also went a lot faster with a roller, and I’m not going to pretend that wasn’t a factor. No regrets!)
Like a true pro, I spread the doors out to dry all over the living room, propped up off the floor on top of paint cans, cardboard boxes, and tool cases. Whatever works.

The only area of the cabinets with any real damage was under the sink, where there had a been a bad leak once upon a time. After removing the gross contact paper, scrubbing everything down with bleach, and repairing the plaster on the back wall (the cabinets were built on-site, so they don’t actually have backs), I could see I definitely needed to stabilize the left side wall. I screwed on a sheet of 3/4″ birch, caulked everything, primed and painted. So fresh! So clean! And yes, that’s a non-GFCI outlet under a leaky sink. Fun!! Since we didn’t want a garbage disposal anyway, it’s since been decommissioned.
Also, that weird inverted U-shape pipe with the shutoff valve on the left? That’s the water shutoff for the entire house. I feel like I’m constantly discovering strange construction/plumbing/electrical things in New Mexico that are unlike anything I’ve seen in a house on the east coast before. ¯\_(ツ)_/¯


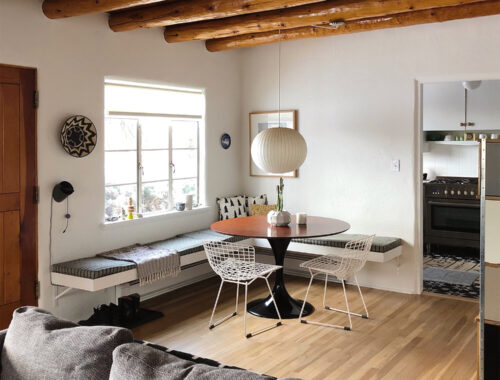
OK, I’m sorry about how terrible and unhelpful these photos are! If I could go back in time and document the painting process a little better, I would. Sigh. WELL. That’s Valspar Du Jour on the upper cabinets, and Farrow & Ball Pink Ground on the lowers. And a big mess. And a countertop that’s still gross. And a floor that’s still gross. But! Fresh paint! If you take a look back at the kitchen plans, you can kinda see it coming together. Kinda.
Moving on…


KNOB TIME! These are just large basic birch knobs that I sealed with a couple of coats of satin polyurethane. I realize these progress photos are looking like an episode of Nailed It, but I swear it looked better in person even at this stage of the game. You’re going to have to take my word for it. Hang in there. Whew.

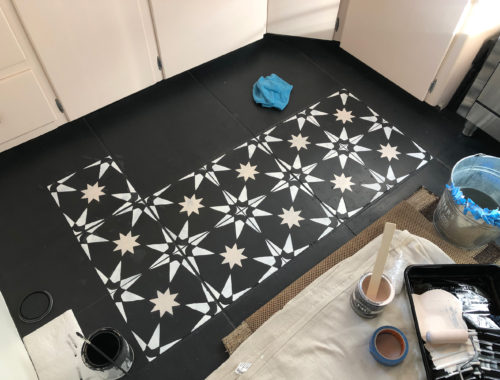
Let’s conclude this post with a less chaotic photo, shall we? We shall. Coming up next time is painting the floor (!!!), which I promise will be both more informative and nicer to look at.
35 Comments
I have a 1931 kitchen with original cabinets in Brooklyn — the hardest part has been finding latches to keep them closed. What are you using? I’ve switched from magnetic latches to the sort of press-in ones that close around (don’t know what they’re called??) but neither work very well and the doors are always swinging open. Also, had the EXACT same hardware when we moved in — since replaced.
Annabelle, my issue has actually been the opposite—that the doors are a little too snug. I started out using these simple friction latches (they’re what was already in use, so I just replaced the ones that didn’t work), but they’re TOO grabby and it’s almost impossible to open the doors. So I’ve been transitioning to the magnetic latches as needed. Have you tried moving the part that attaches to the inside of the cabinet a little further forward? I wonder if maybe it’s just not catching enough. I had to do a LOT of adjusting to get them in the right spot.
Annabelle, the problem with the doors wanting to swing back open may be due to the build up of paint/shellac over the years from refinishing. Due to age, there has probably been several coats applied. Hope this helps
You chose the chrome hinges, right? Just checking. In my newly redone bedroom I chose “pinky swear”. By Ben Moore, a pink but not pink if that makes any sense Looks similar to you pink.
Yes, chrome!
No no on the chrome, the wood will feel much better to touch.
Wood hinges? I’ve never seen such a thing, but there’s zero clearance on these cabinets for anything other than the type of hinges I’m using.
I love watching the entire process and how thorough you are, I’d be embarrassed for you to see our efforts at DIY!!
I LOVE your level of thoroughness with the cleaning / prep of things before you paint them!
Curious about why no disposal? 🙂
I’ve never understood the point of garbage disposals! There was one in an apartment I lived in years ago, and the only time I ever turned it on was to clean it because it would start to smell so gross.
Ohhh yes. You haven’t seen crazy plumbing or electrical until you move to NM. East coaster here- in my 3rd place in NM and it’s unreal. Even newer things are often not done to code. The last place I lived was crazy and had no shut off valves for either bathroom or the kitchen. The water had to be shut off at the main valve on the street in order to do any work. The boiler room was a mess and built so it was nearly impossible to light the pilot- which literally blew out every time the wind blew. Thank you for this post- I have old cabinets I need to paint as well and these are really helpful tips! I know I’d take them all off and not label them!
The first sign I had that plumbing was weird here was when I went to winterize my hose hookup in Albuquerque and discovered that not only was there no shutoff, but my landlord had NO idea what I was talking about when I asked where they were! He proceeded to wrap the hookups in bubble wrap, old t-shirts, and duct tape for the winter. Wild.
When I painted my kitchen I knew my new hinges would be in the same place, I took a picture of the cabinets wrote 1,2,3 etc on the photo and wrote the corresponding number on the door where the hinges goes. If that makes sense.
I also put 2 small hooks on the tops of the uppers and bottoms on the lowers to hang them while I painted. I used 2 ladders and 2 2×4”s to hang them across. This old house has a tutorial.
It takes forever, especially if you need to have a functional kitchen everyday and have kids. But So worth it!
Thank goodness for small pandemic miracles, like you blogging again. So very happy!
What a lot of hard work! Already much better!
I’m in favor of having the whole house plumbing shutoff upstairs and near at hand. When plumbing goes bad, time is soooo important!
There are very few basements in northern New Mexico, so it’s either going to be upstairs or nowhere! I’ve just never seen a pipe situation quite like this one.
SO much work! Whew! But it was all SO worth it!
I’m exited for the next post!
I love how painstaking and thorough you are! It sounds like it was a hell of a lot of work, but the cabinets look fantastic.
I was going to put a cabinet pull on my cutting board too, but I wasn’t sure I could get it in the middle. How did you put yours on?
It’s the original pull, so I just put it back where it was. It’s attached with two screws from the outside, not from the inside like a drawer.
Labeling the doors as you took them off was such a smart idea! *Note to self* Things are coming along!
Kaitlyn @ Oh, the Places We’ll Go!
Ahh, thank you. I didn’t notice the screws on the outside. Kitchen looks great. Thank you!
So, so thrilled your are blogging again! Thanks so much.
Can’t wait to see the painted floors! Did you also paint the sides of the drawers?
No! Better to not have paint in areas that make contact and need to move freely.
We have cheap laminate cabinets in our kitchen and I SO DESPERATELY want to paint them…it’s low on the list of things to do, so we’ll see if this post + pandemic push me over the edge and it ends up done! 😀
Beautiful work! We also live in Santa Fe and are updating our 1940s kitchen. Our cabinets had so many layers of gunked up paint, some of which was lead-based, that we decided to strip the wood down to the original primer with a heat gun. It took FOREVER, and even with having larger chunks of paint plus wearing a respirator, I felt like I was breathing in the lead paint dust. Do you have any magic technique for avoiding lead paint dust while you sand? We’re getting really close to being done, and (like you and your great kitchen!) I’m so glad we decided to keep our original cabinets and put in the work to make them beautiful again! Thanks for posting about your home!
Jessica, no magic techniques, but I follow recommended damp-sanding protocols. There’s a good, basic outline here:
https://www.bobvila.com/articles/how-to-remove-lead-paint/
I love the little detail on the cabinet just below the sink! I’m really enjoying seeing the kitchen progress.
That pic of cabinet doors spread all over the living room made me laugh – same thing going on over here this week! Bravo, fresh paint is insanely satisfying.
You’re much more thorough than we’ve been. Totally left the old (80s blue, glopped on with an old brush) paint on the hinges because it’s not dissimilar to the sagebrush green we went with.
I’m so glad you started blogging again!
I have a question about knob placement.
On the drawers, do you feel like installing them in the center makes them look “cuter” and doing it closer to the top edge would make it less so, maybe more modern or super weird?
Your kitchen looks beautiful and I think you made the right call, but if you have any opinions about this, I would greatly appreciate them. I’ve been living with handle-less white ikea drawers in my kitchen since I installed it, more than a year ago cause I was agonizing over type, size, finish… I recently had a lightbulb moment and bought a bunch of yellow ceramic knobs which I think I still love, but now I’m worried they will read like an eighties child’s dresser. Anyway, do you have any thoughts on this? Is placement something you considered when you installed them?
Labeling the doors and drawers is genius! I definitely would have skipped over that step and then paid the consequences later haha I love how your kitchen turned out, it’s so cute and quaint! We are looking into cabinet painting and it seems like the best way to get “new” cabinets without actually having to pay for new cabinets. Thanks for sharing this post!
rental kitchen cabinet question: how much paint did you use for both bottom and top? was it one gallon of primer for both, and one gallon of f&b/Valspar each? The pink ground color is really pretty!
i had been considering the plaster pink but i think i like this one more!
I’m not sure how much of the Valspar or primer I used since I was using those products elsewhere around the house (and inside all of the cabinets), but one quart of the F&B was enough to do two coats on the lowers. It really depends how much cabinetry you have, though—consider any details/trim and whether you’re also painting the insides and any sides/large expanses.