
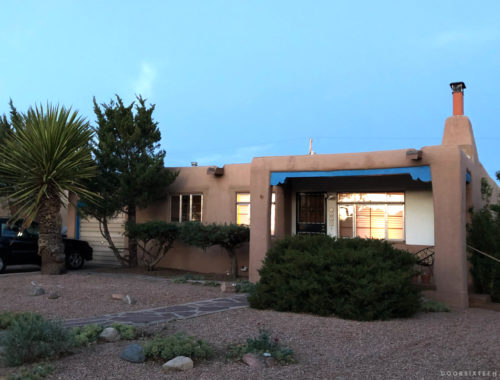
November 2019
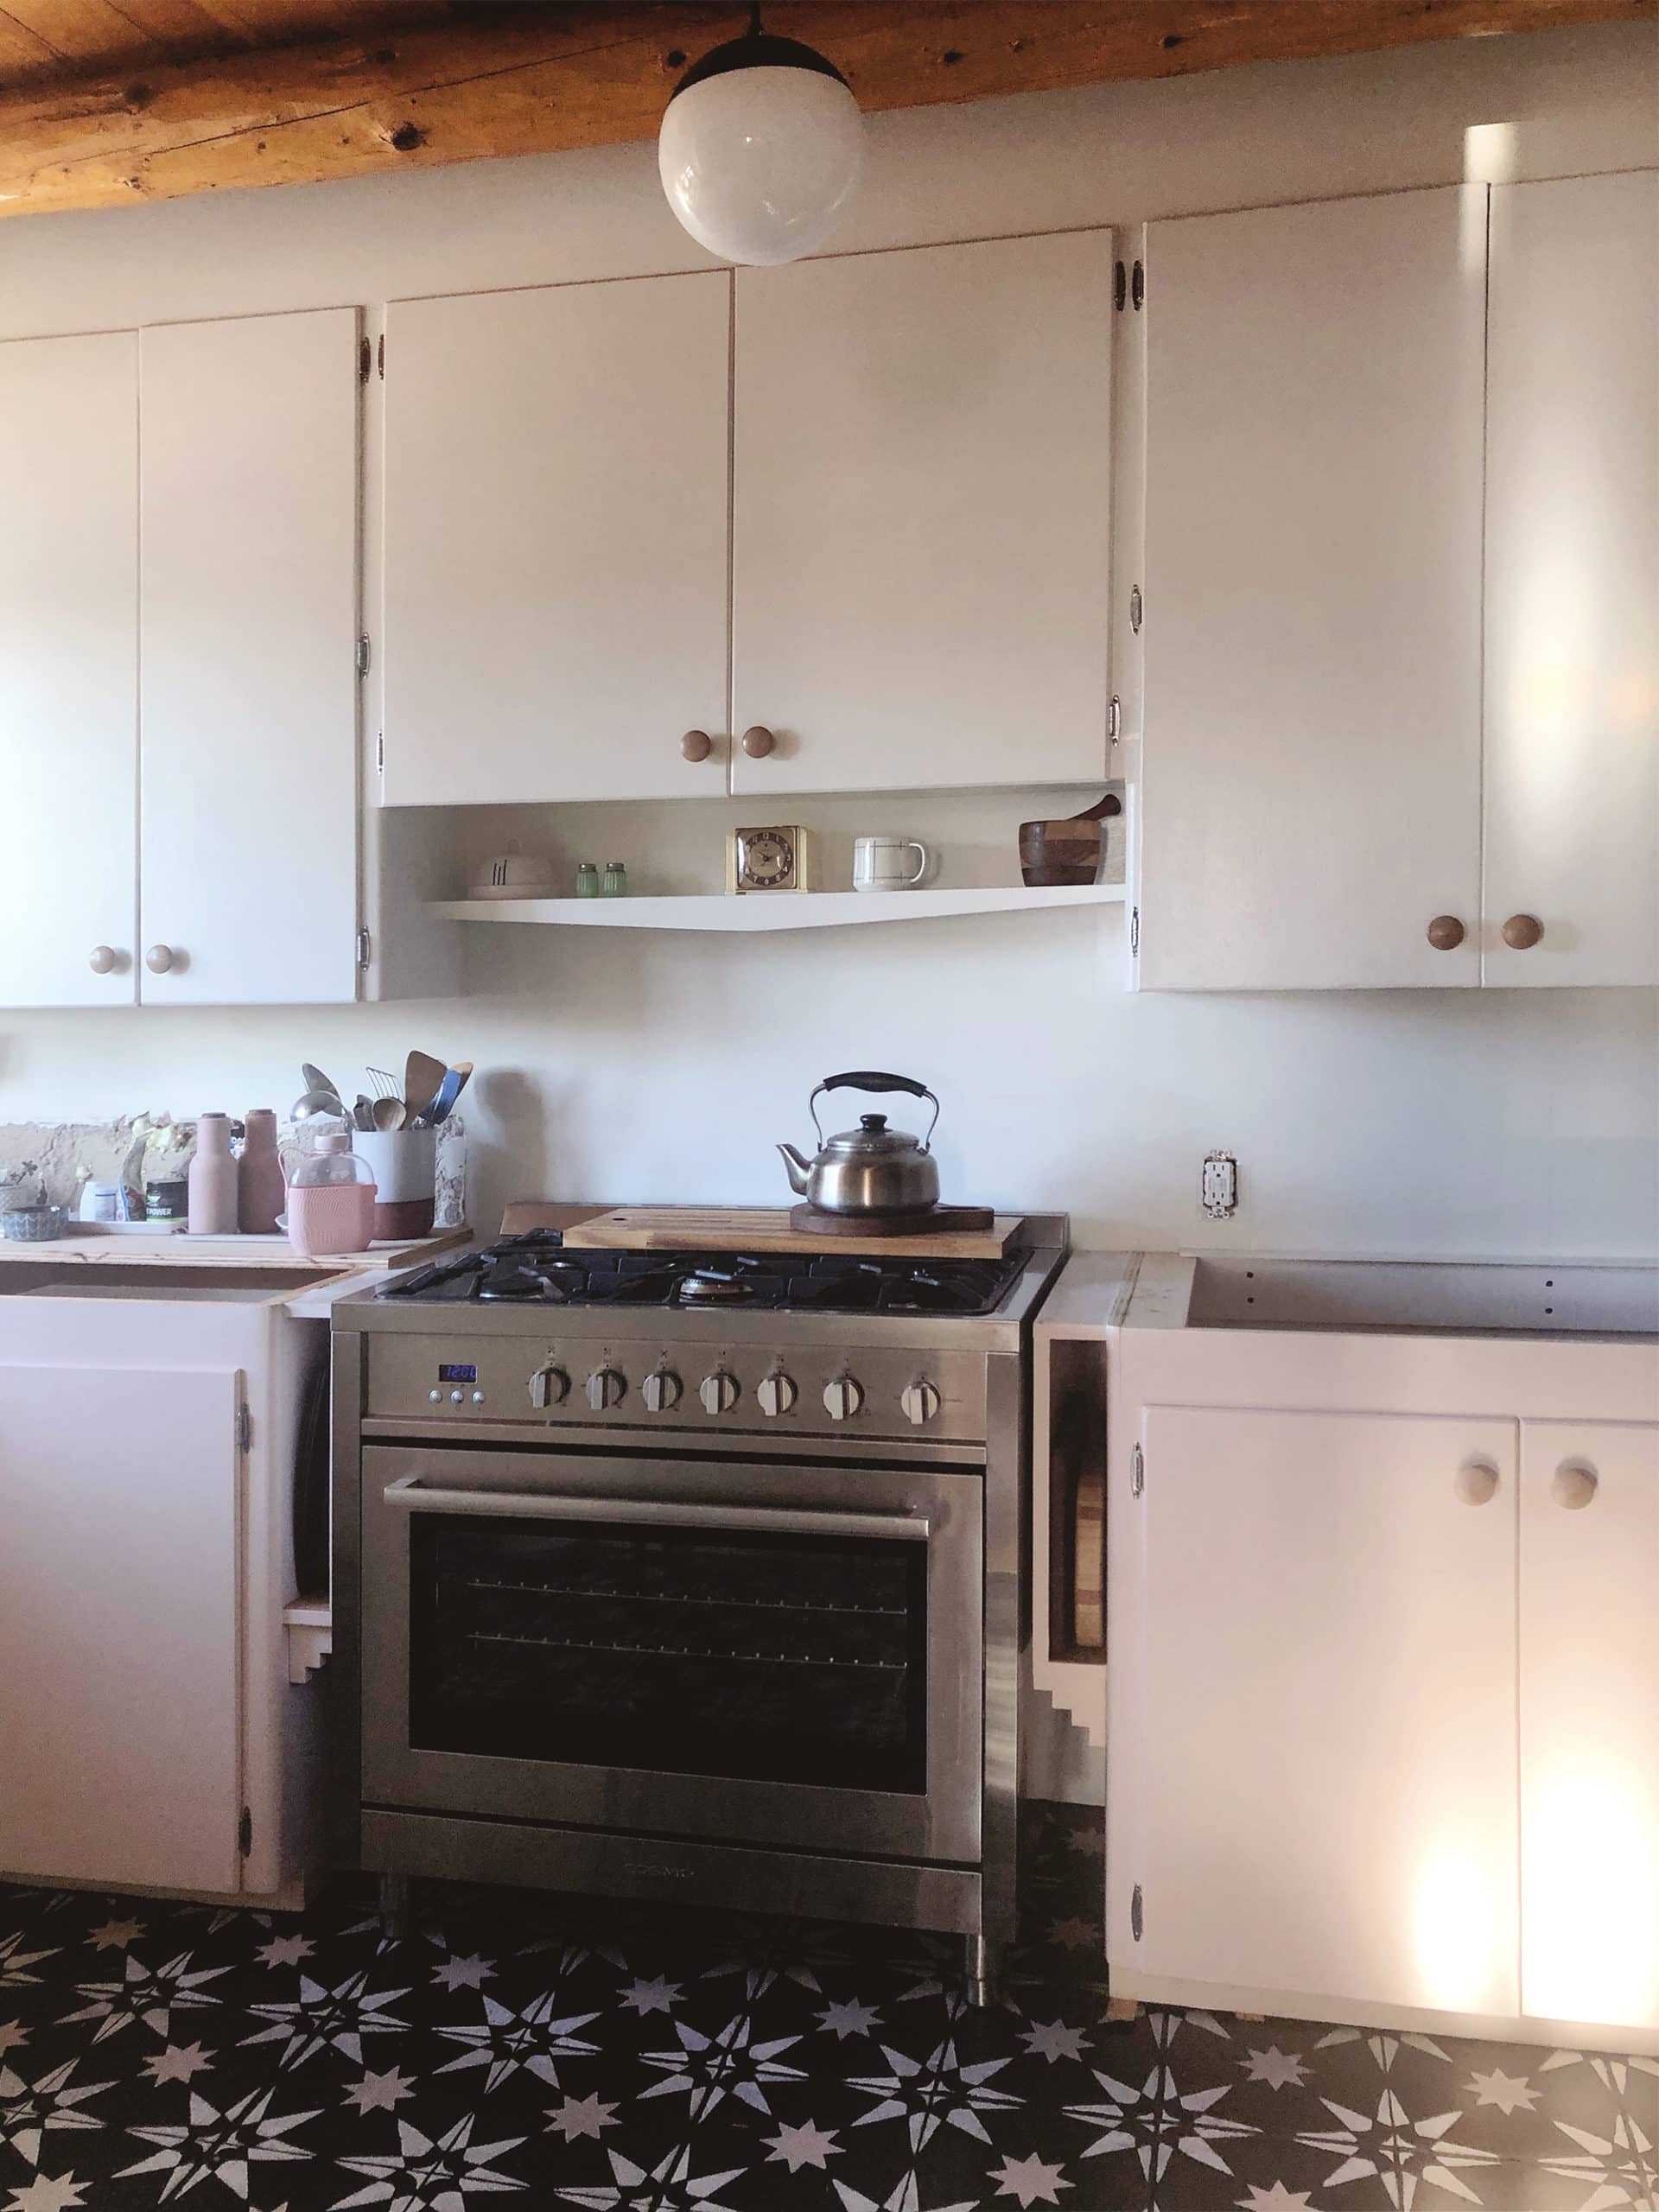
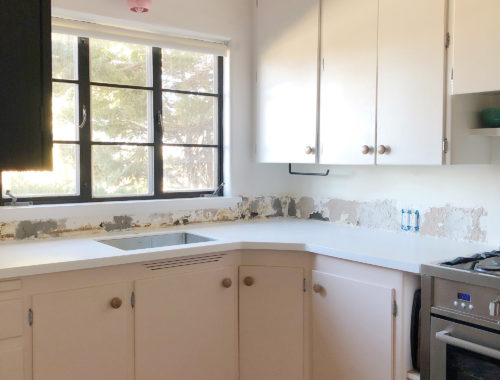
When I shared the photos of the new lower cabinet, a few of you smarties wondered what I might do to fill in the remaining gap on either side of the range. The existing space is 43″ (to accomodate the 40″ width of a standard range in 1950), and while upgrading to a 36″ range instead of a 30″ (the contemporary standard) reduced the overall dead space from 13″ to only 7″, that’s still a full 3 ½″ (well, 3 ¼″ if you account for the necessary ¼″ clearance between the range and the cabinets) on each side. 6 ½″ of extra countertop is no joke in a small kitchen, and surely the space underneath could be used for some kind of storage!
If you’re wondering why I didn’t just shove the range all the way to the left and just have a wider cabinet built to go to its right, it’s because I’m not a monster. That would have meant the range would no longer be centered under the existing built-in shelf and upper cabinets. It would have thrown off the entire balance. Unthinkable!
Now, it’s not a revelation to fill gaps in cabinetry with storage cubbies for baking sheets and cutting boards, but I wanted to do it in a way that wouldn’t look like a fill-in. Because the range is freestanding (meaning the sides are finished, and the top doesn’t have a lip designed to overlap the countertop edge) and on legs, I thought that running a cubby all the way down to the floor—or even to the toe-kick—would look weird. It would have conflicted with the lower corners of the range. Also, I didn’t want to interfere with the proportions of the cabinets as they were designed.
After spending a lot of time holding up pieces of wood and pinching my lower lip thoughtfully, I decided that the best option was to build cubbies that maximized the available width, but were only tall enough to accommodate a standard 13×18″ cookie sheet turned on its side. I also thought they should be set back slightly from the front of the cabinets so as not to take away from the curved cabinet corners.
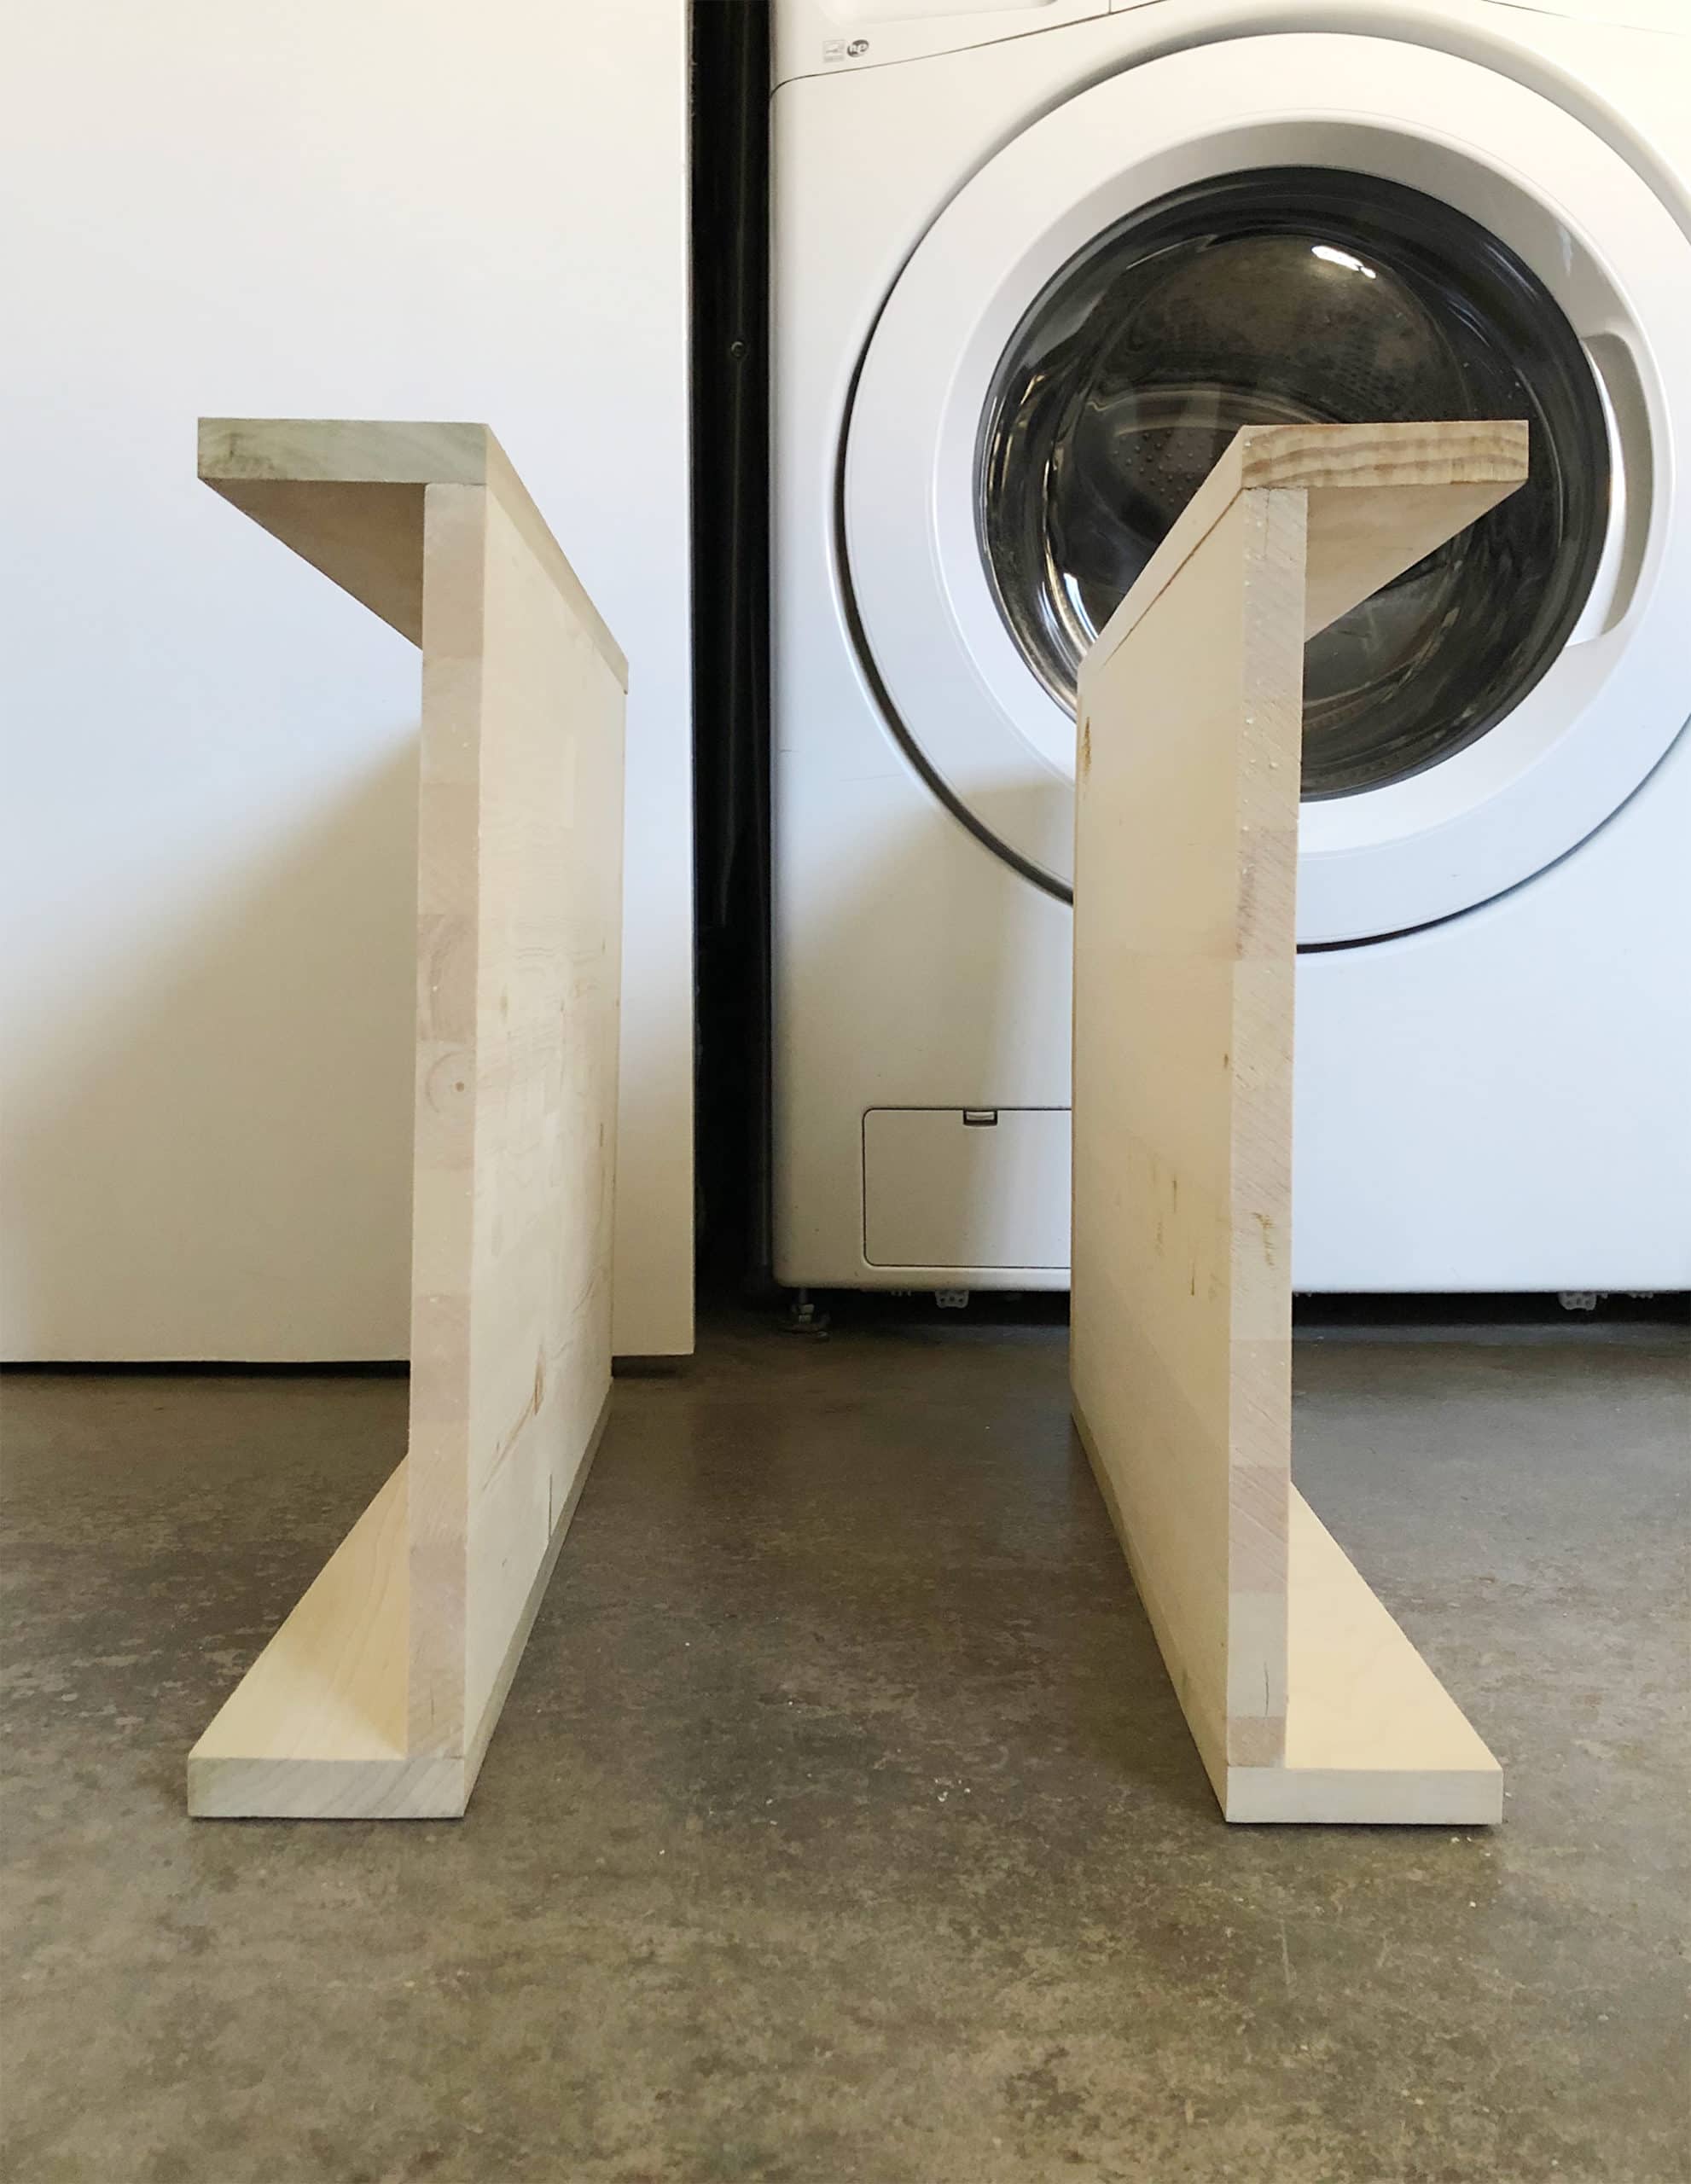
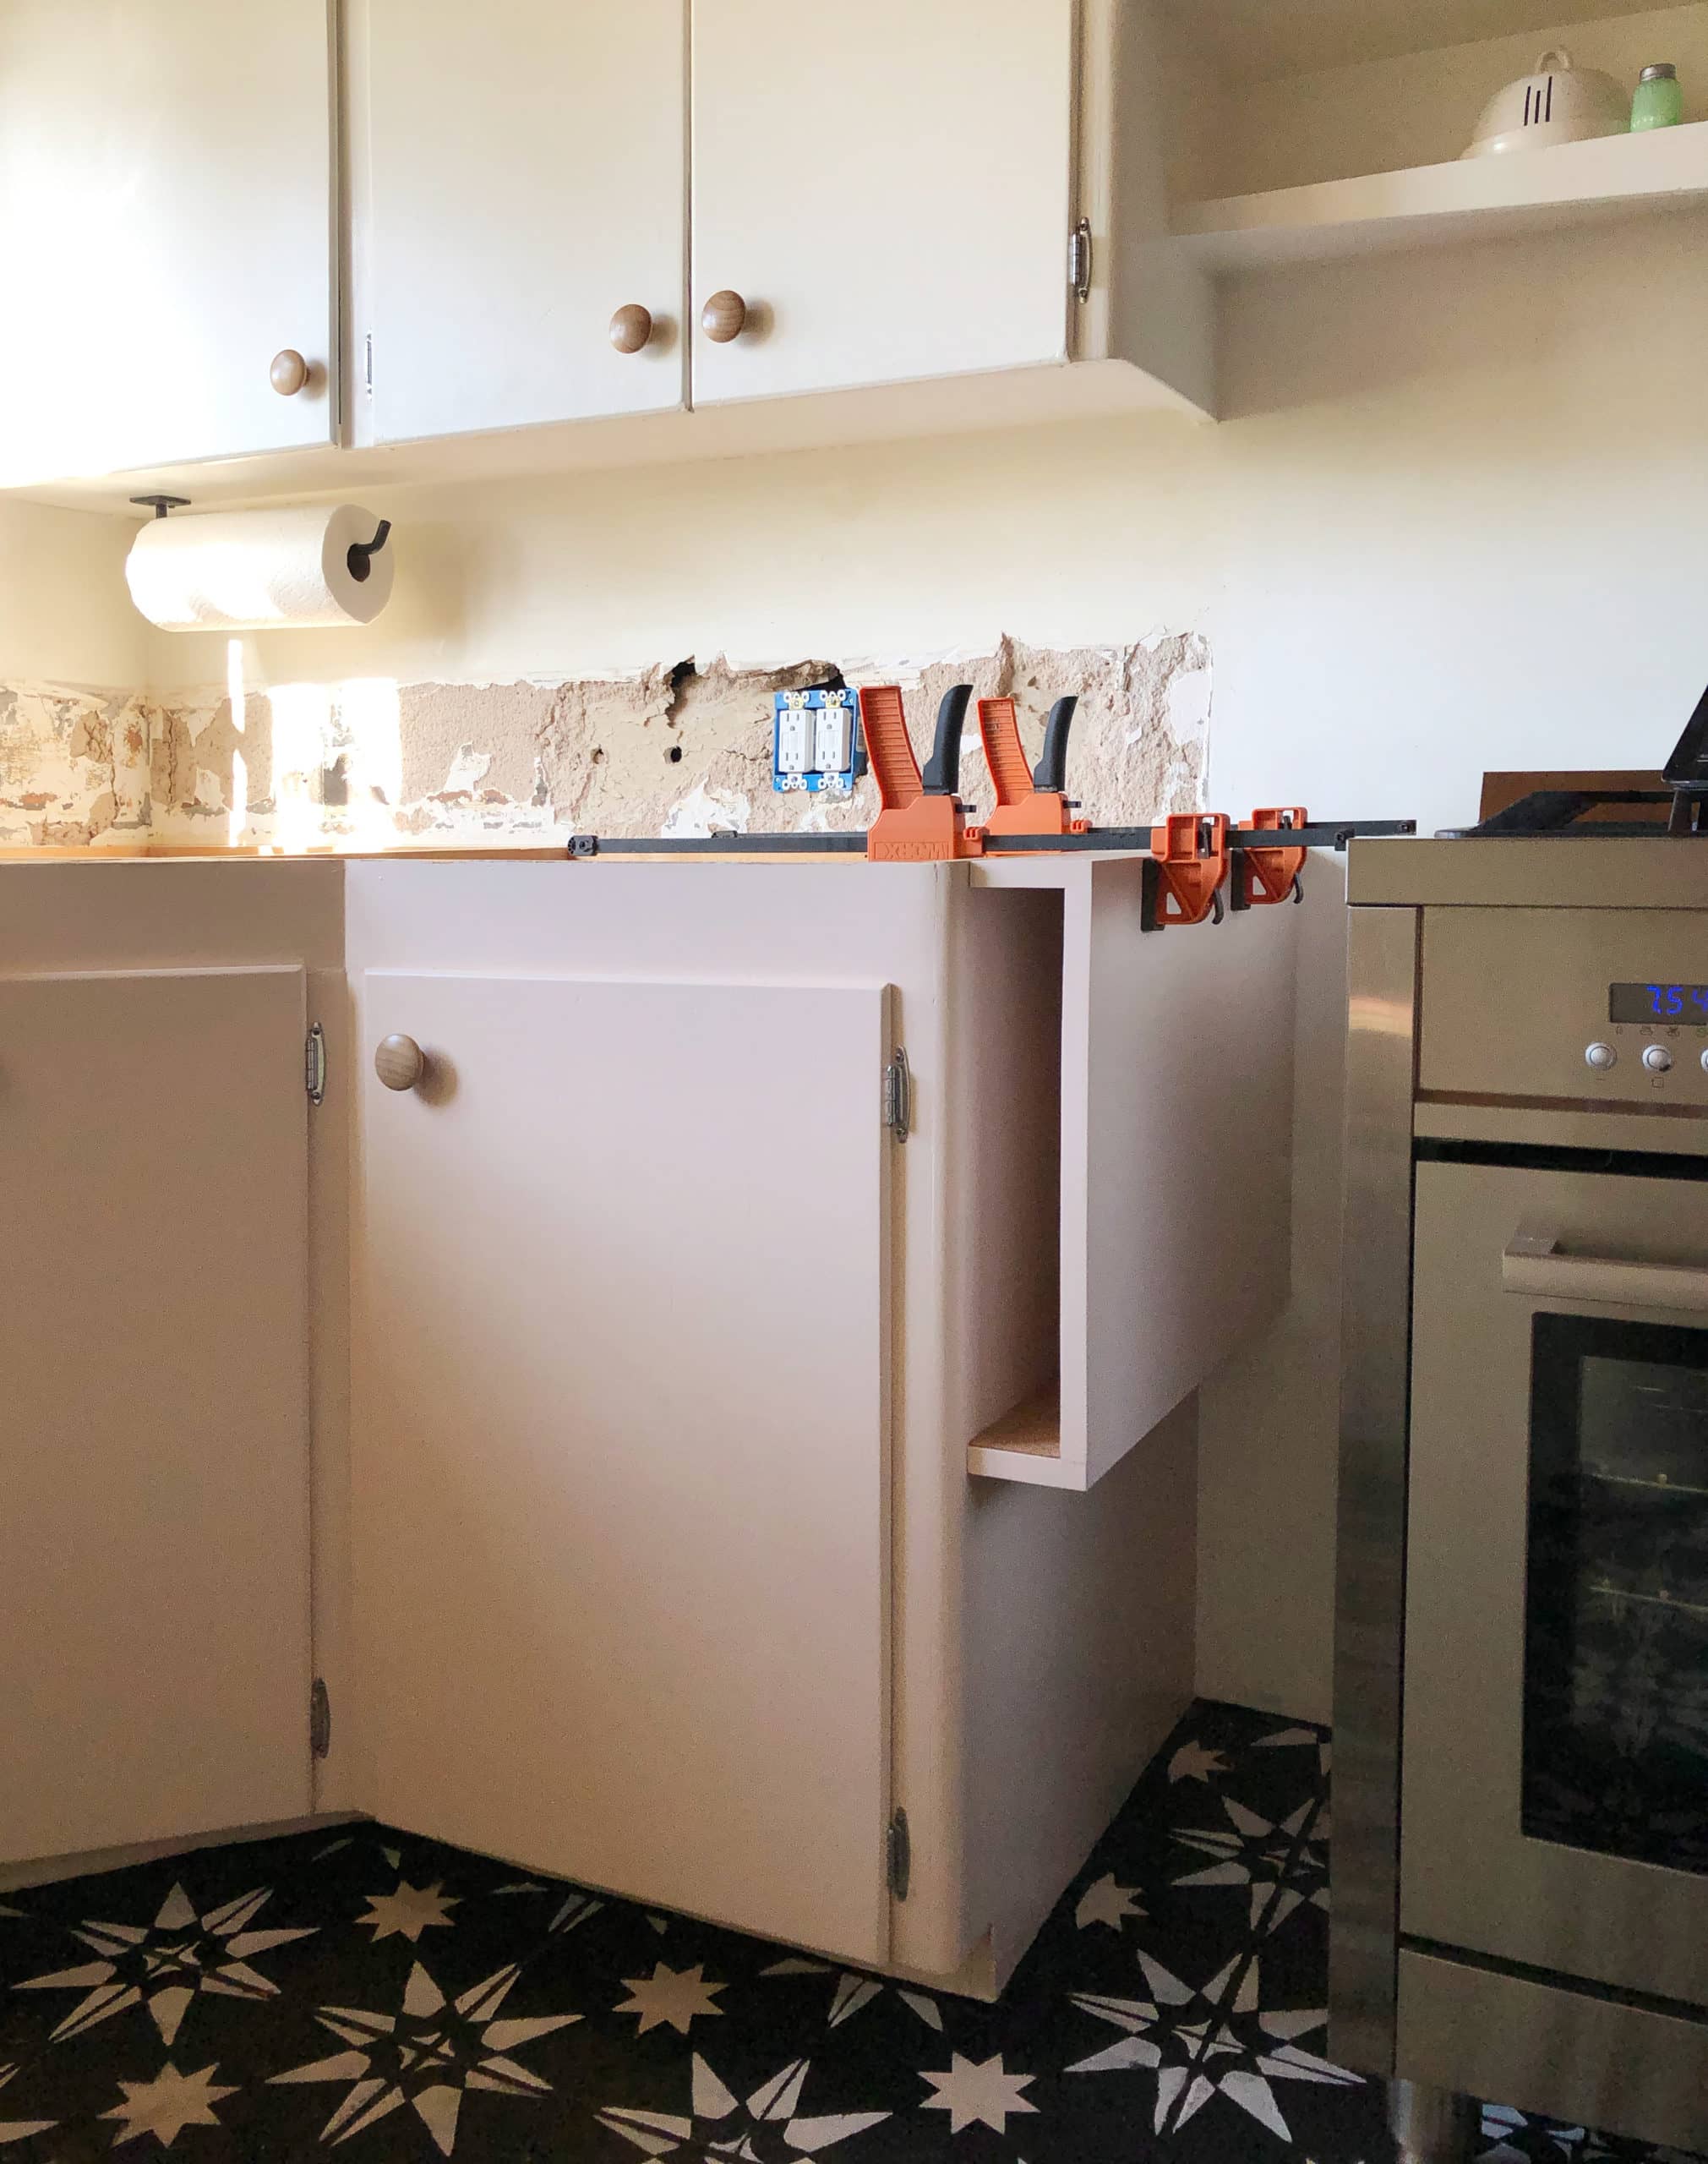
And…cubbies! There’s nothing fancy going on here. I just used some basic pine project panels for the sides, and 1×4″ pine boards for the tops, bottoms, and back. Everything is the same thickness as the cabinets. It’s all held together with screws. Super simple. If you look verrrrrry closely at the cubby on the right, you can see that I drilled a hole in the side to line up with the hole in the cabinet so I’d be able to run the range cord through. I’m still patting myself on the back for remembering to do that before I permanently attached the cubbies to the cabinets. Well done, Dorfman!
With the cubbies securely in place (again, nothing fancy here—I just used my handy Kreg pocket hole jig to make holes through the cubbies and into the cabinets so everything could be screwed together) and the range in position, I could see I needed to add a little something else to make it all come together visually. My favorite thing about these cabinets is how simply-built they are, and how everything looks handmade. I started thinking about what I could do to incorporate a handmade element of my own, and how I could introduce a distinctly New Mexico flourish.
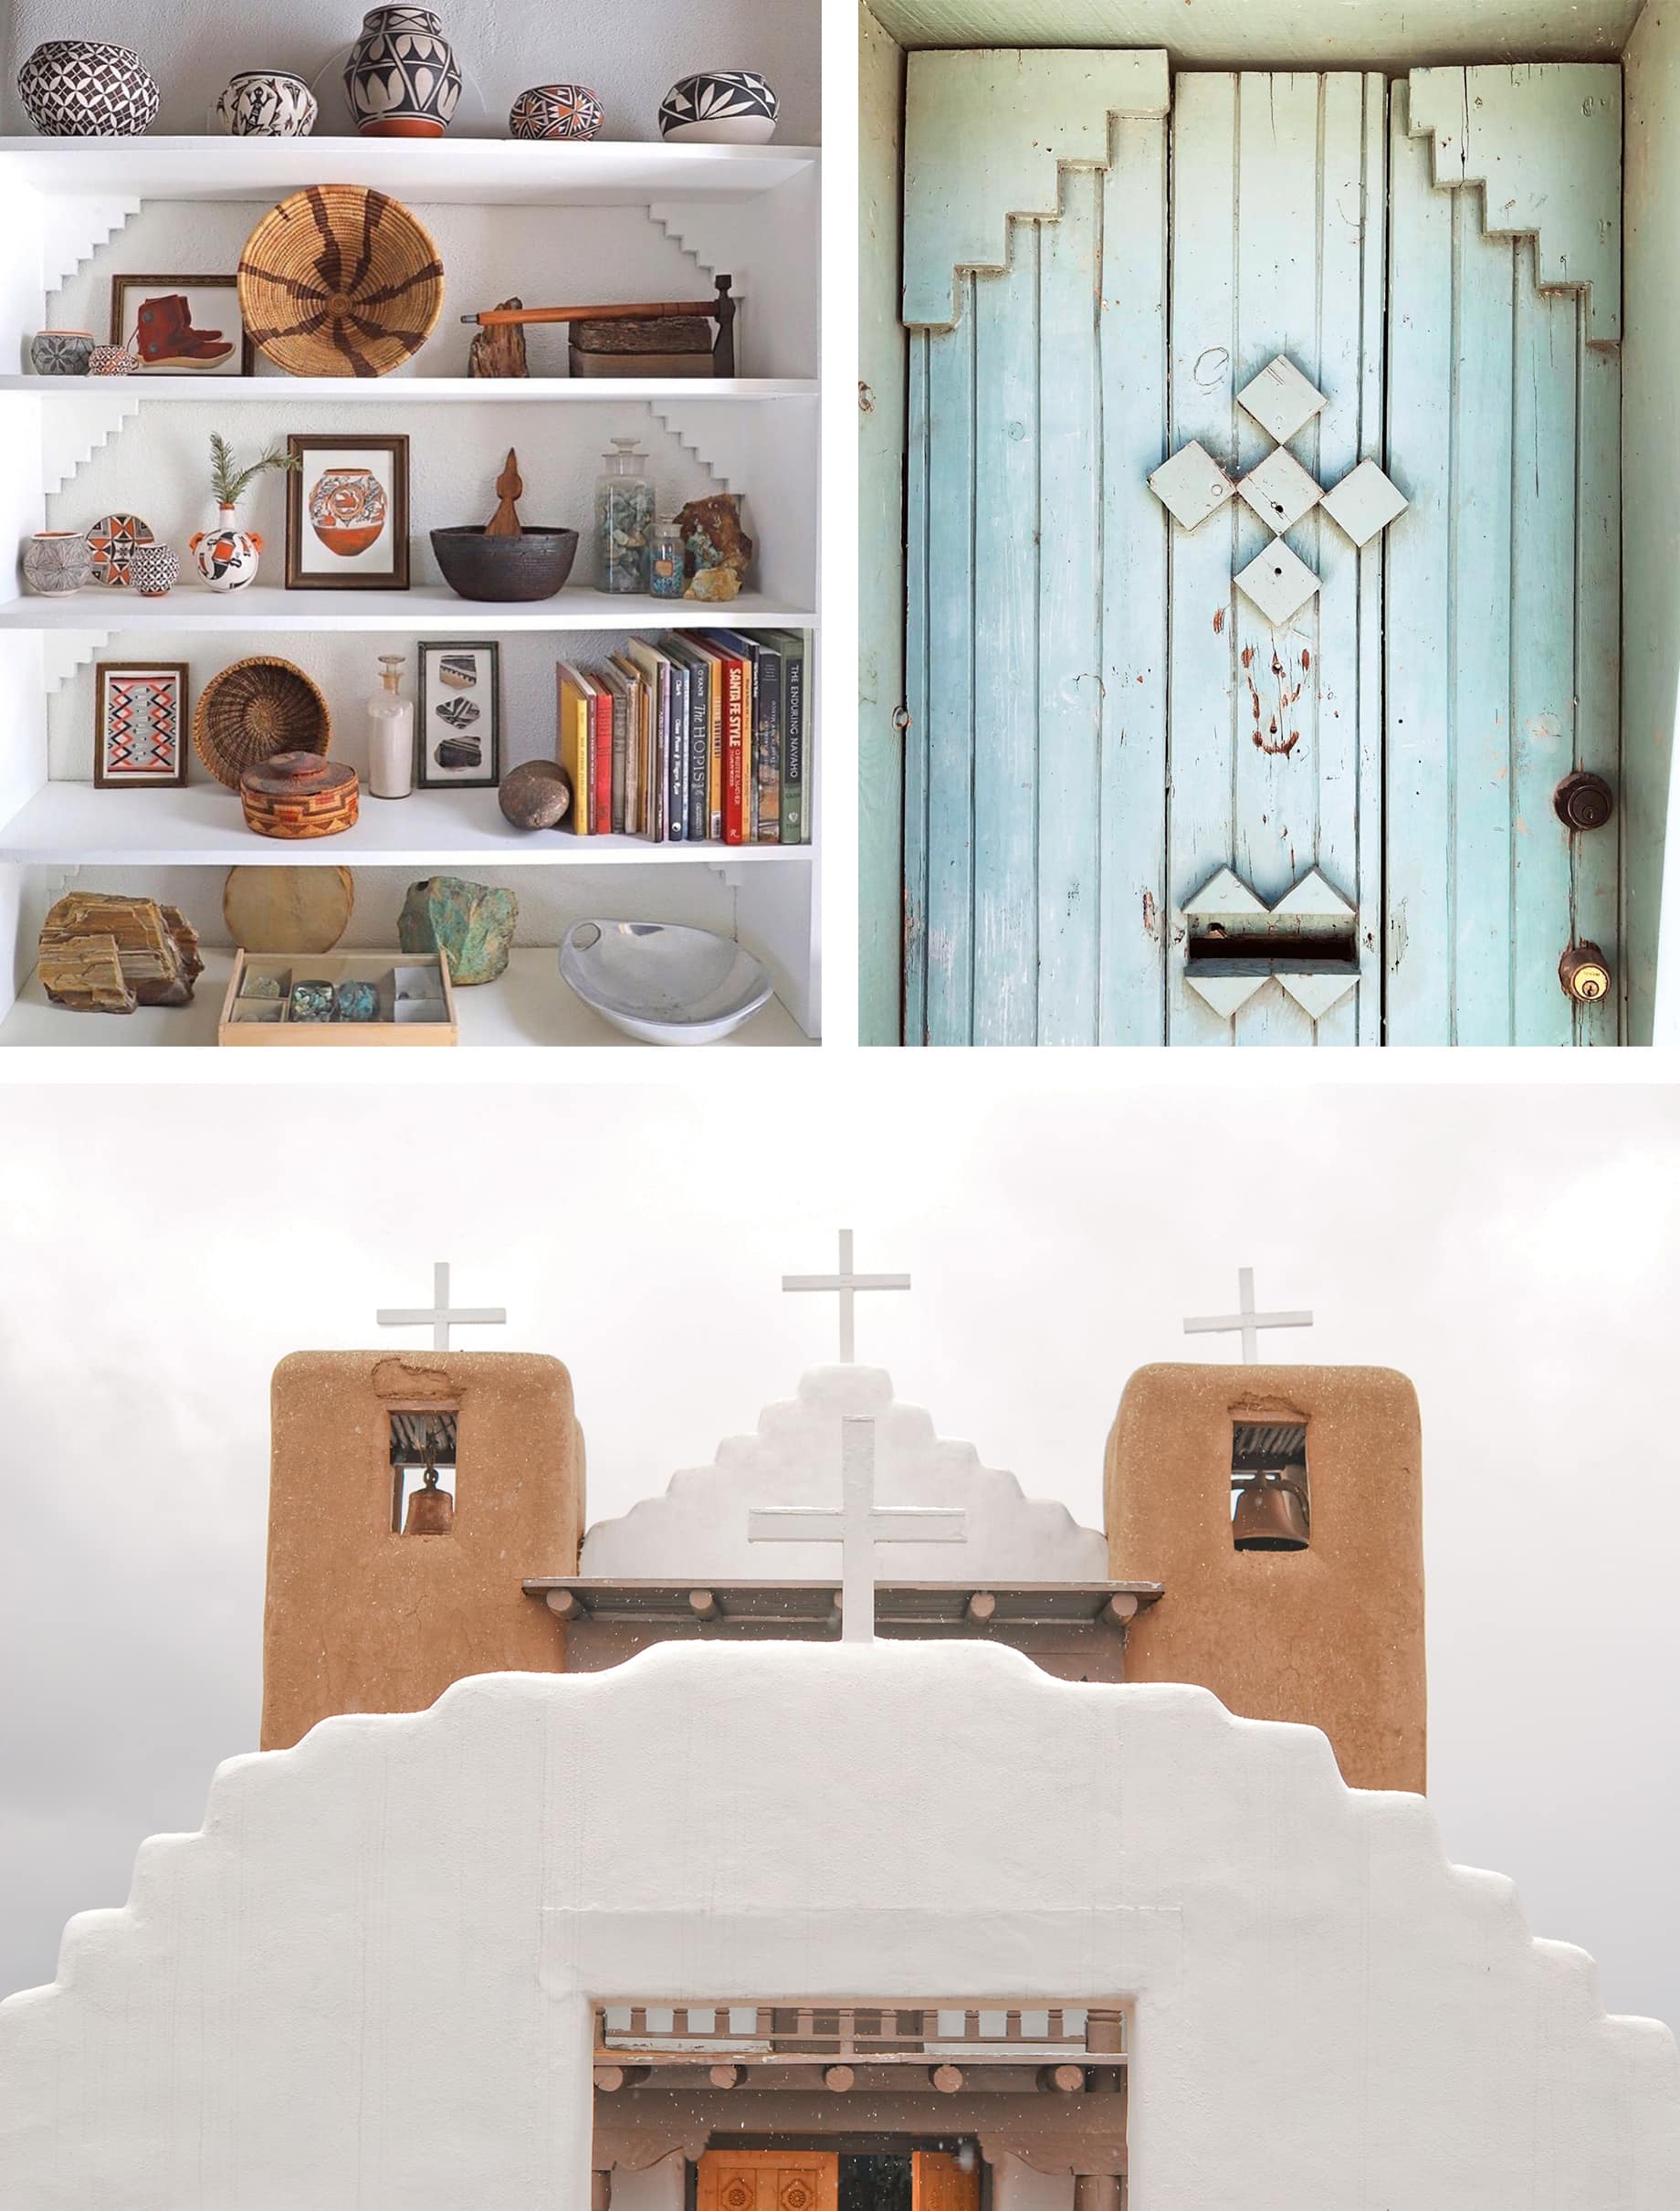
My mind immediately went to this stepped motif that’s seen all over New Mexico. Here it is on the corner brackets of a lovely set of shelves in artist Paul Baxendale’s Santa Fe studio at Field Studies Editions; on a door I spotted at a house on Santa Fe’s famous Canyon Road; and at the San Geronimo church at Taos Pueblo (photograph by Jennifer Yin).
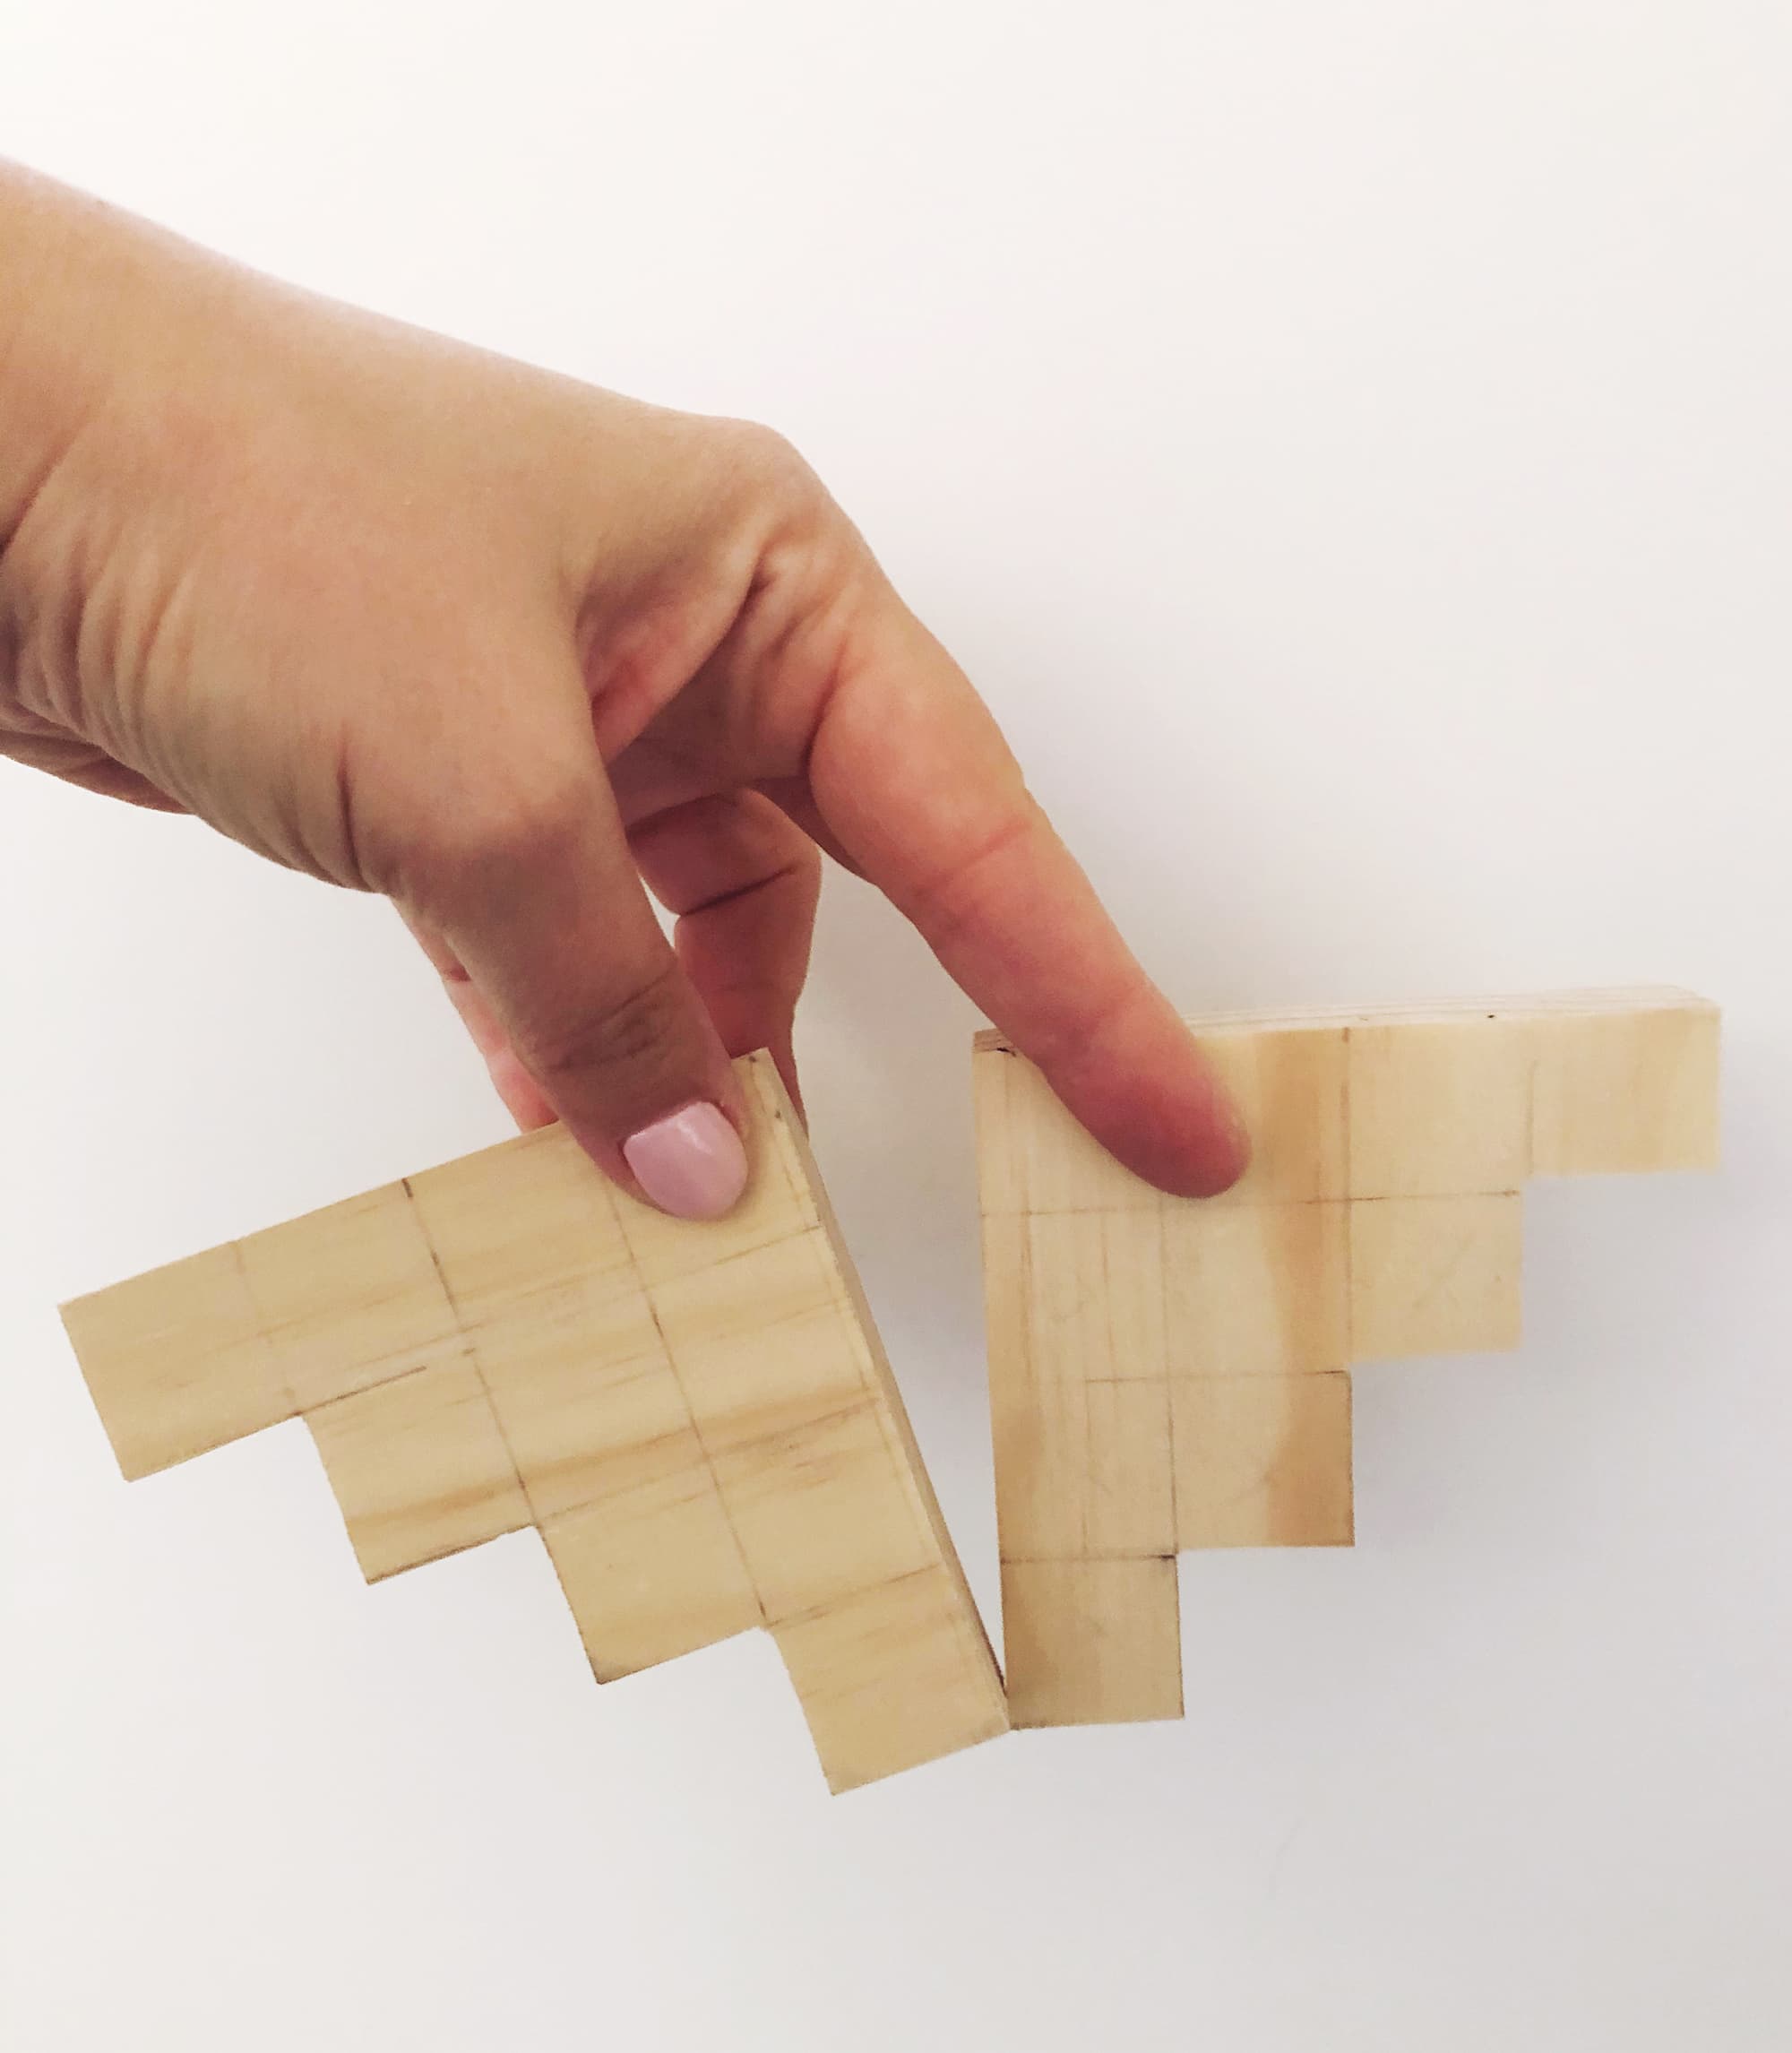
A couple of scrap 1x4s, a ruler, a pencil, a jigsaw, and about 20 minutes later, I had some cute little stepped doo-dads to add to the storage cubbies! I don’t know why it doesn’t occur to me to make stuff like this more often.
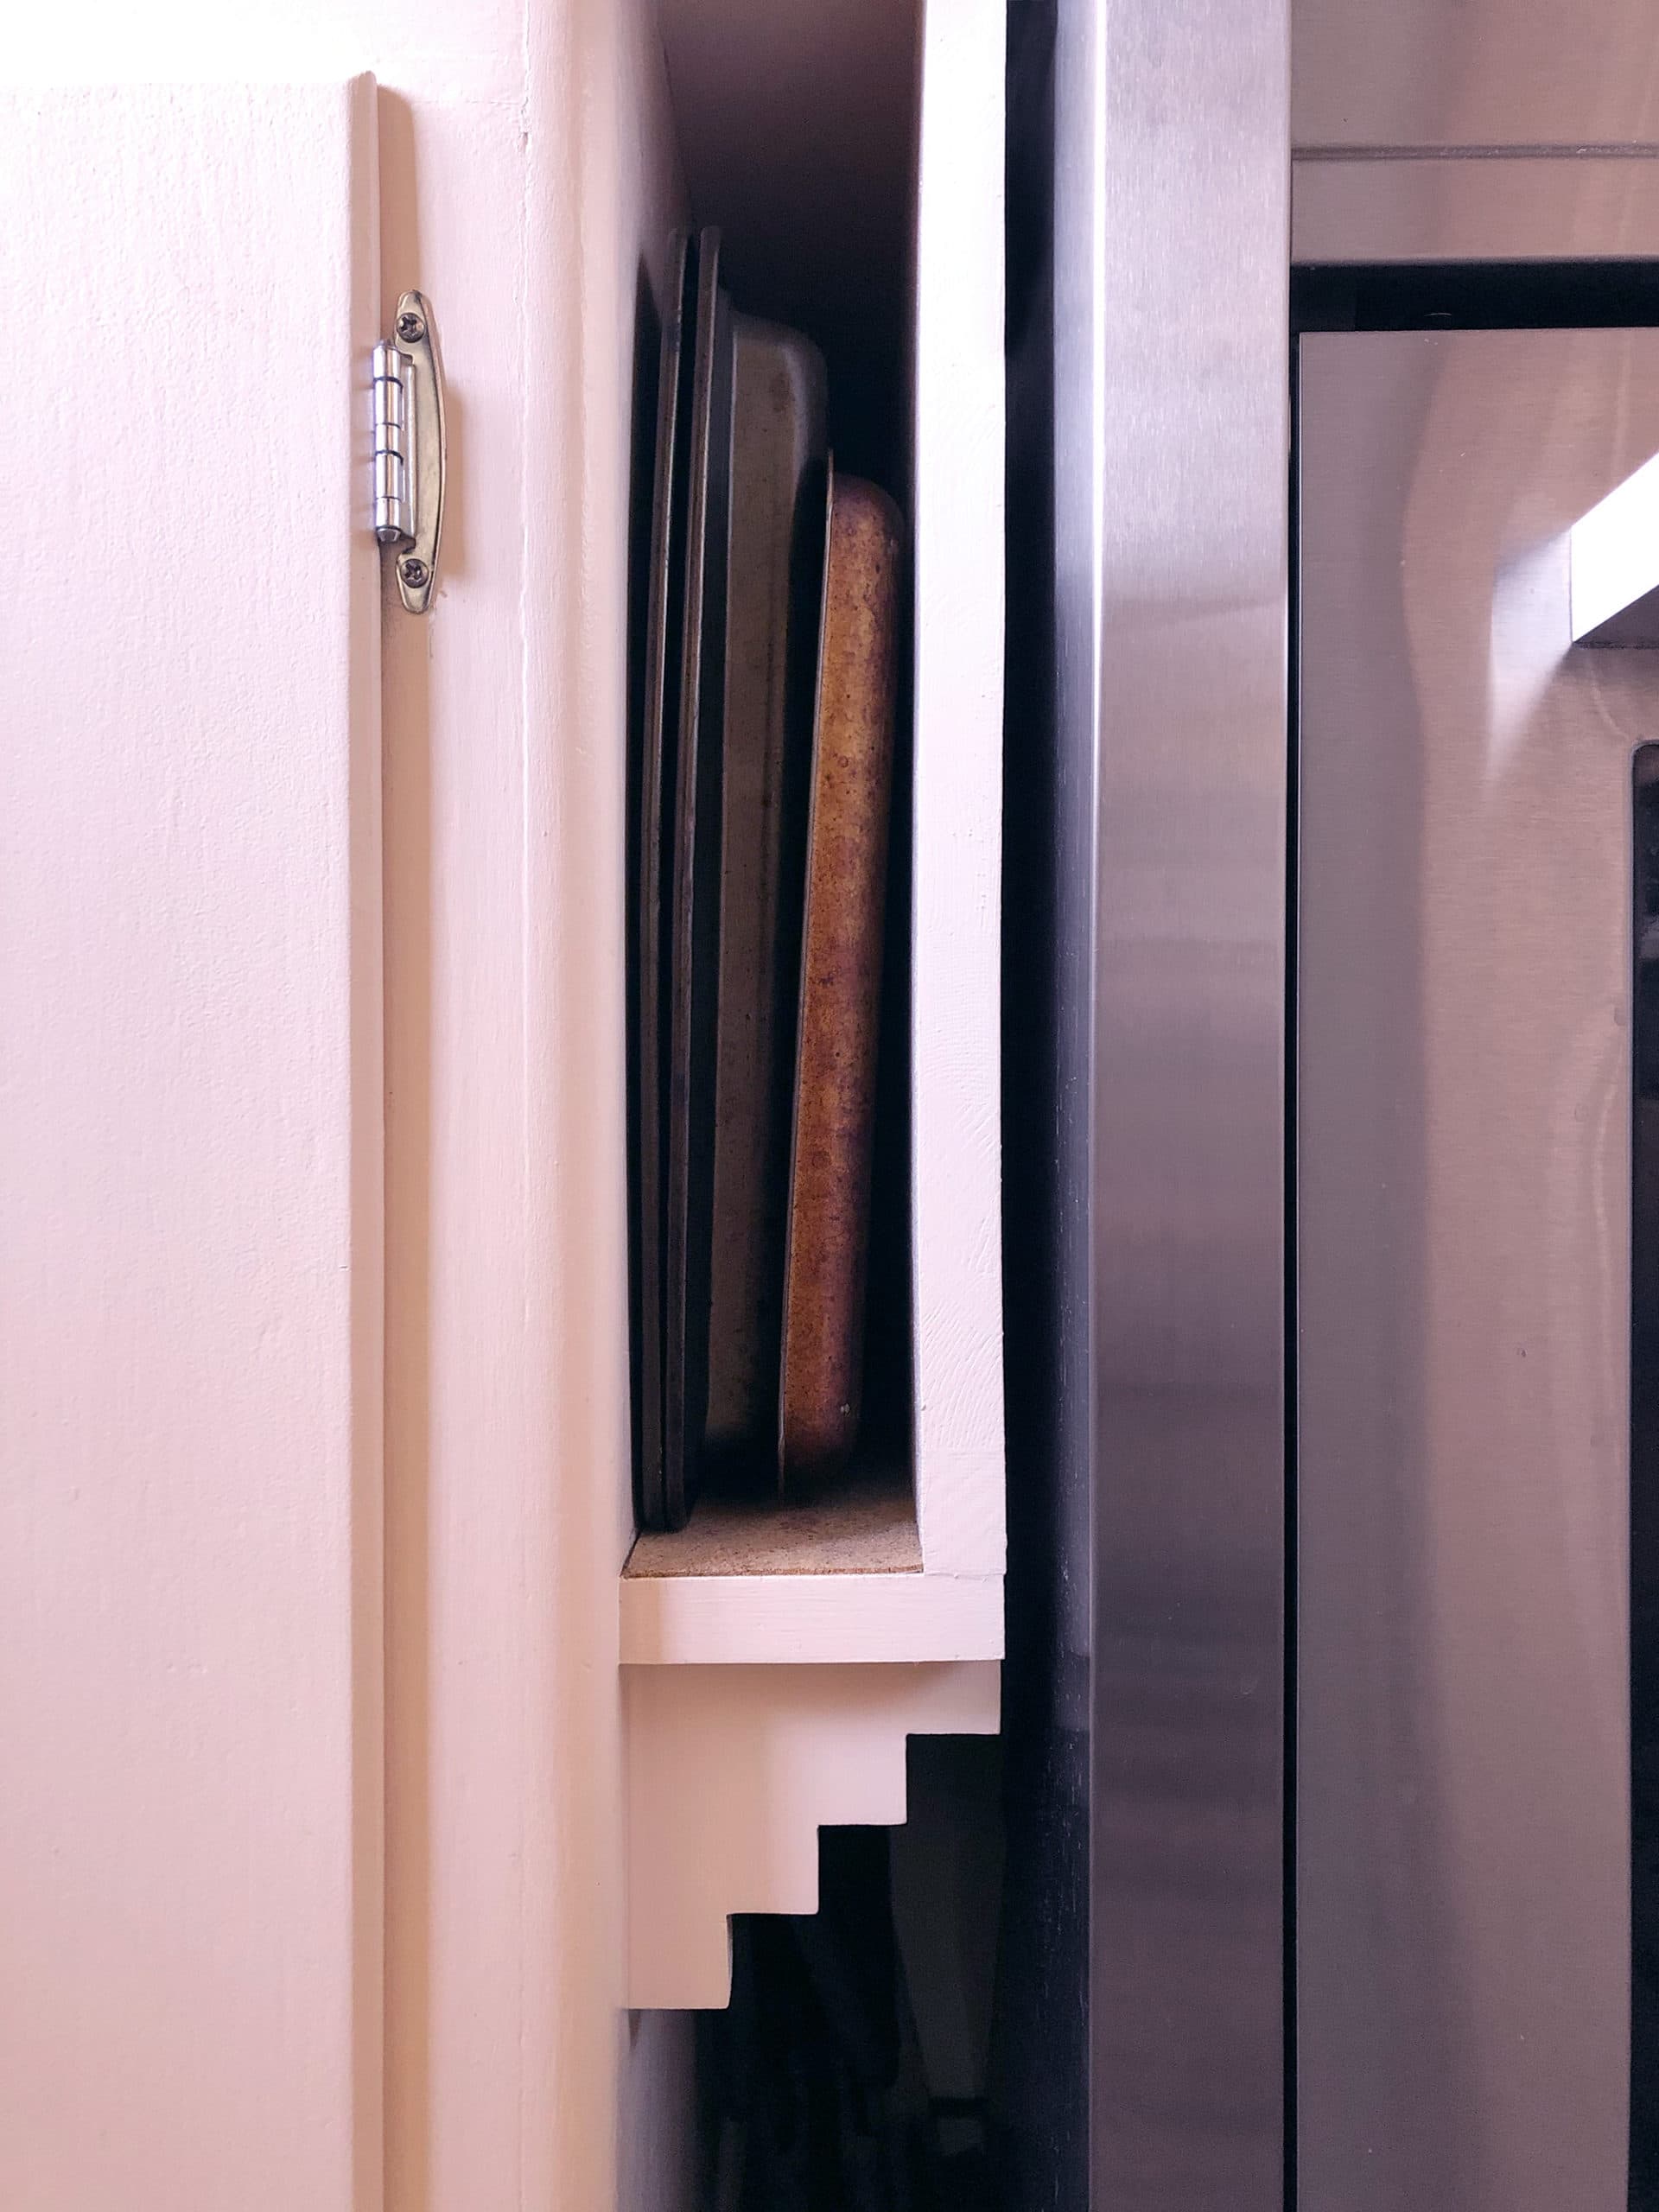
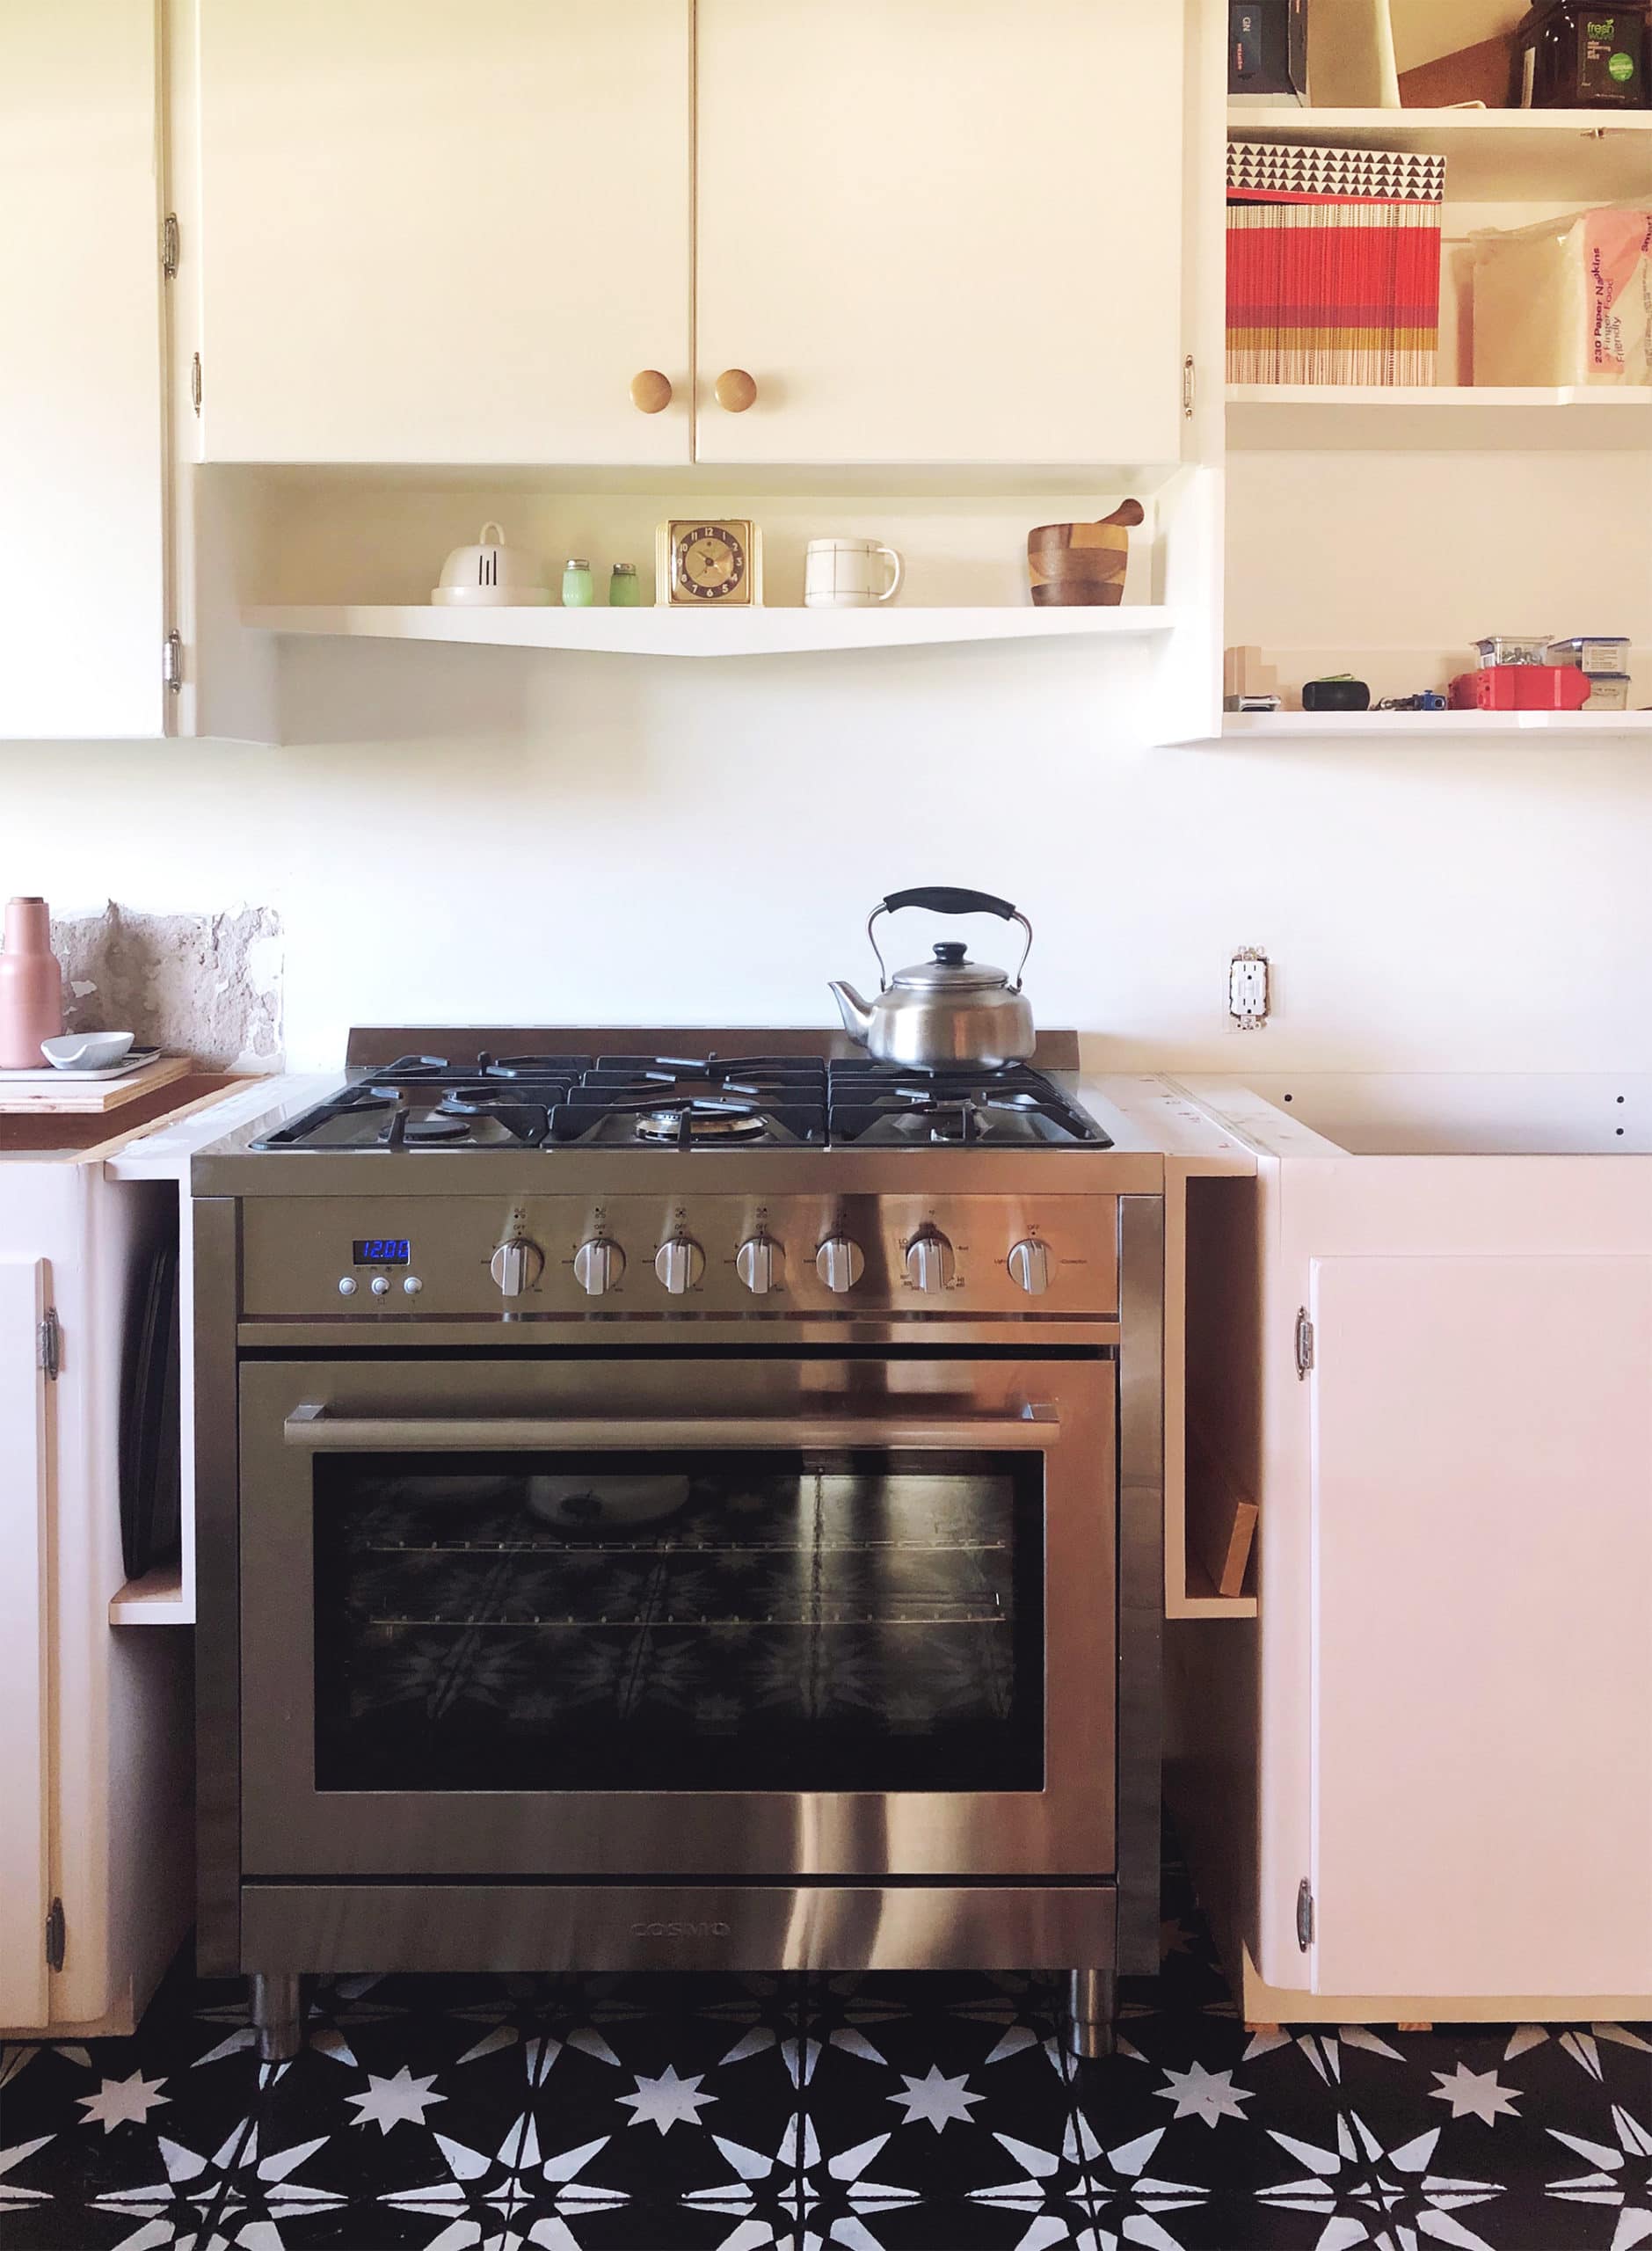
TA-DA!!! Could these storage cubbies BE any cuter??? No, they could not. This is the maximum amount of cuteness that can be achieved via cookie sheet and cutting board storage cubbies. And yes, both of my 13×18″ baking sheets and the mini sheet for my toaster oven fit in the left cubby, and my lesser-used-but-still-essential cutting boards fit in the one on the right. I lined the bottoms with self-adhesive cork to prevent scratching. Not only cute, but deeply satisfying.
(You know what else these cubbies mean? It’s time to measure for countertops! Yesssssssss.)
Kitchen recap:
✚ It’s time to meet the kitchen!
✚ Kitchen planning!
✚ Kitchen cabinets: Prep + painting.
✚ Painting and stenciling the kitchen floor.
✚ Kitchen countertop demolition.
✚ Painting the kitchen’s steel casement window.
✚ Let’s add some cabinets!
60 Comments
It’s just lovely.
Thank you, Fiona! ❤️
Gasp!!! These are SO CUTE and also so practical! I’d love to have something like this; the only practical baking sheet storage in my kitchen is the dreaded drawer under the oven. (And no, it’s not a broiler!) So annoying and noisy to deal with. I store my cutting boards in the corner of the counter, upright, with a very good simple bookend to keep them from slithering down. I felt very pleased with myself when I figured that one out!
My previous kitchens have all had the not-a-broiler storage drawer thing, and even thought they’re annoying (you always need the one on the bottom, for some reason) and noisy, I didn’t realize how much I would miss not having one! I figured out pretty quickly that storing my baking sheets inside the oven is not awesome—especially since I kept forgetting they were in there when I turned the oven on to preheat. Argh!
Super cute, the ‘doo-dads’ really finish them off and connect them to the existing units and the house.
Love those cubbies and the nod to New Mexico architecture!
These are really cute!! You should see what Christine McConnell in youtube has done in her kitchen. Totally different style from yours. But is another example of how you can customize your space and make it truly unique. Plus I wouldn’t be mad if it inspired you to be in youtube.
Love how the decoration on the cubbies works with the floor pattern!
I love this so much.
finished with flourishes AND cork-lined, no less
Lining things with cork is an instant life improvement!!
i am TRULY obsessed with this. everything about it. easier to clean the floor down there… the additional storage… the little doo-dads that are so fantastically new mexico-vibey. I cannot handle!!!
I love being able to get into all the crevices with the vacuum and the mop!!
I don’t know how to say this without sousing cheesy, but this, is delightful. So charming AD, brava.
Thank you, Annie!!
That little extra added detail was PERFECT! Aren’t you a clever girl?
You rang?

“… it’s because I’m not a monster.” Great addition, both utility and design!
Not gonna lie. As I read and saw the cubbies, I thought ‘Yep, good idea. Smart storage solution. Uh-huh.’ Then I see the stepped doo-dads and thought ‘This is expletive brilliant!’ They totally make the cubbies look like they were meant to be there…and could have always been there. You have the eye Anna!
“The cubbies look like they were meant to be there” is the BEST compliment! Thank you. I really wanted this to turn out looking like they were always part of the house.
Beyond perfect!
Way to go!! I wondered what would happen here and you totally exceeded my expectations!!
Cutest cubbies EVURRRR
Thank you for the ongoing moral support while I embarked on this project!!
This is so charming! Pulling in vernacular graphics on the fly? – my head is exploding with admiration.
This is really charming. I love the idea of taking motifs from the surrounding architecture and repeating them in small ways. It reminds me of something I read about machine learning – pictures of cities were fed into it and it identified Paris hallmarks like metal balconies. All those small details add up to a distinctive style.
Yeah, now I want to rip out my whole kitchen and start over. Thanks, Anna. 😉 (Also…you should consider interior design, no joke. I’ve loved your style from Brooklyn to Newburgh to here.)
I could never design interiors for other people. I’m too inflexible when it comes to other people’s opinions!! I’d have to make everyone sign an agreement to let me to whatever I want, no questions asked, and to also be fine with me changing my mind 100 times along the way. 😉
OMG! I saw the cubbies and went meh yeah I guess those will work from a functional standpoint (stifled yawn) and then you added the doo dads and my mind is officially blown! ❤️ Friggin genius you are
WIPE THAT YAWN OFF YOUR FACE 😀
As someone who has been reading your blog and Daniels since, I don’t know 2008ish, I can honestly say I’ve never disliked anything you have done. Today, in 2020, my blog consumption has shifted to iPad rather than cubicle internet work distraction, and I now always scroll through and look at photos first, THEN read. At first I was like, oh gosh, I hate it, what the?? Then I saw the stair step detail pieces, proving you are always right and I’m sorry for the moment I doubted you. Absolutely love the clever and design thoughtful addition =) (Then of course I went on to read it and it was a fabulous post as always).
Is anyone else at the edge of their seat about the counters though…..? Dying.
Hahahahahaha!! I’m sorry for the rollercoaster of emotions!!
Oh, STOP. Anna, this is ridiculously awesome. To the point where I now want to sell our house with its exactly-as-I-designed-it-IKEA-kitchen-with-all-lower-drawers-and-an-induction-cooktop and find a new house to renovate…a house with a kitchen that needs CUBBIES. CUBBIES. GENIUS. (And yes, an off-center range would have been unthinkable. Because the arrow-like protrusion on the built-in shelf POINTING TO THE RANGE is just TOO GOOD TO BE TRUE. Thank you for keeping our standards high, and my overuse of capital letters intact.)
Now I don’t want to do any client work tomorrow. I just want to sit around whispering “CUBBIES” like I’m a weird Harry Potter character.
A couple of people who shall remain nameless actually suggested moving the range off-center for the sake of making this whole thing easier, and I was aghast. AGHAST!
Love this so much. A sweet reminder that a little thing can make a huge difference. I wonder if we may see more of this pattern as more home reno is revealed.
Love, love this solution. It looks so ‘finished’ and in keeping with the style of your house. I’ve always wondered this about ranges that are on higher legs… how do you clean the floor underneath? Is it easy to pull out? And now you have floor space under the cubbies to clean too. (Sorry, been spending too much time cleaning while in quarantine.)
Hmmm. I haven’t needed to pull the range out since I tiled the backsplash, but I’d imagine putting felt sliders under the feet would make it very easy to pull in and out. As for cleaning, it couldn’t be easier. It’s just like vacuuming/mopping under any piece of raised furniture. It’s a full 6″ off the floor.
Amazingly charming and very practical!!!
Practical and cute, always a winning combination!
The stepped cubbies are everything. The steps totally make them.
And “because I’m not a monster” – yes! (from someone who also recognises and appreciates centeredness).
Its official, you are a design genius. This might be the cutest thing you have ever made!
So cute! And agreed, the perfect amount of cuteness!
Thank you for the suggestion of self-adhesive cork liner. I’ve been attempting to use felt rounds to ‘stick’ to the bottom of some pull out baskets I use for onion storage in my kitchen and no surprise, they don’t stick very well and constantly fall off. Cork adhesive to the rescue!
The only downside to cork lining is that you can’t really wash it, but it’s very easy to vacuum. It’s also fine to blot it clean with a damp sponge if needed! I’ve tried a few brands, and the Con-Tact kind I linked to is definitely the best in terms of non-lifting at the edges/corners.
Brilliant and practical, great job!
Love this – practical and special.
Cripes and criminy! I Love those cubbies!
Oh, I love it! So impactful and doesn’t break the bank!
I must have missed something. You extended the upper cabinet, but then did he make new doors since you used the upper doors for the lower cabinet? The cabinets and all that you have done look great. Thank you for posting.
Yes, extending the uppers meant new doors had to be made. I mentioned it in the last post, but I hadn’t hung them at that point.
The cubbies are super smart, but the doo-dads make them smart AND adorable! They have so much character and look like they have been there forever!
So practical! So tidy! So well-suited for this space!
Are you planning to repeat the stepped motif anywhere else in the kitchen (e.g. the shelf above the stove)?
No plans like that for the time being, no. I think just this little bit is enough—the shelf above the stove has its own thing going on already 🙂
This is all looking SO GOOD!
Are you kidding me? this is simply genius, and I need to copy this for my tiny tiny NYC apt that has a stupid space next to the stove that is currently just housing the little step stool needed to reach the upper cabinet. gaaaaahhhh!!! so smart
Brava!
Endlessly cute!
Cute! I’m curious, how did you attach the decorative pieces to the cabinets? Screws seem like they would be too big and rip it apart. Brad nails? Glue?
I used long, thin steel screws through the inside of the cabinet (I drilled pilot holes first). Dowels and glue would’ve worked great, but I don’t have the right kind of bit.
So happy to see you blogging again. Love your kitchen. I love all SW architecture. And your kitchen cabinets are my favorite style. You can totally design the home my hubs and I are planning to bill (we live in southern CA). I will totally give you total control.
Okay, the more posts I look at, the more obsessed with your style I become! Those little cubbies are so smart and so cute! You are giving me so many ideas for our cabinet refinishing project we’re about to take on!