
After Wednesday’s documentation of my 11-month kitchen floor painting/stenciling saga, I definitely need to devote a couple of posts to the kitchen renovation work that I did not do myself. First up, the demolition of the countertop!
Before I get started, let’s get caught up…
Kitchen recap:
✚ It’s time to meet the kitchen!
✚ Kitchen planning!
✚ Kitchen cabinets: Prep + painting.
✚ Painting and stenciling the kitchen floor.

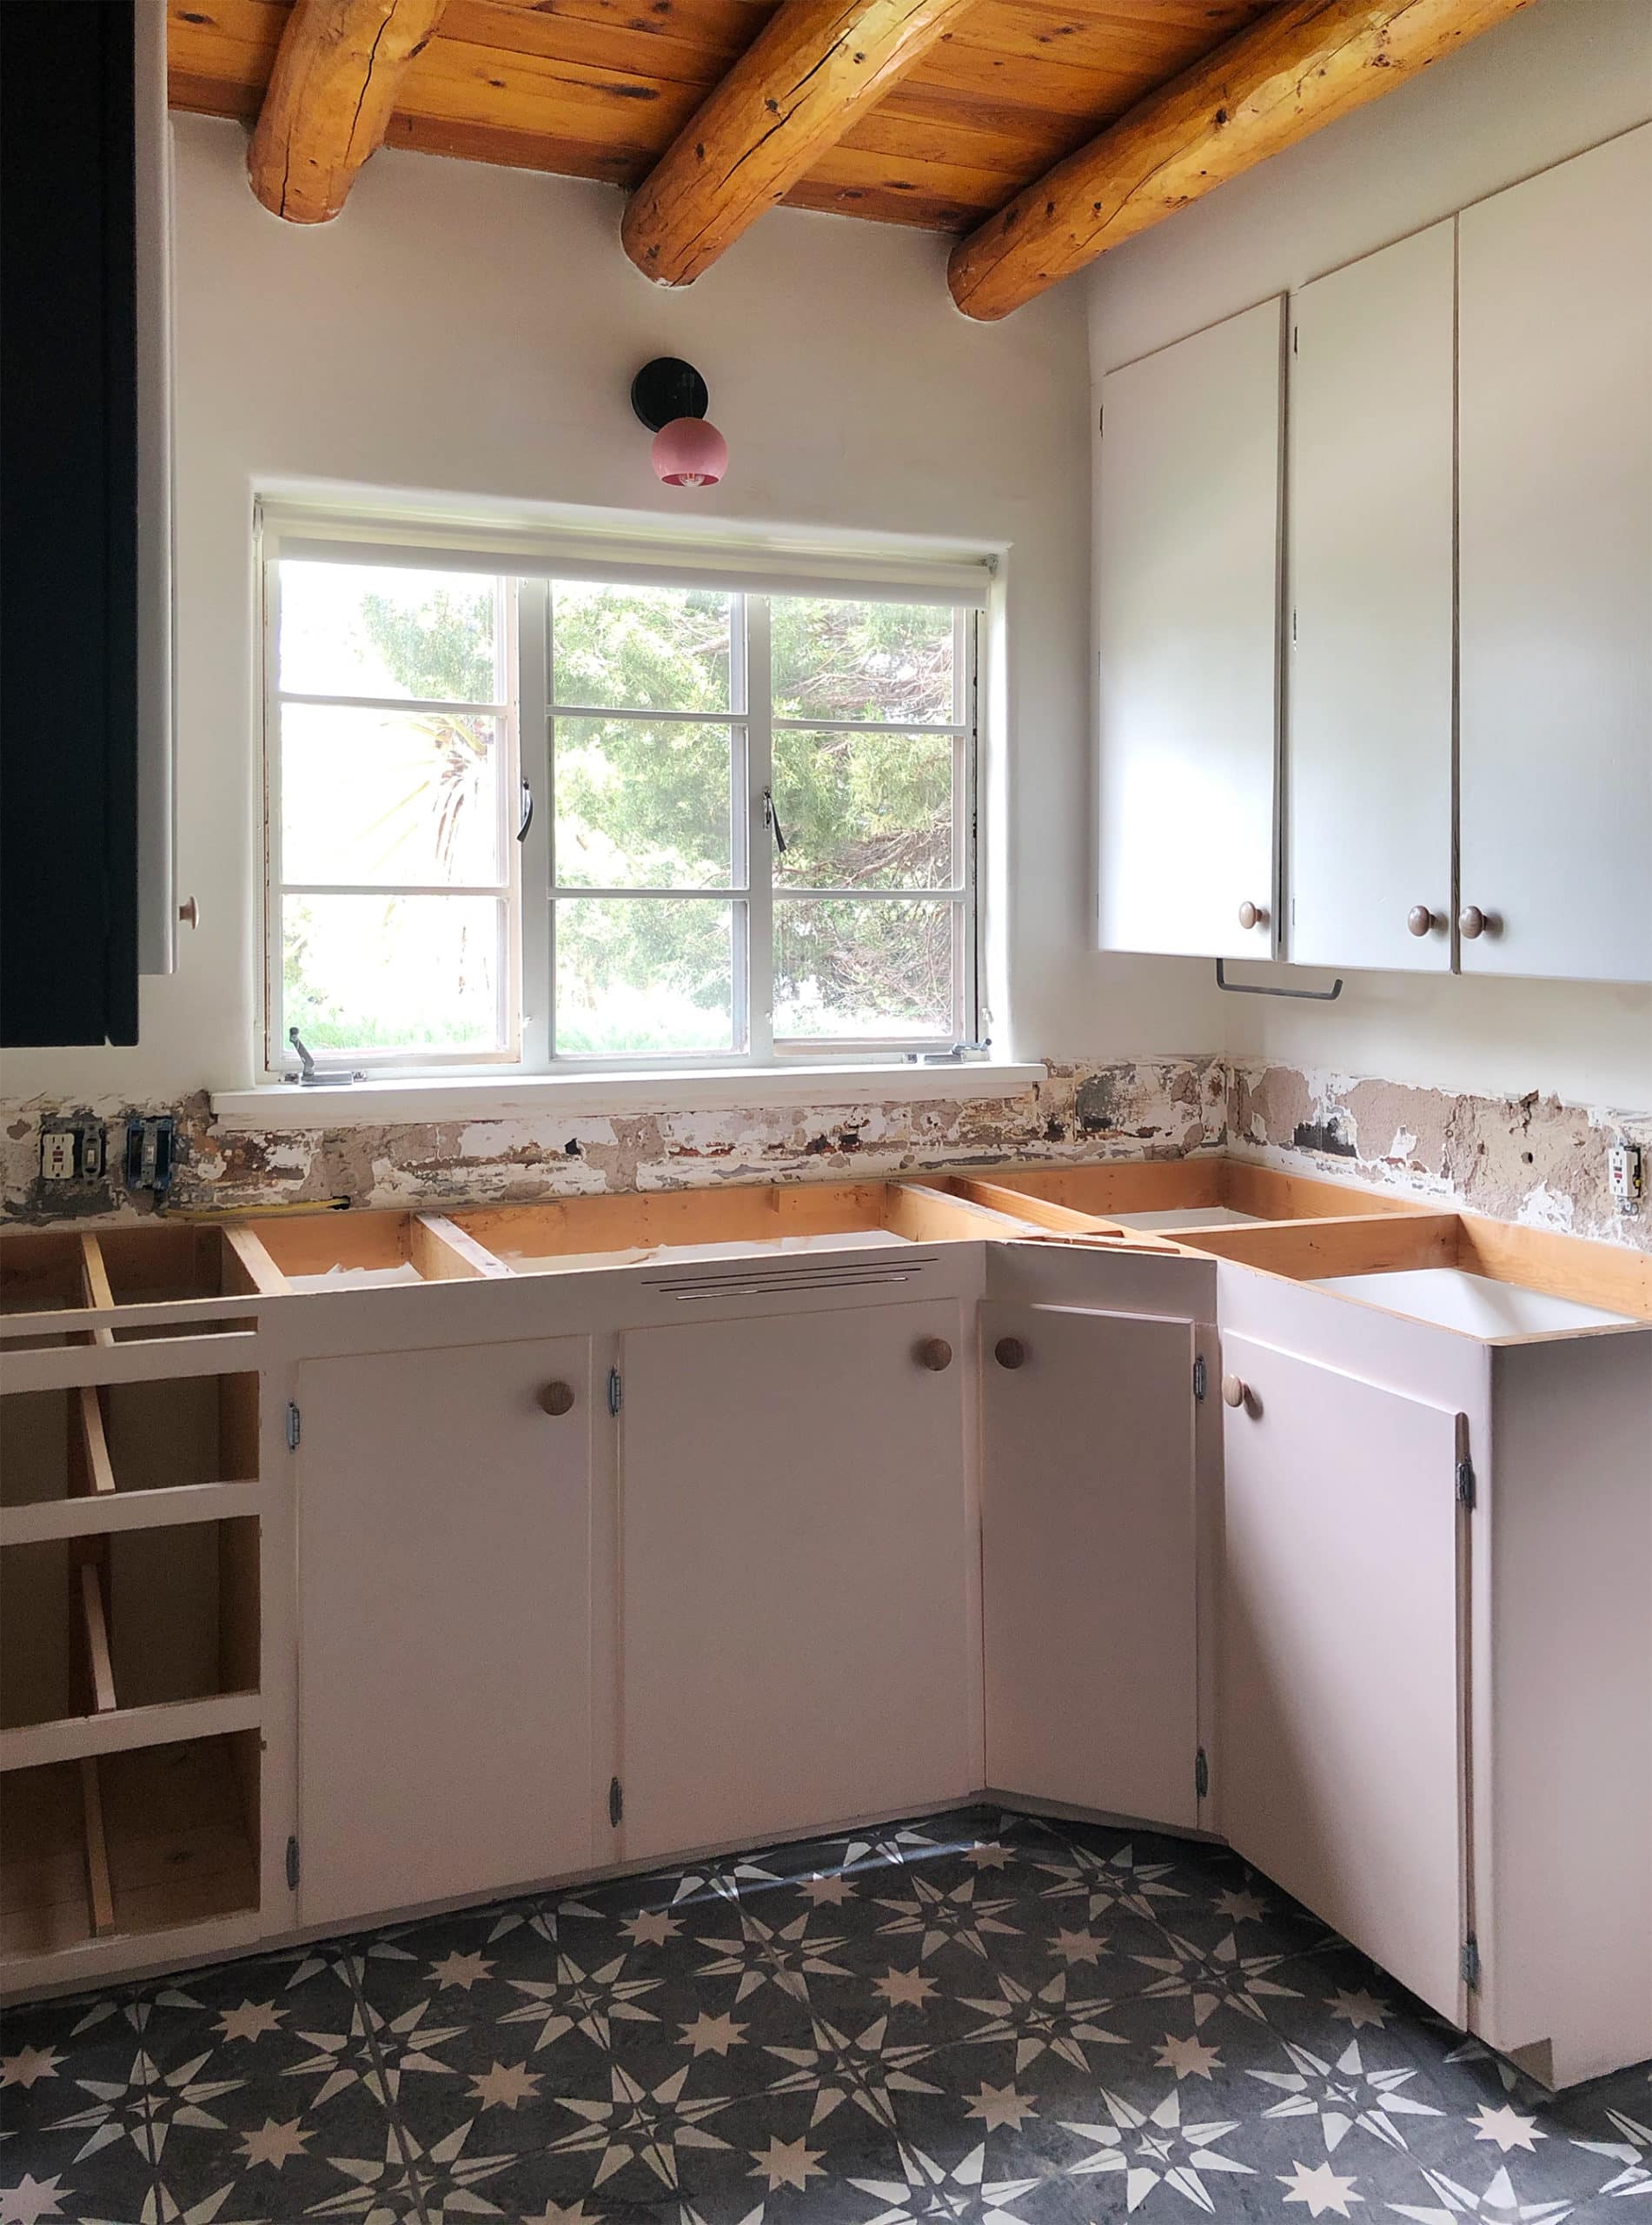
Also, let’s revisit the countertops that are getting demolished, lest anyone think something nice is being destroyed here. First of all, this is definitely floor tile. The same tile that’s under the paint on the floor, in fact, only smaller. Second, it was definitely installed directly over the original countertop, which was sheet Linoleum glued to plywood with a metal edging band. Because the tile is sitting on top of the old countertop, it’s higher than the sink, hence the hand-sculpted grout transition edge you see. I cannot stress enough how gross this situation was. It had to go.
September–October 2019
A good eight months passed between when I finished painting the kitchen floor and when we decided to go ahead with the rest of the kitchen renovation. By this past October, we’d been living in the house for a year and a half, and I guess it was a combination of knowing dealing with the countertops would be expensive, and just plain putting it off. But on September 27, this happened:
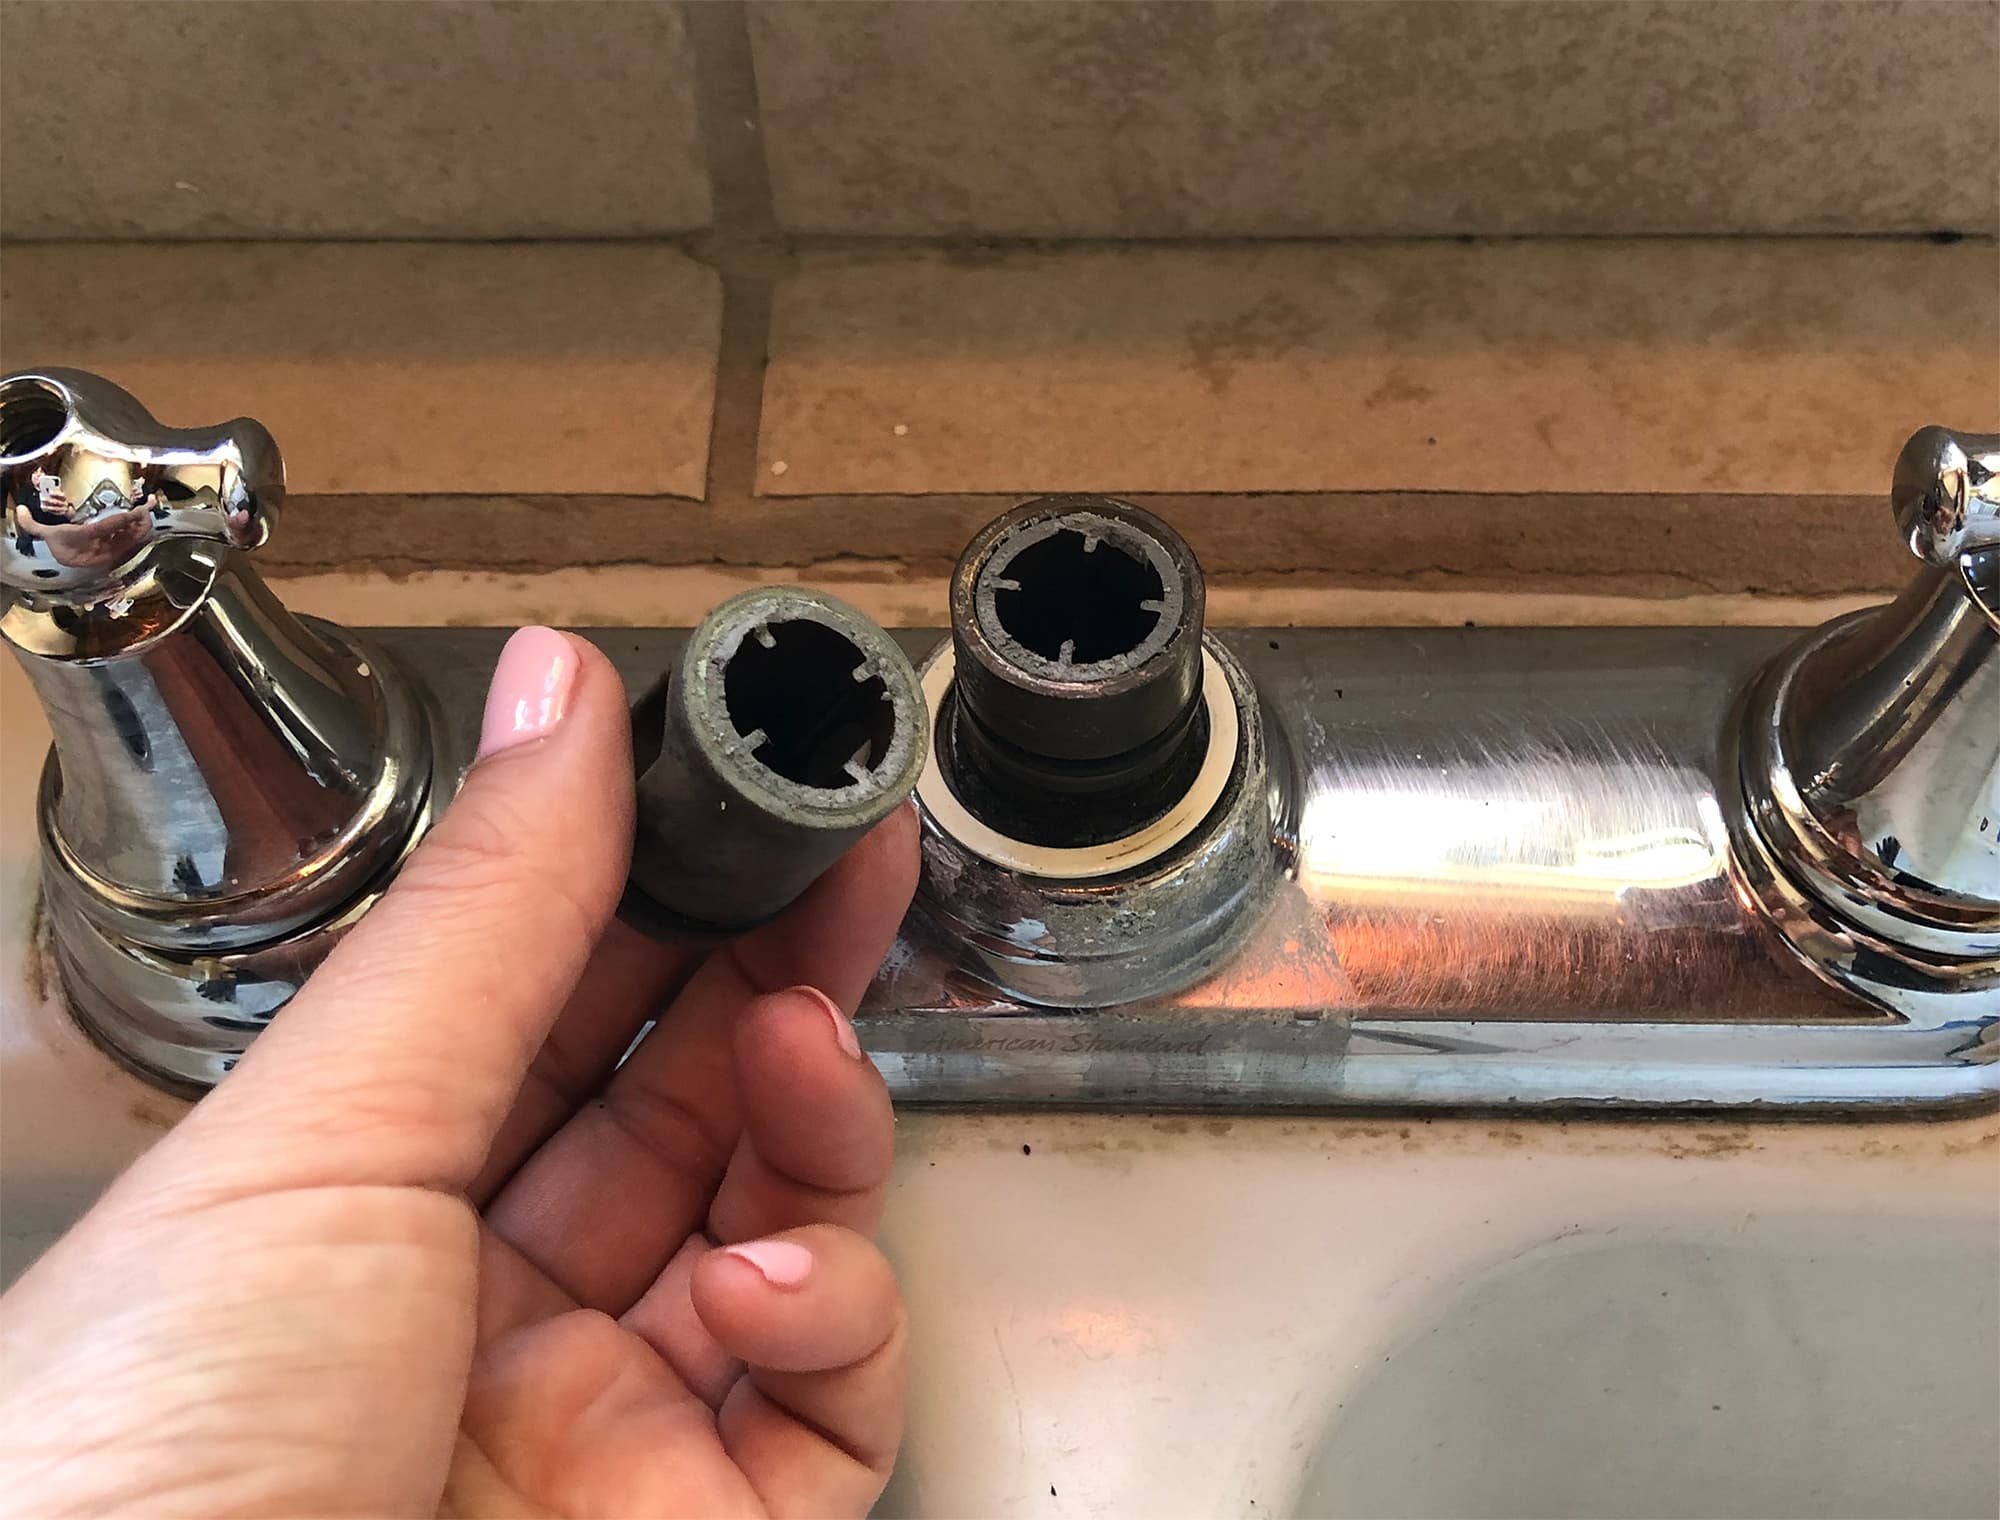
In case the photo isn’t clear, that’s the inside of a cheap kitchen faucet. It’s made of plastic, and the plastic is snapped cleanly in half. The faucet had been leaking incessantly, so I decided to take it apart and see what I could tighten up or if there were any washers I could replace, and…well, it basically just fell apart in my hand. Which explained the leak, and also meant either I was going to have to temporarily replace the faucet, or the gods of plastic were trying to tell us that it was time to do what we’d be planning to do for the better part of two years and just move forward with the kitchen renovation. The latter option seemed correct.
(September 27, 2019 is the day I started washing dishes in the bathtub. Let’s remember that date for when it comes up again in a future post.)
We knew we couldn’t do the countertop demolition ourselves. Between the tools we’d need to have at the ready, the skills it would take to remove the countertop without damaging the cabinets, and the need to then haul all of the debris to the dump, it was just beyond what we were realistically capable of doing. It’s really hard for me to admit when something is too hard for me to DIY, but I’m getting better about it. We called Francisco, a lovely handyman who had previously removed a concrete block wall for us and done a great job doing it cleanly and efficiently, and got a reasonable quote—which specified “a case of Corona” as part of the payment for him and a buddy. That sounded funny in October 2019. Six months later, it sounds downright sinister.
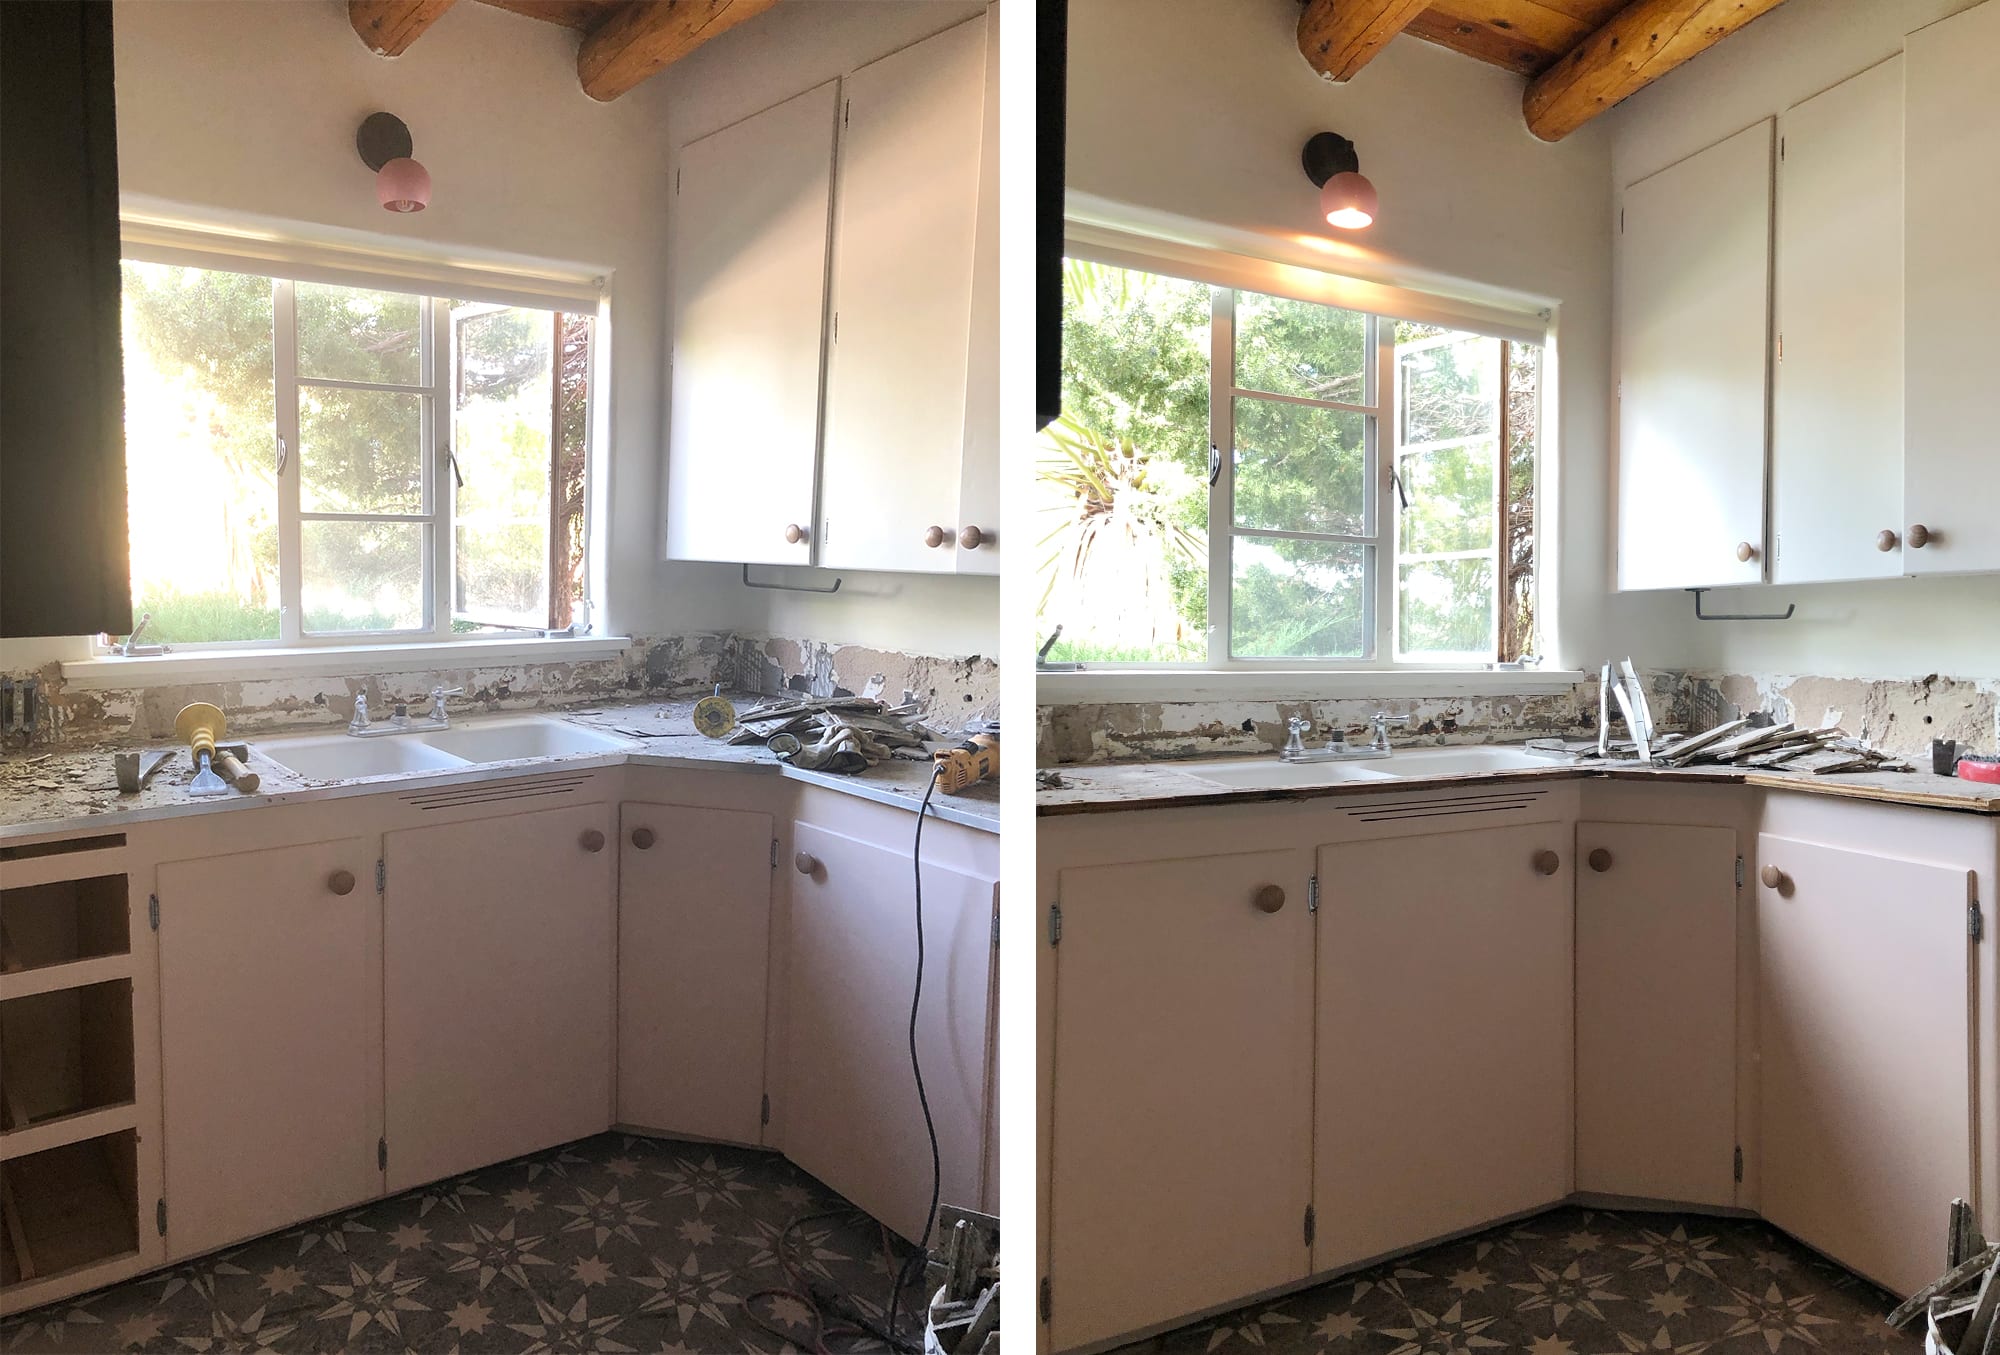
It took Francisco and his buddy a long time and a LOT of effort to remove the countertops. I’m really shy when it comes to taking photos of people doing work in the house, but I sneaked in a couple of times while they were taking debris out to the truck. First they chiseled off the tile, which was easier than I’d imagined it would be. Then they set about trying to remove the original plywood countertop, which was an absolute BEAST. It wasn’t neatly held in place with a few screws, it was nailed to the cabinets…with approximately one million 4″ nails. They used a reciprocating saw, a circular saw, multiple sizes of pry bars and chisels, hammers, mallets, and an angle grinder. It was an ordeal.
But! They didn’t damage the cabinets AT ALL! Like, not even a tiny scratch or chipped bit of paint. Amazing. Plus they swept and vacuumed when they were done. Then they loaded up their case of Corona (beer, not virus) and headed off to the dump.
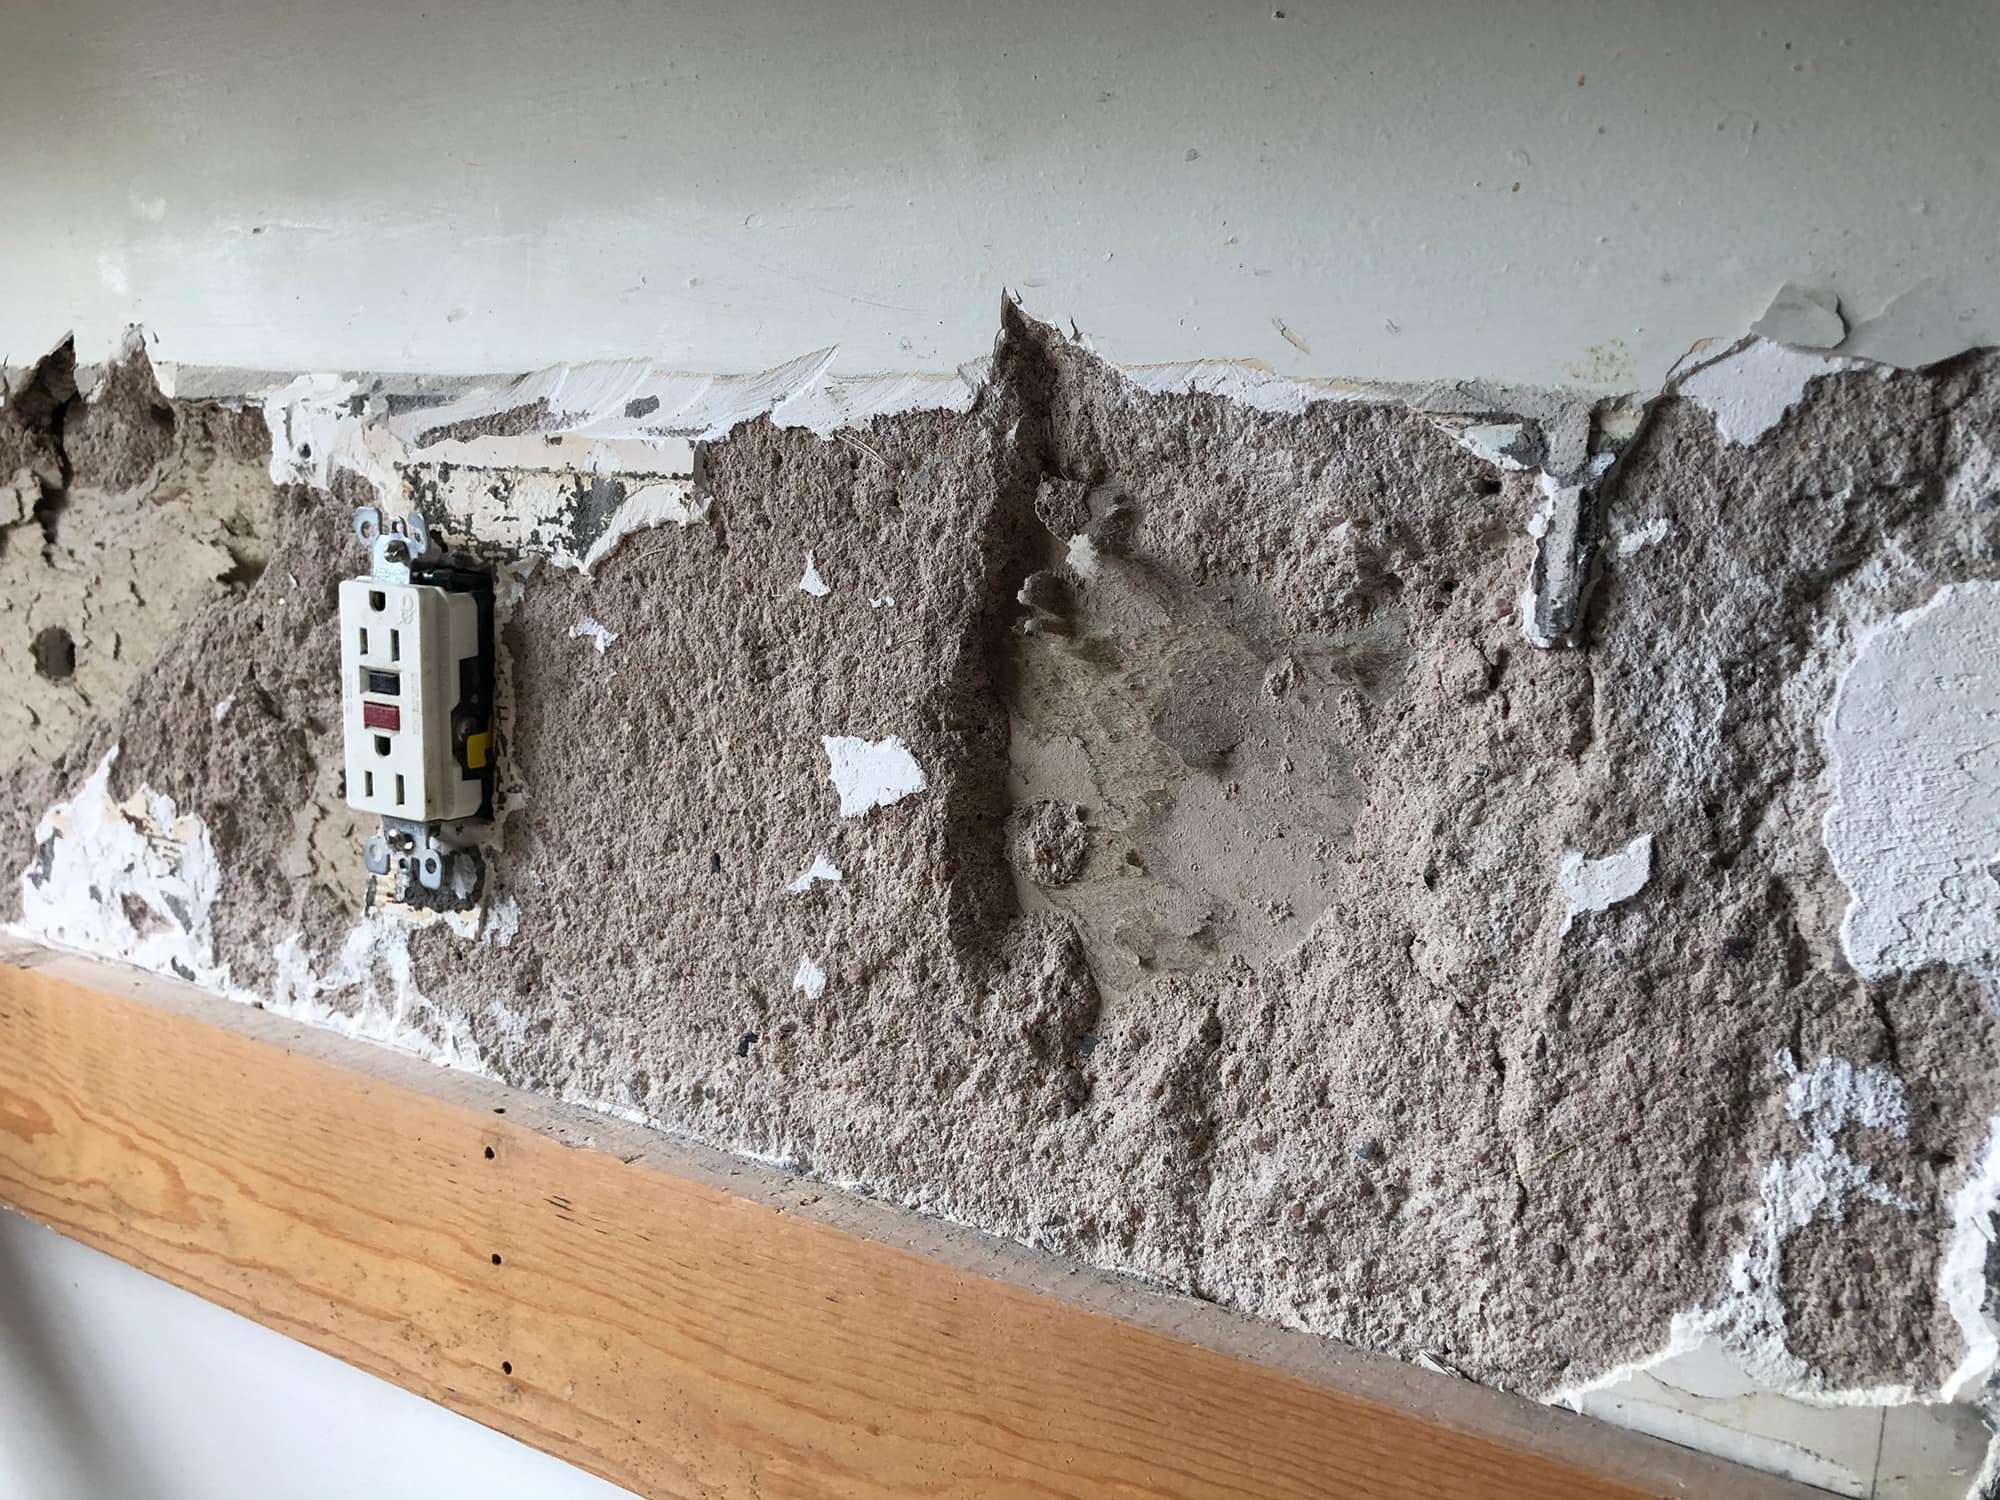
The walls—which are concrete and plaster over rock lath/button board—took a beating, however. I expected this, because there’s really no way to rip tile off of plaster without causing damage. Not a big deal, though, and something I knew I’d be able to take care of myself before tiling the backsplash.
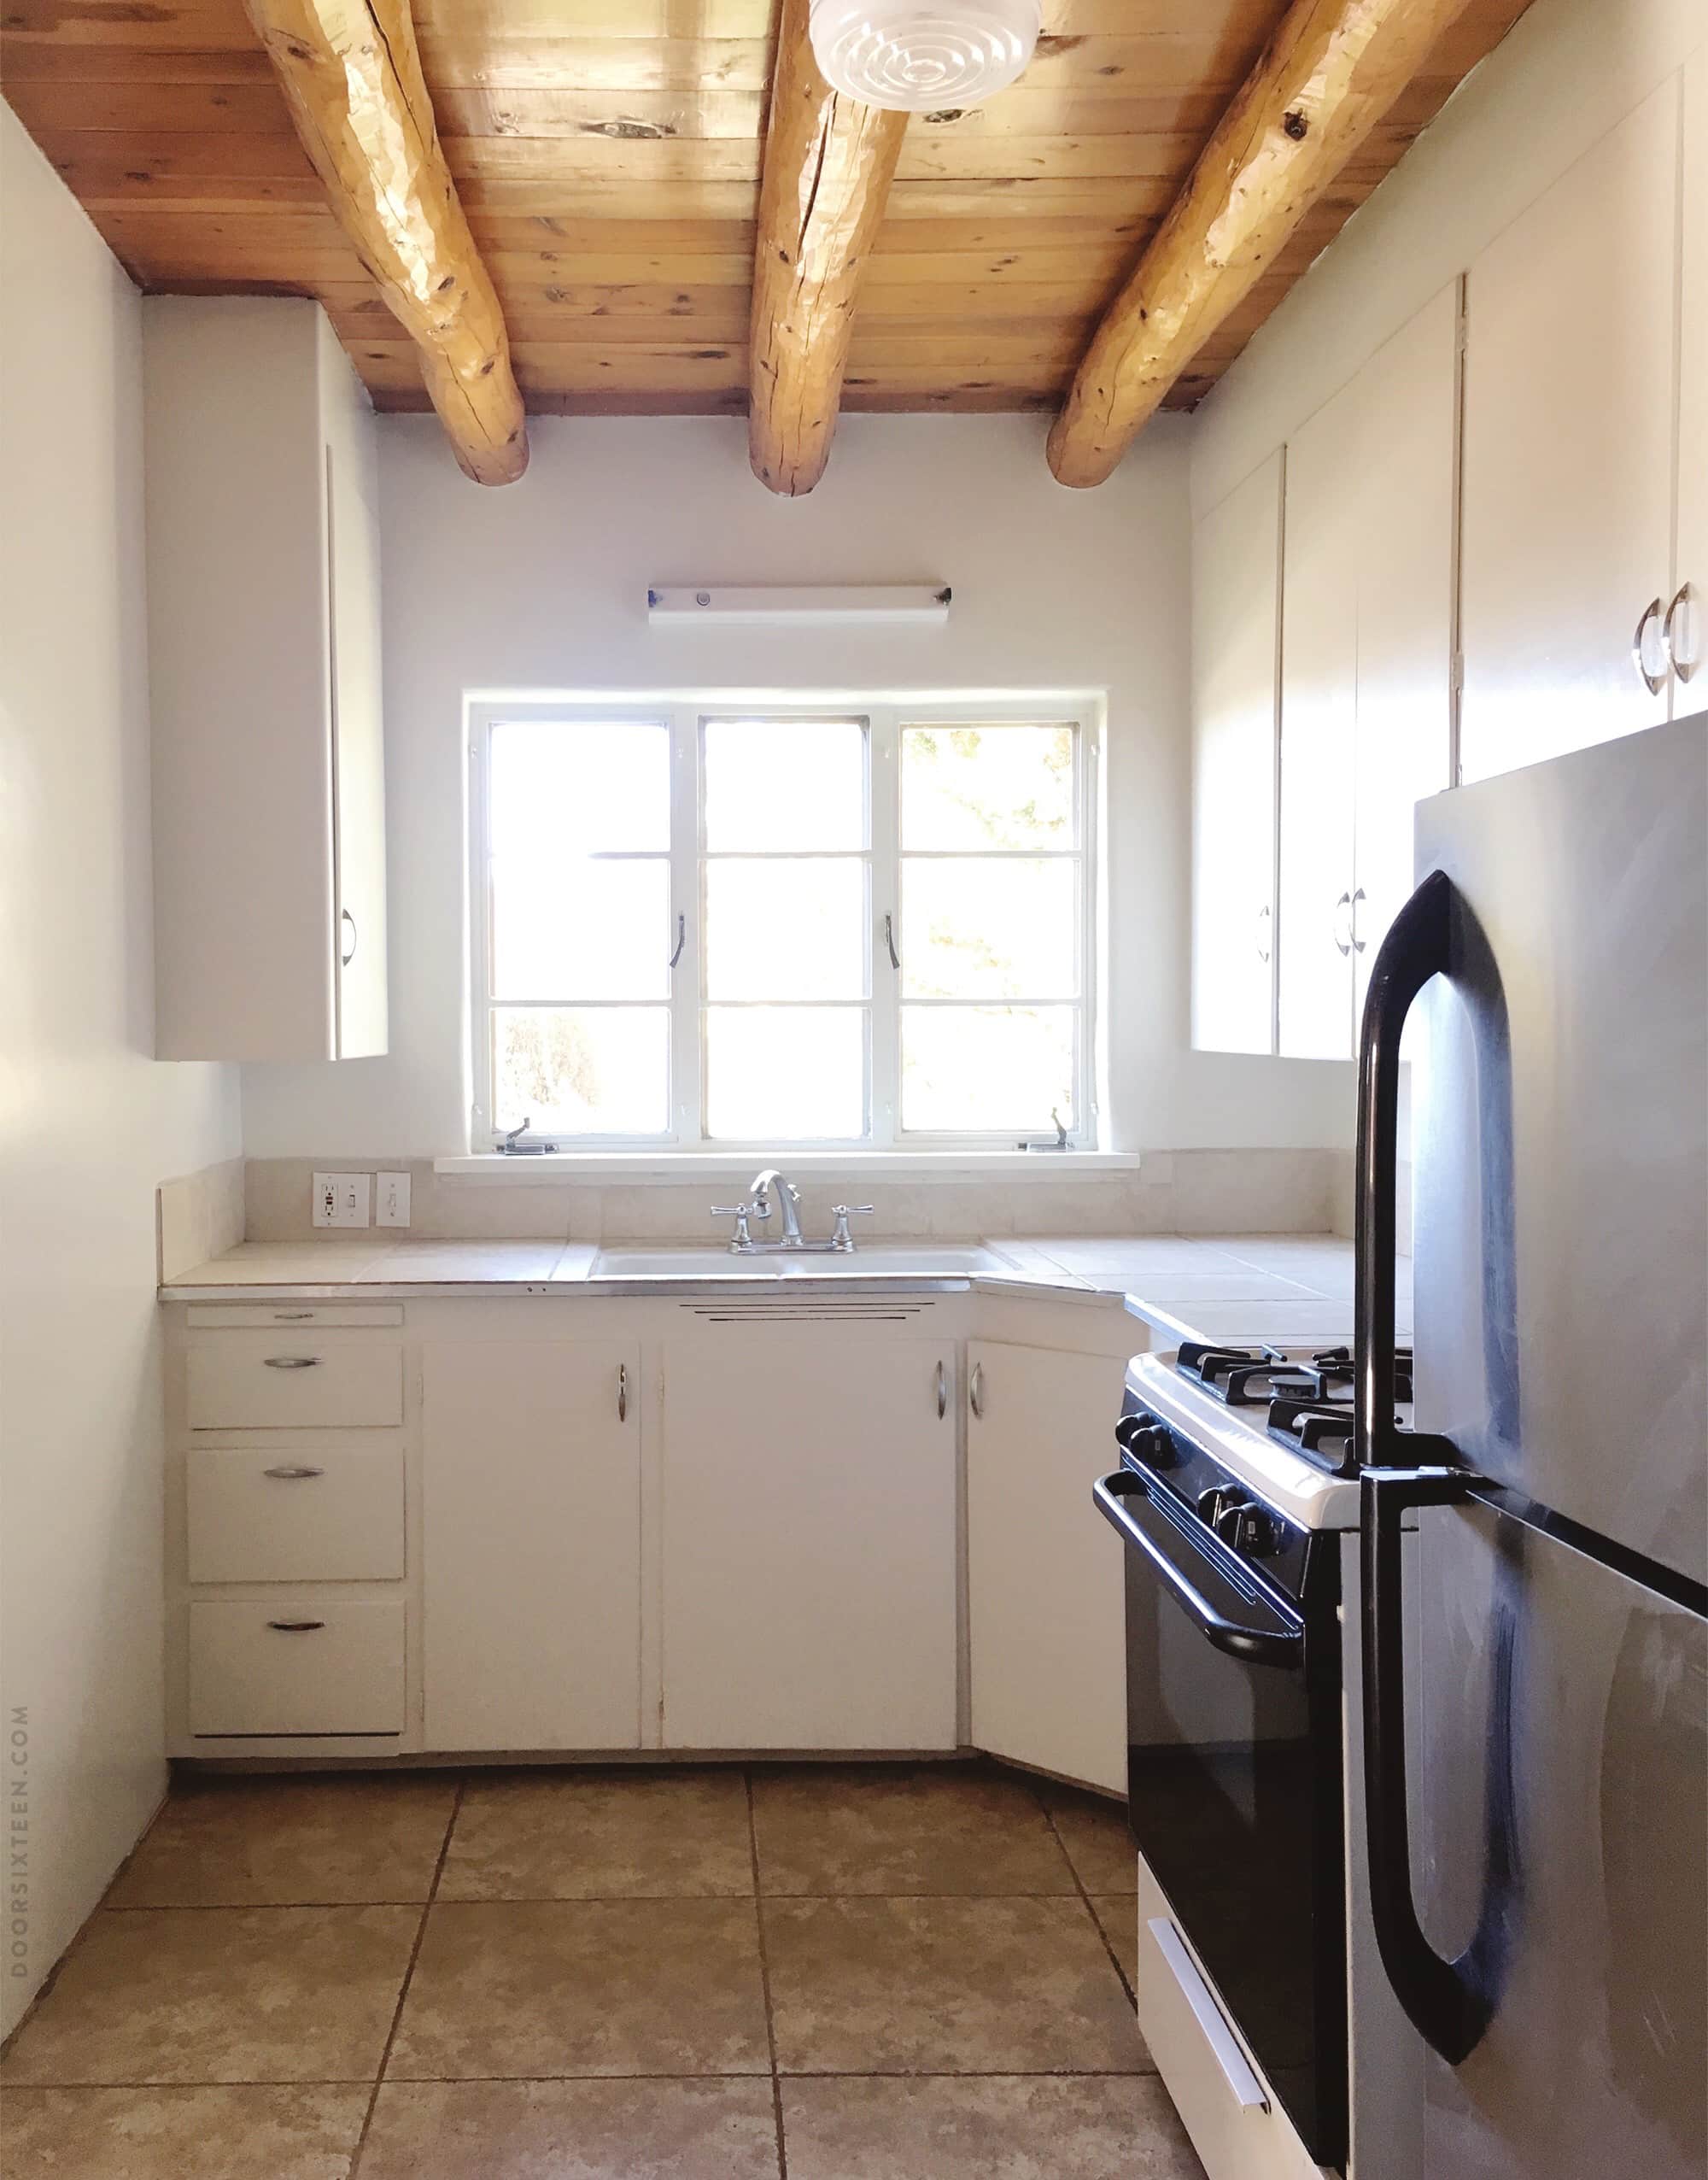
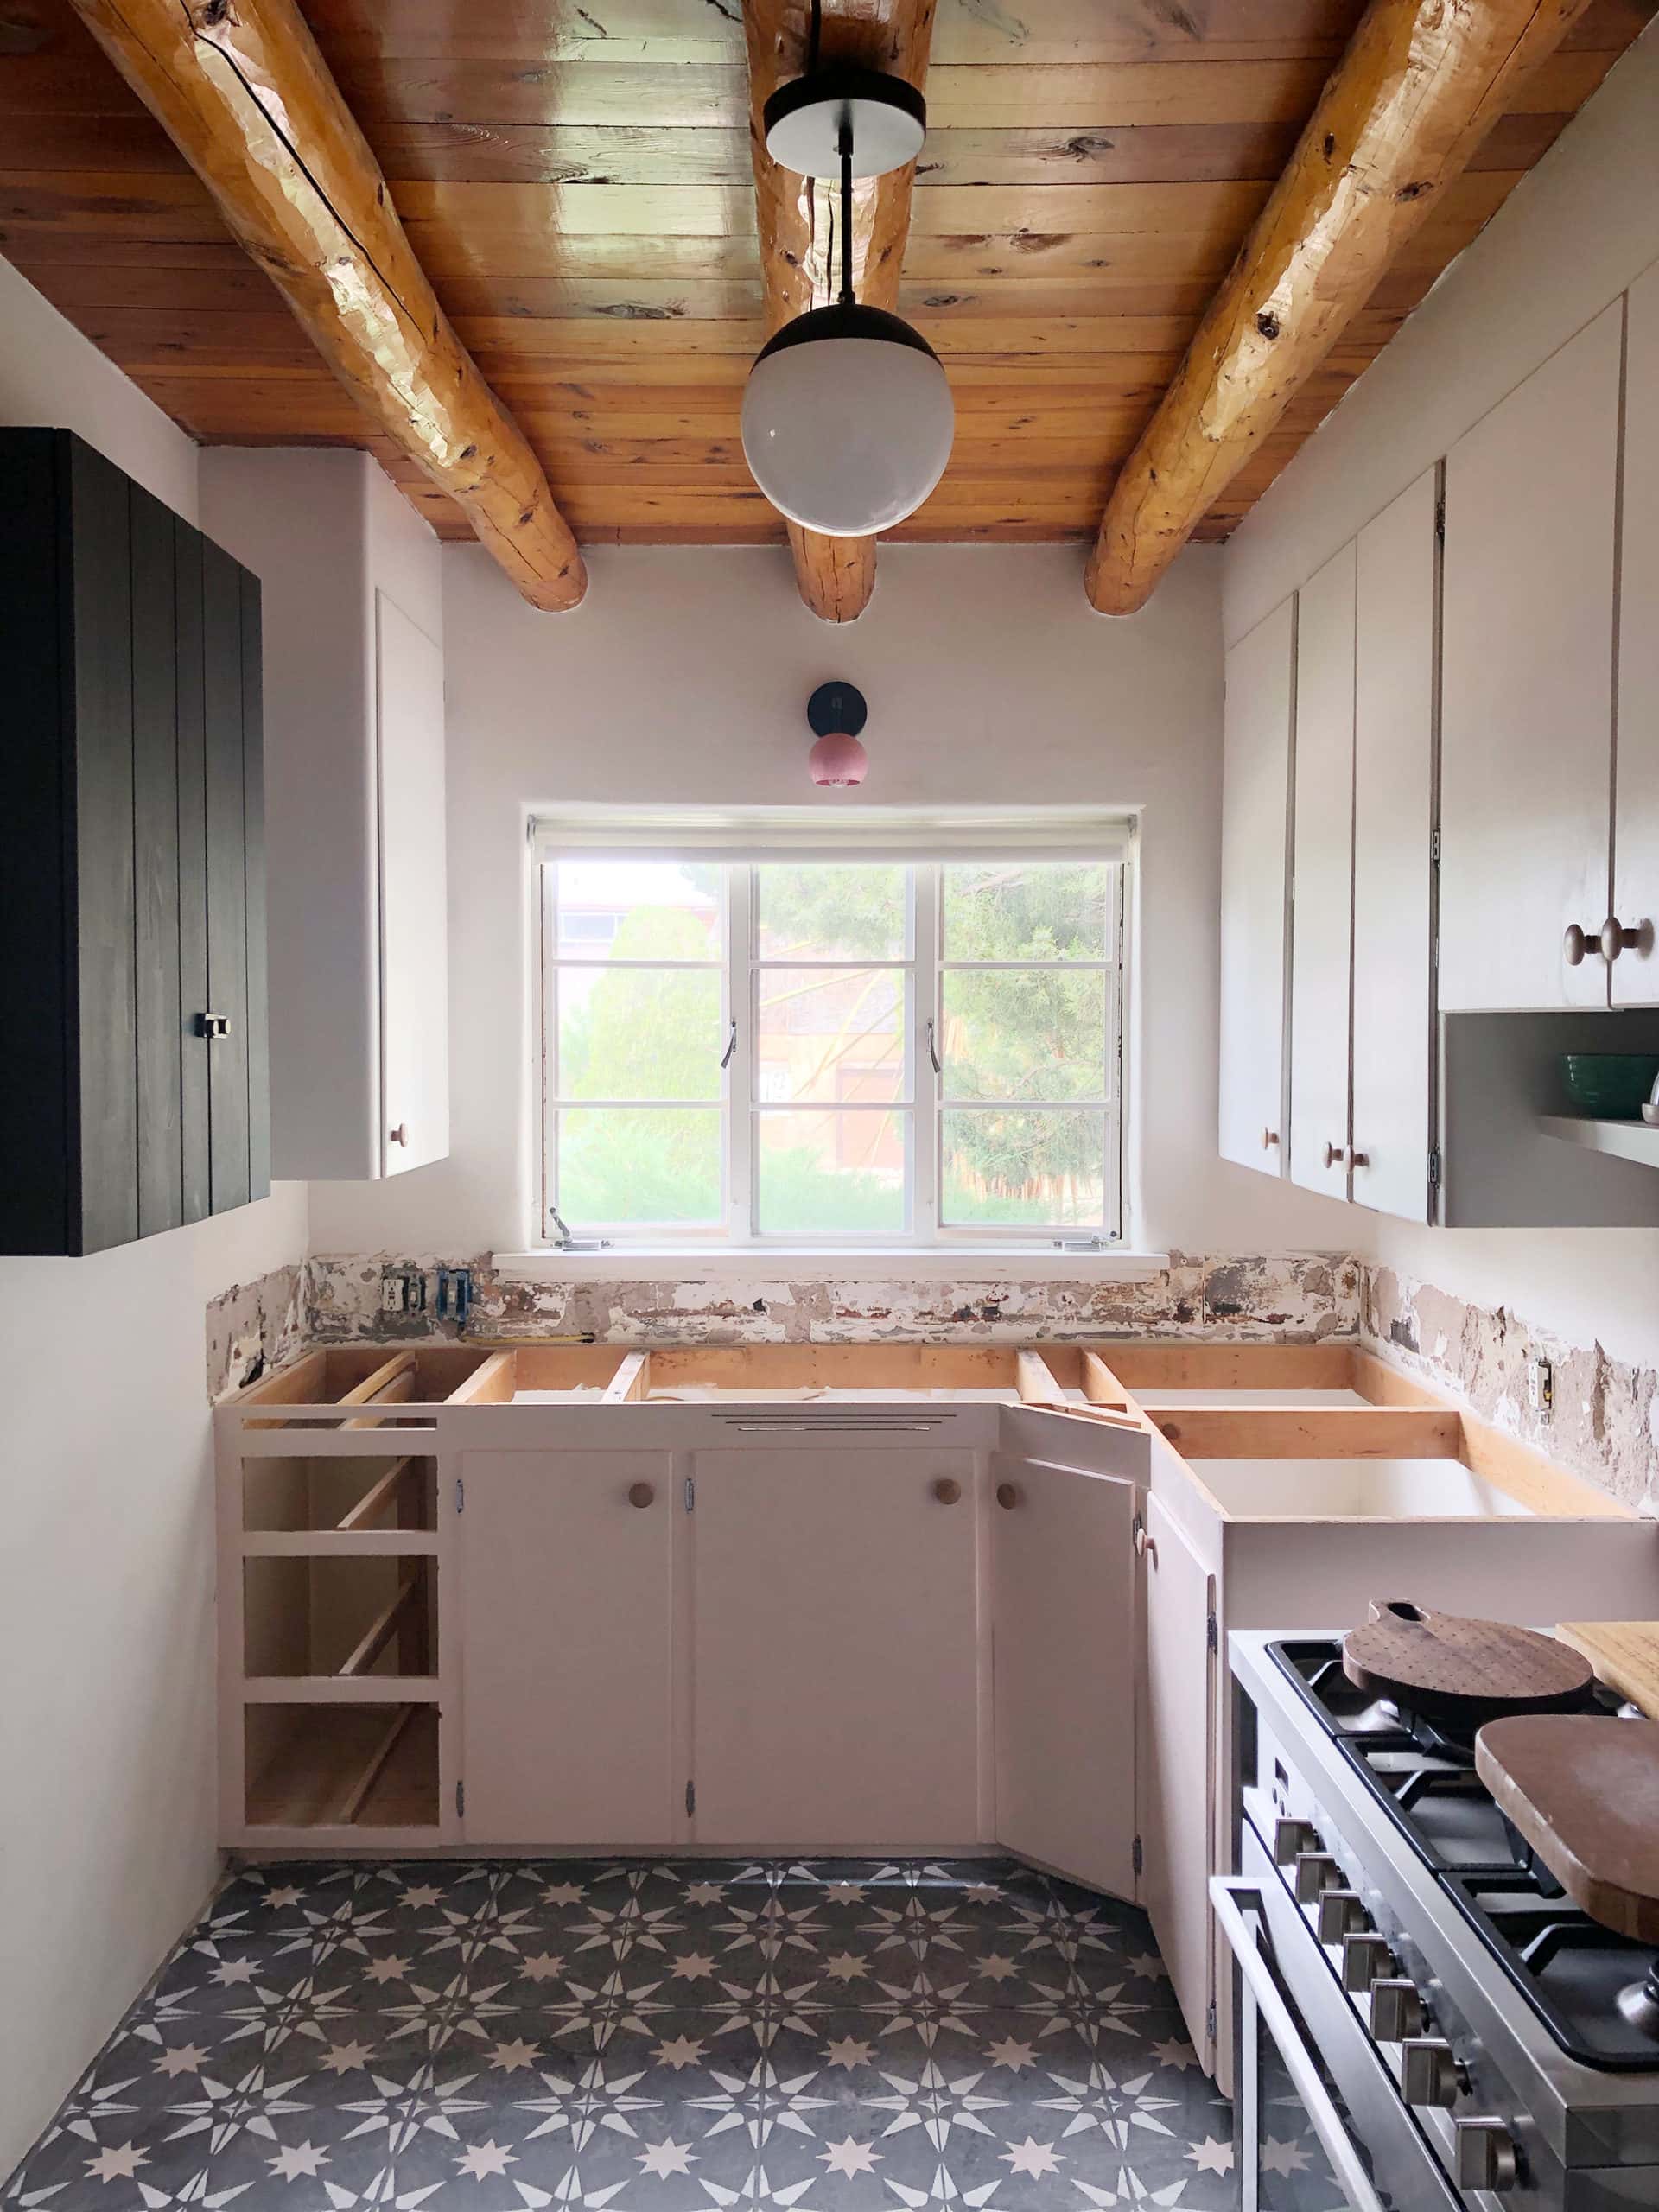
SO MUCH IMPROVEMENT, yes? It’s kind of wild to look back to the kitchen as it was in early 2018 and see just how much better it looked post-demolition—even without countertops or a sink. We started feeling really excited after the demo was done, and we went full steam ahead from this point on. Can you see it all taking shape and starting to come together? IT’S HAPPENING!!


24 Comments
Hurrah for your black ikea oloptorf (?) Wall cabinet. Such a great piece and perfectly balanced out the units on either side of the kitchen. I’m enjoying these reno posts. Thanks!
Yes, that’s the OLOFSTORP! It’s where my mega-organized spices live:
https://doorsixteen.com/2020/02/14/setting-up-a-super-efficient-spice-cabinet/
The pink cabinets are so perfect
Okay – I’m now mega excited for this transformation. Our kitchen sink is in a similar state, and I think we have the same exact cabinets (and our laminate counter tops literally have spots where the laminate has been worn away and it’s just the OSB underneath). I can’t wait to see what you do to transform it! It’s going to look amazing!
Holy cow, the laminate has worn away?? On a countertop??? That is a kitchen that has been USED. I’m impressed!!
Who would’ve thought it’d be such a herculean task to remove the counters! Crazy, no wonder you hired someone else to tackle this job. Smart move, worth every penny.
I live for these posts! Welcome back!!!!
Aha, now I understand where the spice cabinet is!
This is amazing but it’s true the kitchen looks so much better due to the other changes even with ripped-off countertops!!
Hi Anna! I love all the recent posts! I’ve been reading your blog since you coined “fauxdenza,” but this is the first time I’ve commented.
Do you have any plans to do any posts about your rock lath walls? There’s plenty of information online about the history of rock lath, but I haven’t haven’t found ANYTHING about how to work with it.
I have rock lath in my 1945 house, and I have the hardest time finding the studs. Strong magnets and studfinders don’t seem to work for me (forget about knocking!), so I’ve resorted to measuring 16 inches from the corner and drilling small pilot holes, but that doesn’t always work. I’m fairly confident DIYer, but I’ve never lived anywhere where it is so, so hard to find the studs! I worry about shelves and heavy mirrors coming off the wall 🙂
So glad to see you back!
Hello Anna!
I’m a longtime reader, and when you started to blog again I was thrilled! It really is worth it not to throw away any old forgotten feeds… Your floor looks amazing!
/Amelie
Sara, other than one apartment years ago, I’ve honestly never lived anywhere with easy-to-find studs (even with one of those magnetic “pop” stud finders), so I’ve been in the habit of measuring and drilling pilot holes for many years now. I wish I could offer you a better suggestion, but I haven’t found an easier way! To tell the truth, I often don’t even worry about finding the studs and just use really good anchors instead. I’ve never had anything fall off the wall, for what it’s worth. (Other than in the apartment with drywall, ironically—but that was due to a leak in the wall that dissolved the drywall.)
Have had similar issues finding studs in plaster/wood lath walls. I have tried a multitude of anchor types & still not found anything that works well. What type of “good anchors” do you use for plaster walls?
That wall sconce is absolutely adorable!
I am so in love with this kitchen.
So happy to see another post on this kitchen! Love the touches of pink in the sconce and the stenciled floor tile!
Oh my god that floor! You did such an amazing job! Cant wait to see the counter top go in.
too funny that it looks better in demolition than before … such promise + loving the frequency of these posts!
I’m so so so glad you are back, Anna! I really missed your blog. Not only do I find it entertaining, I also learn a lot. You taught me how to fix janky century old windows and make a faux plank floor out of plywood (actually followed your tutorials in my own home!) . And so many other things. Thanks!
I miss my plywood floor!! 😀
I think it was a great decision to hire for this job. So excited to see the new countertop and tile! I love this slow roll out of each step in your kitchen reno! I appreciate the detail.
This is AMAZING, Anna. I’m sitting on my couch a bit stunned, like “Why am I physically tingling over a photo of kitchen before it has countertops?” I knew I’d missed following your blog the last few years, and now I know how much.
It’s also nice to see how others handle the balance of DIY and hiring out. Lots of projects in my house are on standby as I waffle over this.
Thank you for sharing. Keeping my eyes out for the next installation.
I love your painted tiles. I wonder, if you had replaced the floor tiles, what would you have chosen?
We didn’t really even go down that road, because who knows at this point! Better to leave that for in the future after we’ve been in this house for at least a few years.
I have many house pet peeves, but floor tile on counter tops is very high on my list… I just don’t understand it. Love watching the progress!!! Also, “beer, not virus” hahhahahaha