

April 2018–February 2019
Yes, that is an absolutely wild range of dates, but hey, full disclosure is what I’m all about. But no, I did not work on painting the kitchen floor for eleven months straight. There was a lot of stopping and starting and working on other stuff at the same time. That said, any normal person would have finished this project in about a week, tops. I, however, like to drag things out to the point of absurdity, probably for psychological reasons I don’t really want to look into.
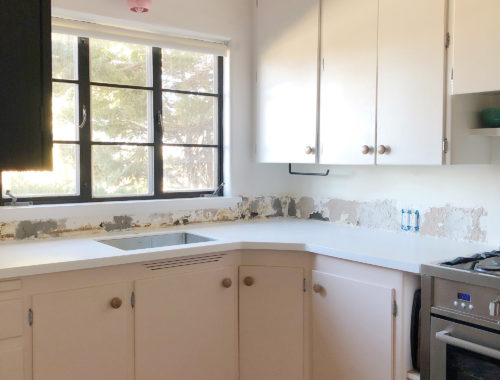
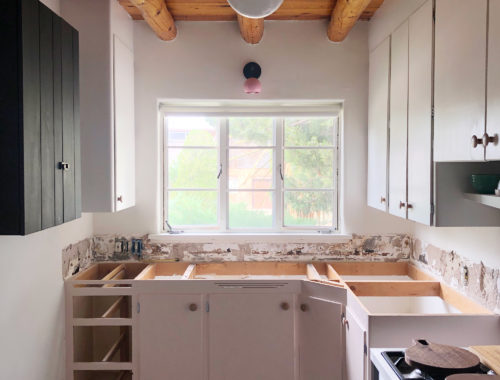
Just in case you’re not caught up on the progress so far…
Kitchen recap:
✚ It’s time to meet the kitchen!
✚ Kitchen planning!
✚ Kitchen cabinets: Prep + painting.
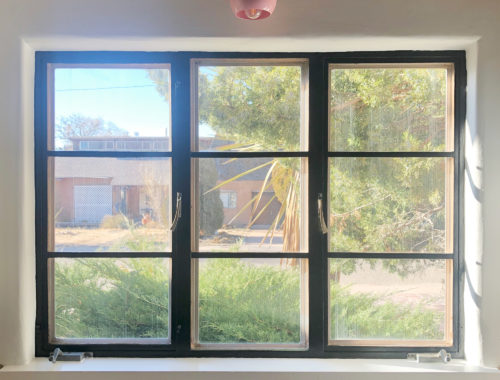
And in case you needed a better BEFORE look at the floor I’m going to be dealing with in this post, just scroll up a little. It only gets better from here, thankfully.
So. Why paint and stencil the floor in the first place? Why not just put in new tile? Well, there are a few reasons. One is that we knew we didn’t have time to demo and re-tile the floor before moving in, and I, hilariously, thought that I could quickly paint the floor in a weekend and call it an easy, temporary fix. Hah! HAH. The other reason is the cost. Realistically, even if I do the tiling myself, we’d still need to pay someone to do the demo work and haul away the old tile. Then there’s the need to install a new plywood subfloor to tile over. Then there’s the cost of the tile itself. And the grout. And the sealant. And all of the other stuff you wind up buying over the course of a project that makes it cost more than you can really afford. There’s also a bonus third reason, which is really just that I thought it would be fun. And it was!

Step One: Sand.
Before painting almost anything, you’ve gotta sand it. When you’re painting something non-porous like ceramic tile, you really need to sand it. You need to make sure that there’s no gloss left at all, and ideally you want to give the surface the slightest bit of “tooth” for the paint to grab onto.
I used a mouse sander, which worked fine. Ideally you’d use something with a little more heft like an orbital sander, but if you’re sanding, you’re sanding. I recommend 220 grit for sanding ceramic tiles—it’s enough grit to remove the gloss, but not so much that you wind up with a rough mess. Be sure you have extra sandpaper!

Step Two: Clean.
Clean, clean, and then clean some more. Aside from removing every last bit of grease and grime that might interfere with the adhesion of your paint, you need to make sure that there is absolutely NO dust left from your sanding anywhere. I vacuumed first to get the bulk of the dust up, then scrubbed with a bucket of hot, soapy water and a scrub brush. Finally, I mopped the entire floor twice with TSP substitute.
Then I let it dry overnight, which took a huge amount of restraint on my part. I’m not good at letting stuff dry overnight.


Step Three: Paint!
Before you close the page and unfollow me forever for painting without priming first, LISTEN: You don’t need to prime before using chalk paint. Seriously. I used Rust-Oleum Chalked in Charcoal, which reads as black. This was my first time using chalk paint, but I knew that it’s supposed to have excellent adhesion properties, that it dries very quickly (with no odor), and that the finish is extremely smooth and flat. I didn’t want ANY brush/roller marks on the floor, and chalk paint will give you that kind of result.
I used a brush first to cut in around the perimeter of the room and on the grout lines, because I was concerned about really getting the paint to fill in every little crevice. This went quickly—maybe half an hour for the whole room. I gave that another half hour to dry completely, then used a small foam roller to fill the tiles. FUN!!! It was so satisfying to watch the faux-rustic tiles disappear, and velvety black engulf the floor in their place.

Delicious.
I did two coats, allowing 30 minutes of drying time (that’s what Rust-Oleum recommends, I swear).

Step Four: Seal.
Because chalk paint has an extremely matte finish (and is therefore prone to massive amounts of scuffing), you need to seal it. Some people use wax to seal chalk-painted furniture, but because this is a kitchen floor, I used polyurethane. I used Minwax Polycrylic (again applied with a small foam roller) because I already had a can on-hand, and it worked really well.
Now, if you’re planning to stencil your floor, you might wonder if you should wait to seal it. I thought about that, but I knew that the amount of crawling around on the floor I’d be doing while stenciling would definitely damage the finish. So I did one coat of polyurethane at this point, just to give it some protection. If you’re not planning to stencil your floor, go ahead and do three coats of poly at this point and call it done.
I let the poly dry for about, uh, a month and half. You do not need to wait a month and a half, but you should at least wait overnight.

Step Five: Stencil time!
Unless you want to freehand the whole floor, you’re going to need a stencil. There are many many many stencil sellers out there, and lots of them are happy to make custom stencils and custom sizes. I bought mine from Pearl Design Studio. They don’t seem to have the exact stencil I used anymore, but they have a gazillion other options.
My tiles are 19.75″, which meant that in order for the stencil to line up with the actual 1/4″ grout lines (which you obviously want if you’re going for a realistic tile effect), I had to get a stencil that was either 19.75″…or 9.75″, which would allow for four stencils within each tile (subtracting 1/4″ for the fake grout line). Does that make any sense? If you’re planning to do this and you’re confused, let me know.
Anyway, I got two identical stencils. I figured this would save me a lot of time while I waited for the stencil to dry after washing the paint off, and also make painting the partial tiles around the perimeter of the room a little easier since I could cut one of the stencils down.
Paint-wise, I just used the same paint I used for the cabinets (Valpsar Du Jour and Farrow & Ball Pink Ground). Honestly, I think just about any kind of paint would be fine as long as it’s suited to using with a roller. It’s going to get sealed with polyurethane, anyway.

There was absolutely no way I could take photos of the actual stenciling, but it went like this:
1. Tape stencil in place.
2. Using a “dry” roller (meaning absolutely no excess paint at all), lightly roll paint over the areas you want to fill in.
3. CAREFULLY remove stencil.
4. Carry stencil to sink, rinse off paint, and leave on a towel to dry.
5. Tape second stencil in place, but not right next to the fresh paint you just rolled on.
6. Roll on paint, and repeat. OVER AND OVER AND OVER AND OVER AND OVER AND OVER.
7. Then do it all again with a second color, if desired.
8. Use tiny brushes to do touch-ups.
9. Weep. Eat something. Apologize to your knees.
THIS is what took me so many months to finish, because I was a fool and didn’t set aside a block of a couple of full days to just GET IT DONE. Don’t be like me. Give yourself 3-4 days and do all of it at once. You’ll be fine eating Taco Bell (who are really going the extra mile right now, by the way) for a long weekend.

Step Six: Seal (again).
Now that all of the stenciling is done, roll on THREE COATS of polyurethane. Read the instructions on the can and let it dry for the right amount of time between coats. Put up baby gates to keep the babies and the dogs out. Negotiate with your cats so they don’t jump over the gate (I assume this is how things work with cats—you have to cut a deal).
Notes:
Do the edges (or anywhere there’s a partial/cut tile) last. Then you can gradually and strategically cut down one of your stencils to do those last bits. Save your other (uncut) stencil in case you need it again someday.
The paint has held up really well. There are some scrapes from when we had to drag appliances across the floor (and from the countertop demo) that I need to touch up, but that’s not a big deal. Honestly, unless you’re doing something that’s obviously destructive, it’s surprisingly durable.
I LOVE THE STENCILED FLOOR. It looks a million times better than I could have hoped, and it really does fool pretty much everyone who sees the kitchen. I have no desire to re-tile the kitchen anytime soon, and that’s a good feeling. I’m sure someday we will, but this is a very good longterm stopgap.
You’re going to have to wait on an official “reveal” photo because I don’t want to leak any KITCHEN SPOILERS, but take a look back at these before photos. This is a MAJOR improvement. What a relief!
If you have any questions about steps in the process I might have missed, ask away!
FYI: I signed a contract with an ad management company for the first time ever. I’m not sure how this will play out over time, but for an initial time period, I’m required to let them do whatever they want with ad positioning. Once that period of time is up, I will likely reduce the number of ads. Also, I’ve blocked ads for dairy, meat, gambling, get rich quick schemes, guns, hunting, religion, sensationalism, tobacco, and weight loss—so it’ll probably just be a bunch of ads for, like, sandals and air freshener.
114 Comments
It’s so beautiful! Gotta be honest, I’ve never liked the idea of painting tile, but you’ve totally changed my mind. Amazing work!
This is a real wow! I had no idea you could paint tile. (I’m clearly not someone who remodels much ♀️) it looks fantastic.
Holy cow this looks sooooo good!!! SO GOOD.
Love love love the floor! You make me want to try this for real. Also wanted to let you know on mobile, the ads are really small and not intrusive but funny enough I did get one for gambling/casino online gaming.
Argh! I wonder if the opt-outs take a couple of days to kick in. Here’s hoping! At least it wasn’t an ad for guns or weight loss.
That looks amazing!!! You have far more patience than me, I think that’s what I admire so much about your approach- patience and attention to detail.
The ads – they’re mostly appropriate to your content and honestly – knowing they’re potentially helping you makes them a lot more relevant to me.
Anna, you have the patience of a saint! And the vision! The stencilled floor looks AMAZING. Well done!
Also, I am LOLing so hard at your FYI and the types of ads you’ve blocked. Yay, sandals and air freshener! I hope the ad revenue and Patreon support are really helping out in these scary af times. Lots of love to you from Sydney, Australia.
Thanks, Ginger! I’m trying to cobble together a livable income, so every bit helps. 🙂
This is insane! The amount of work it took and how good the results look. And the amount of money you saved. I always budget twice the cost of the tiles on subfloor and materials. I also use ditra membrane and that shit isn’t cheap.
I got hardwood floors ads. And it’s fine except the first time as I scrolled was a bit confusing.
Gah!!! This is too good! Can’t wait to see the whole kitchen.
You’ve inspired me! I’m thinking of trying black chalkboard paint on my ugly laminate floor.
I’ve never painted laminate, but I imagine the process would be pretty much the same!
Wow. Just. Wow. I was going to fall in love with your kitchen anyway, but I think that floor sealed the deal even before having seen the full reveal. I’m so inspired by your vision and execution, Anna!
Love it! We painted our kitchen subfloor, but it didn’t hold up very well. Maybe tile holds up better to being painted. It was a good stop gap measure though, until we could put in a permanent floor. Yours look great, a long term update!
Marianne, what was your subfloor made of (plywood, pine planks, etc.)? Pretty much any wood flooring is paintable, but the durability will really come down to the prep and the products used. I’ve painted several wood floors that have now held up for a decade with nearly no wear—if you need suggestions on how to do it, I’m happy to help!
That floor looks incredible – I know I would not be patient, nor organised enough to stencil like you have – bravo to you!
Loved the FYI note too!
I am blown away by how amazing this looks!!!
That floor is so BEAUTIFUL !!!
Hideous tiles banished forever.
I am absolutely amazed at the change to the kitchen ( well what we can see at the moment).
A year to finish it ? Obviously worth it.
Totally TOTALLY inspiring. Touché !
It shouldn’t have taken me a year, but I kept doing it in short increments instead of just setting aside the time!
Really impressed by how good this looks. Stunning. I also love that you can have totally personalized tiles that would be impossible (or extremely expensive) to find. Great idea
My ads are all for pond products I’ve googled over the last week on Chewy, so not too terrible!
That floor looks amazing. I am completely sold! I cannot wait to see what you did about the countertops!
So good gonna share with my niece. She has the same fug tiles – my sister painted the cabinets already and this is so needed to finish it off.
I’m shocked by how awesome this is. And my ads were for hand sanitizer.
That seems fitting!!
Was not expecting it to look this good. I think I might be convinced to pain over the shitty tile backsplash in my kitchen now.
If the backsplash is in an area that gets wet (like behind the sink), make sure that bottom edge where the tile meets the countertop is caulked well. I think the prime spot for peeling/chipping of the paint would be right there!
the last google search that I did was how to sand tile floors with a mouse sander. Literally. I have a tile entry with tile from 1988, and my first impulse was to paint. So glad to see your post! I decided last week to skim coat with concrete instead (ardex), but this looks so much faster. All of my projects take 30 minutes plus one year so it seems to be about right.
30 minutes plus one year is definitely accurate!! Even things that take five minutes.
I actually considered doing Ardex, but the only info I could find about using it on a floor was on Gabby Blair’s blog, and that wasn’t in a kitchen/high-traffic area. I’d be curious to know how it holds up over time!
This is amazing!! I love seeing all of your wonderful design choices and patient execution and am so glad you’re back to blogging — the ads won’t stop me reading!
This looks insanely good -forget about concrete tiles! I now feel inspired to spruce up my kitchen. Btw, my ads were for mod furniture and dry cleaning supplies -not bad.
It looks super good! I got ads for mattresses, spotify, and prescription drugs.
Not psyched about the prescription drug ads, but I think they’re in a broader category that I can’t block. Hopefully they’re not too persistent!
Looks fantastic. I have painted floors and will try your approach when I repaint to see if it is more durable. I painted over wood and have three dogs, which kicks the s#%t out of floors, but your prep and paint choices might be more durable.
Ads for purses, jewelry, and home improvement.
WOW, the floor looks stunning! I’ve been following your blog for years, and you have outdone yourself. Love, love, love.
I can’t believe you and Daniel posted on the same day – my cup overfloweth 🙂
I really appreciate this from a sustainability standpoint! “Dog ear”-ing this for the future.
P.S. my ads were Glossier products and I don’t mind 🙂
This looks incredible! Regarding the ads, I’ve gotten so used to seeing them on other sites that it honestly didn’t register with me that anything was different until I read your P.S.
I had the same thought!
same thought here as well … no biggie … I went back to look after the mention of what was blocked and things seemed good today (I’ve come a little late to the party. I was apoplectic for 2 days after going out for a traumatizing grocery shop).
WHUT. Gurl, this looks absolutely outrageous! In the best way.
We have plain concrete floors, which I do love, but if we move back to Tucson in the next 5 tears (yup! Imma need some driving lessons from you??) we will undoubtedly have tile floors and I am stealing this idea because it is zenith. End of.
xoxo
You and me, just a couple of ladies who drive!!! (If you move back to Tucson, I see some road trips in the future…so GET THAT LICENSE!) ❤️
OMG! This is awesome.
Seriously impressed. Gorgeous. Congrats!
Very very cool and it looks fabulous!!!
Aren’t you glad you didn’t go for the four-stencils-per-tile??!! OMG
Oh my gosh you can disapprove my earlier comment — you DID do the four stencils per tile!!! But it looks fabulous so that’s what matters (except for your sanity during the process!)
And good luck with the ads — honestly I didn’t even notice them!
Hah! Yes, I did go with the smaller stencils. The options at the larger size were really limited, and I think it’s beyond the size limit for the laser cutters people have at their homes for making custom stencils. I try not to think about how much time it would have saved!
Wow, what a great result! Absolutely gorgeous!
Love it!! Desperately want to paint the bathroom floors need to stop overthinking and do it. PS-my 2 adds were for super cute rugs, so that’s a win for me too.
Marta, I definitely wouldn’t do this inside a shower/tub area, for what it’s worth. If it’s just the bathroom floor and it doesn’t get wet all the time (aside from a little bit dripping after using the sink, etc.), then I’m sure it’s fine, though!!
Wow that is gorgeous! Also, your blog is giving me life these days, I am SO happy you are back and am thrilled to read about fun renovation projects. Please keep it up! This reprieve from the heavy news is feeding my soul. Thank you!! Xo
You had me fooled at first pass
This is incredible – WOW! Beautiful work and wonderful process description.
AHH LOVE. It looks SO GOOD and now i want to paint my floor. Darn you!
FYI I’m getting ads for Bethel Seminary. Not bothered, but thought you might want to know!
Thanks, KC! I think that probably counts as an educational institution ad, not a religious ad. I’m mostly concerned about getting clickbait from right-wing “news” sites, so I blocked religion and politics to try and cover my bases.
Just amazing! BTW, you don’t negotiate with cats – period. One of my pandemic projects, once I am done sewing masks for everyone who asks for them, is to paint my hallway closet pink – similar to the hue you used for the cabinets (I have been meaning to do this for years, but I am a cheapskate, so I have painted all of my closets with “OOOPS paint” – the returns that sell for $5/gallon. Two weekends ago I had to go to Lowes and I found a gallon of the color I wanted! This is $50/gallon paint I would never buy at full price, so it was a double score). I am now waiting to muster the courage to get it done, because I know Cactus, my catten, will probably end up with a pink skunk streak across her back unless I lock her away for the afternoon.
CACTUS!!! I love that name!! Awwwwwww.
I always check those “oops” gallons at Lowe’s, and they’re always these horrible shades of muddy brown. I wish we had a place here that sells re-tinted leftover paint like on Rehab Addict!
This is amazing! I’ve hated my kitchen floor for 13 years and now I want to try this. It looks beautiful!
!!! This is incredible. We have the same faux tan limestone tiles on every. freaking. surface. in our kitchen (walls, counters, floors, pantry! with special inlays whose corners don’t match up!). Oh, and it flows across the house, through the hall, into our bathroom. YAY.
I’ve never had the budget to outright replace it, plus it would irreparably damage the hella cute pink ’40s wall tile in our bathroom where it meets up, so this is a mind-boggling option! Thanks for all the great links and step-by-step instructions. If I can source some paint during quarantine, this just might be added to the reno list. <3 <3
Is that what it’s supposed to be? Limestone???? Gosh. Actual limestone tiles are beautiful. Oof! And the “special inlays whose corners don’t match up” makes me laugh. Every time I see this kind of tile in a residential setting, it’s badly installed by someone who clearly didn’t know how to do a good tiling job. The massive grout lines don’t help matters!
It looks sooo good!!! I’ve been wanting to do this over the ugly tile in my bathroom and this is the push I needed!
Shelby, I mentioned this in another comment, but I definitely wouldn’t recommend doing this inside the shower/bath area. A bathroom floor should be fine, though!
It is beeeeeaaaauuuutiful!
Can’t wait to see the finished kitchen.
And I am SO HAPPY you’re back on my screen ❤️❤️❤️!
Amazing, Anna ! So good to have you back ! I have the same ugly tiles in my kitchen and don’t have the $ to replace it. Let’s say I just paint it black without stenciling ( this part scares the hell out of me) How do you think it looked when it was just plain black ? And how is it holding up after one year ?
Julie, the solid black looked amazing (no one would ever have known it was paint), but because solid black floors tend to look “dirty” within about 3 minutes of mopping—especially in a kitchen—I really felt like I needed to do a pattern to distract the eye from seeing every speck of dust. That said, I think any other color (or even black somewhere other than a kitchen) would be just fine as a solid!
It’s held up really well, other than in some spots where we had to drag appliances across the floor, and from where there was a lot of debris falling during the demolition of the countertop. I still need to touch up those areas, but even with those dings and scratches, it still looks great.
This is gorgeous! I love chalk paint too, but I’ve not used it on tile before! So great!
PS I got ads for lamps and pot plant pots – not at all sad about that.
Loving having your blog back!
Your floor looks divine, and better than new tile! Talent and patience. I love your restrictions on ads. Perfect.
You’re giving me IDEAS! This looks great!!!! I absolutely hate my kitchen floor! So many exclamations!
Um…….this is BEAUTIFUL. Such a great job! I love that chalk paint – I feel like I use it for every project I do nowadays.
Phenomenal result!
Thanks for the update on your ads. This morning I went to download an ad blocker, and then I remembered that bloggers need them. I mean, I’m being entertained for free, looking at ads the least I can do! So I whitelisted your site. This all happened before I read your ad management update. The info was appreciated!
Thanks so much for doing that, Bonnie. I know they aren’t awesome aesthetically (they make long posts so much harder to read!), but hopefully after a couple of months I’ll be able to see what’s working and what isn’t and then cut back on the number that appear.
Holy shit this looks so good! We have REALLY crappy tile in our kitchen and sadly the floor ranks pretty low on the long list of stuff we want to do to our house. Do you think the finish would hold up to the activities of a 120lb dog and a 60lb dog…or am I just wishfully thinking here?
I’m sorry, did you say ONE HUNDRED AND TWENTY POUNDS???? I am not equipped to answer that question, Nikki (I guess it depends how closely clipped your dogs’ nails are?), but I definitely do want to see this monster of a dog!!
I’d love to see your dog too! Newfoundland? Mastiff?
That looks absolutely gorgeous. I already have a black vct floor in my bathroom because of your blog, and I may end up with stenciled tiles somewhere, too!
I got ads for febreeze, pergolas and clothing. I don’t know how specific you can be, but if you can block clothing sellers like “noracora”, that would be good. They steal all of their photos from designers and bloggers and then send a cheap piece of polyester that barely resembles the original. Total scam, under a bunch of names, unfortunately.
I’m not able to block specific advertisers myself (just certain “sensitive” categories), but if you ever see a scam seller ad here, take a screen shot of the ad and email it to me and I’ll alert the ad management company.
Oh no– you’ve suddenly inspired me to just take on my entire half bathroom during this quarantine! I’ve been wanting to do a sort of half-measure remodel until I can afford to gut it but the only thing holding me back has been the atrocious laminate… hmm…
This just looks soooo fantastic! Kudos! I love the matt black and dusty pink star. I am curious about the grout itself … did the paint soak into it easily, or does it flake up or require some upkeep?
(p.s., the ad I am seeing is for a Chipotle beef and dairy class-action settlement)
The grout soaked up the paint beautifully! There’s been absolutely zero flaking/chipping/peeling on the grout lines.
Hmmmm. I guess a lawsuit against beef/dairy counts as not beef/dairy?? I have a feeling I’m going to have to just do my best with the blocking!
This looks AMAZING.
Amazing! I have been puzzling over what to do with our own hideous kitchen tile, so was excited to see your solution. Your work is perfection. (And so glad you’re back up and running with the blogging!)
I’ve definitely had projects with those … accidental timelines. 😉 Glad to know I’m not alone. The floor looks RAD – great vision!
AMAZEBALLS!!!!!!!!
Anna, this is just amazing! You are so so good at diy projects. I’ve never used chalk paint so thanks for the info. And the colour! Black floors are killer and the stencil looks amazing!
I am happy for you to see so many comments! I also have no qualms with the ad adding. Mine were for Lamps Plus, a clothing co that I can’t decide is cheap chinese crap or legitimate (I previously clicked on it) and an ad for an energy audit.
The floor looks incredible. I follow you (and support you) because I don’t think you have ever done one thing I didn’t like. PLUS you are and always will be the ORIGINATOR of the FAUXDENZA! 🙂
Long time reader, first time noter because I couldn’t leave this post without expressing how much I feel your pain! I ripped off linoleum and scraped and scrubbed my subfloor to bare wood, then painted it. (A checkerboard pattern.) Oh, my knees! They felt it for days. Your floor looks lovely and I’m impressed by your bravery to use chalk paint.
This is CRAZY impressive. And I also wanted to say I see a babaa add, tata, and the rest are airfreashioners and one face shield but that last one is a sign of the times I think
Floor looks great Anna! I tiled a very small bathroom once and it took 4 days. I wore my super thick roller derby knee pads and STILL had sore knees so can appreciate the effort and pain that went into this project. On the ad front, there is a ‘luxury bathroom trailer’ ad to the right of the comments right now, lol.
I don’t know what a “luxury bathroom trailer” is, but I think I might want one.
This is AMAZING! If I hadn’t known from the title that you were stenciling the floor, I would have assumed that you had retiled! Mad props and aaaaaaaaall the kudos for the patience and attention to detail this project required. It’s inspiring to see that you don’t have to do a total gut job to make a space feel more welcoming and useful — and let’s face it, most of us don’t have a spare $20,000 lying around to do one.
Side note — would you consider making the body text font larger? It’s a lovely font, but making it just a little (a few points, maybe?) larger would make the content much more accessible, especially to older eyes or those with other vision challenges that love your content. (NOT meant to be a criticism, just some user feedback. I really love the site redesign you’ve done!)
Hi, AnnMarie! I actually haven’t redesigned the blog at all, other than increasing the font size about a month ago. Hah! I’m happy to bump it up a little more, though. Can I ask whether it’s the desktop or mobile view that feels too small to you? (Or is it both?) Always happy for suggestions!!
Well crap, I guess that means I haven’t been paying very close attention?? Or maybe I’m conflating your site with the site redesign you just did for Daniel’s blog…? I guess what I’m saying is it’s the end of the semester and I’m short on brain cells, apparently. #teacherlyfe
Mobile seems to be working better for me than desktop – maybe it’s because the individual lines of text on mobile are shorter (i.e., the paragraphs are taller than they are wide), making them easier to follow. Thanks for your reply!
AnnMarie, I actually couldn’t remember at first if I HAD redesigned here, so it’s definitely not just you!!! I will play with the size in the next couple of days. Thank you for the feedback!! 😀
I love this SO MUCH!!! Your floor is beautiful! You’ve inspired me to do this to the nasty mauve bathroom tile in my Brooklyn apartment. It’s a 2″x2″ square, so it will take a little searching and testing patterns to get it right. Thank you!!
Good luck, Laura!!
Holy moly this looks incredible! I am jealous of your floor as I look at my disgusting white flour with a 1/4″ grout line as well. They’re 12×12 tiles and reading your post makes me feel like this is totally doable. But I do have a question.
How do you know if your floor is ceramic or porcelain, and does it matter when following the steps you’ve outlined here for sanding and prep?
Miranda, and easy way to tell is if the tile is the same color all the way through. If it’s solid, it’s porcelain. Obviously that can be tricky to see unless there’s an exposed edge (or a chip) somewhere. That said, it doesn’t make any difference in terms of prep!
WOW!!!! It looks amazing!
This looks really nice. When you painted the center stars pink, did you have to mask out the points of the white stars in the corners? Or were you just really careful with the roller?
No masking necessary! I used a small foam roller, so I didn’t even really need to be particularly careful.
That is positively gorgeous! I looks like Azul (the boardgame, in case you know it) but in black and white. Really cool.
I would love love love to do this in my bathroom. But a couple questions!
1 – Do you think this method as described will hold up to the warmth/dampness of a bathroom? This is my tiny master bathroom that needs a full gut and remodel, but that’s not in the cards for several years so I’m hoping for a stopgap. Only I’ll see it so it doesn’t need to be PERFECT but….I don’t want it peeling off like laminate sheeting.
2 – The tiles actually have an indentation pattern on them – now I’m wondering if the paint will pool in there….and if I could adequately sand in there. Any opinions?
Very well done but I would have painted the floor white / or a light colour and stenciled black. I find the floor too dark.
I love dark floors in general, but going with a light floor AND light cabinets AND a light countertop would’ve really caused an aesthetically stressful imbalance with the darkness of the vigas/wood ceiling.
Whoa – thank you very much for this post! I didn’t realize I could change up my horrible tile without a big reno.
Also, I LOVE your ad boundaries! 🙂
Qué bonito se ve! Hasta me dieron ganas de hacer lo mismo en mi cocina.
Hi Anna,
I have been following you for some time and love your diy posts. I too have a hideous tile floor (almond, just gorgeous) and thanks to Covid am unemployed and trying to keep myself busy. My tile is shinier than yours was so I’m a bit worried about doing the same thing. Do you have suggestions/online resources for painting tiles. My house is 1950’s bungalow and I’m wanting to keep it MCM in style. Just wondering if you got away some things because of the style of your house and tiles.
Carolyn.
Oh yeah, and because it couldn’t get any better, it has tiny diamonds between each 12” tile. Stunning.
Carolyn, first of all, I’m really sorry to hear that you’re unemployed right now. I know it’s easy to say that this is a great time to tackle home projects, but it’s another thing to actually do it when you’re probably feeling a lot of uncertainty and anxiety.
With that said…have you tried sanding the tiles in an inconspicuous spot? If you can get the glossy finish off, then you should be OK painting them. There’s a great post on this blog you might want to check out—she used porch paint on her bathroom floor, and it’s held up really well. Here’s someone else who used designated tile paint and had good results.
Thanks Anna, both for your advice and your kind words. I’ll check both out.
As always, your taste is impeccable. The floor is gorgeous.
Hello! It’s been over 2.5 years since this post, and I’m curious if your floor has still held up?
Yep!
Hi Anna! Really outstanding job!
I am planning on painting my horrid, faux limestone kitchen floor with the same charcoal chalk paint, minus the stenciling.
I looked up the product you used to seal your floor and they don’t recommend it for floors, in the hardware store’s description. I imagine the hardwood floor version of the producr is twice the price. How has the product you used held up so far and would you recommend the hard wood floor version?
Hi Carol Lynn, are you wondering about the Minwax Polycrylic? I used it because I already had a can on-hand—there’s no special reason I chose it. Painted floors are so easy to touch-up that I really was not concerned about the durability factor. My favorite polyurethane is General Finishes brand—if you’re looking for a top-quality brand, that’s where I’d start. You most likely won’t need more than a quart unless your kitchen is absolutely massive, so the higher price probably isn’t a dealbreaker unless you’re on a very tight budget with this project.
Thank you, Anna! That was very helpful.
Congratulations on your website. This menopausal insomniac sure is enjoying all of your fantastic design ideas and excellent writing! Cheers!