
October–November 2019
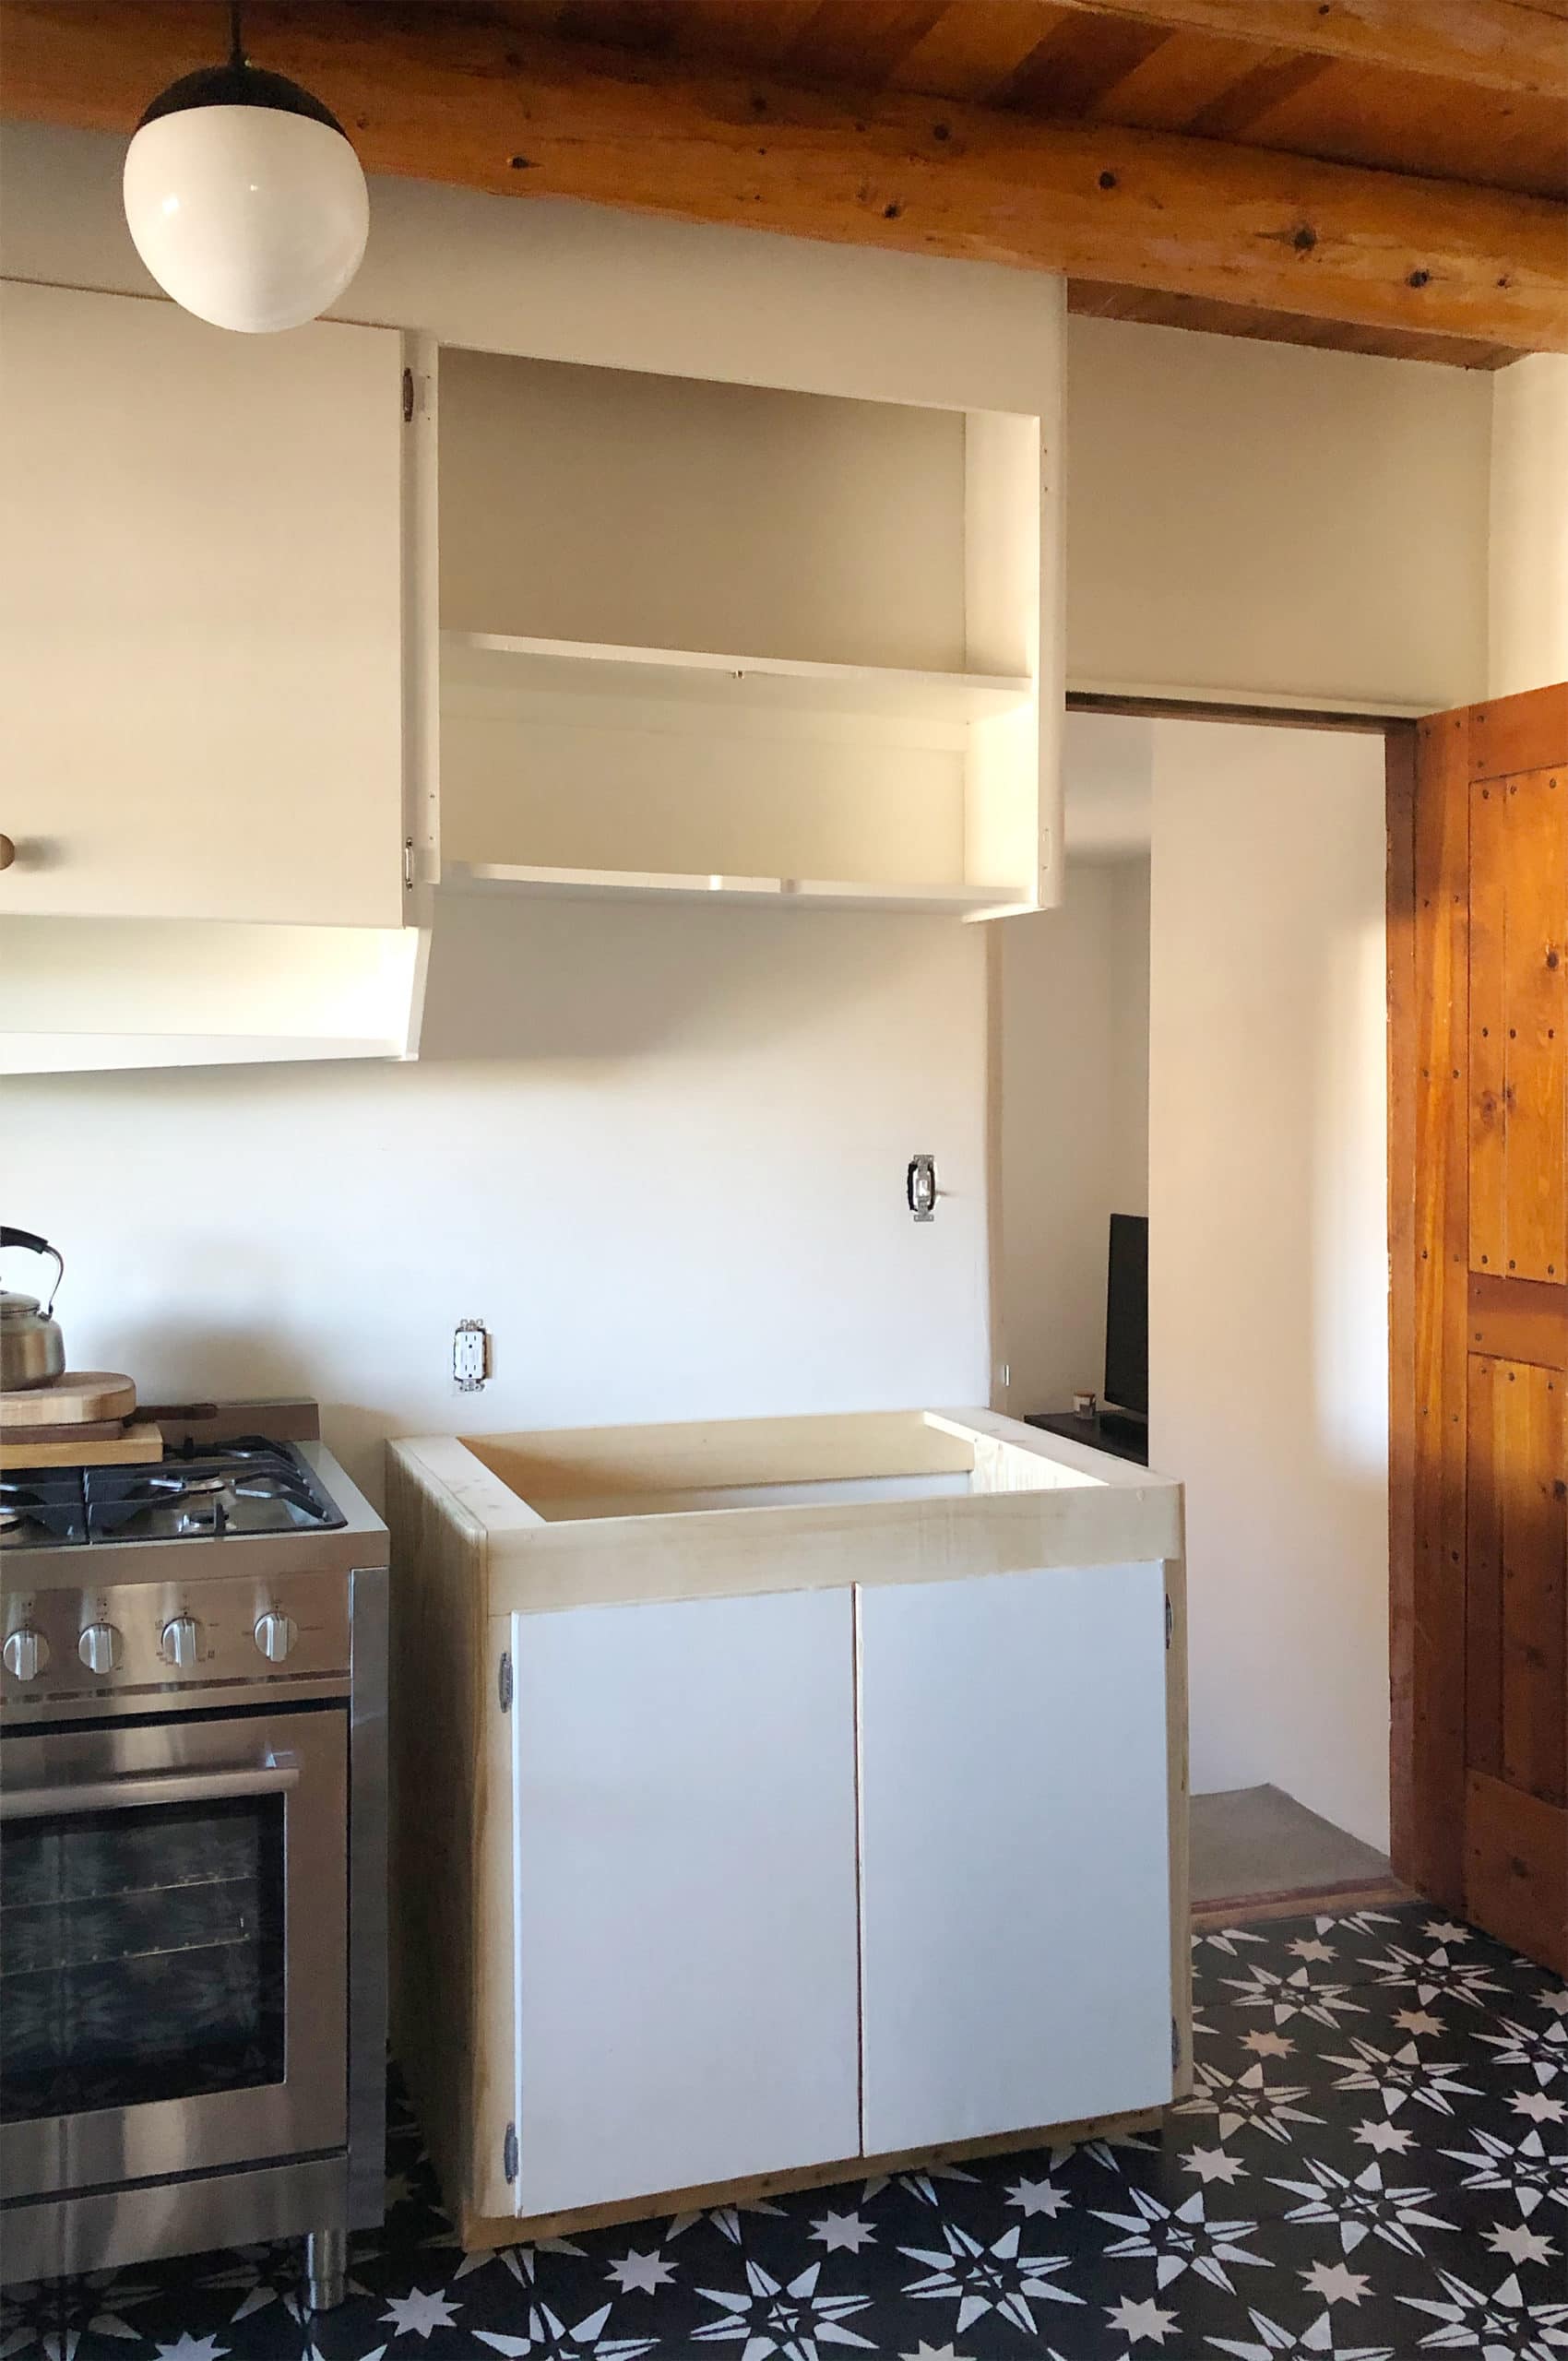
Along with demolishing the old countertops (and, obviously, fabricating and installing the new ones), the other part of the kitchen renovation project we decided to hire out was the construction of a new lower cabinet and the extension of an existing upper cabinet.
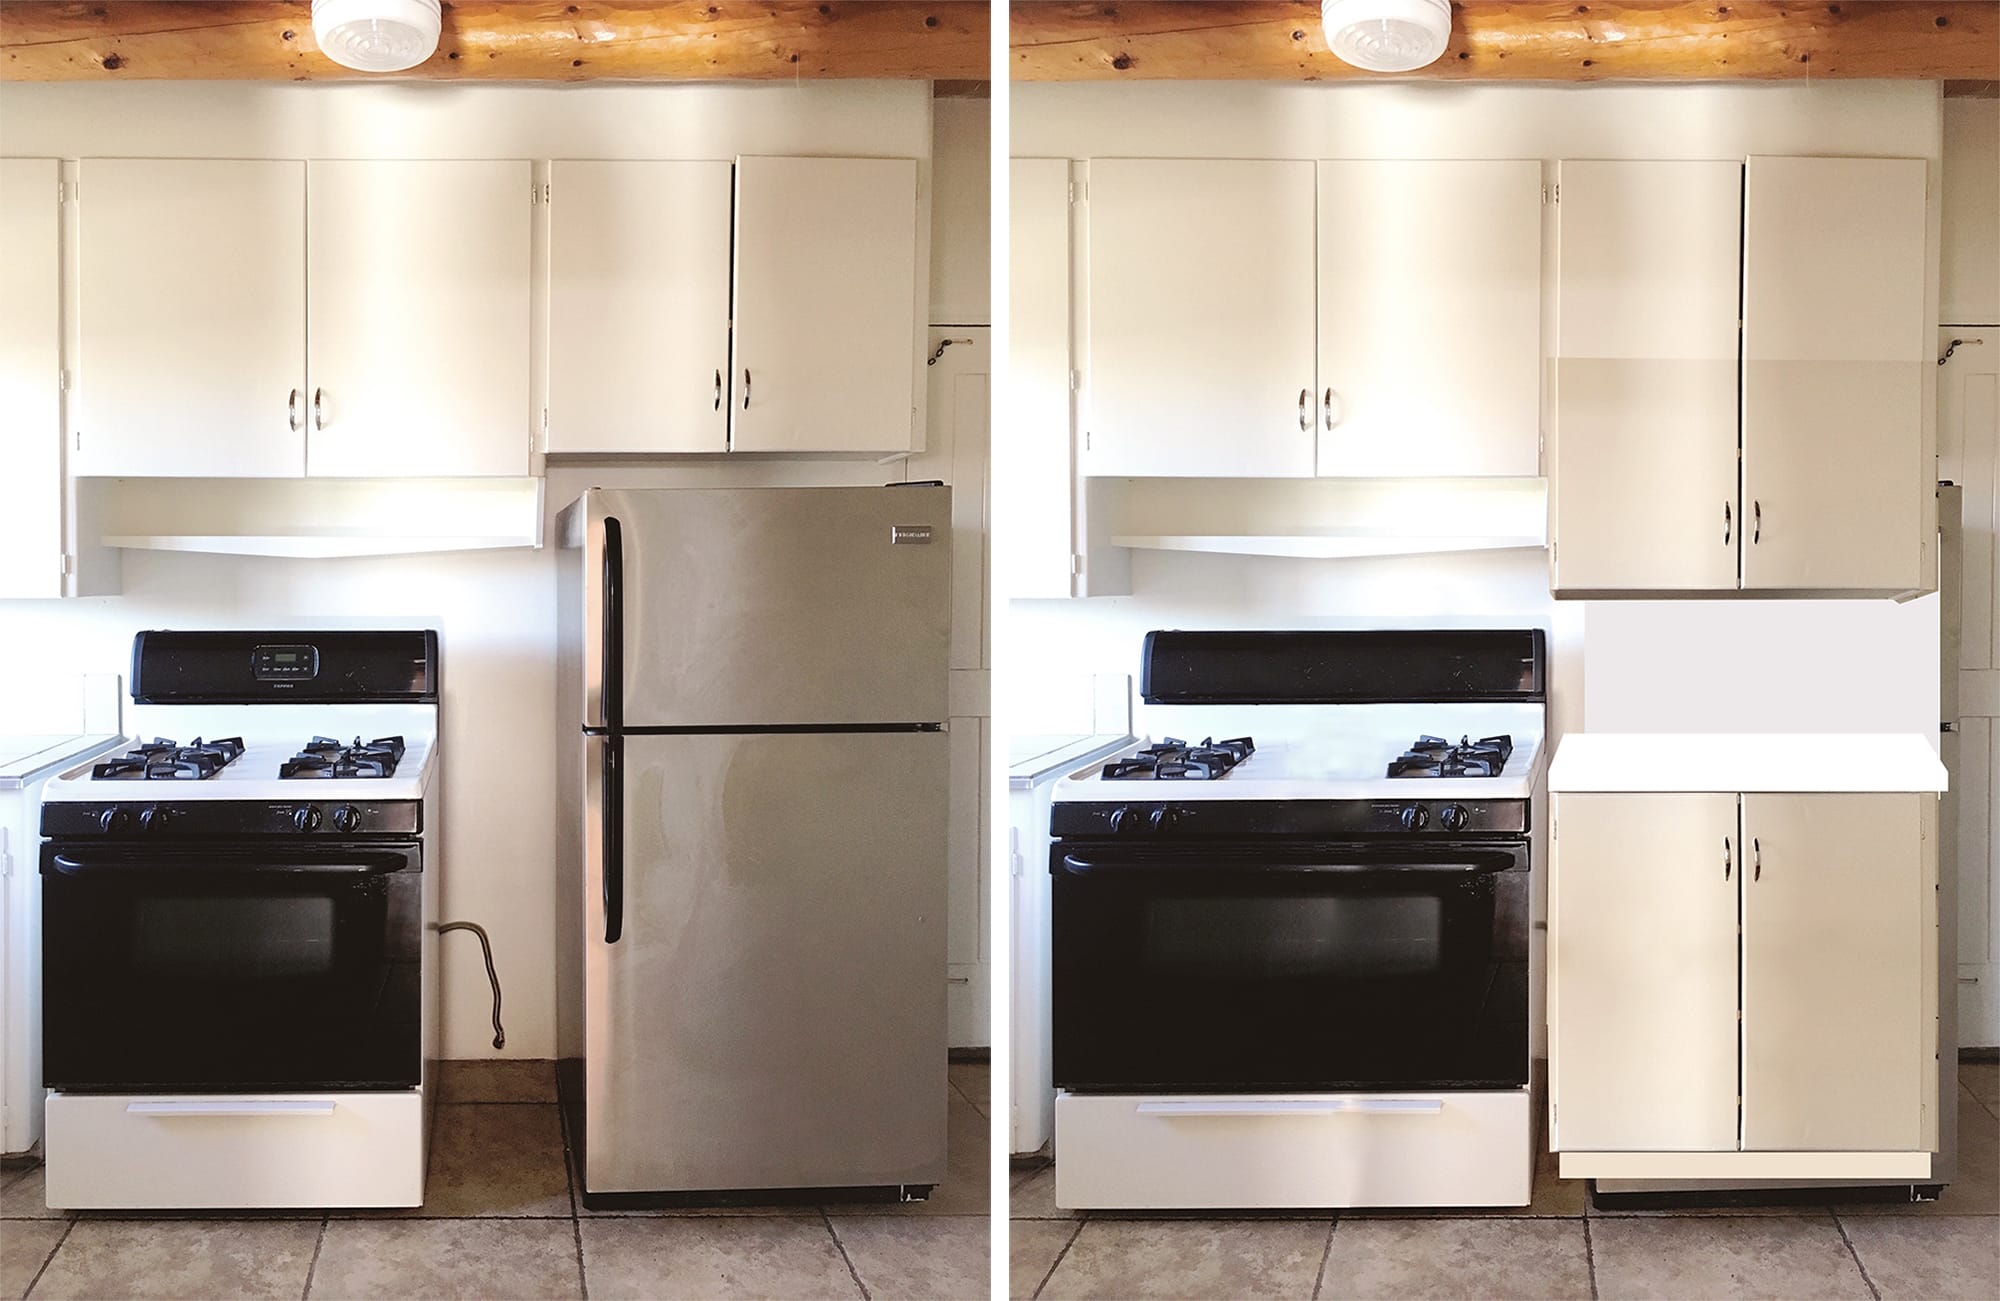
Back when I introduced the kitchen, I shared this amazingly realistic, professional rendering showing my plan to (a) move the refrigerator to an unused area at the end of the room, (b) add a lower cabinet in its place, and (c) extend the existing upper cabinet to match the one on the other side of the range. You’ll also noticed that I stretched the standard 30″ range out to better fit the 40″ space.
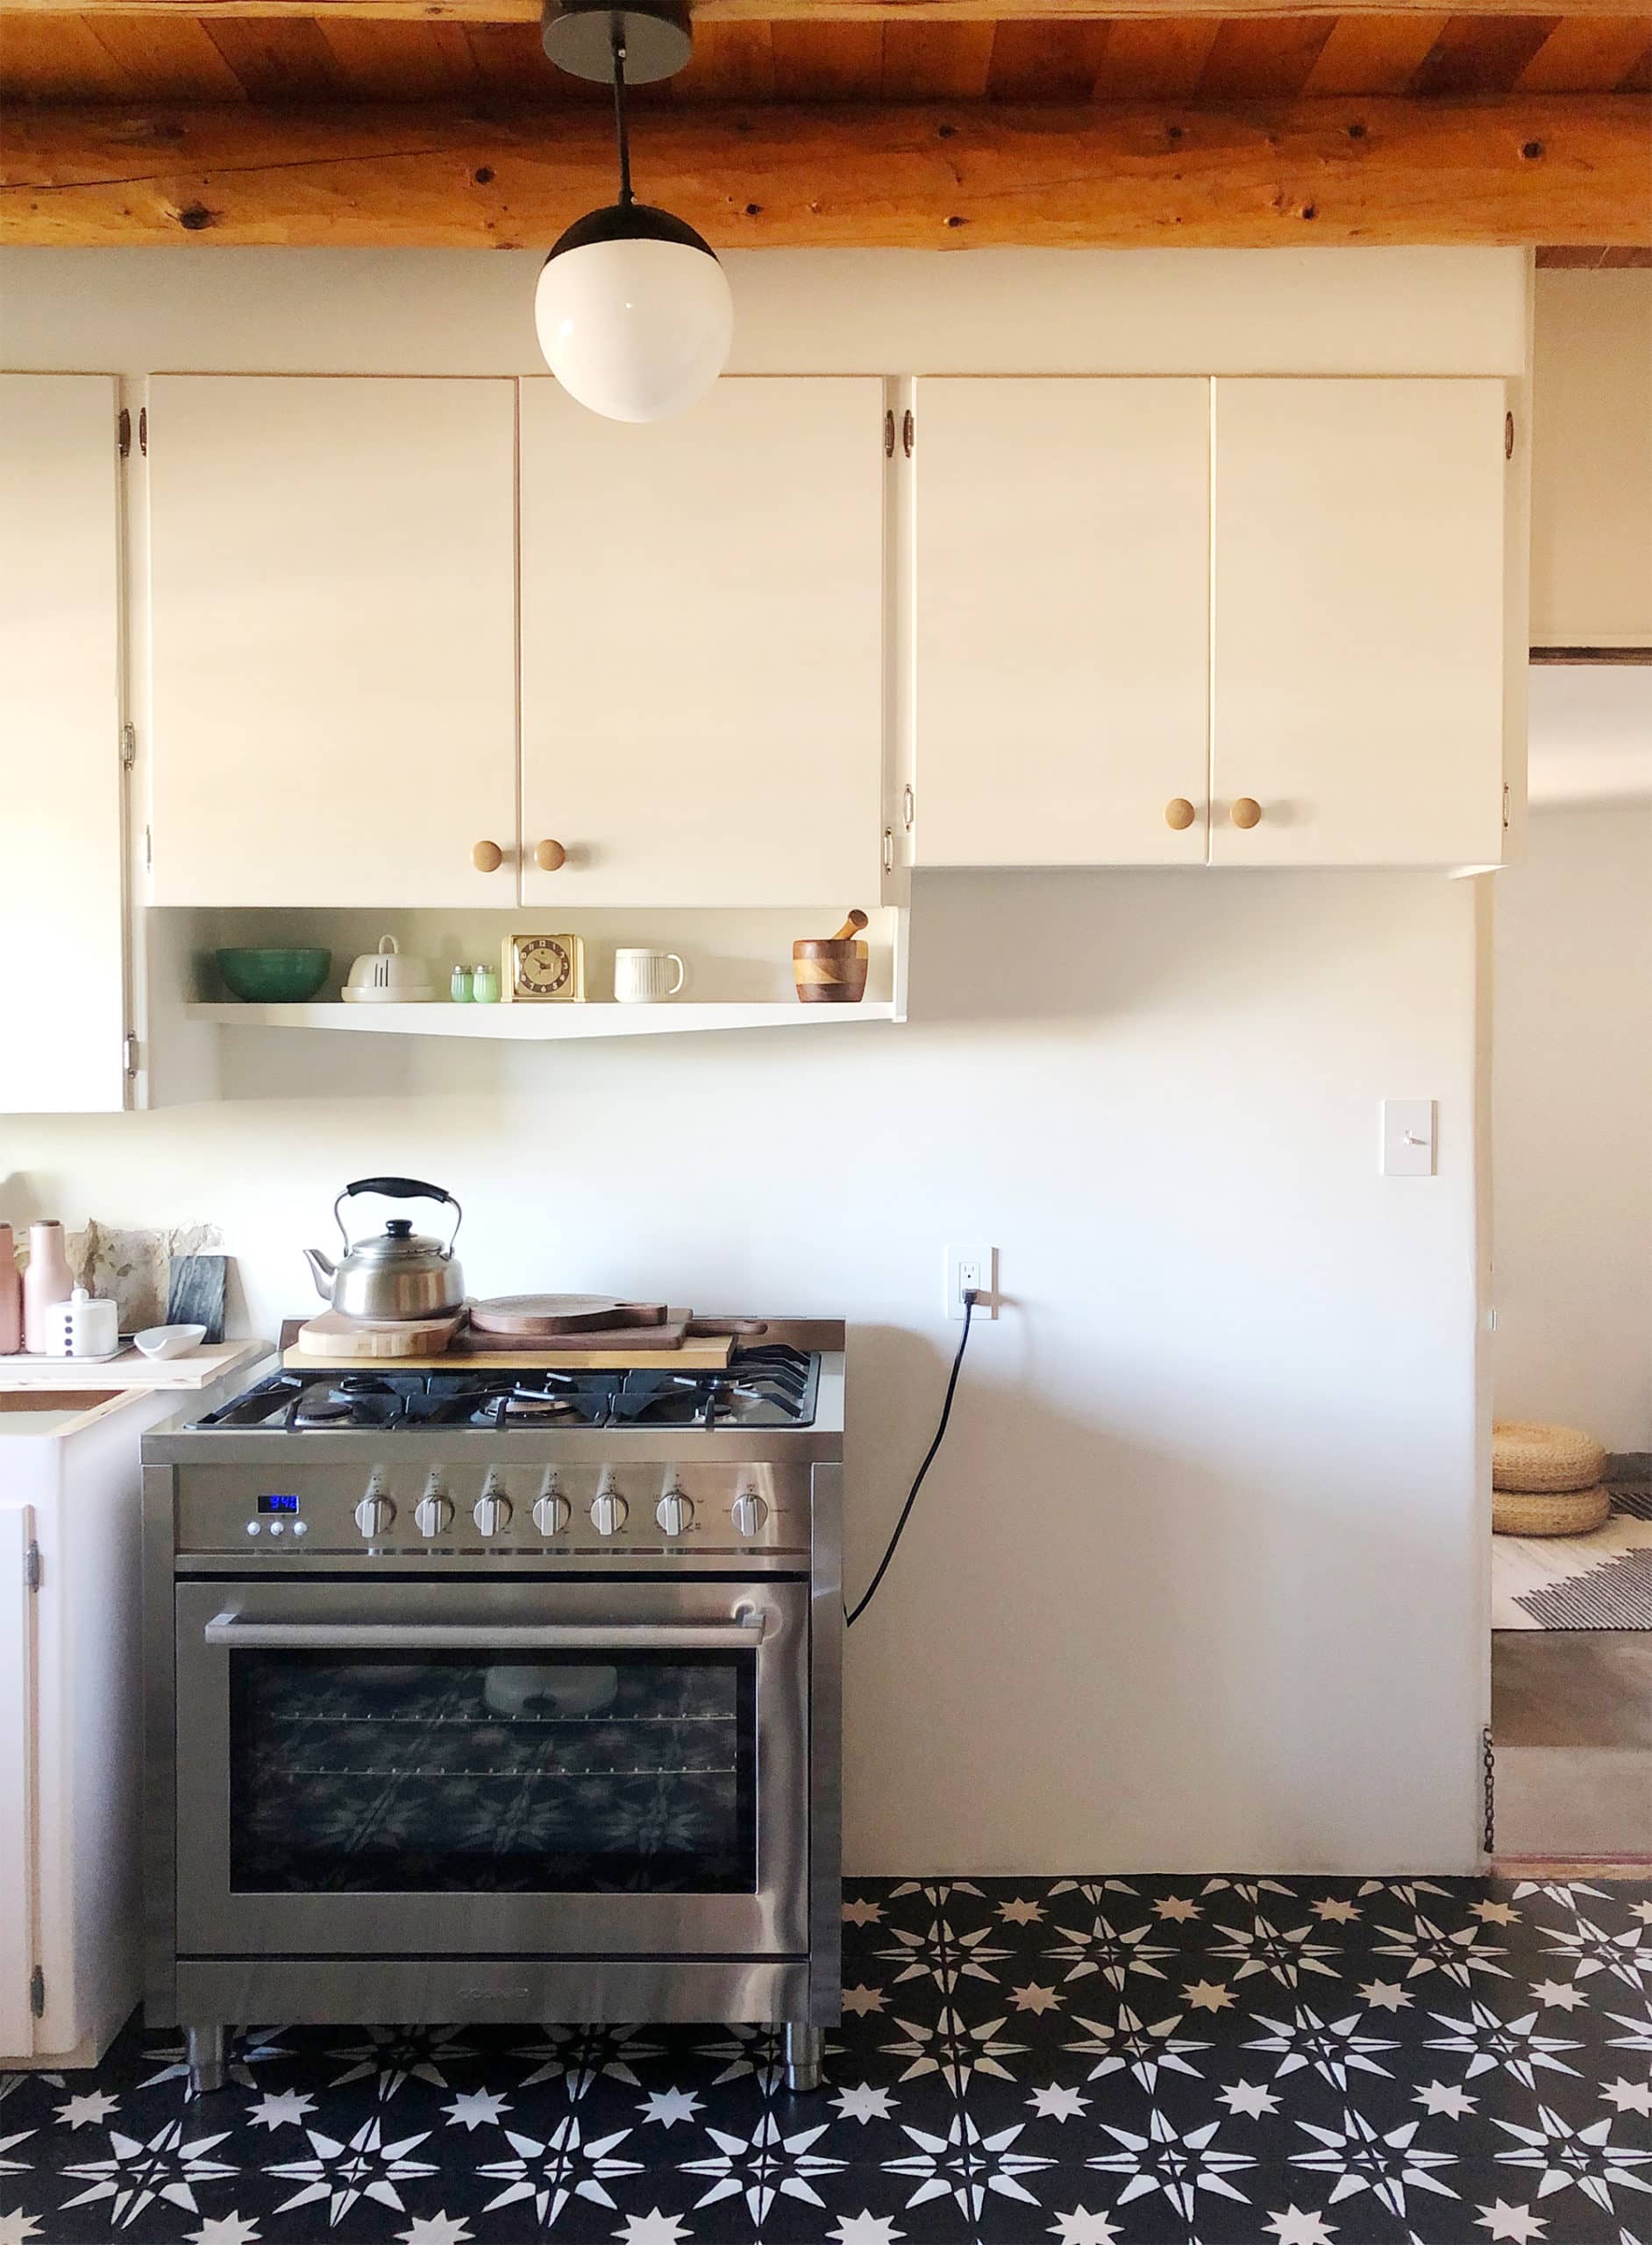
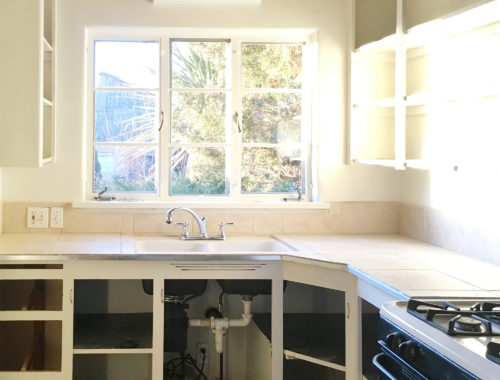
The photo at the top of this post is the progress in that spot so far: Cabinets repainted, hinges and knobs replaced, old countertop removed, floor tiles painted and stenciled, and the freestanding 36″ Cosmo range in place.
The most important thing to me and AK when it came to adding the new cabinetry was that it match the original cabinets from 1950. They were built on-site and are very simple—basic plywood boxes and shelves with pine fronts—with beautiful rounded corners that were created with a strip of quarter round! Such a great idea, right? We really didn’t want someone to get carried away and build something too fancy, or insist on adding extra elements that would’ve given away that the additions were anything but original to the house.
The extension of the upper cabinet was a little trickier, since it would require making a cutout to notch in the new section…plus some creativity to attach it to the existing cabinet in a way that wouldn’t be visible. And, of course, new doors.
My friend Geninne recommended a lovely local furniture builder named Manuel, and we went together to talk to him (I don’t speak Spanish, regrettably, but Geninne is bilingual and was happy to help!). Manuel came by the next week to measure, then came back to measure again, and then he got started. Fortunately, because his workshop is very close to my house, he was able to come over periodically and dry-fit the cabinets as he worked on them. It was harder than he expected to get everything to fit just right (especially the upper cabinet), but eventually he got there!
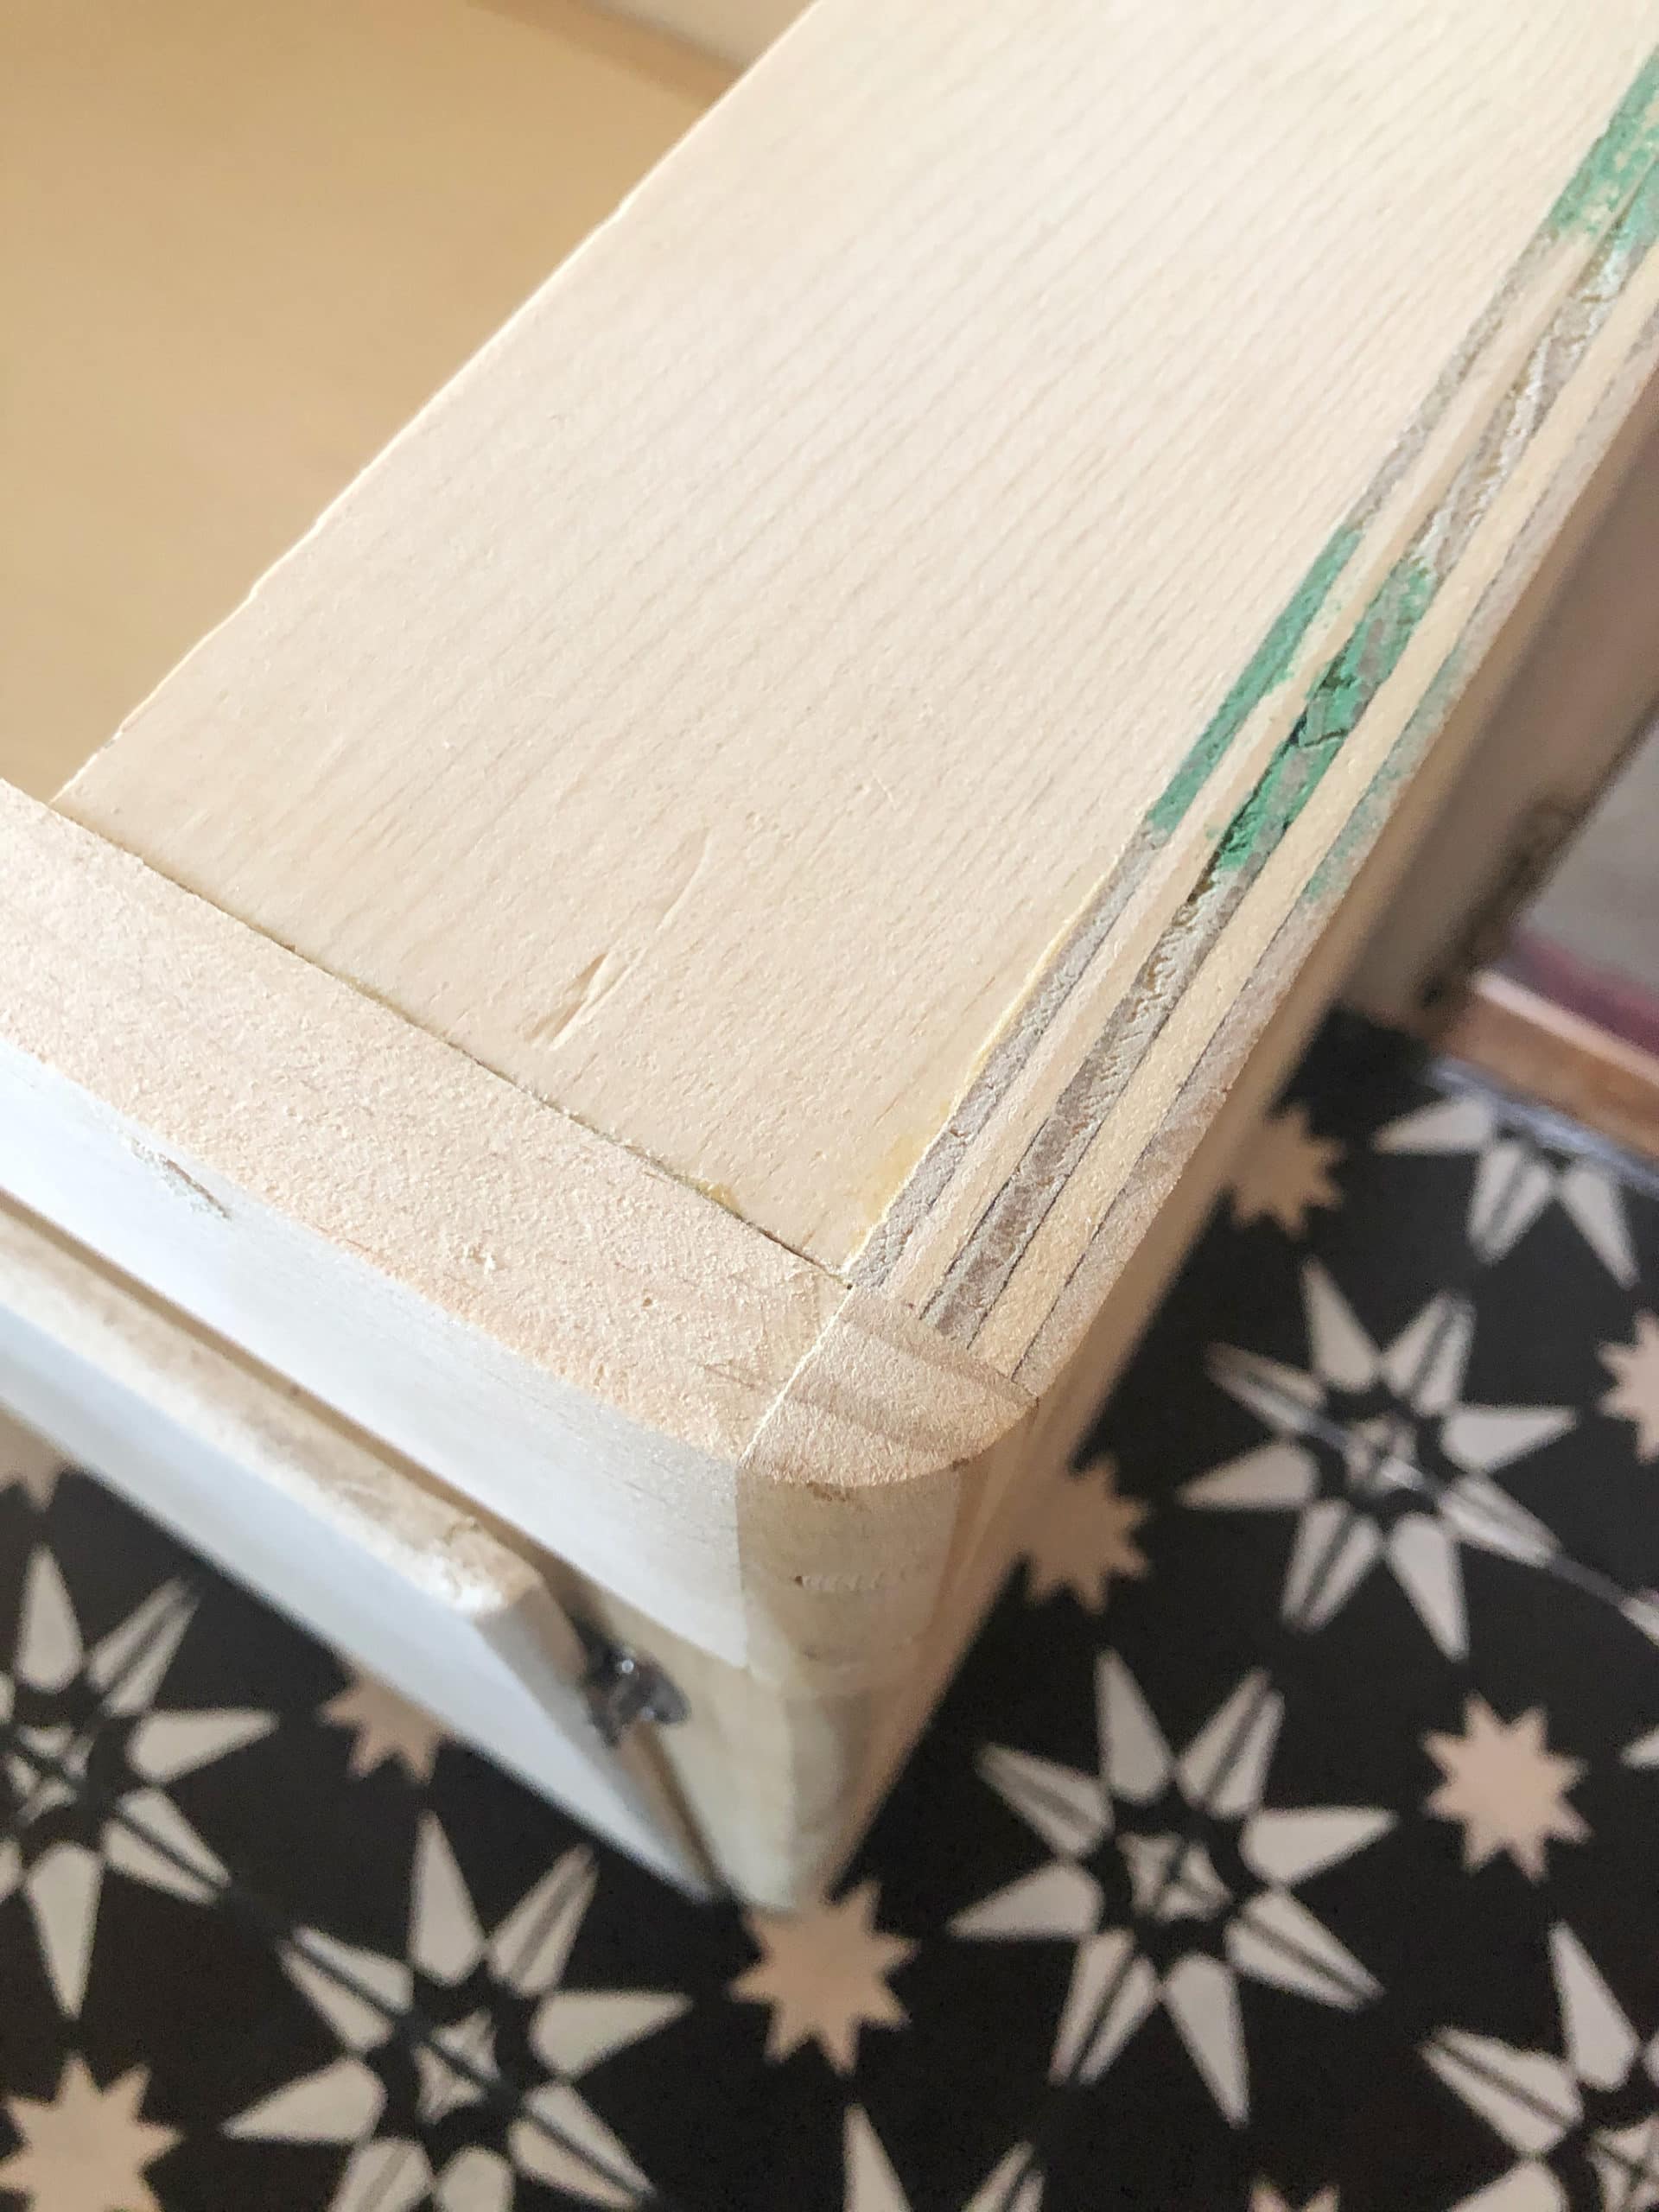
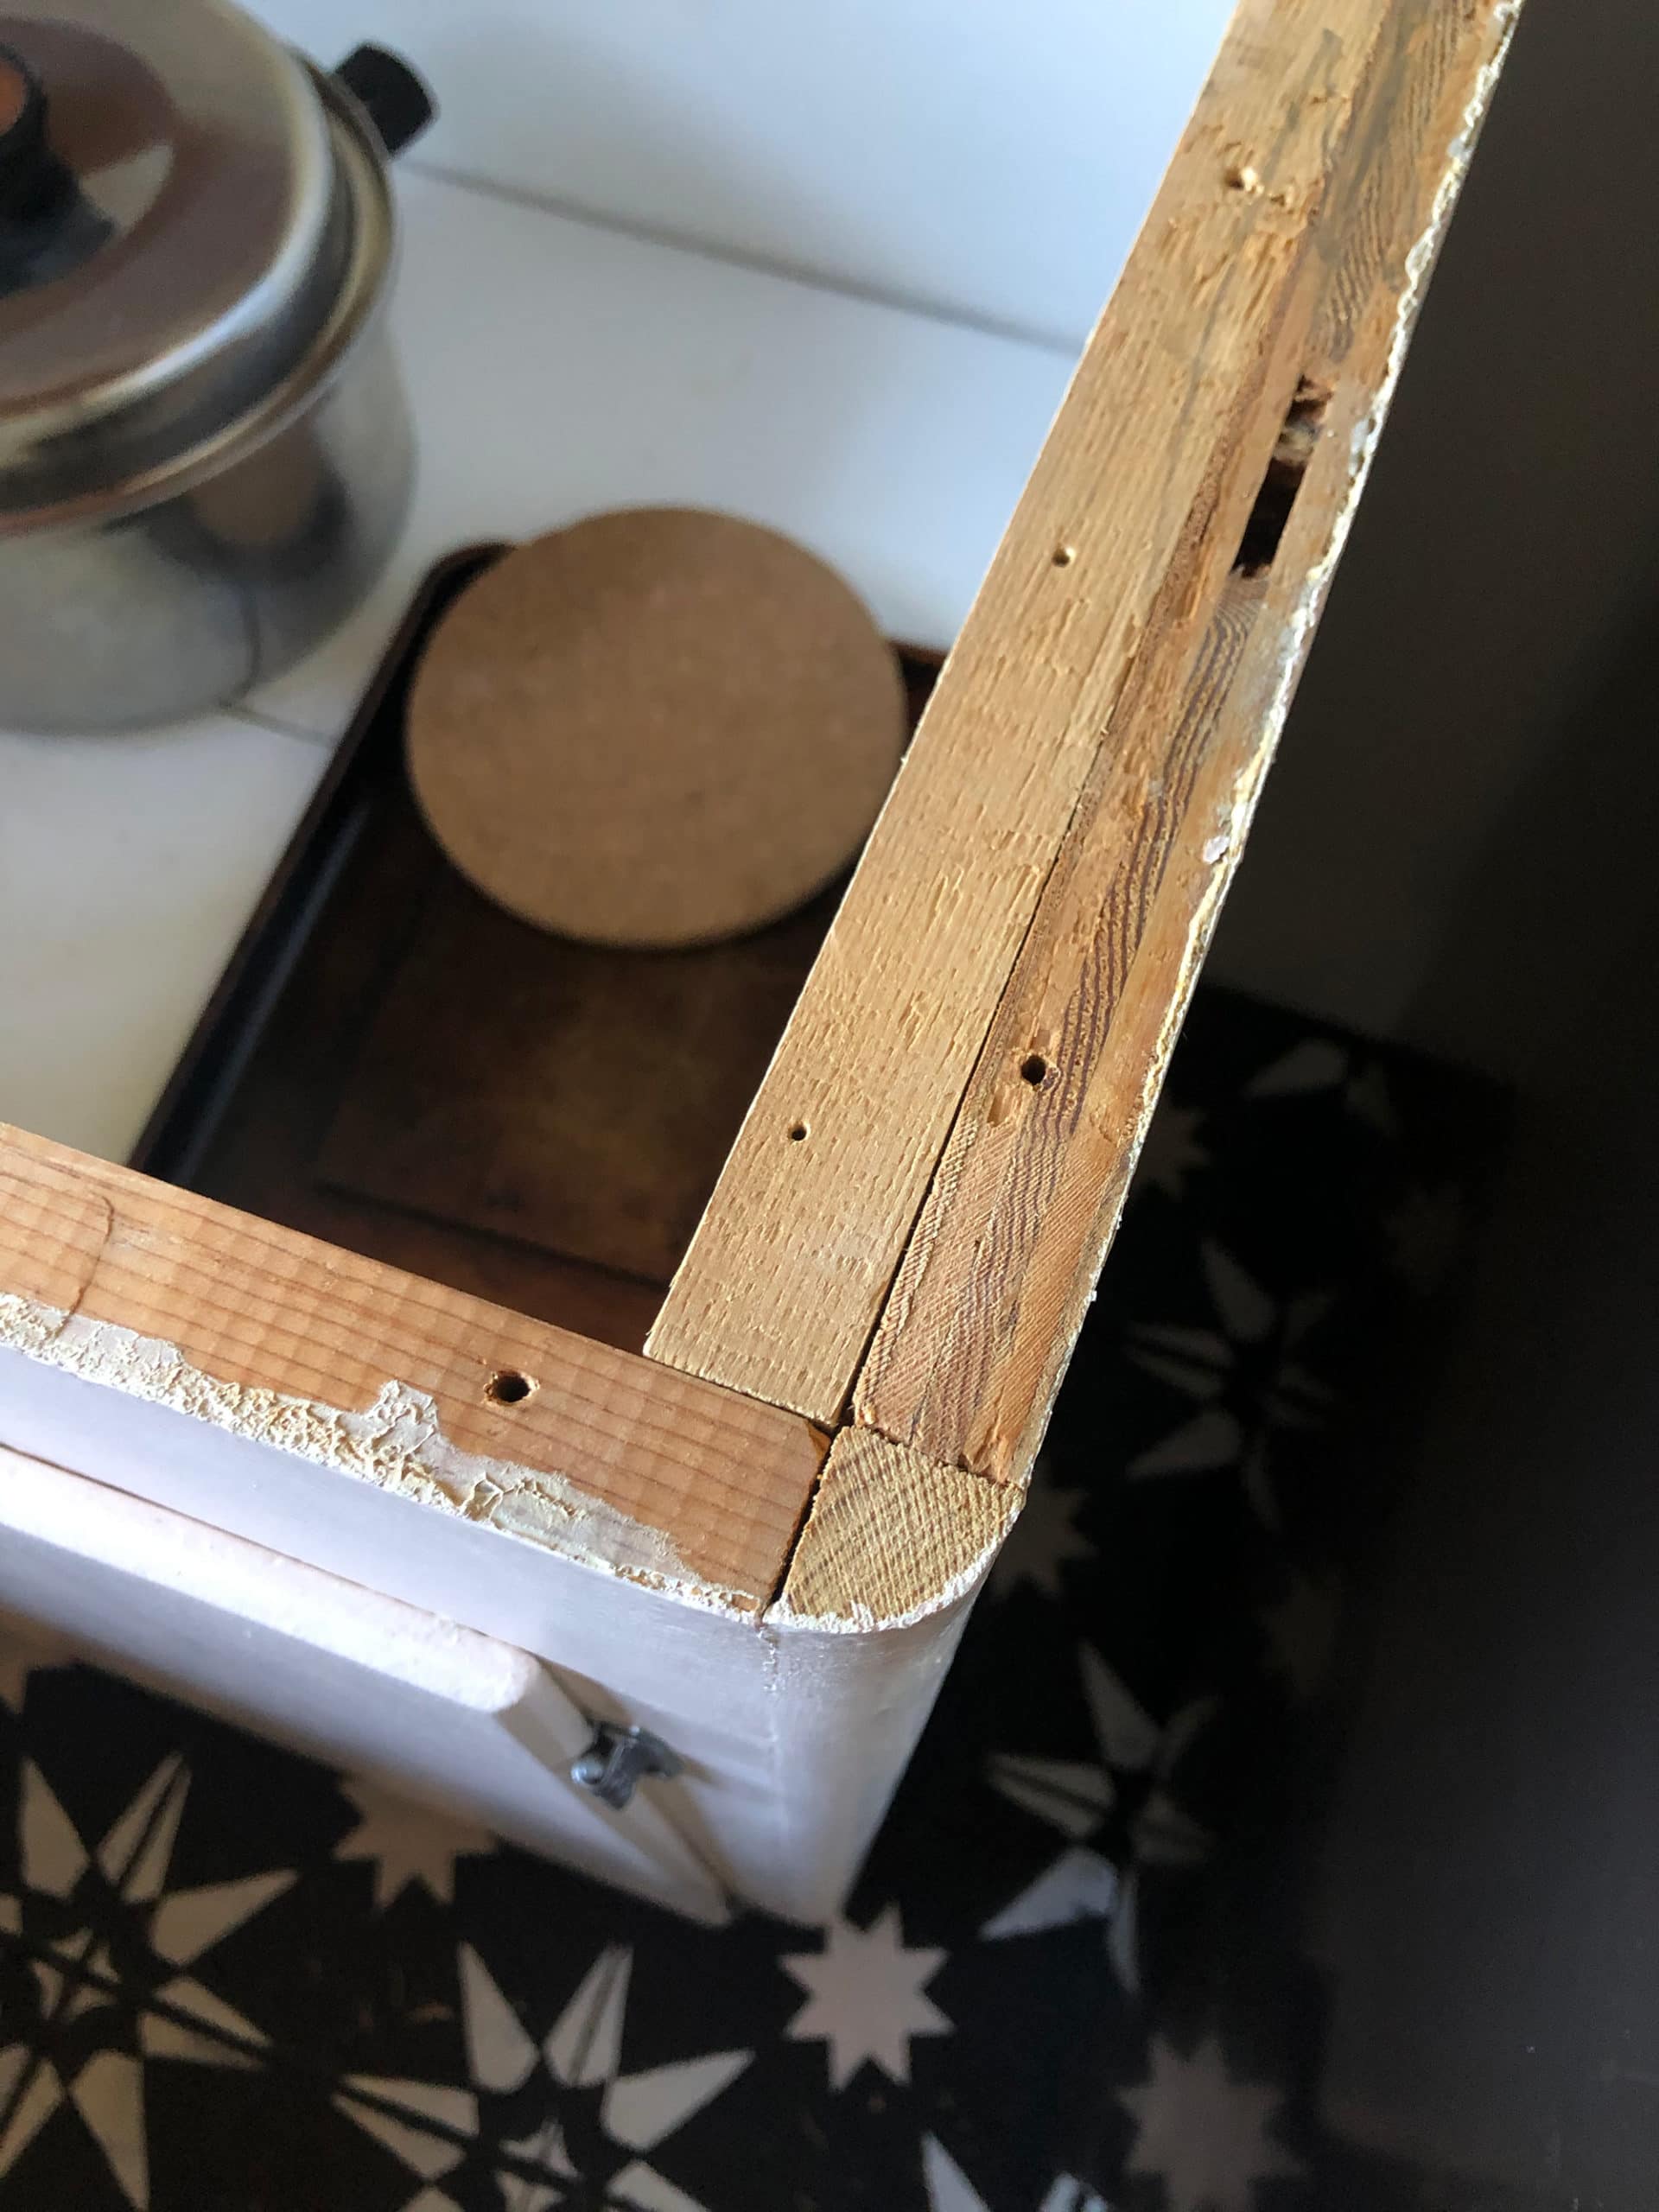
LOWER CABINET SUCCESS!! Conveniently, Manuel was able to use the original doors from the upper cabinet for the lower cabinet. That goes a long way toward making everything look like it’s been there for 70 years. And check out that corner!! He did it exactly like the original. The only change he made was to add an extra piece on the inside top for extra countertop support. Probably not necessary, but much appreciated. The back is open, just like the other cabinets—the “back” is actually the kitchen wall.
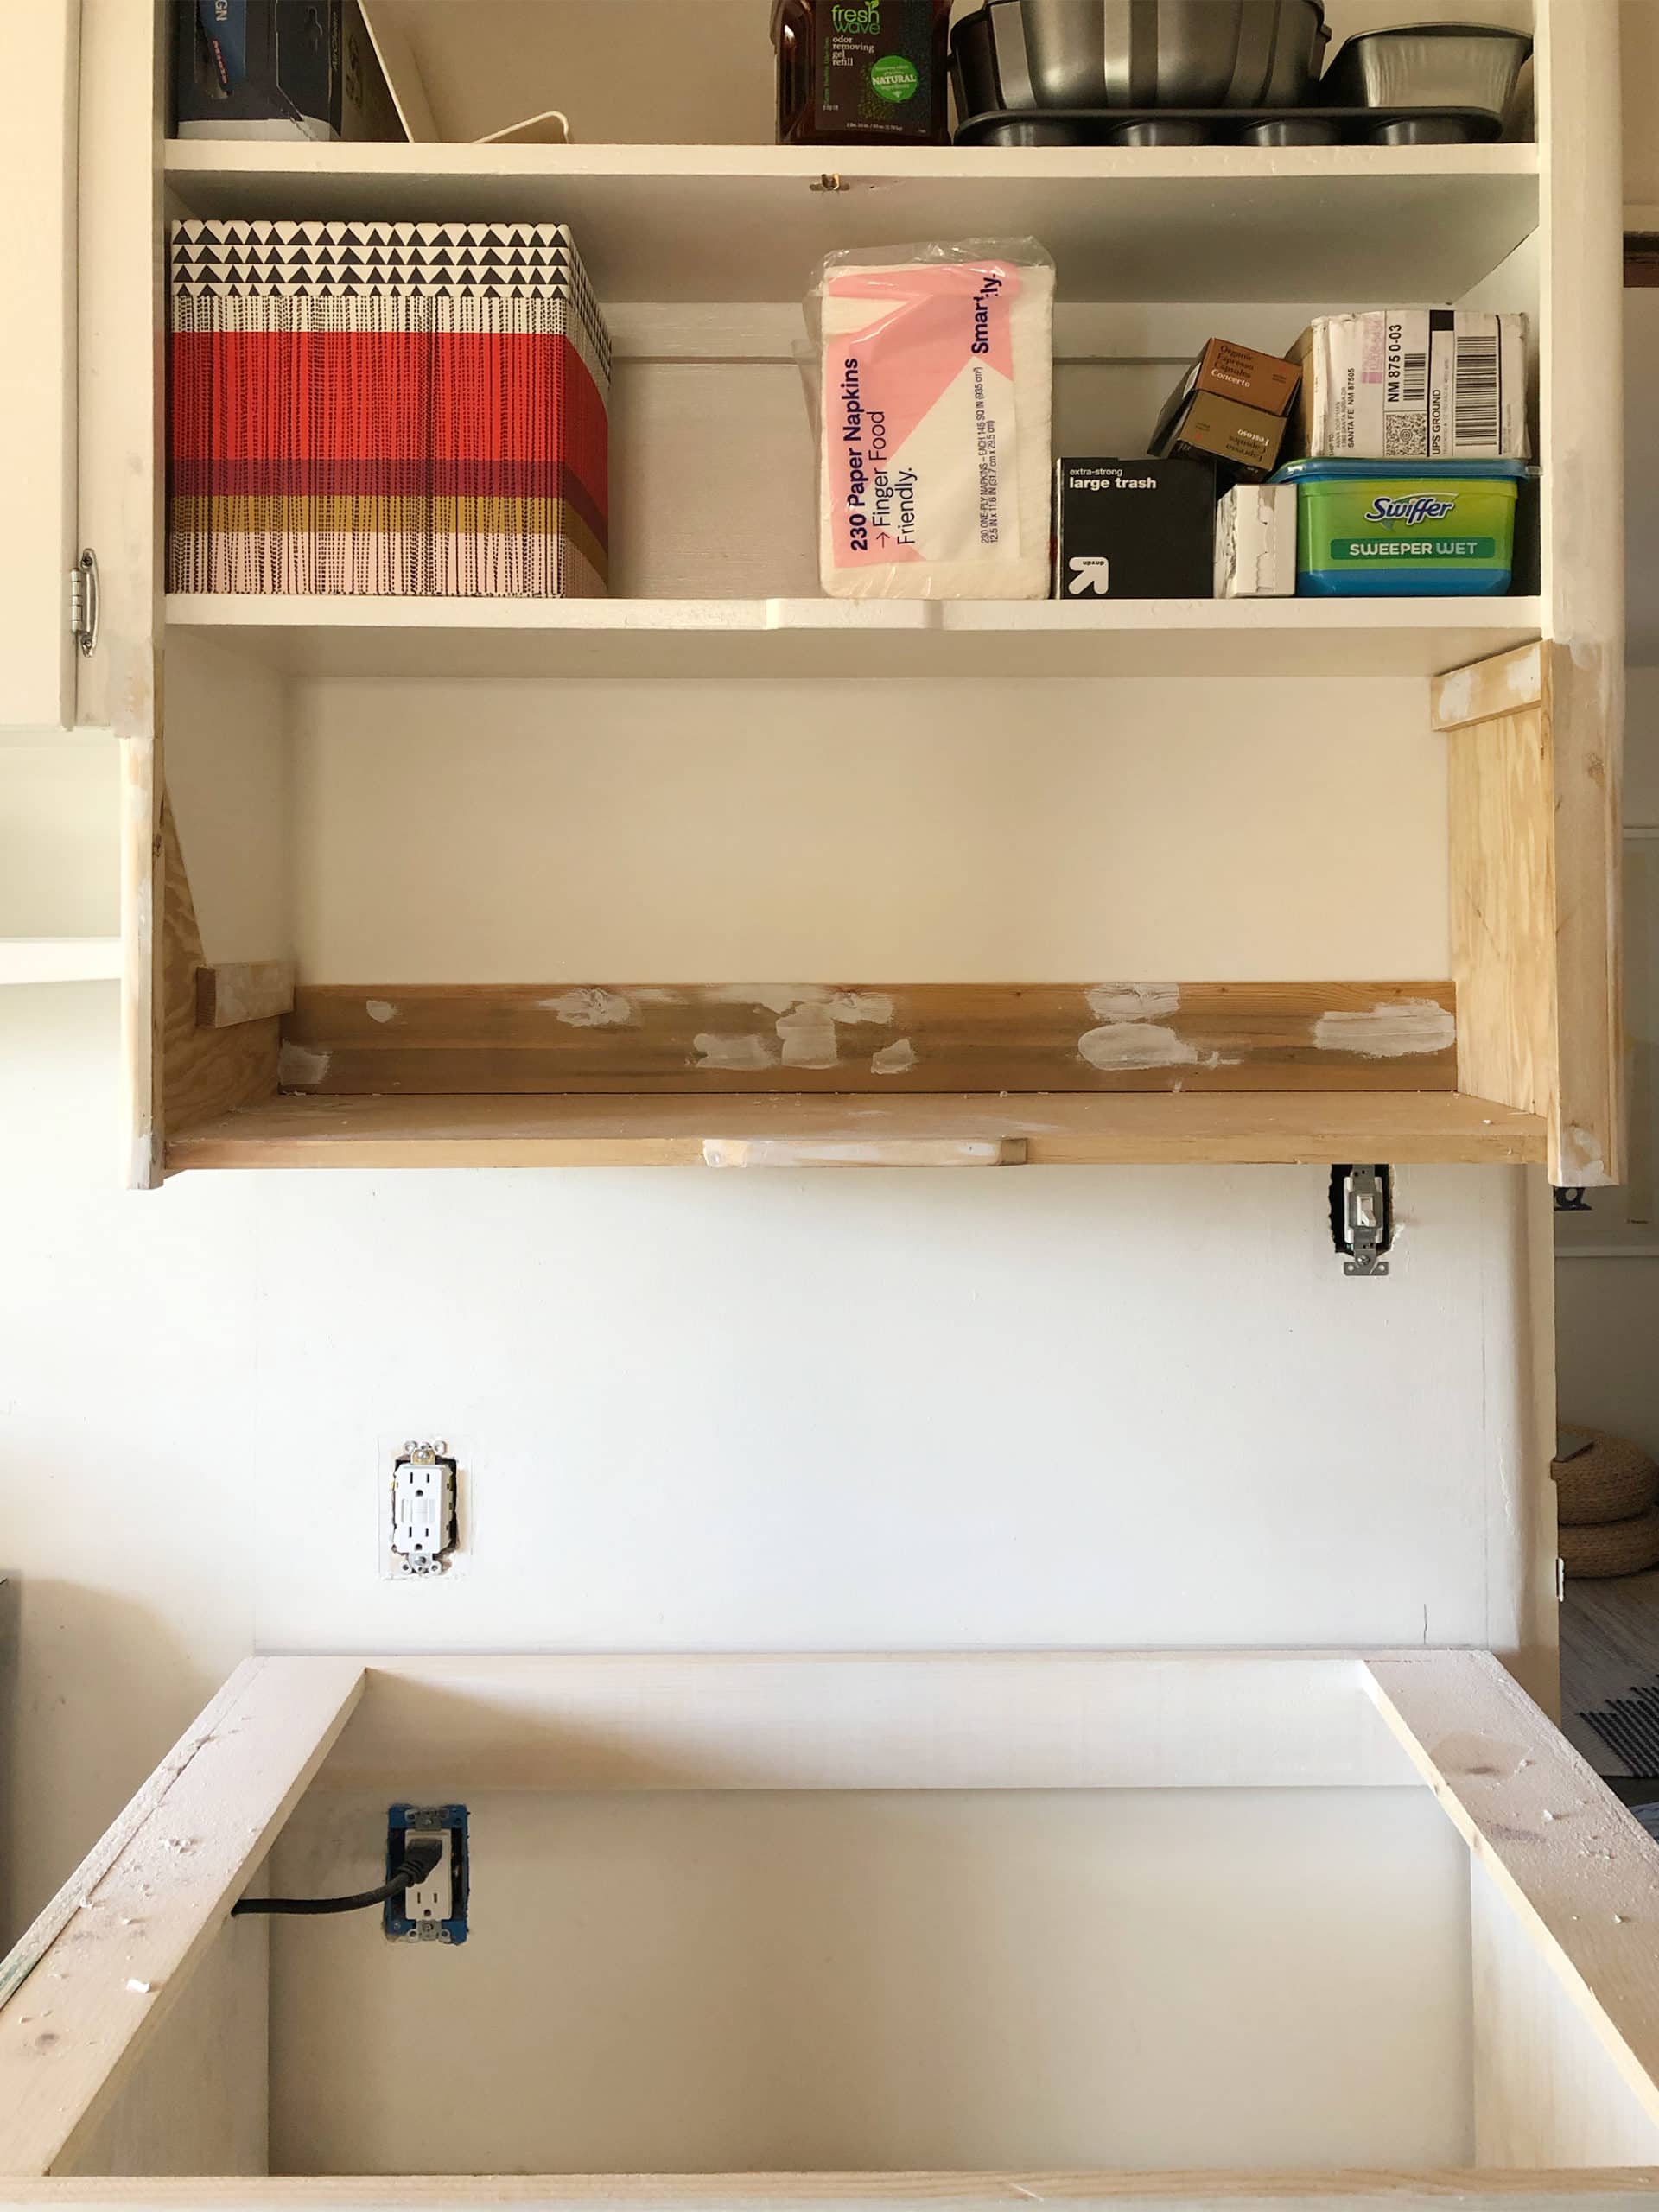
About a week after the lower cabinet arrived, Manuel brought the extension piece for the upper cabinet over. It didn’t fit, of course, so that began the first in a series of increasingly-comical trips back and forth between the kitchen and his workshop, shaving off a tiny bit at a time and checking to see if that did the trick. (Yes, I offered let him work in our garage to save himself all the back and forth, but he’s a man who needs his own space, and I respect that.) Finally…UPPER CABINET SUCCESS!! We cheered and high-fived, because this was back in the olden days when it was still OK to shake hands and high-five people.
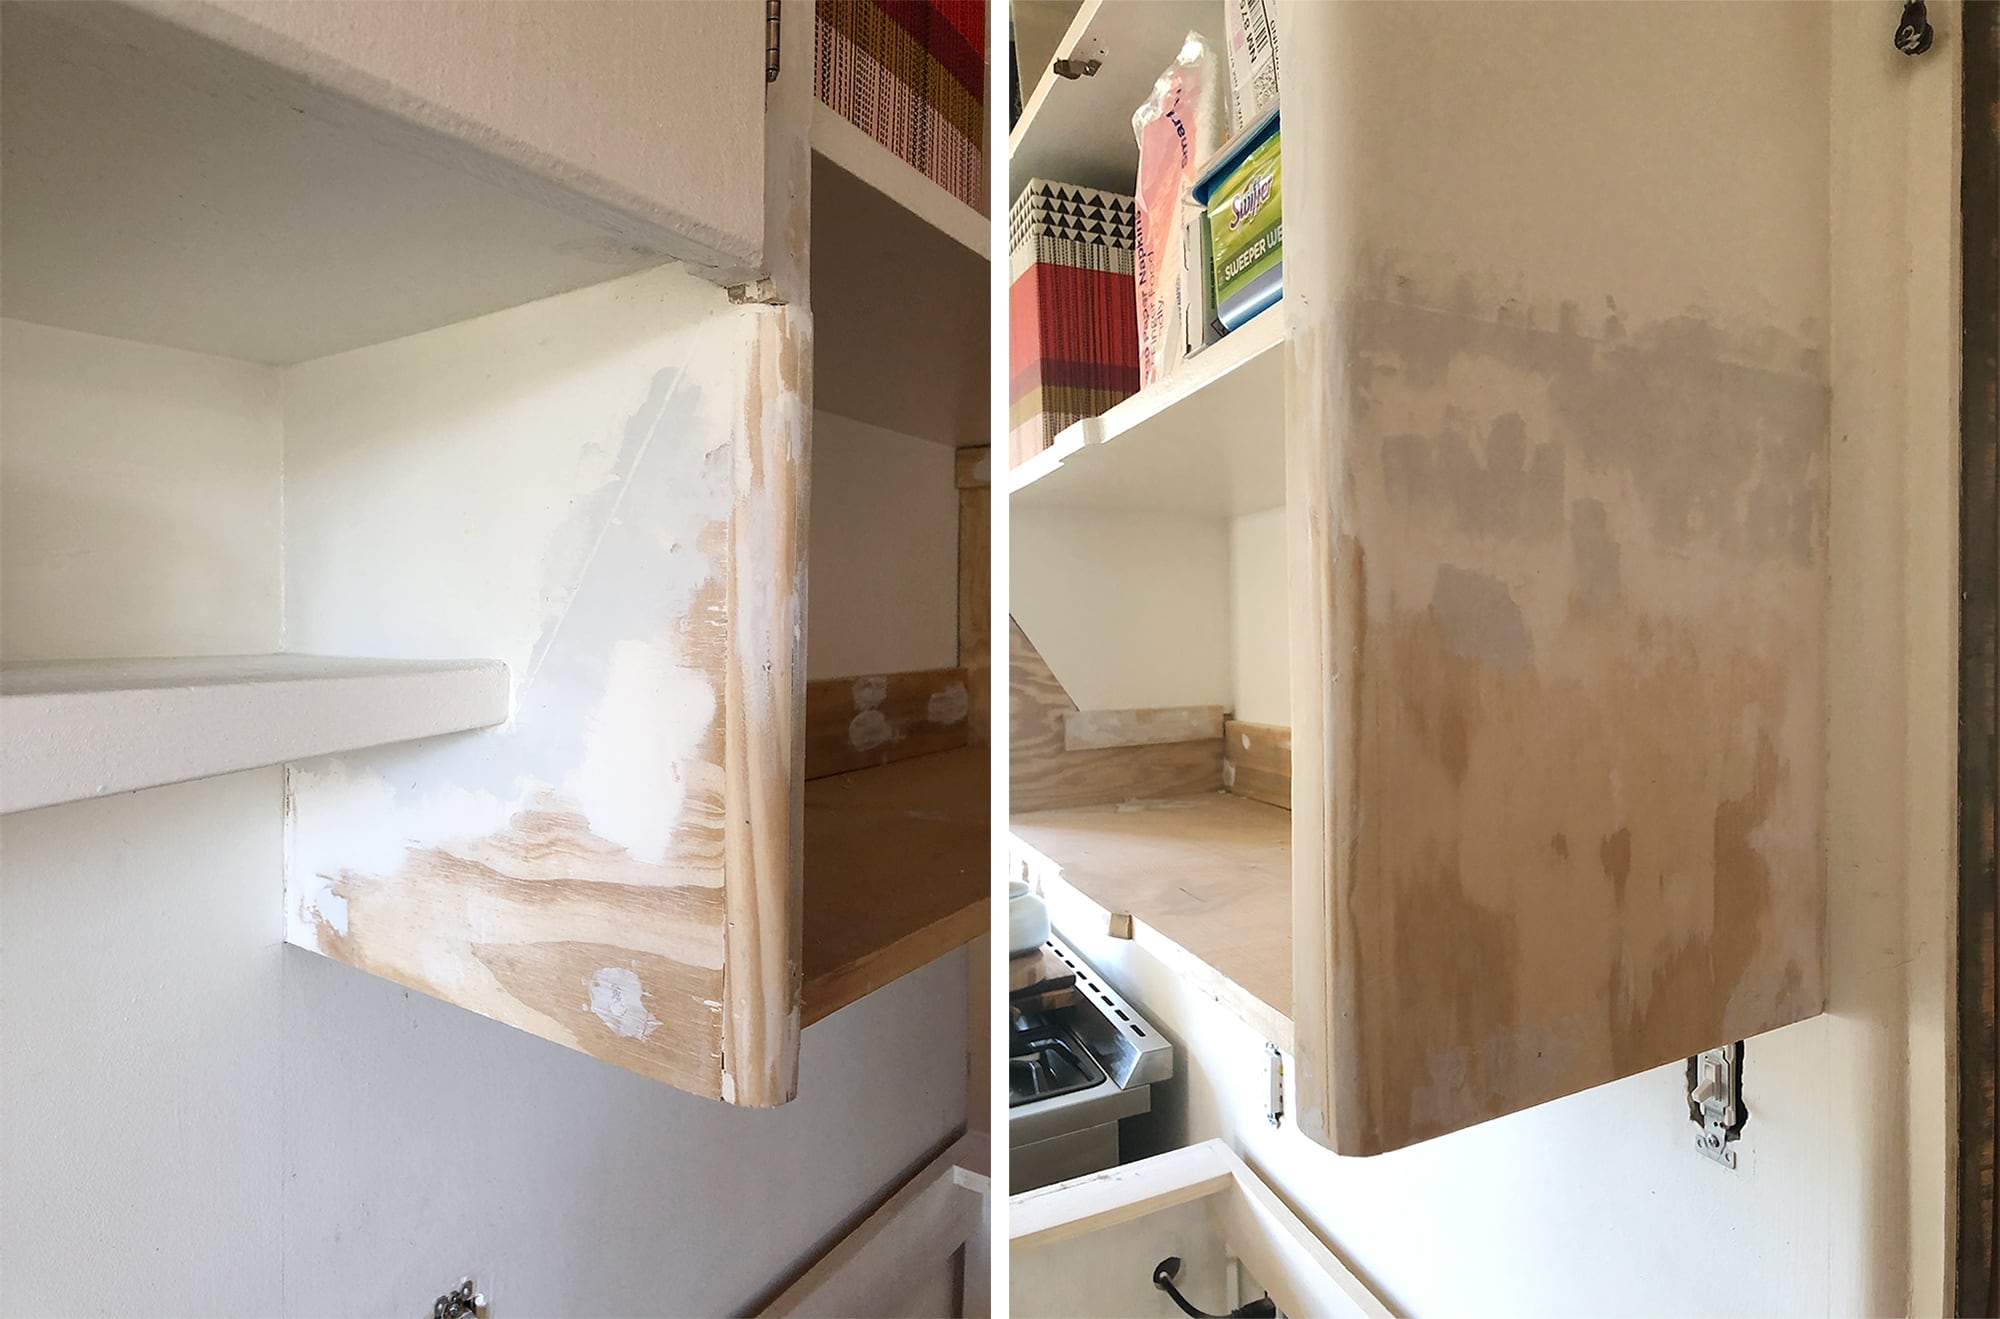
I used a combination of caulk, wood filler, Bondo, and Ready-Patch to even out the seams where the old cabinet and the extension piece meet, and then sanded the life out of it. Now that it’s painted (we’ll get there eventually), you really can’t even tell that the cabinet was altered at all.
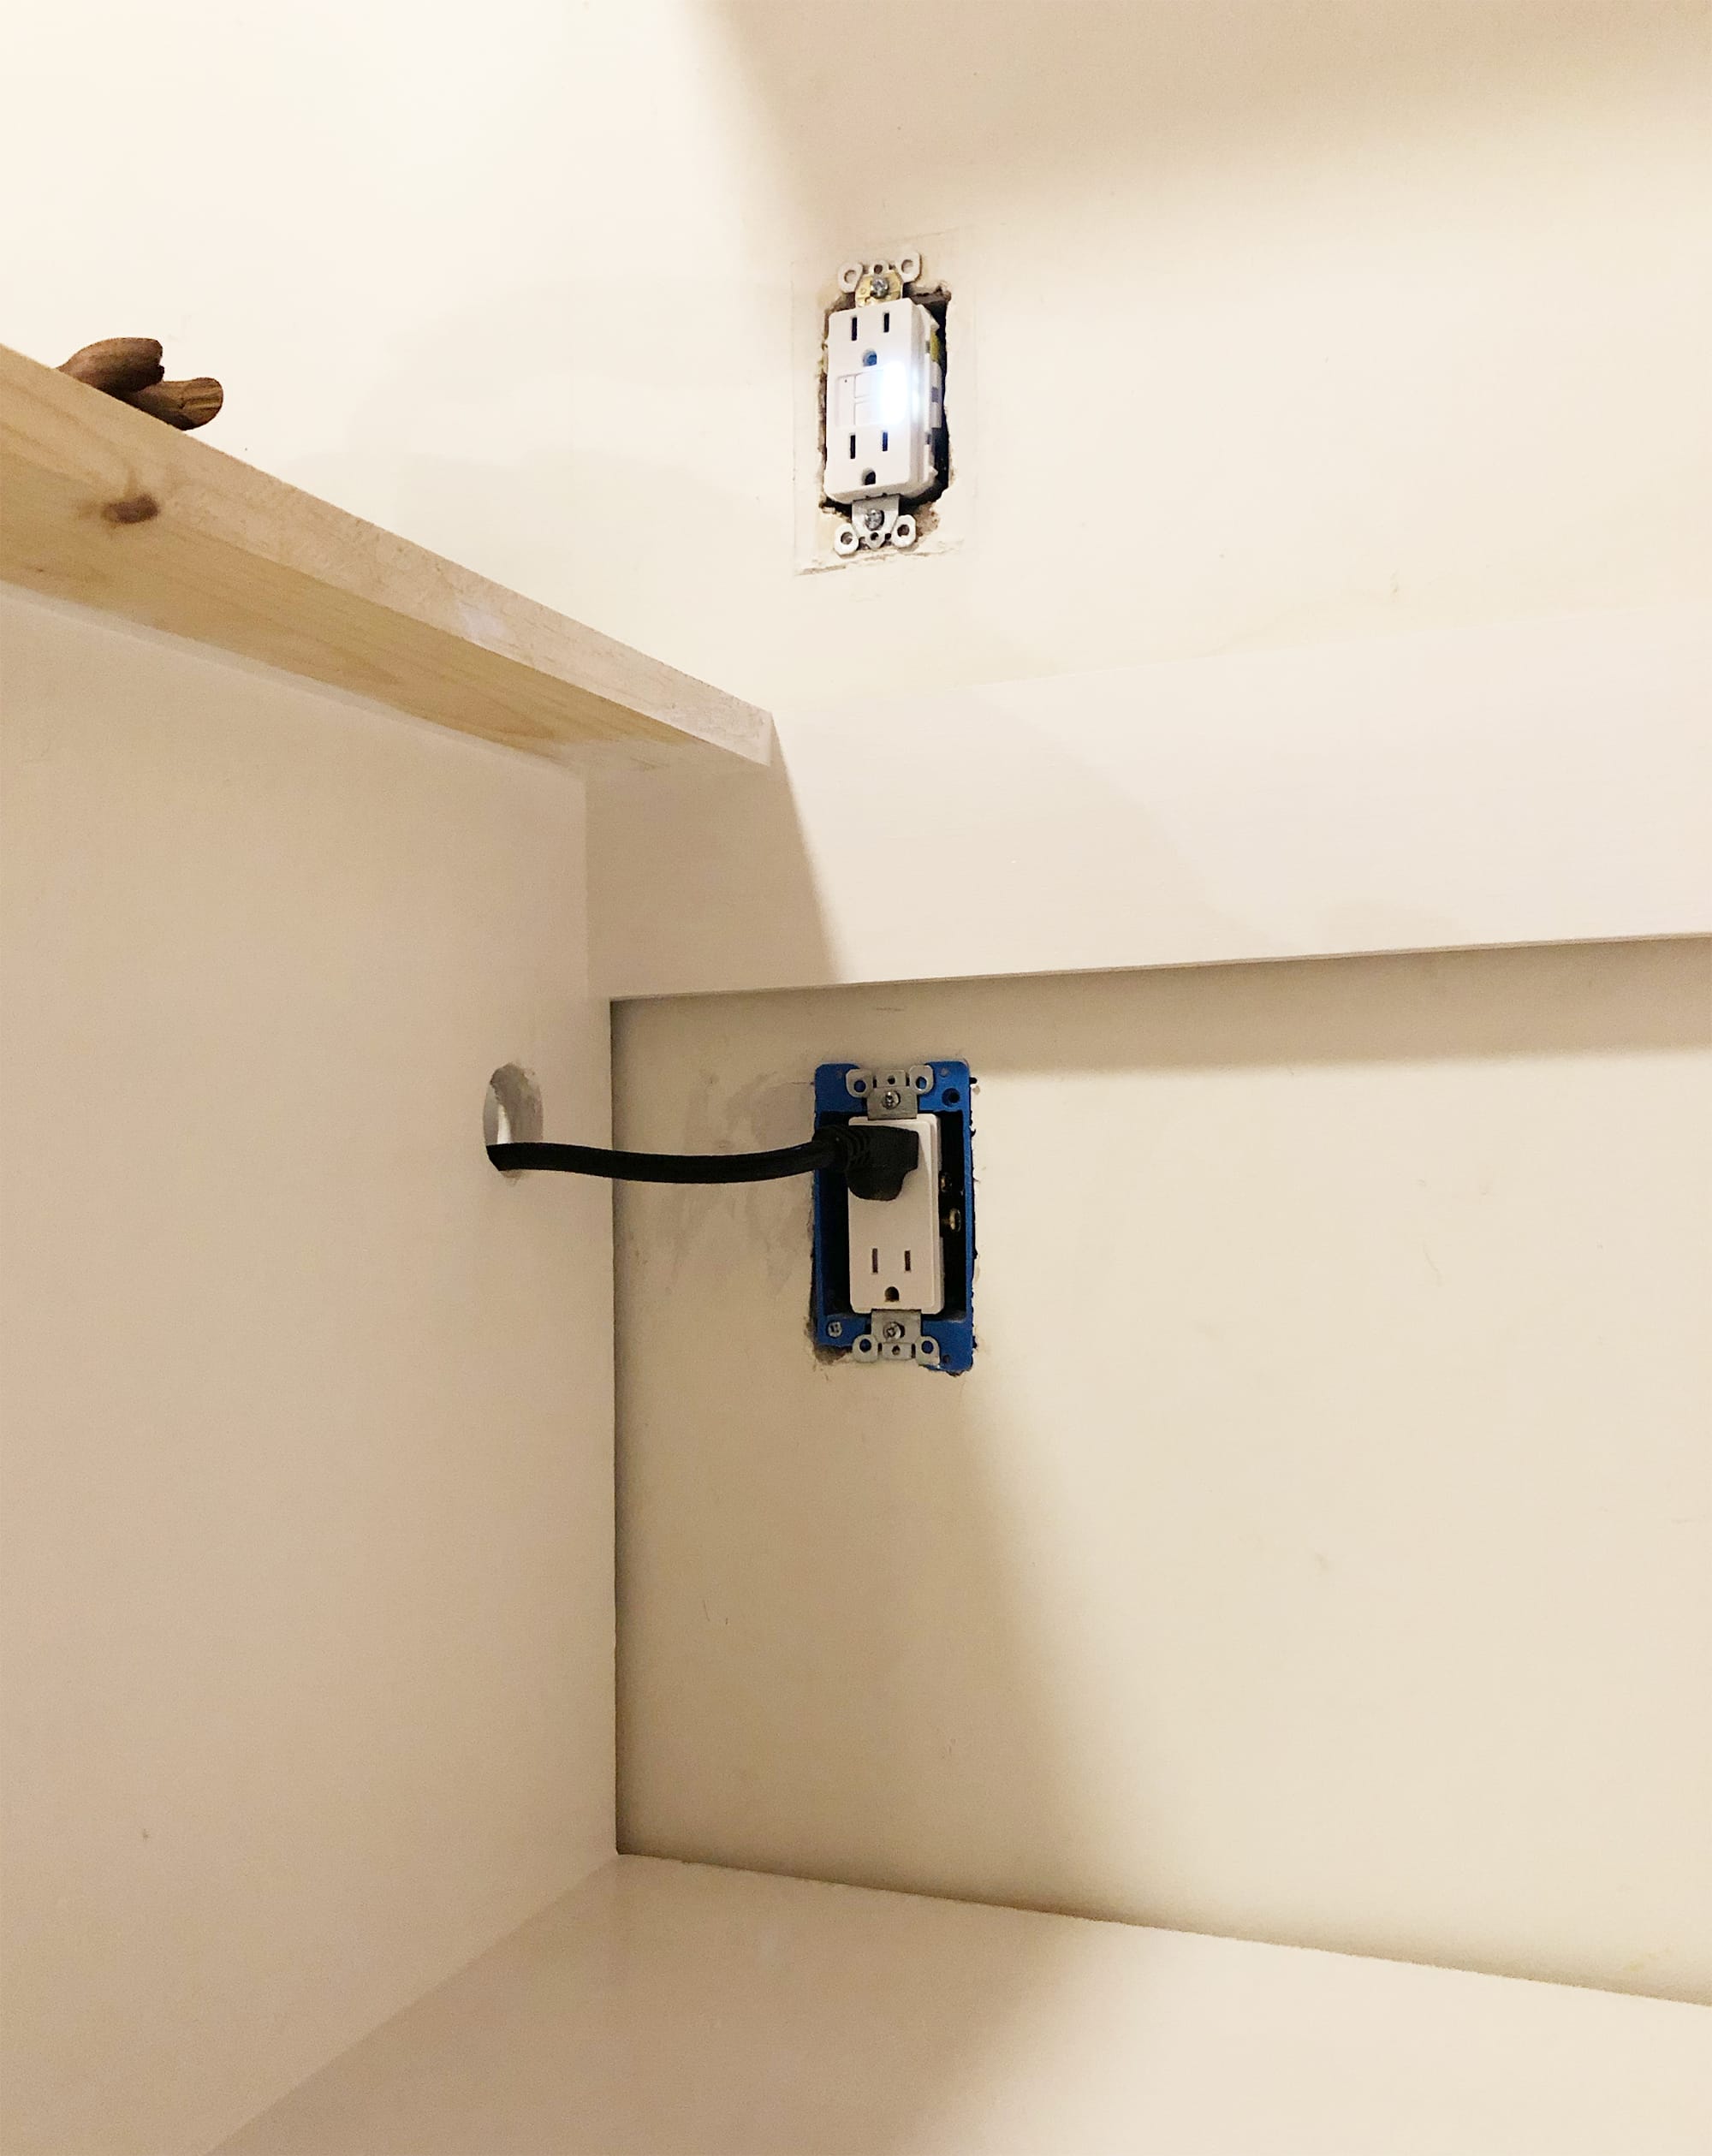
I felt very smart when I came up with this solution. There wasn’t an outlet behind the range, and I knew I wanted one inside of the cabinet so I could hide the microwave, so I used a spade bit to cut a hole in the side of the cabinet and ran the range cord through. Feed two birds with one scone. Love it.
At this point, I had been washing dishes (and draining pasta, and washing vegetables) in the bathtub for a month. I was starting to feel like Kramer. I did my best to remind myself that this really wasn’t the greatest of hardships, but my back…my back was very angry and grouchy about the whole situation. I started to feel like this was just how it was going to be forever. I thought about Little House On the Prairie and tried to channel Ma instead of Nellie. I love Nellie.
But we’re getting there! A functional kitchen is definitely in sight!
Kitchen recap:
✚ It’s time to meet the kitchen!
✚ Kitchen planning!
✚ Kitchen cabinets: Prep + painting.
✚ Painting and stenciling the kitchen floor.
✚ Kitchen countertop demolition.
✚ Painting the kitchen’s steel casement window.

25 Comments
I know the point of this post is cabinets but I’m distracted by the EXCELLENT phrase “feed two birds with one scone”!
Cathy – I am too — haha (and the excellent plug)
Haha!! I really hate the real expression, and this is one I’ve seen used before. I wish I could say I made it up!
Beautiful result with both the cabinets and the strategically located plug! We didn’t have dedicated outlets for our range or refrigerator and ended up chiseling out our adobe wall to run new conduit for each appliance, which was an ordeal. I’m totally intrigued about the combination of ready-patch, bondo, wood filler and caulk to get a smooth seem between new and old upper cabinets parts! We’d stagnated on finishing stripping/sanding/painting our kitchen cabinet doors and drawers, and your posts have inspired me to get back at it and I made some good progress over the weekend – thanks! 🙂
I love your attention to detail – I’m so glad you were able to find someone to do proper job with the new cabinets! I adore those rounded corners.
Jessica, I can’t say my caulk, wood filler, Bondo, and Ready-Patch combo was anything other than doing what felt right in the moment, but it worked! I figured using caulk directly inside the gap was the way to go. Then I used Bondo to fill that gap to the surface, but because Bondo won’t adhere properly if it’s “feathered,” I finished off the surface with Ready-Patch. Wood filler just went in the nail/screw holes. If it works, it works!
Such a great job!
xx from Bavaria/Germany, Rena
Hi Anna, wonderful project. The caught me most is your way of photography. Can you guide me regarding the process goes in your mind and heart before, while, and after taking a photograph? How do you process them? Will be thankful. Have a great day ahead.
I’m terrible at taking pictures, so what’s going through my mind is usually along the lines of “Shit, I really shouldn’t be using my iPhone for this, because it’s going to look really grainy on the blog.” But thank you!
So happy that Gennine recommended Manuel to you and that you were able to work so well together. He really took the time to get it as you wanted it, and it looks fabulous!!
My favorite part was the reference back to « the olden days » when we could high five! Hee hee
That’s so satisfying. 🙂
Does the tile run under the original cabinets too? And what are those little bump-outs on the upper shelves on the front edge of the shelf – are they just decorative or functional?
The tile is probably only about 10 years old (I painted it to look like cement tiles in a previous post), so no, it doesn’t run under the cabinets.
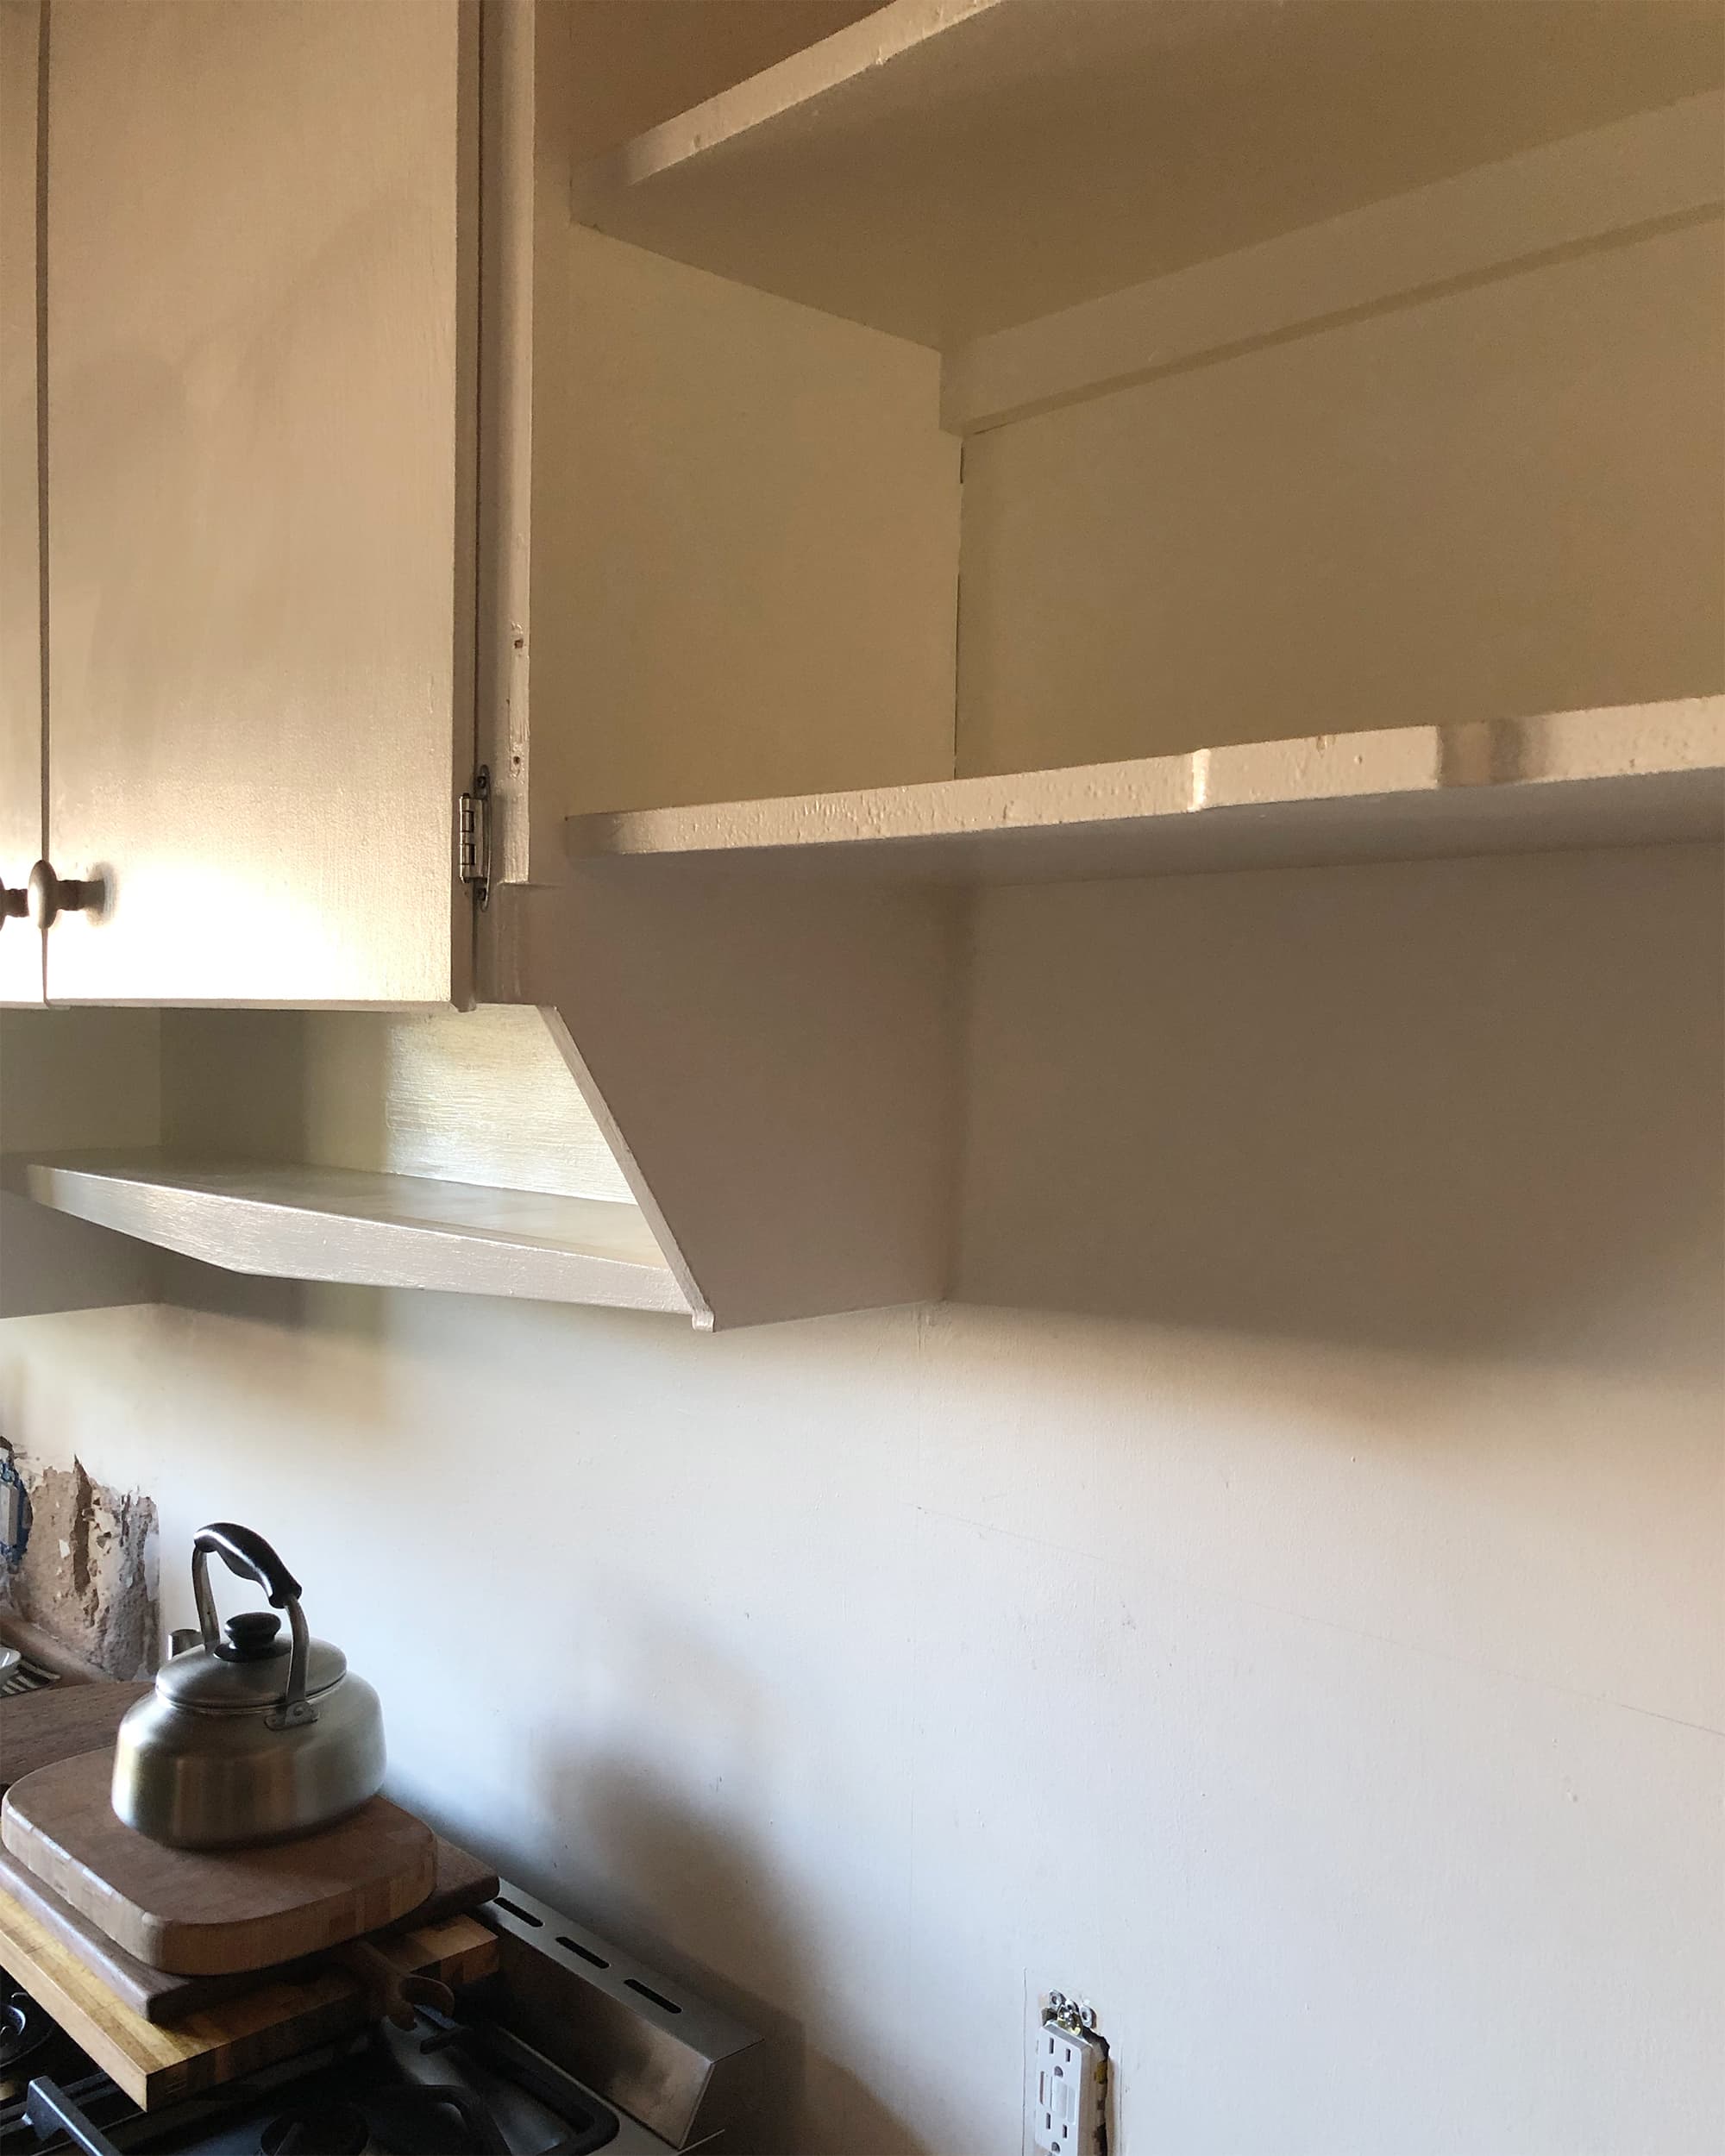
Oh! The little curve on the front of the shelves is just to stop the doors from going inward when you close them.
I’m now obsessed with the rounded corners on the lower cabinets, but I’m also puzzled as I just can’t figure it out. Are the sides made of two pieces of plywood so that the front has something to attach to, to leave the gap for the quarter round on the outside corner? Or are there angle brackets inside holding the front and side together or…?
No, the sides are just single pieces of plywood. That second inner piece is just a 3” strip at the top for added structure. The shelf is the answer—it’s not removable; it’s a structural part of the cabinet. Both the sides and the front frame are attached to the shelf, and to the “floor” of the cabinet.
Ah ok, thanks!
That little curve detail to stop the doors is so sweet and also brilliantly functional. Shit is just not made that way now…
I love the rounded corners! My 1954 house has rounded door jambs, and I’ve been trying to figure out how to honor that detail when a new baseboard meets it. Rounding the baseboard edge as well might be the solution!
I just love little details like that!
I love that you are figuring out how to keep so much of the original but change it to make it work better for now! It’s looking so good! I’m interested to see what you do with the gap between the new stove/range and the cabinets….
Re: your outlet hack: good job! I have been known to drill holes through entire walls so I can feed extension cords and/or lighting into closets. I also have some feeding through cabinets too. The lengths I go through to avoid visible cords!
If you have outlets inside cabinets, you can (caefully) drape an extension cord into a drawer above. Now you have a hidden charging station!
Fantastic progress. Happy to see you blogging again. Are you going to fill the gaps between the range and the cabinets, or leave it floating?
Yo hablo Español 🙂
SO glad Manuel was able to git it done!
Amazing!
Hi, another house like yours!
https://www.apartmenttherapy.com/desert-modern-new-mexico-house-remodel-ideas-36746501
That’s actually Spanish Mission style—a lot more like my previous house in Albuquerque than where I live now (which is Pueblo Revival/Santa Fe-style). See the moldings, the archways, and plaster ceilings? I’ve got none of that. In Pueblo Revival houses, you’ll see Pueblo fireplaces, vigas on the ceilings (those are the support “logs”), and no moldings around windows or doors. I don’t see a photo of the exterior, but I’m willing to bet it’s got terracotta tiles on the roof. So yes, southwestern vernacular for sure, but a different style from mine. 😉