
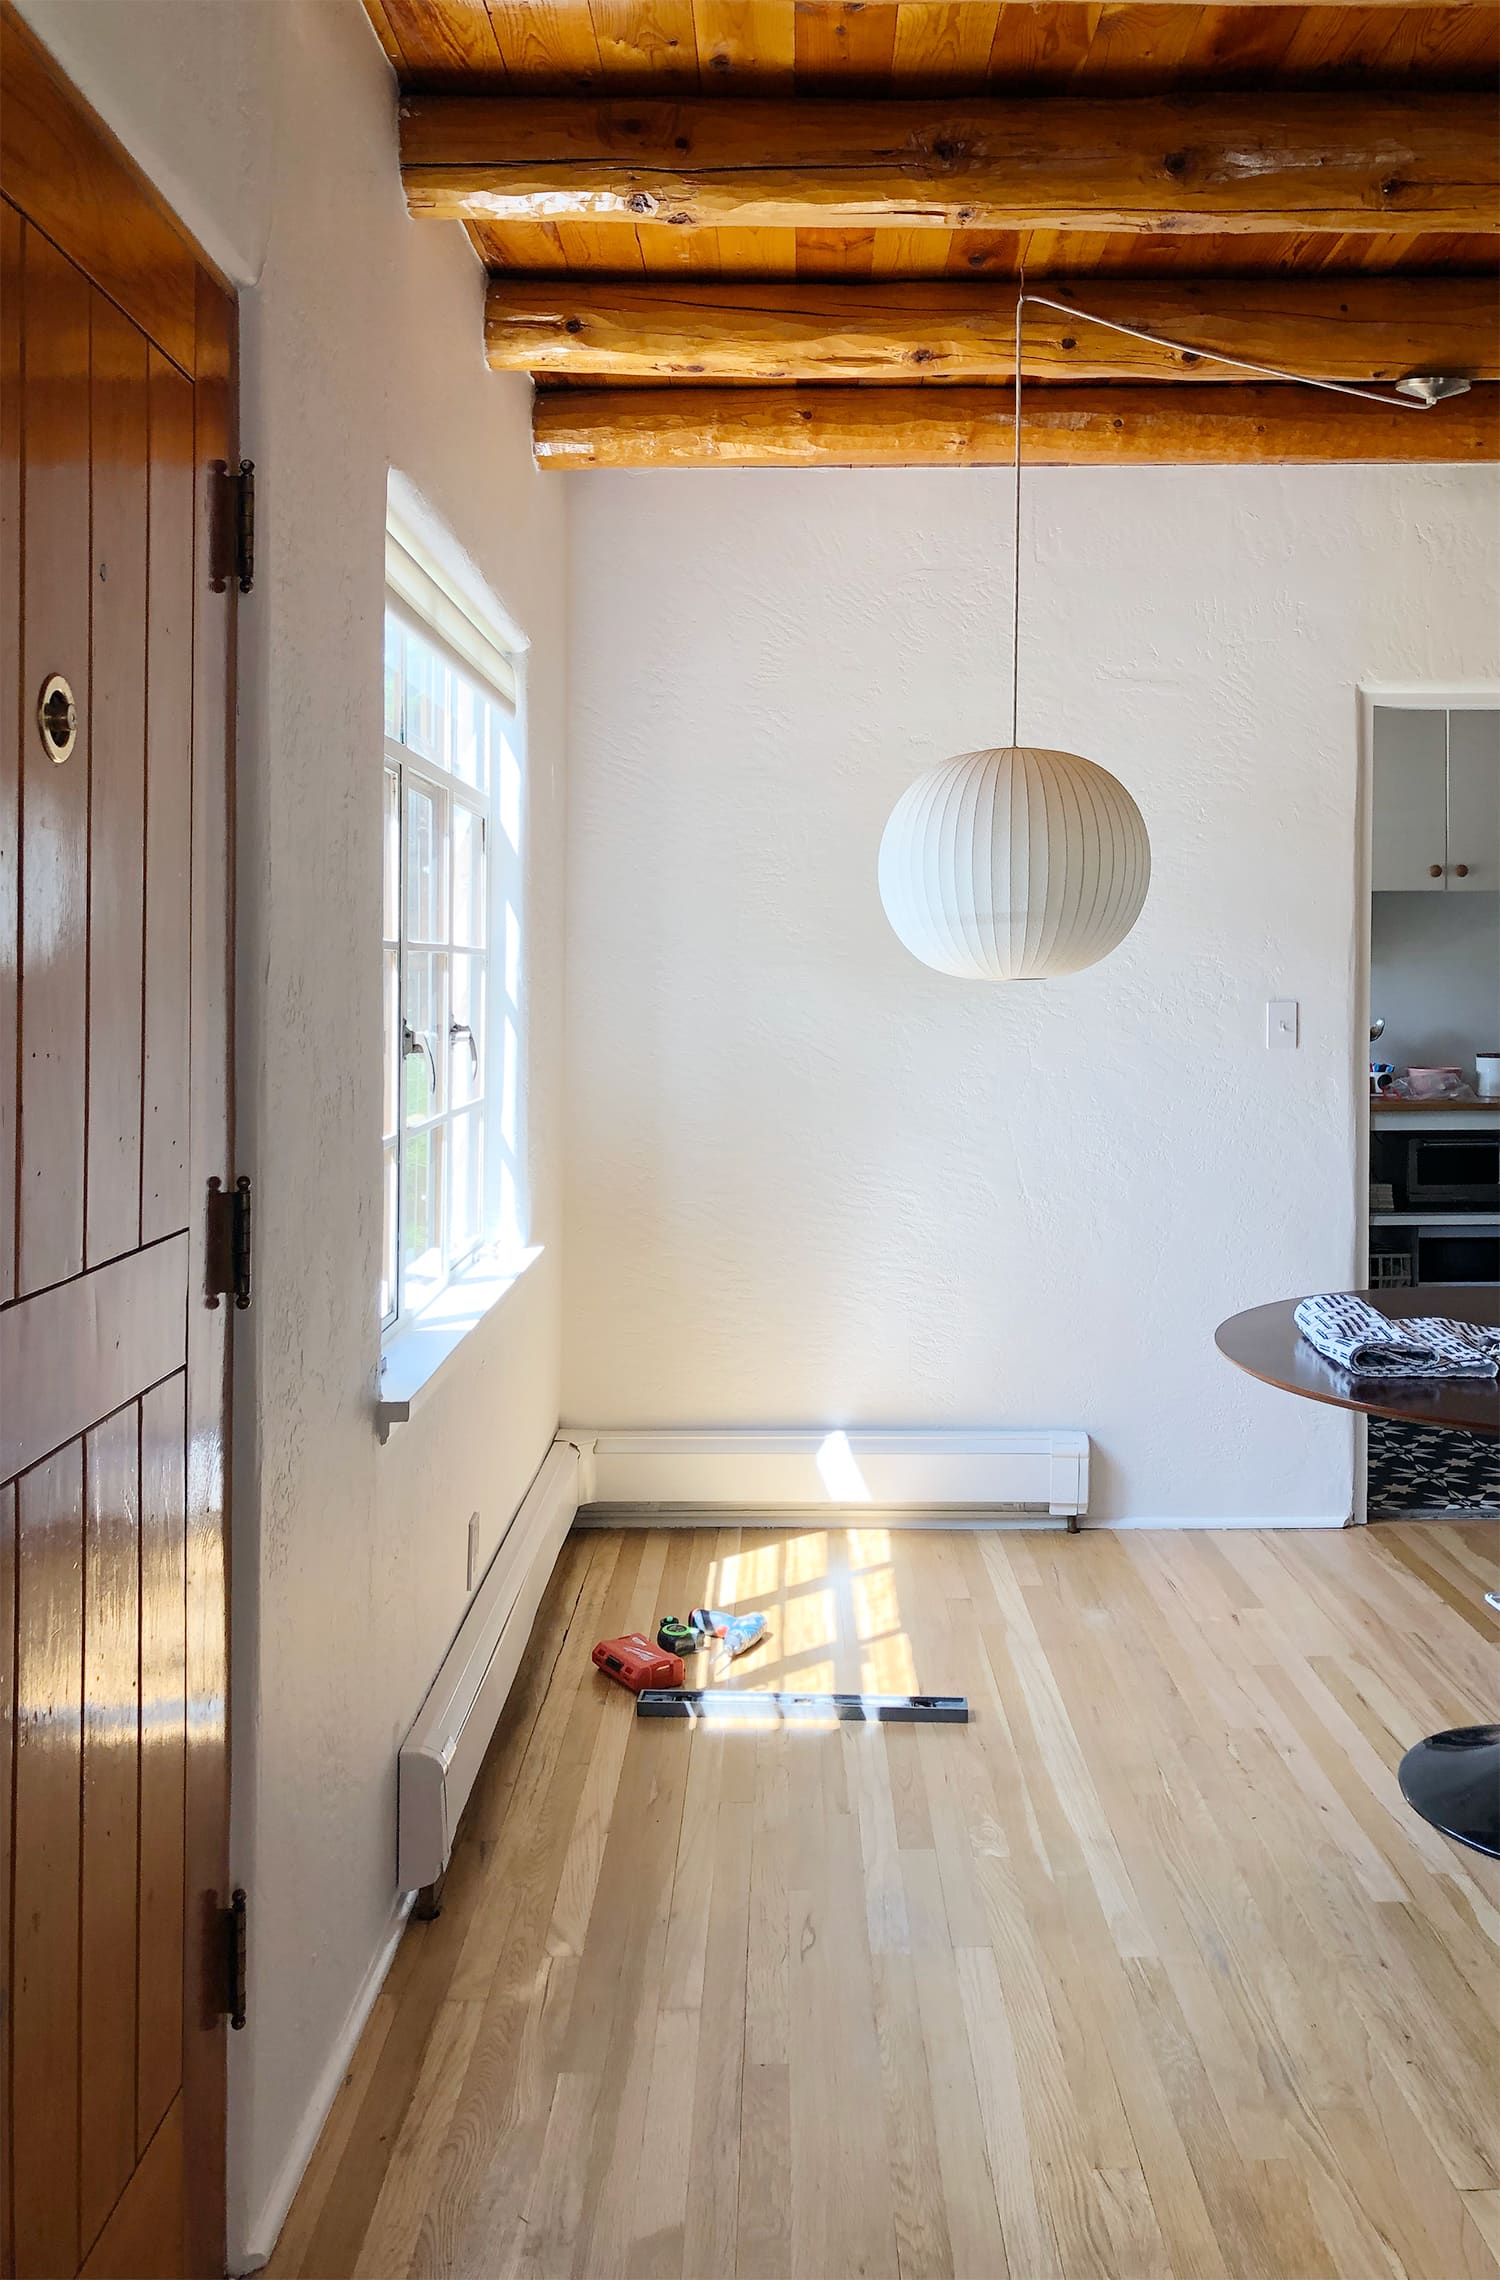
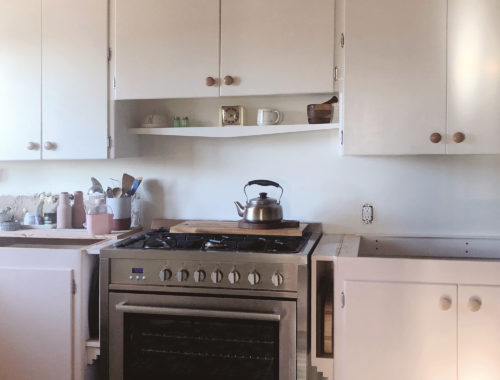
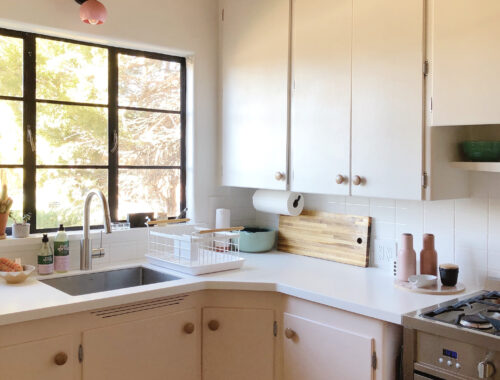
As I alluded to in my previous post about our small dining room area, the clear solution to creating a defined, purposeful space that feels separate from the living room area (despite them being fully open to each other as one large room) was to build a floating banquette in the corner. I wanted the banquette to also serve as a way to at least distract from the baseboard radiators beneath it, while not interfering with their functionality and purpose.
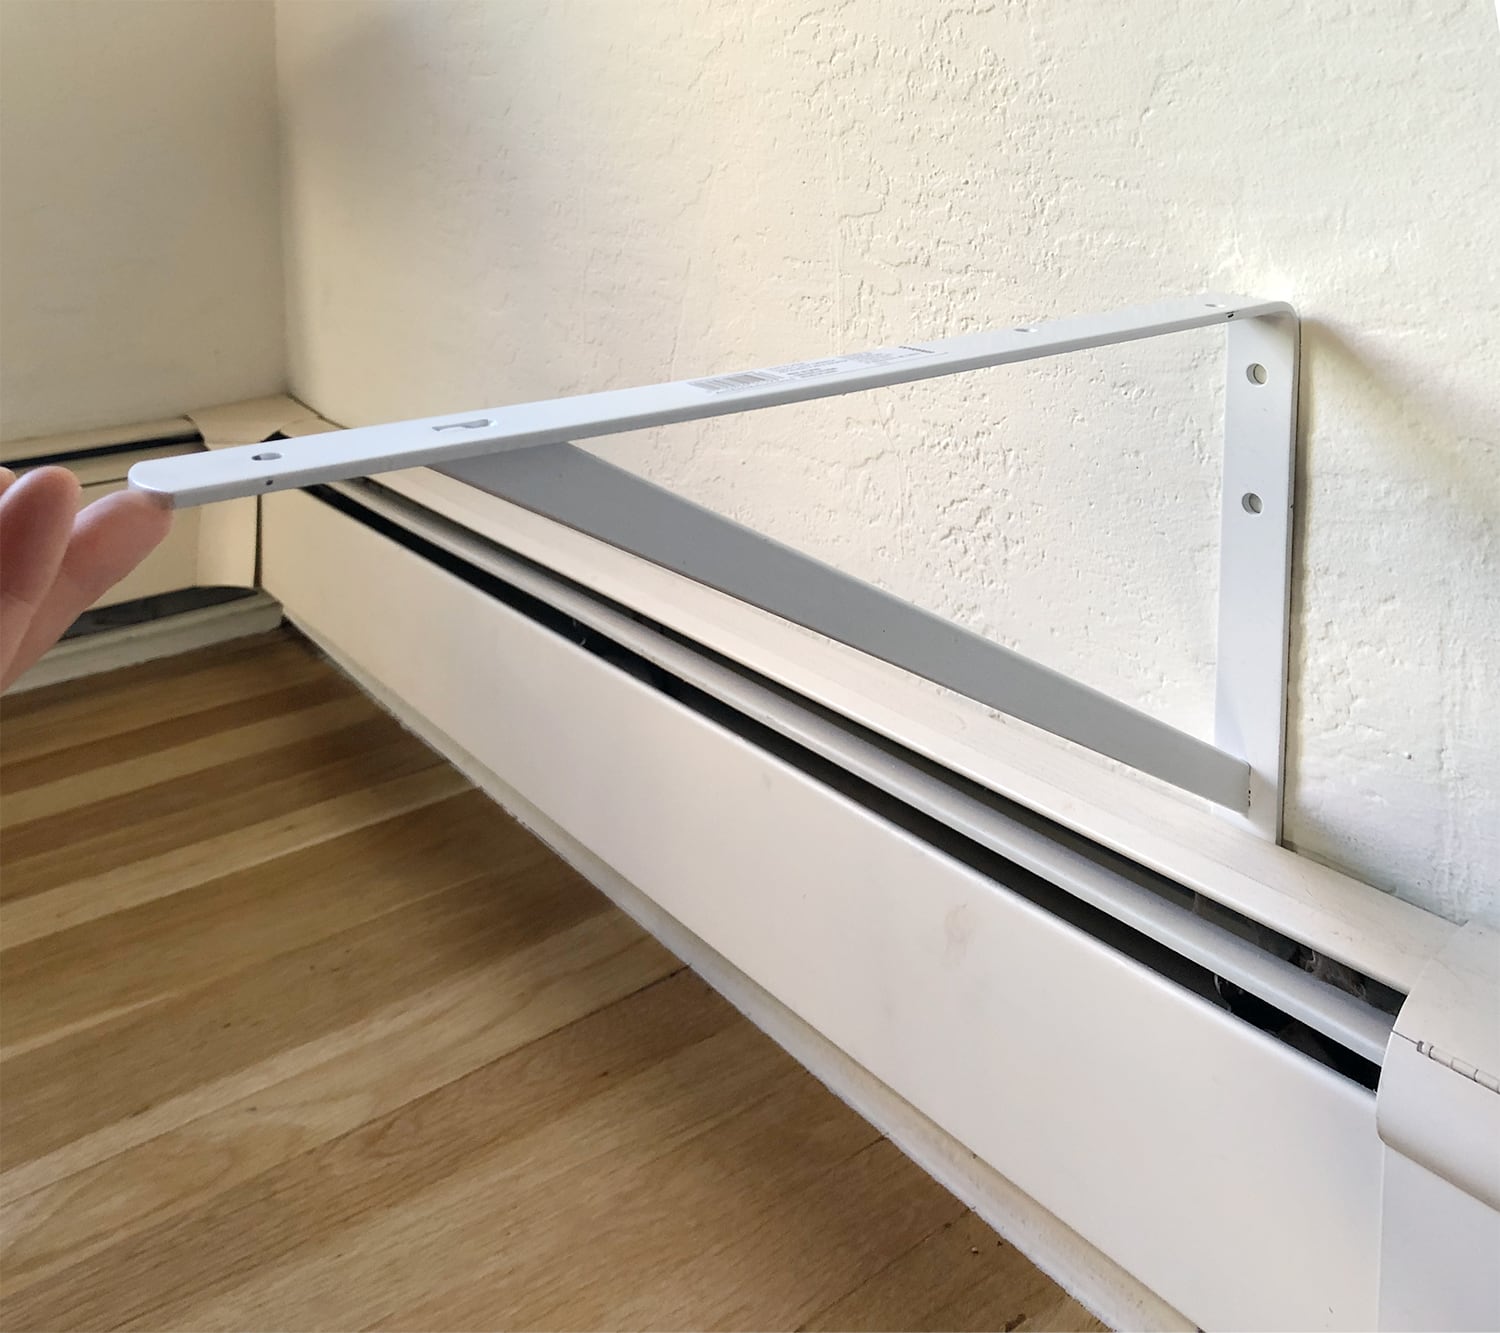
Having discovered that Lowe’s carries a ~16″ industrial shelving bracket with a rear flange that’s just able to slip behind the baseboard radiators, I figured out how many I’d need to buy to support both sides of the banquette. Each pair of brackets is rated to support 1000 pounds, and 36″ of 3/4″ plywood can support 50 pounds, and…you know what? That is TOO MUCH MATH for me to deal with, so I decided that the safest route to take was one of possible overkill: Attach a bracket to every stud.
Then began the always-tedious process of figuring out where the studs are, which involved a Studpop magnetic stud finder, a tape measure, a drill, and perseverance. In older houses with walls made from materials that aren’t drywall, there’s just no easy trick to finding studs.
Ten brackets turned out to be the magic number. Naturally, Lowe’s only had three in stock, so I had to order them. This was a fortunate delay, because it occurred to me while waiting that I was probably going to want to put seat cushions on the banquette, and that it was probably going to be expensive to have them custom made to fit.
Cushions first, plans second?
My brain did the thing where it comes up with an idea, and I decided it might be better to work backwards from the cushions when figuring out the exact measurements of the banquette. In other words, look for pre-made bench cushions, and take it from there.
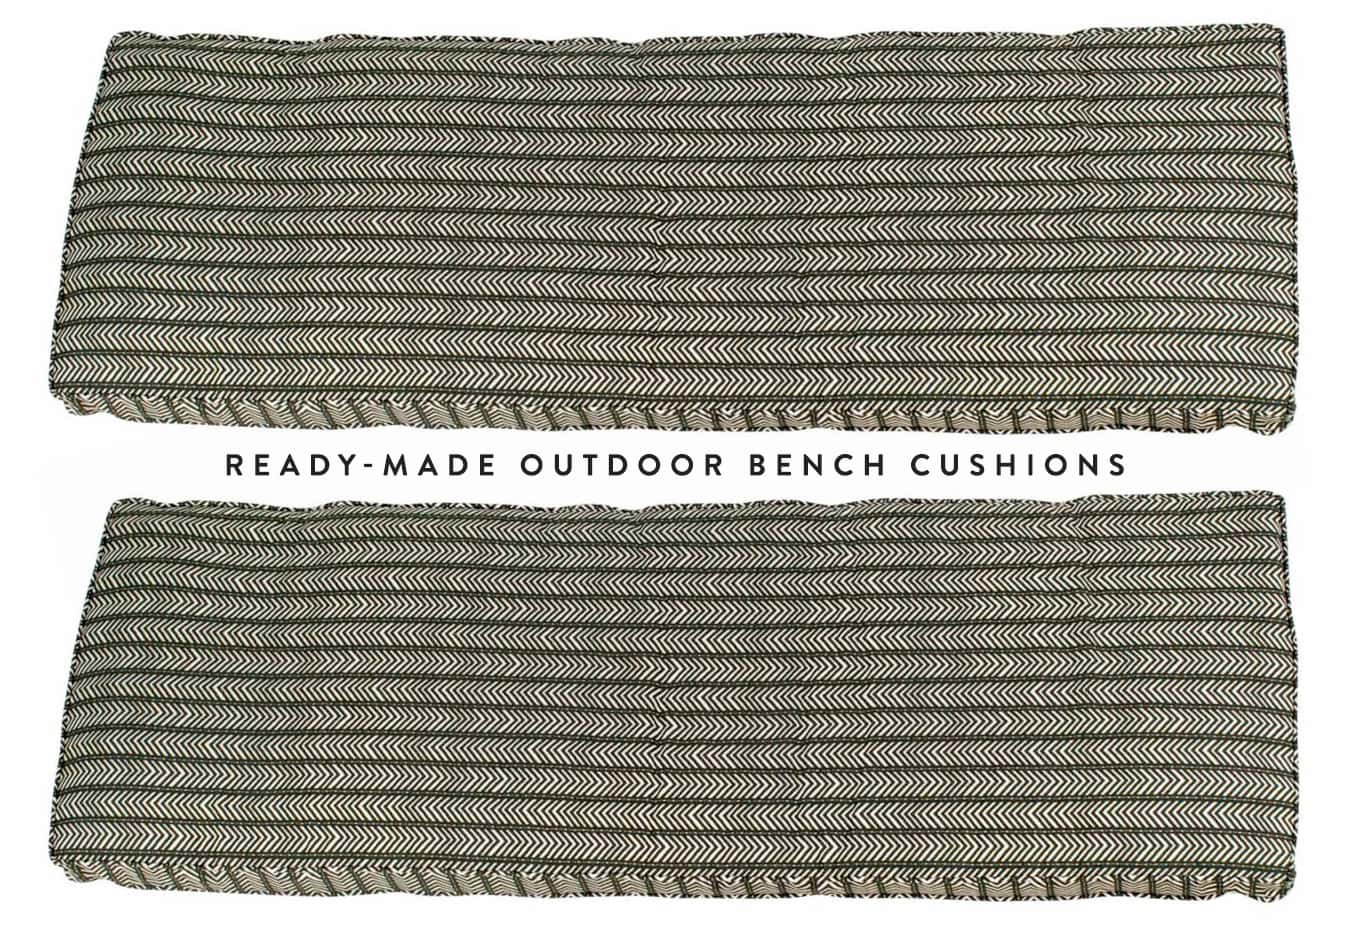
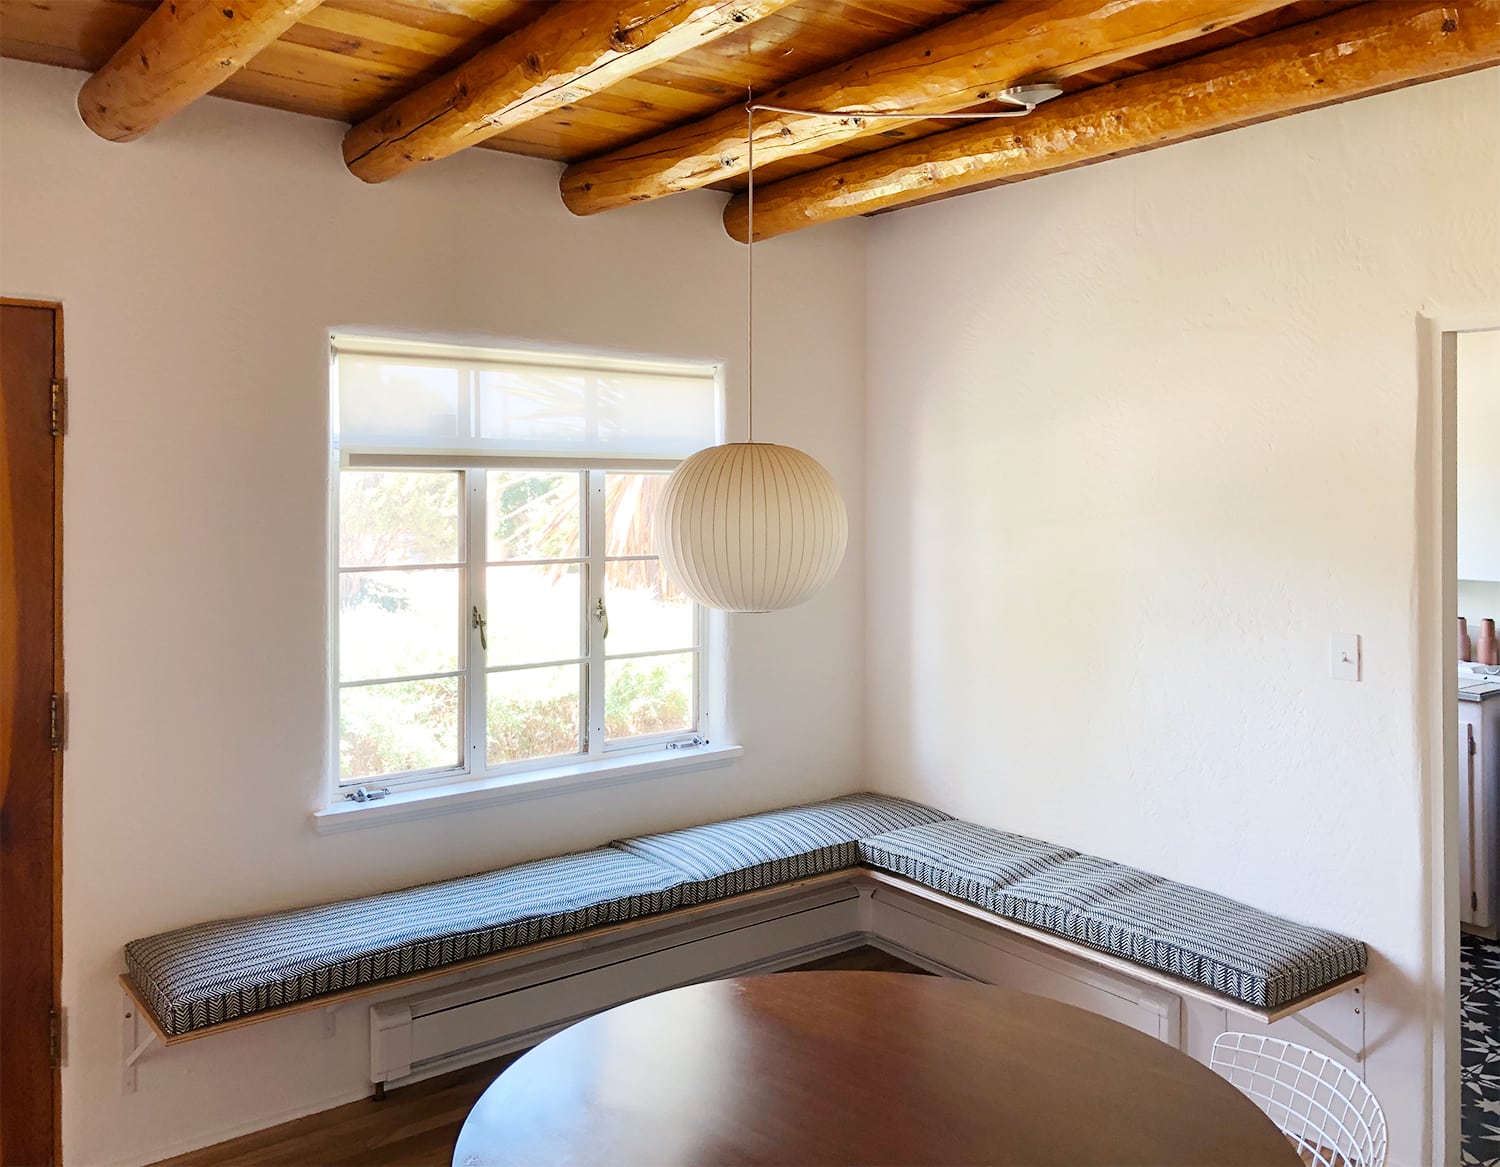
I found these 18″ deep outdoor bench cushions on Hayneedle (they’re sold out now), and they came in both 45″ and 55″ lengths. This was miracle #2 in the Anna Builds a Banquette story (the first being the Miracle of the Bracket)—by using two of the shorter cushions and one of the longer, I could build the banquette at just about the EXACT size I was envisioning. Truly amazing.
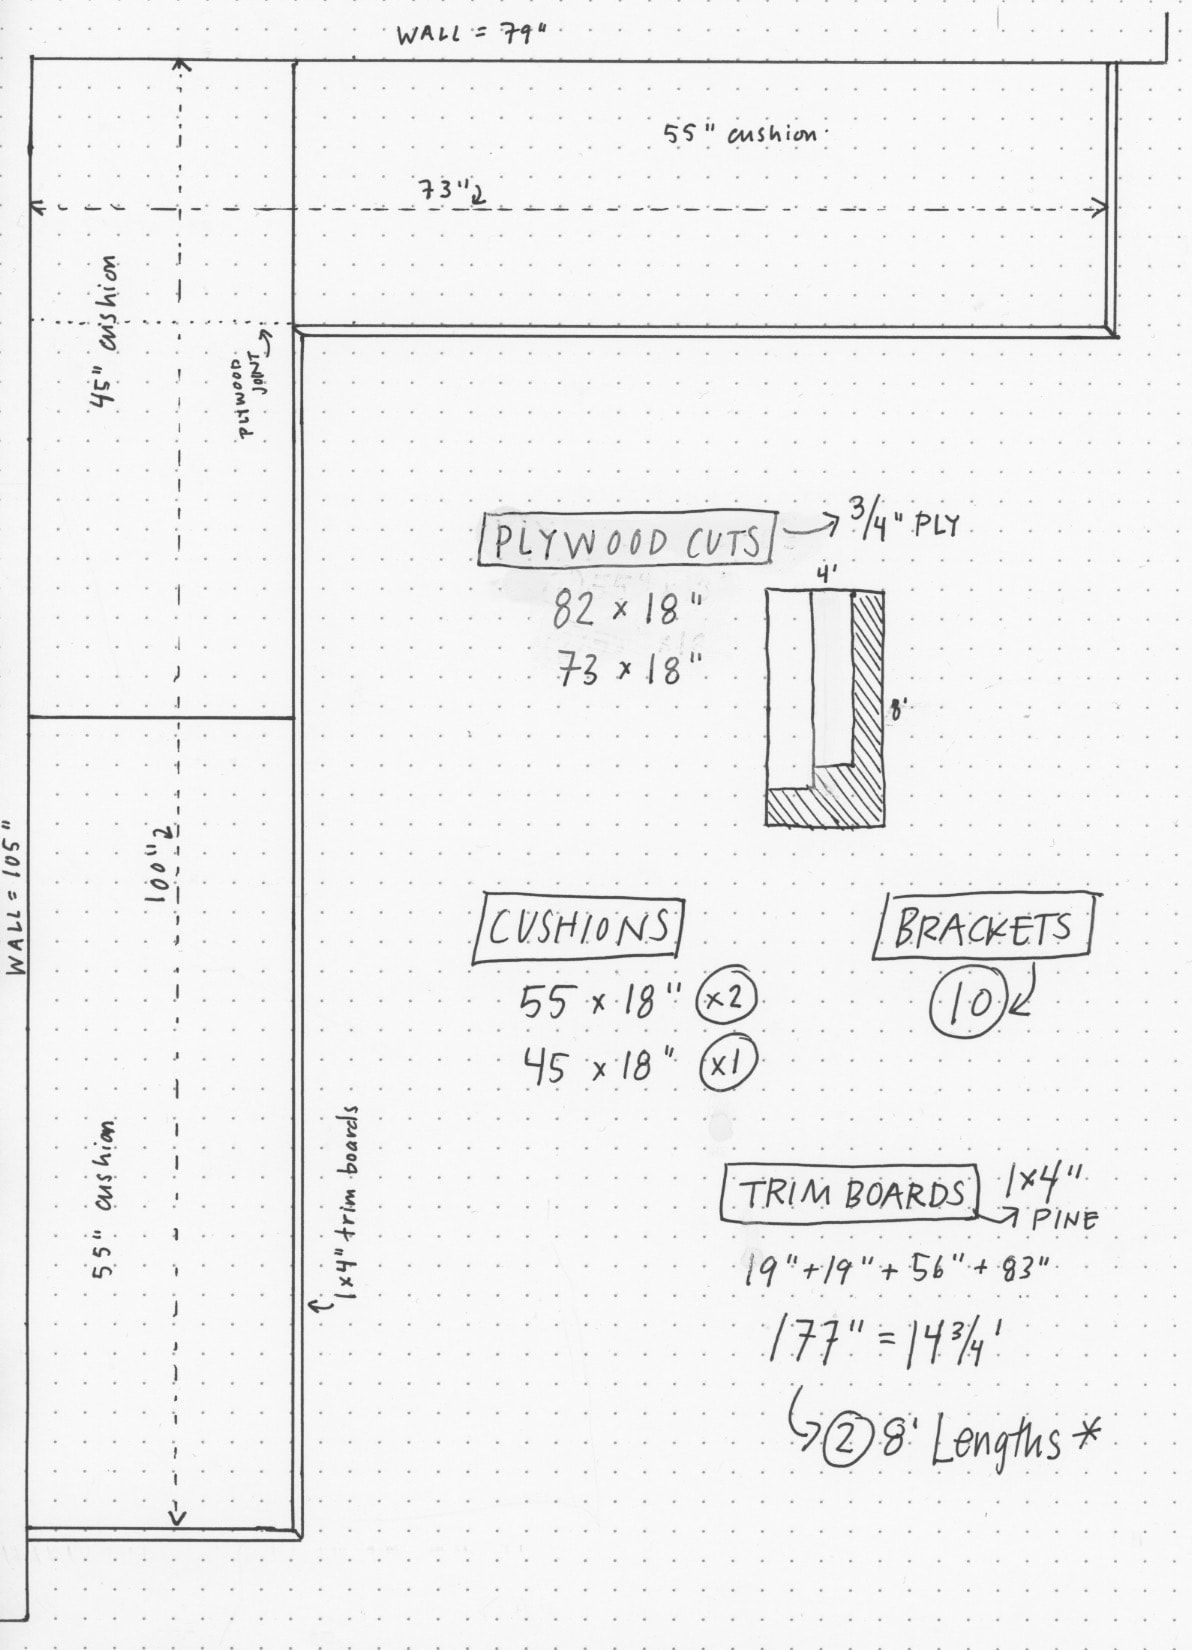
Plans! Measurements! Materials!
Why yes, I did just draw this five minutes ago because I can’t find the version I drew when I was actually planning the banquette, which is probably crumpled up in a tool bin somewhere.
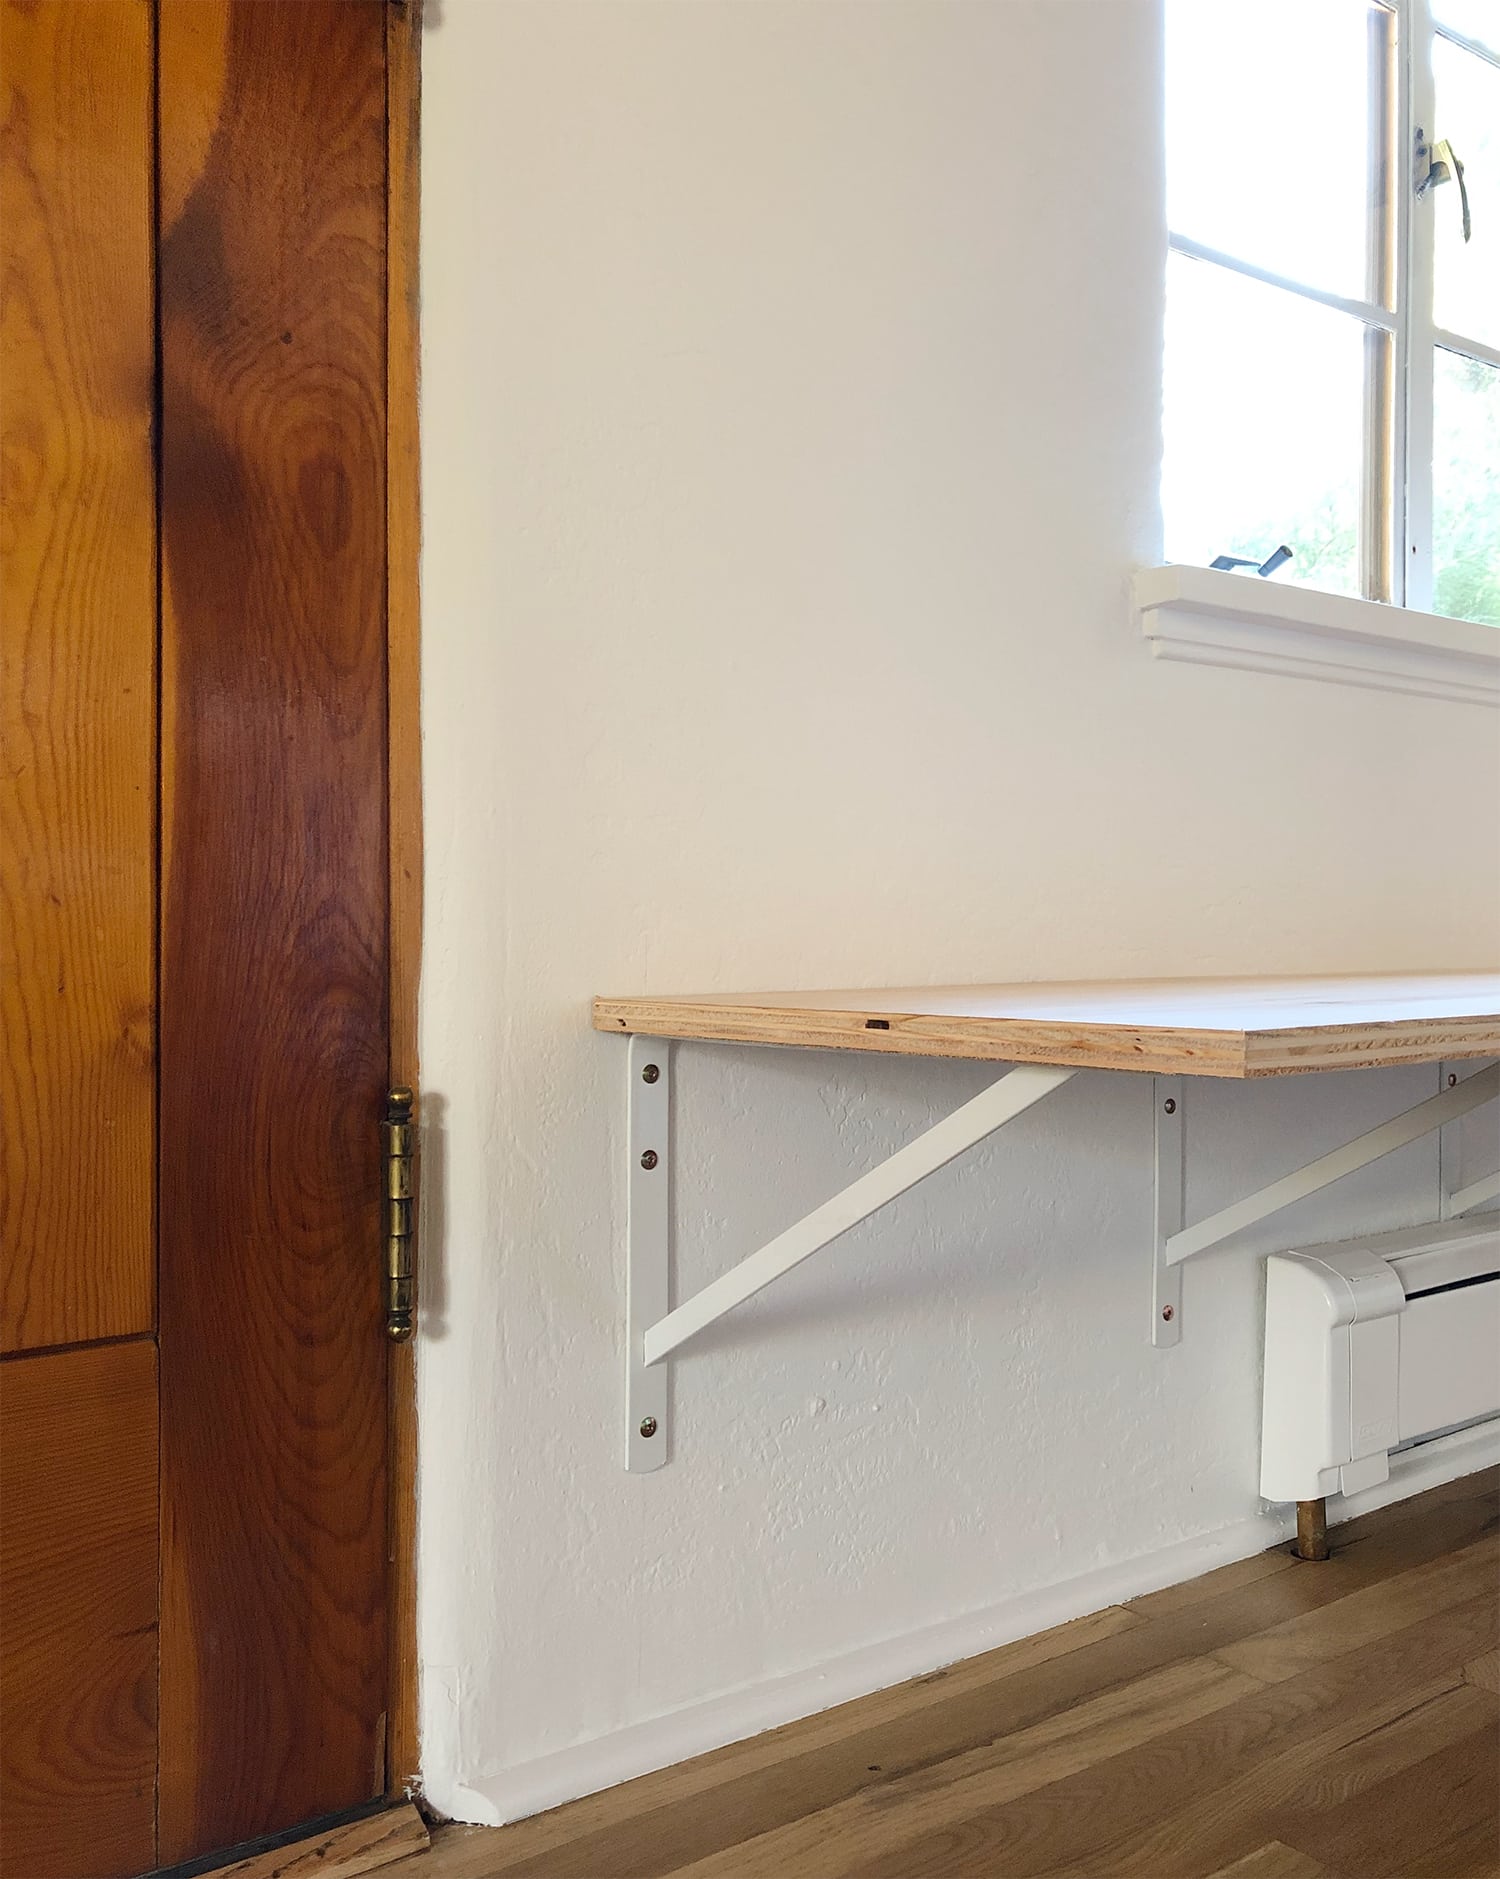
I had Lowe’s cut the 3/4″ plywood into two 18×96″ planks (plus the scrap) because my car isn’t big enough to hold a full sheet. Besides, why not? I don’t have a table saw, and doing a long cut like that is no fun without one. I also picked up a couple of 1×4″ boards to use to trim out the sides of the banquette to give it a bulkier/thicker look.

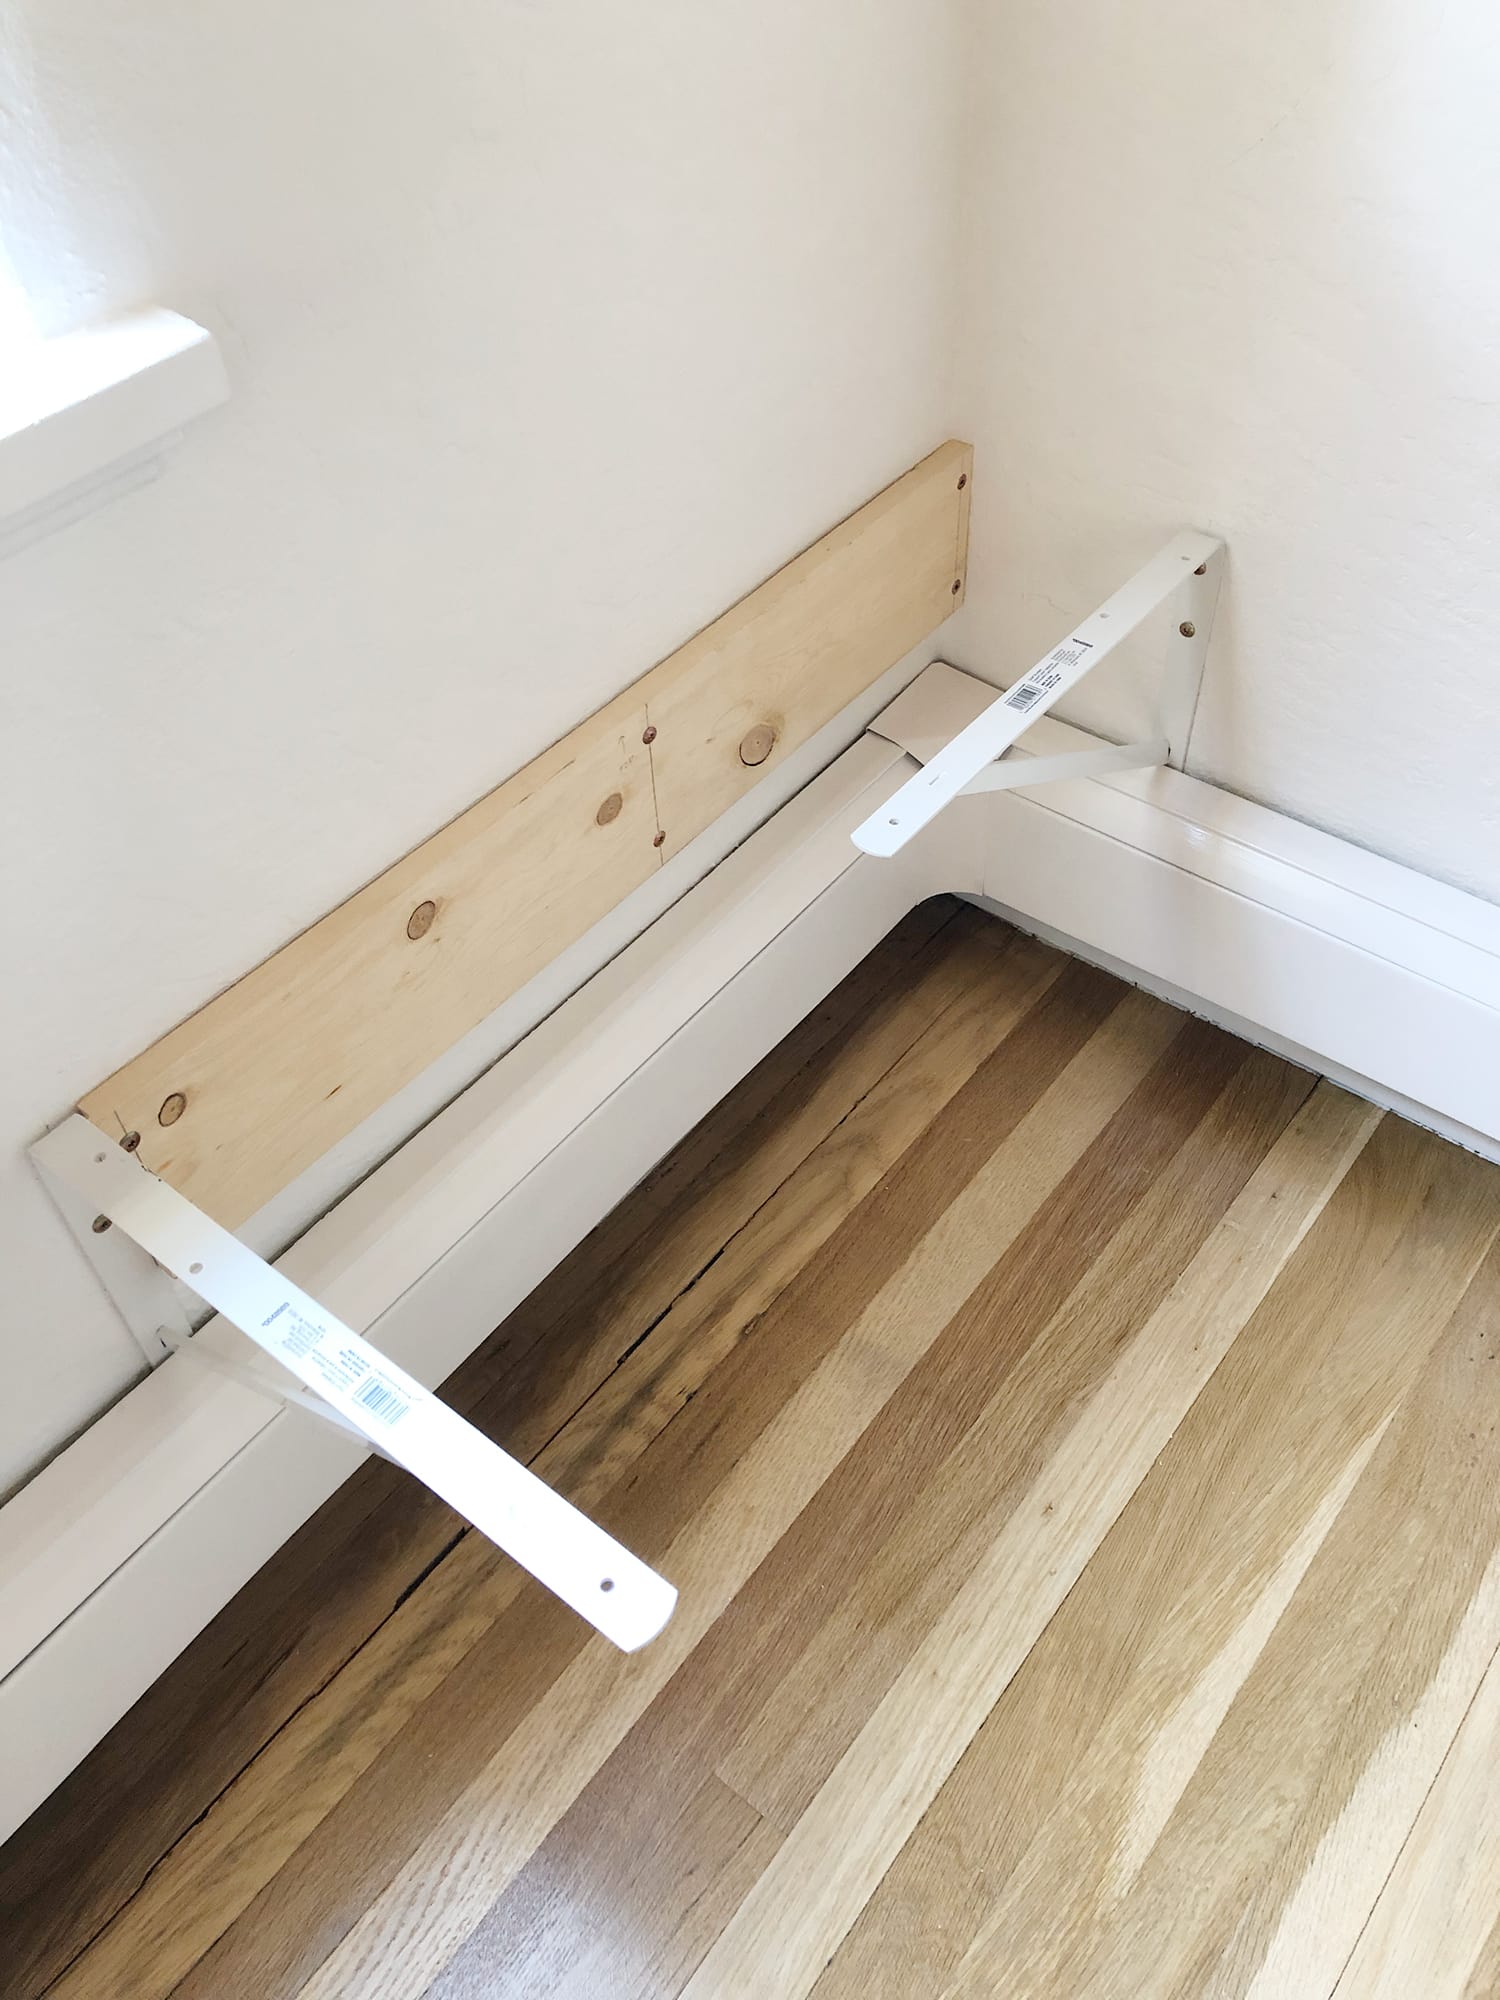
Installing the brackets
I had marked out where the studs were a few weeks prior when figuring out how many brackets to buy, so this part of the project actually went up pretty quickly. I drew a level line at the right height along both walls before I started, so it was just a matter of drilling into the stud, and driving in a 3″ lag screw in the top position, getting the bracket level on the vertical, and then driving in two more screws (except for the brackets above the radiators—those only got two screws, but because they’re all attached to studs, I have no concerns about the strength). As I worked my way around the room, I double-checked the horizontal leveling between each pair of brackets with a scrap 2×4. All ten brackets were up in about an hour, give or take.
When I reached the corner, I added a cleat (also screwed into the studs) for extra support. Possibly unnecessary, but given that it’s the end of the far board and also where the two sides meet, it felt like the smart thing to do.
Plywood time!
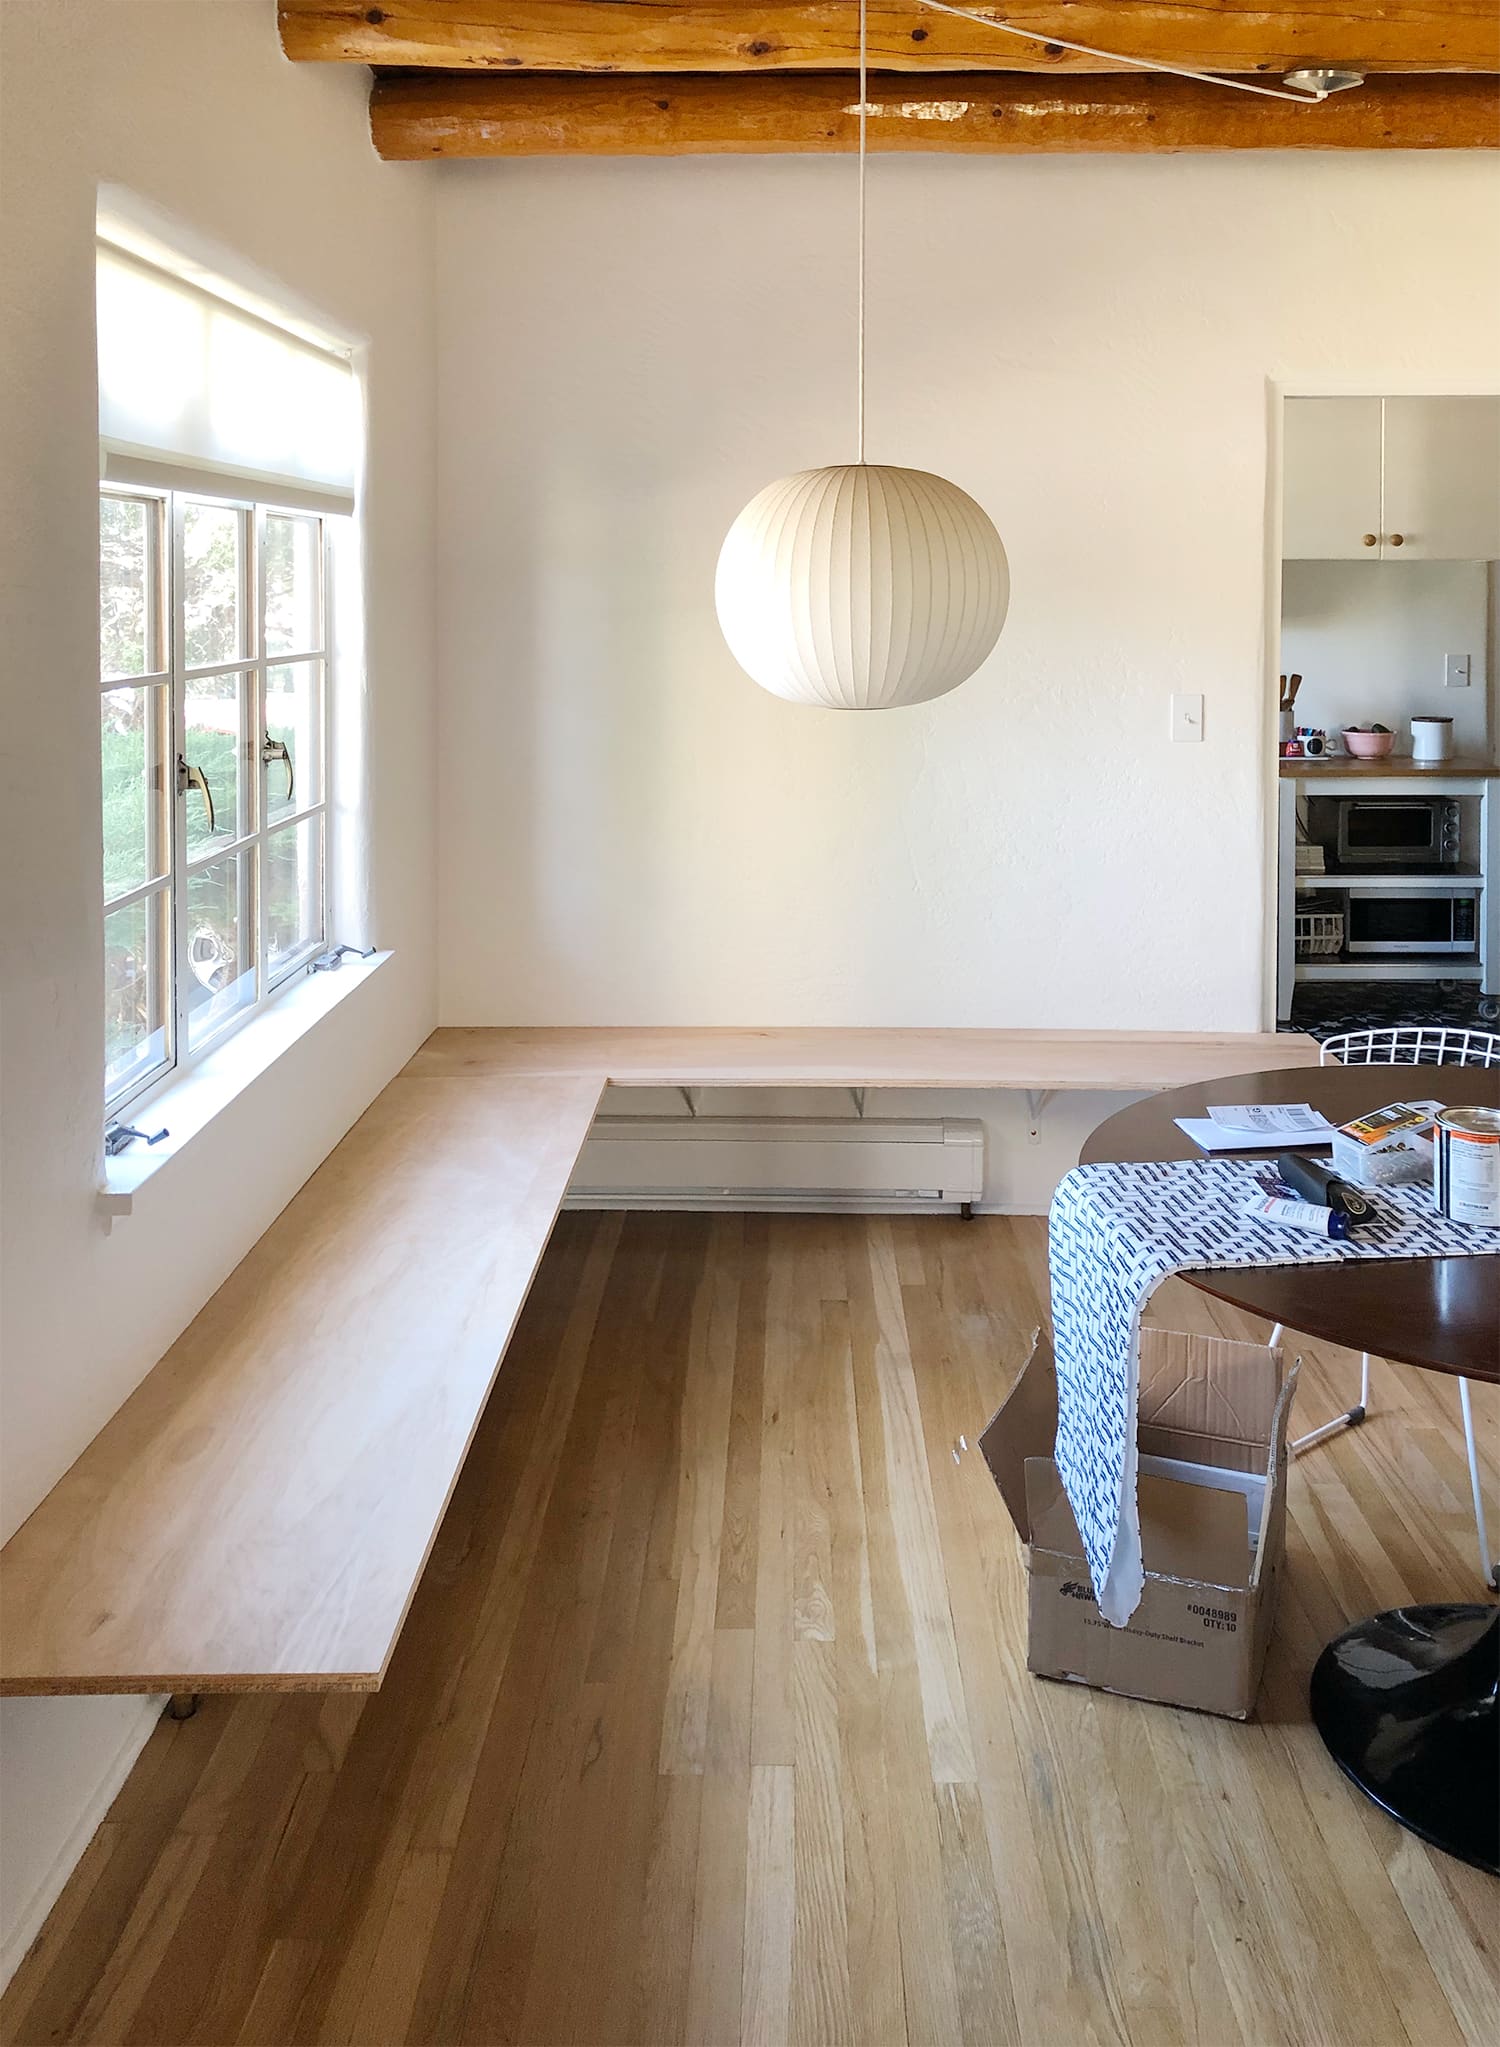
Before cutting the plywood boards in length, I did a dry-fitting. This was in part to test out the stability of the whole thing, but also so I could get the cushions in place and then mark off the cut lines based on the actual cushion and not the measurements on the website. I mean, it’s a cushion. It’s not like it’s going to be EXACTLY 55″ or whatever, and I didn’t want to wind up with any overhang—or any exposed plywood, for that matter.
It was so satisfying to sit down on the plywood and not feel any movement. Super solid!

Almost there…
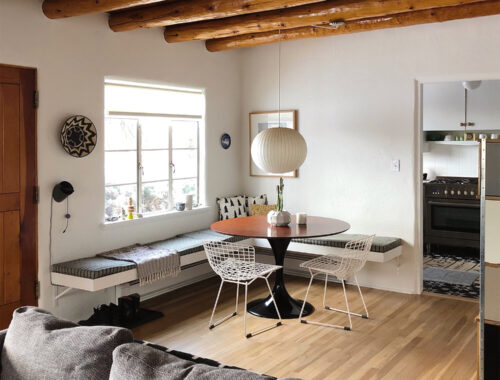
How about that?? Plywood cut to fit and screwed down to the brackets, cushions in place and looking swell. Trim boards mitered and attached (I nailed them to the edges of the plywood, then added L-brackets underneath for extra strength and stability) and painted white.
All that’s left is to get the rest of the room looking cute! That’s coming in the next (and final) installment of this series. I swear I’m not intentionally dragging this out, but I’m trying to be conscious of not posting TOO much all at once for the sake of attention spans (mine and yours), and also to be sure I’m actually taking the time to convey the entire process in detail.
If you have any questions, please feel free to ask! This whole project was really easy once I figured out the specifics, and it’s definitely something you can handle yourself if you have a spot in your house for your very own floating banquette.
Dining room update:
✚ Read about my plans for the dining room here!
✚ See the finished dining room here!
36 Comments
I love it! It fits perfectly in the space, looks great, and doesn’t take up too much visual room.
Smart to work from cushion backwards! They can be expensive or a pain to make. Love your updates!
You’re so talented and resourceful, thank you for sharing
You are most welcome!
How does the depth actually feel to sit there? Does your back bump the wall?
With the trim piece it’s almost 19” deep, which is more than the average depth of a chair seat (16”). It feels like sitting on any other chair/bench, really!
Is this for sitting? I’m wondering how you account for the weight? Thanks!
Nice benches! What size Nelson Bubble Lamp do you have. I have a similar sized space and am torn between the small and medium. I like the idea of a bigger one but I don’t want it to overwhelm my small space. Thanks!
It’s the medium size! I think the small ones look a little too dinky above a table, regardless of the size of the space. I like Bubble lamps hung on the low side for extra-impact, too. Just high enough that people sitting at the table can see each other.
Thanks, that’s very helpful!
Looks lovely and not too hard to do, very helpful to see the step by step process. Thanks for that!
Love this and can’t wait to see it all designed out! Thanks for sharing your process and, so smart to get the cushions first!
I’m loving this project! So many off the shelf components and clever ideas. Excited for the reveal!
I’ve been mustering up the energy to do the same exact thing to our kitchen, and this is super helpful and inspiring–especially the brackets! I was about to attempting blocking out actual wood benches from scratch but this is much more in line with my skill level. Can’t wait to see what you do with it!
I have been dreaming of a banquette in my kitchen for years and am planning to tackle it this spring. This make it seem totally doable and way more straightforward than what I was planning. All of my kitchen walls are tiled – looks like something they did in the 70s??- so finding studs should be fun. Thanks for the inspo!!
Anna, the joy I felt when I saw you had another post up is hard to describe. Happy New Year to you and thanks for all you do and share.
Awww, Jacqui! Thank you. Happy New Year to you, too.
Marvelous – and the perfect spot for a cat sitting cozily on the cushion warmed by the baseboard heater, but that probably isn’t going to happen. I had a cat once who slept with her head beneath an old-fashioned radiator so that’s why I’m pretty certain this bench is perfect for a cat!
It works for a heat-seeking chihuahua, too!!
This is so inspiring. I just love this solid, simple design solution … and the fabulous cushion fabric … can not wait for the final installment of this. Happy New Year Anna and everyone!
Thanks for the post. So exciting to see you had a post up…. love your get-it-done sensible approach to things. You’re fabulous
Starting with the size of the cushions is a SUPER smart move, and I hope I remember that if I’m ever in a similar situation!!
Oh wow it’s lovely. Like it was always meant to be there. I wish you many happy lounging hours at that window. My DIY New Year project was ordering a skip, filling it with all the junk that was driving me crazy. Then going into town with my son today on the last day before lockdown to replace this one very essential thing he needed for school that was now at the bottom of the skip.
Love it! I was wondering about the cushions since they looked custom, but pre-made is definitely the way to go! And love when an off the shelf bracket solves all your problems. Amazing.
Also, your opening sentence sb – “As I *alluded to…”
Thanks, Meli! That’s what I get for writing a post at night in bed. I fixed it!
Hi Anna, this is so great and we’re about to tackle it (I have the studs all marked out already and am sourcing cushions!) I have one question about how you installed the plywood. How is it actually attached to the brackets? Are there visible screws on the top? nuts and bolts? It’s the only part of the project that I’m finding a little unclear. Any help/advice would be so appreciated!
Hi, Stephanie! There are three screw holes in the top of each bracket. You can see one of the screws securing a bracket to the plywood in the last photo in the post. No screws are visible from the top. Let me know if you have any other questions!
Hello, I have a question. Did you drill a pilot hole for the lag screw? I keep seeing conflicting info on this. Thank you in advance.
Yes, but much smaller than the size of the screw. Really just big enough to situate the head and prevent the stud from splitting.
Can you show images with the trim from the side?
There are photos from all angles in the finished banquette post:
https://doorsixteen.com/2021/01/01/the-finished-dining-room-floating-banquette-details/https://doorsixteen.com/2021/01/01/the-finished-dining-room-floating-banquette-details/
Love this! How many does this comfortably?
How many people, you mean? I have no idea because only two people love here, but maybe six? I can’t imagine ever having more than two guests, so it’s not something I’ve really considered.
That’s a really nice project, thanks for commenting it. You made me laugh at: too much math for me. I felt connected lol!
Hi Anna, Love your design! What height did you place the top of the plywood bench at (before adding the cushion)?
Hi Leslie, the bench height is 18.5″. A bit higher than standard, but that’s as low as the baseboard radiators allowed me to go.