
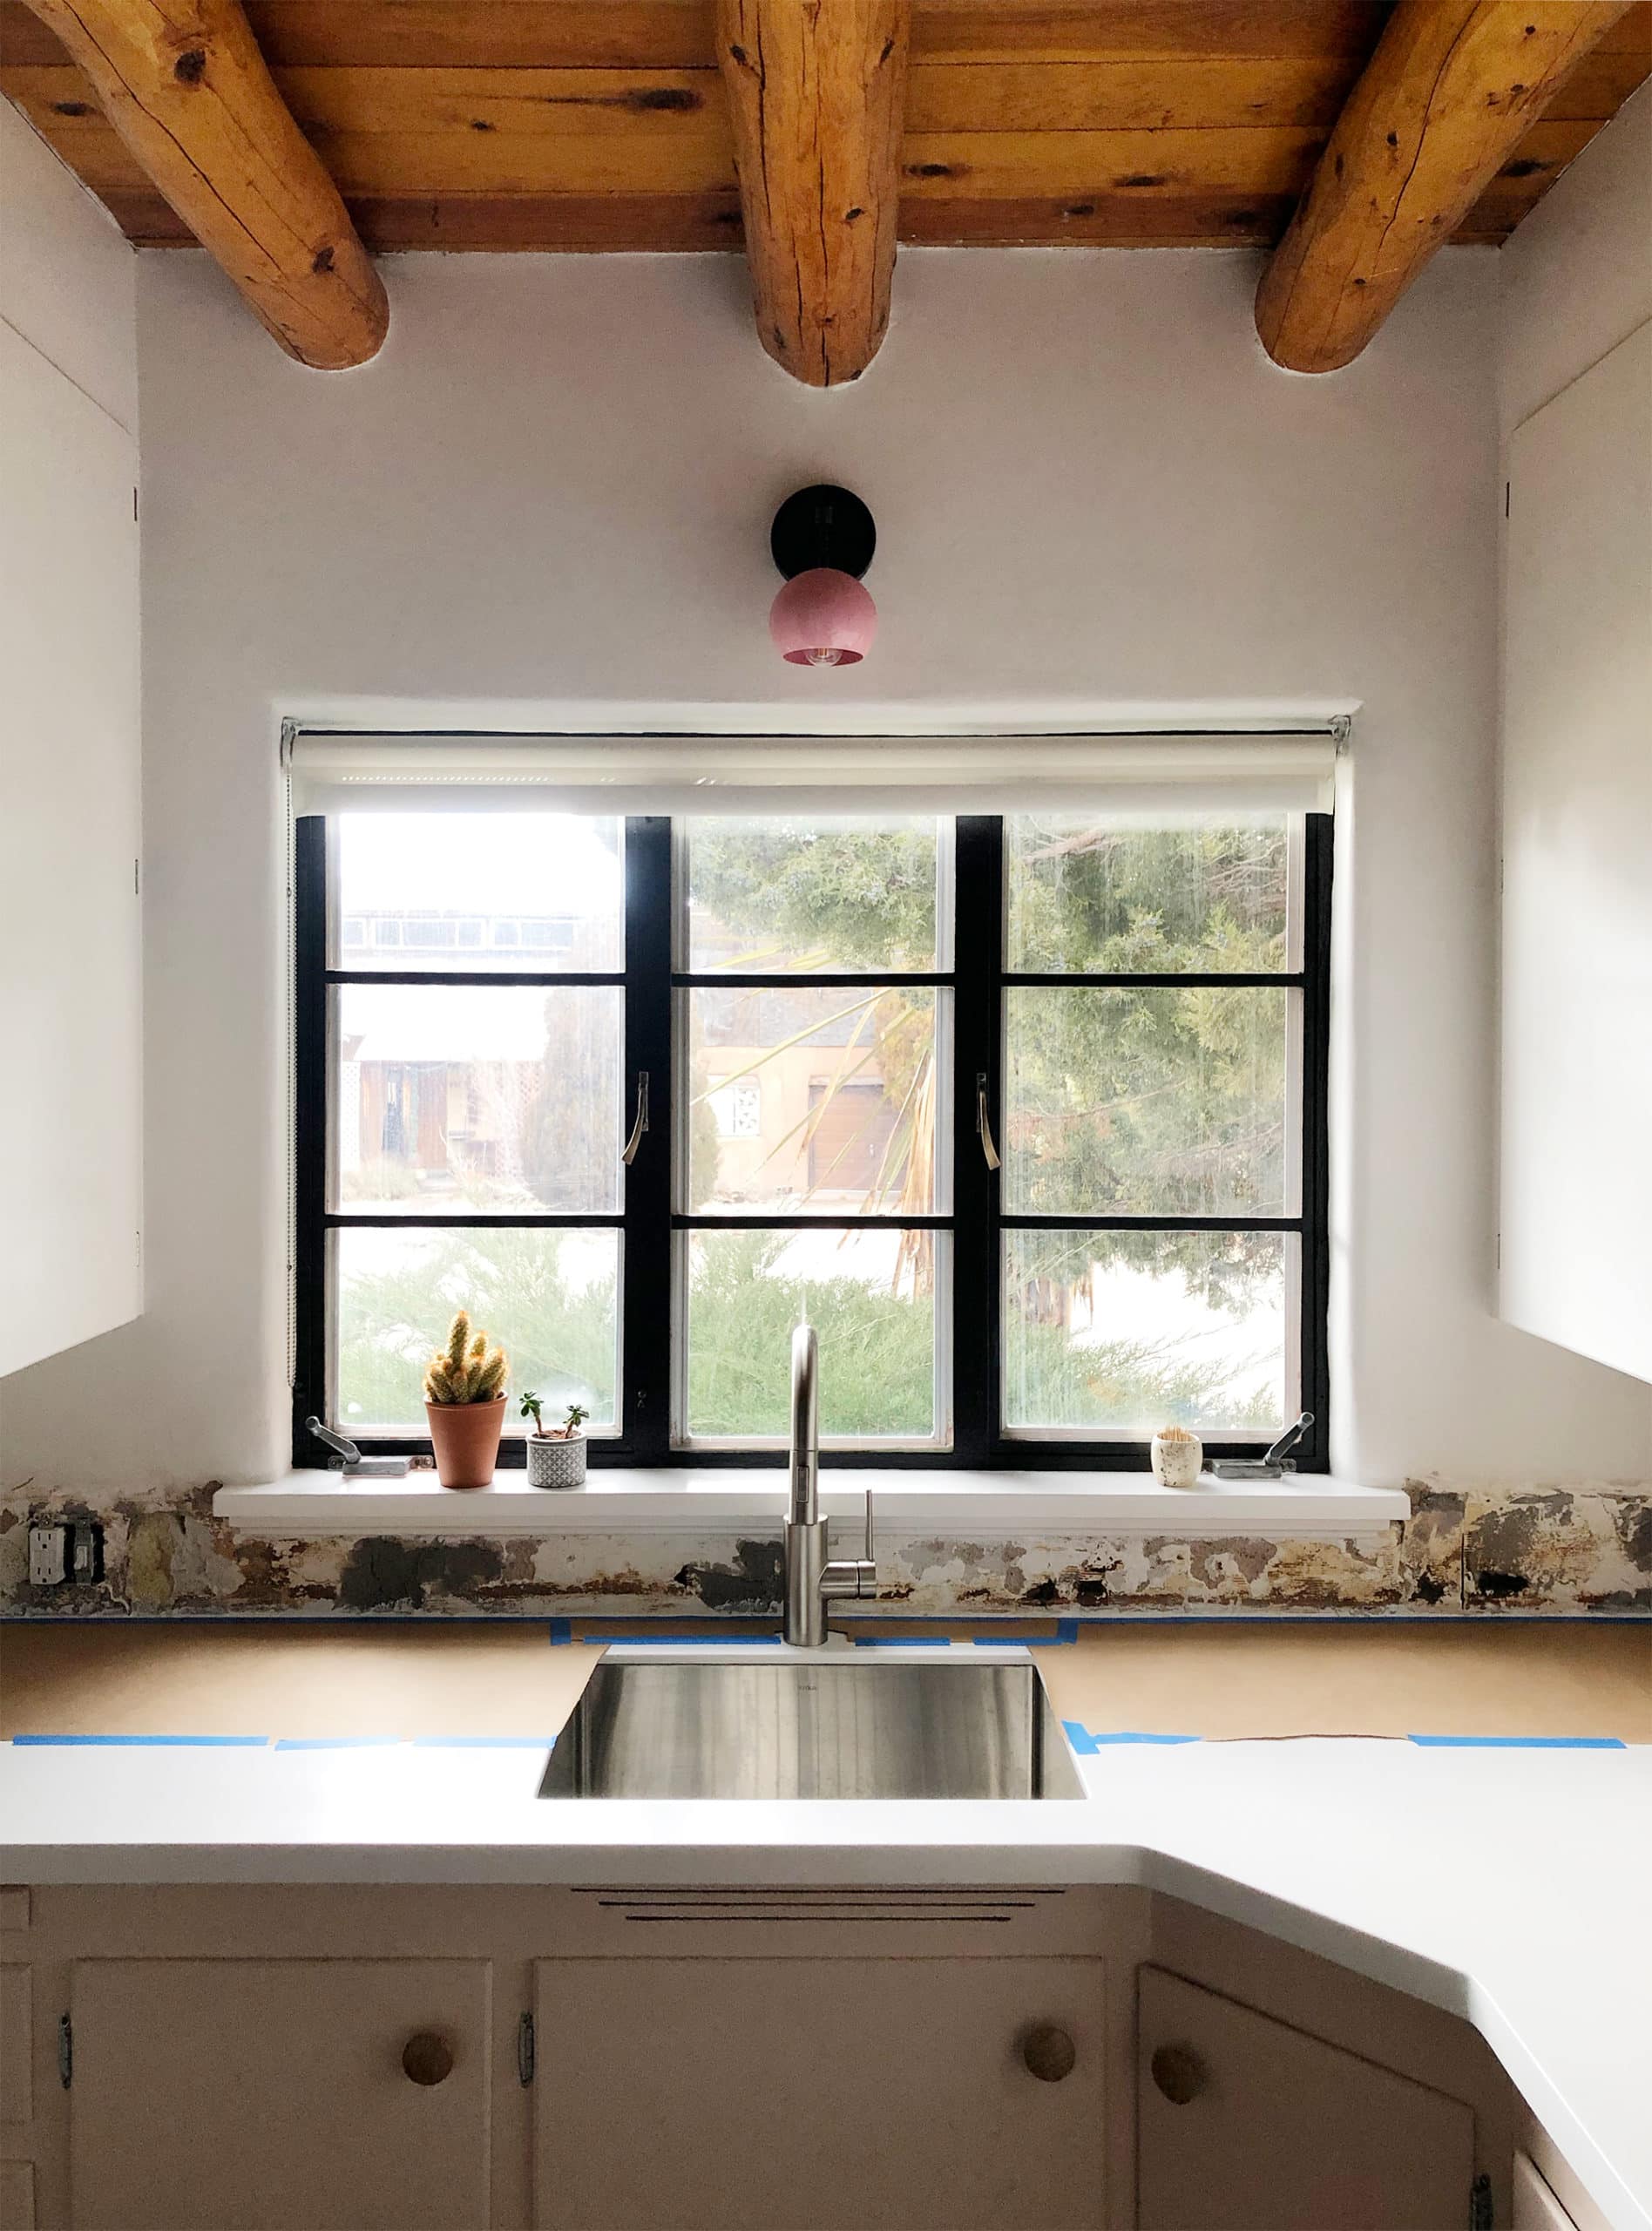
Now, I know what you’re thinking looking at this photo: That backsplash looks great already, Dorfman, why in the world would you want to tile over it? (Am I close?) Well, I’m more of a traditionalist than you might think, and while it’s certainly an adventurous combination of concrete patch, mastic, spray foam insulation, joint compound, and Bondo, I just felt like some good old-fashioned tile might be a little…safer. Back when the kitchen was in its planning stages, my first thought was to use 4″ square white tiles in a grid layout. While this kitchen never had a tiled backsplash (the original backsplash was probably just a low strip of the same linoleum used on the countertops), 4″ square tiles were very popular in the 1950s, and I know they would have looked right, but I just kept feeling like a rectangular proportion was needed.

BMT 4th Ave tiling / Forgotten New York
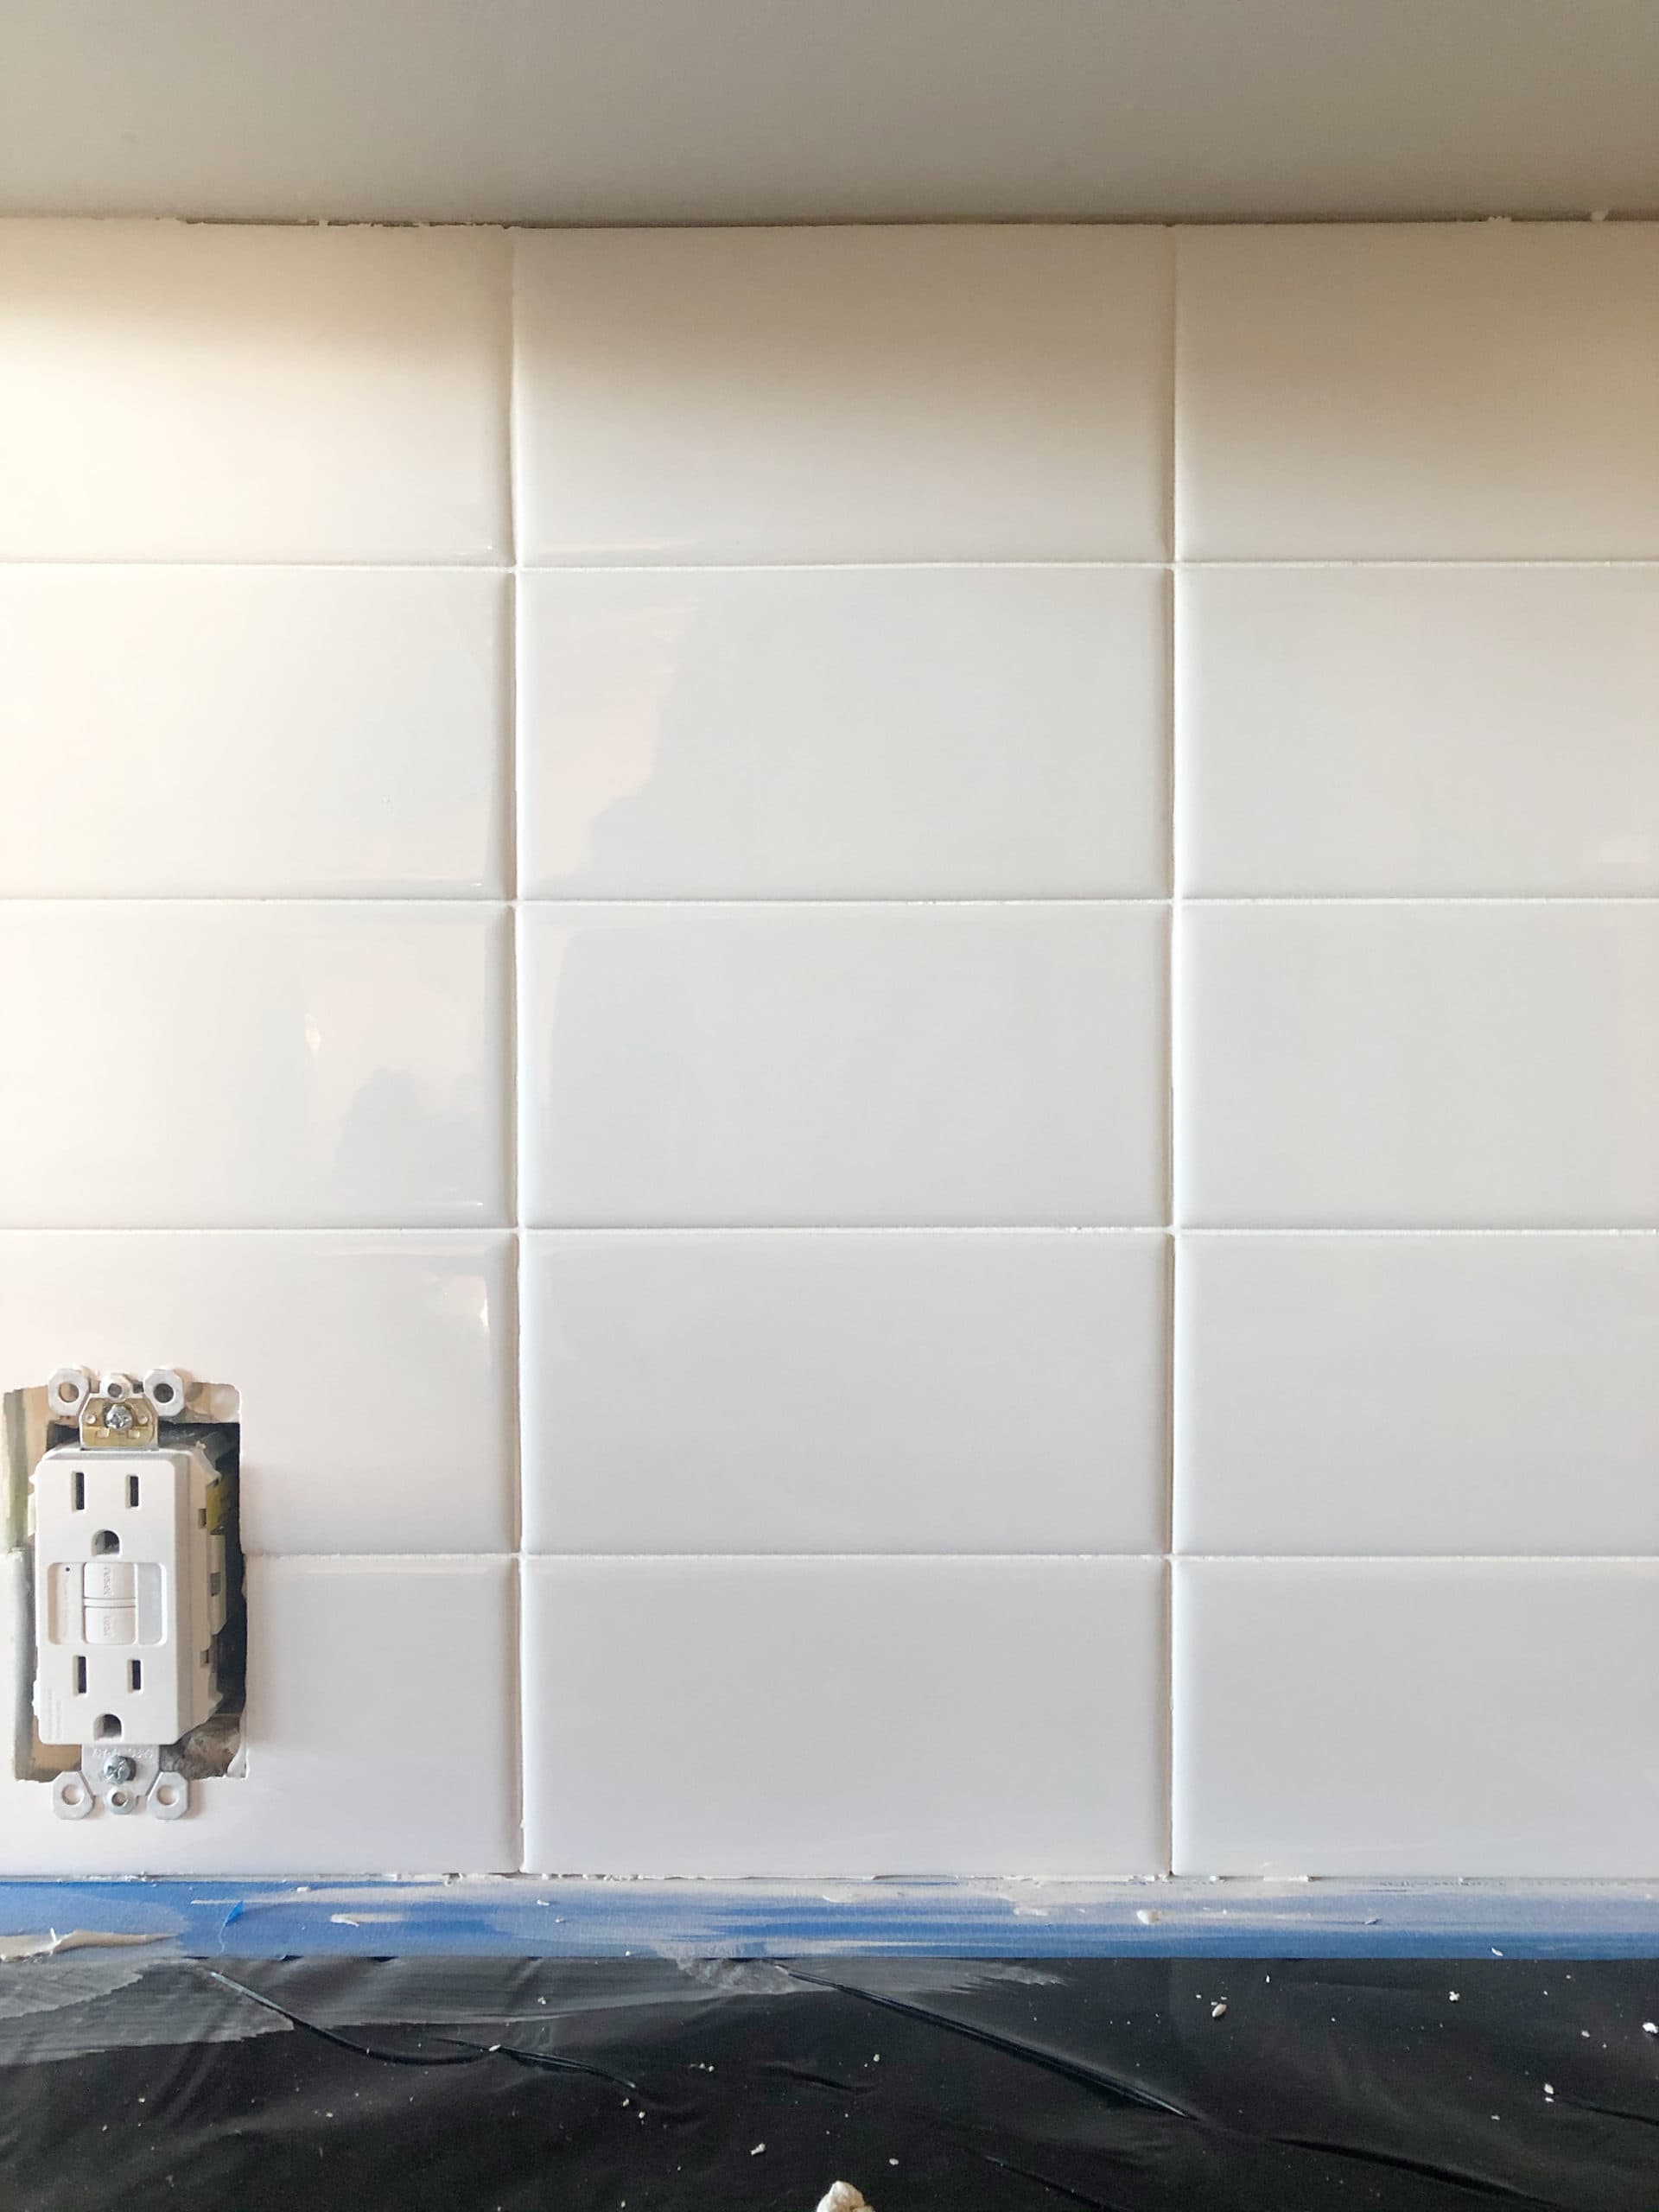
That got me thinking about the tile work that was going on in actual subways in the 1960s and ’70s, and how great that kind of stacked bond arrangement looks with rectangular tiles. It’s the same proportion as the tiles used in the classic running bond configuration, but it reads much more modern.
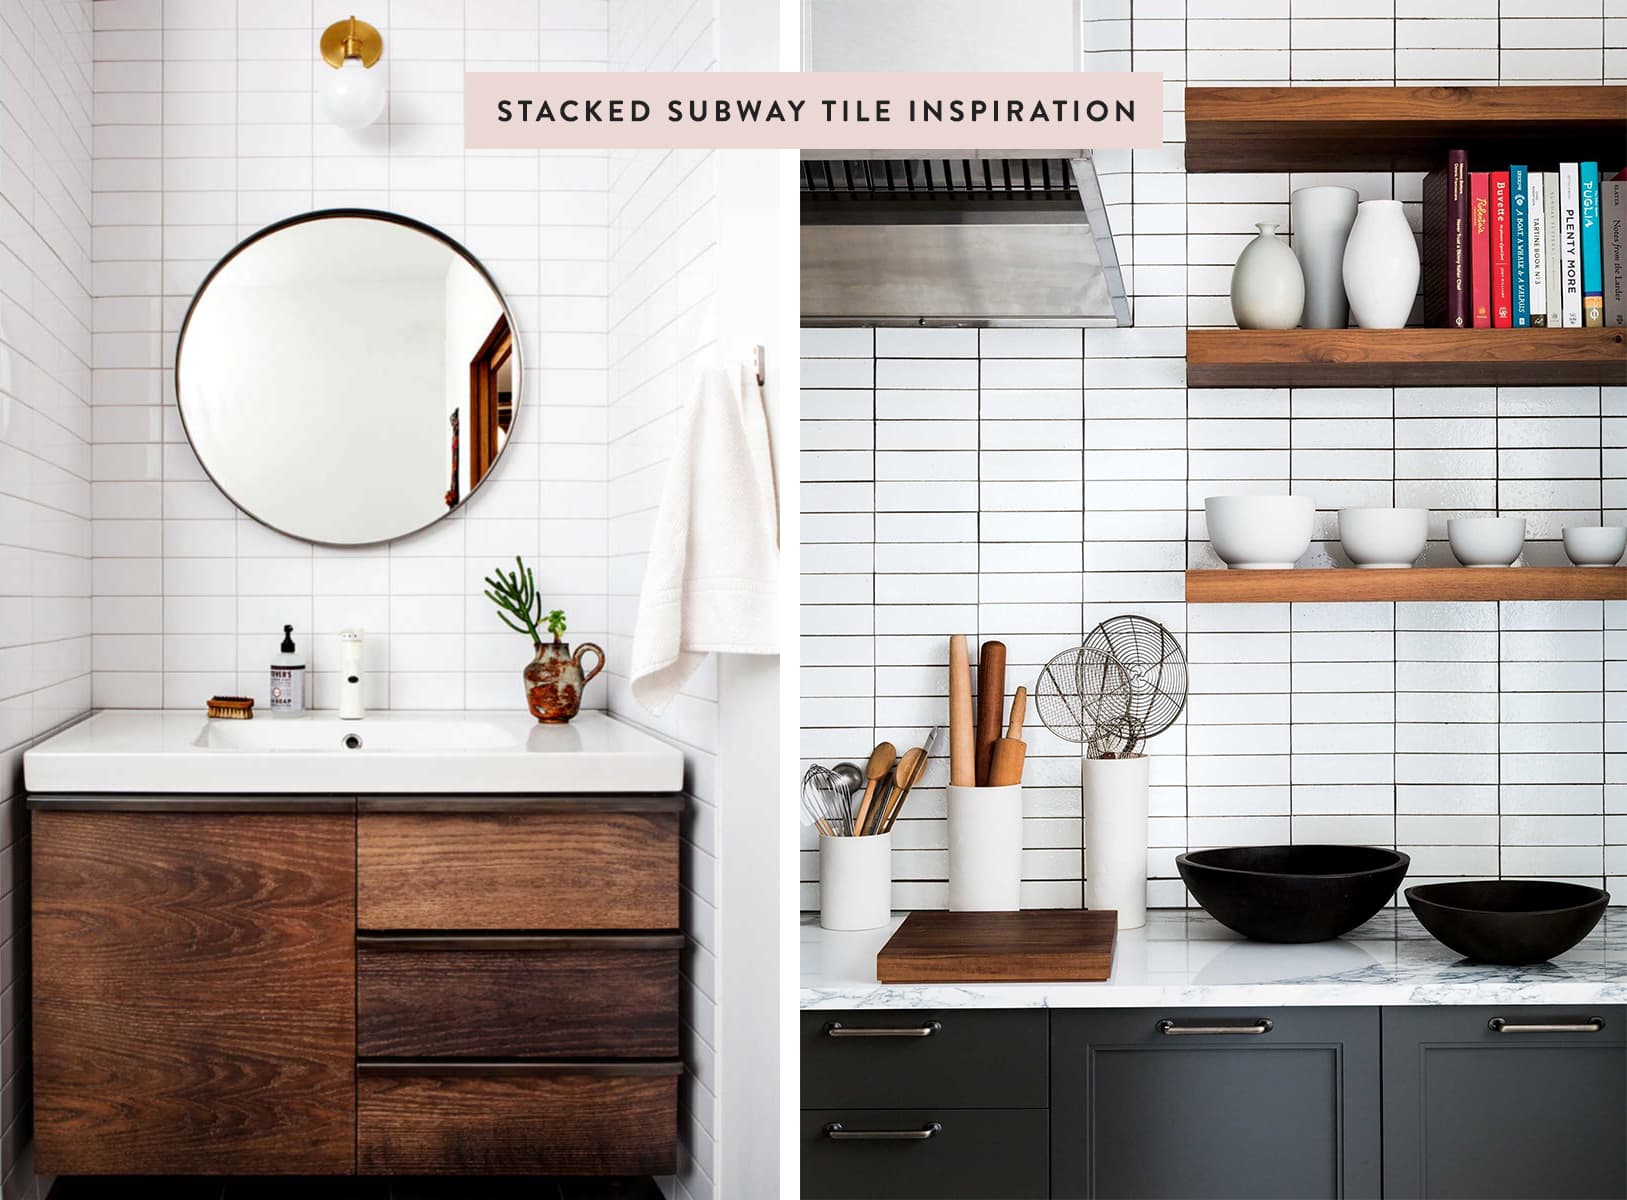
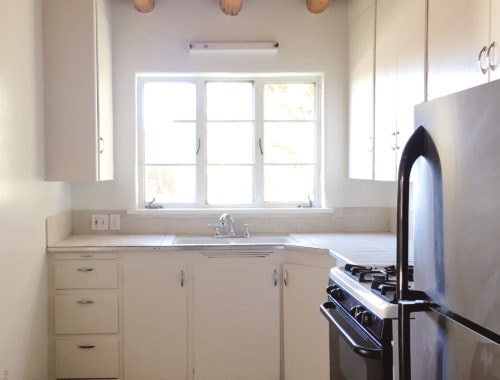
◀ Home of Thao Nguyen and Anthony Angelicola / Photo by Heidi’s Bridge
▶ Bon Appétit test kitchen / Photo by Douglas Lyle Thompson
Since I don’t live in a subway station, it was nice to find a couple of examples of homes with stacked bond subway tiles that have a bit of a later-mid-century vibe to them. These are the two images that really pulled me away from the thought of using square tiles. The contrast between these two examples is also what confirmed my hunch that white grout was the way to go in this particular application. As lovely as the dark grout looks, I knew it would be too busy in our smallish kitchen, and that it would accentuate any weird transitions and cuts I knew I’d likely have to make.
December 2019
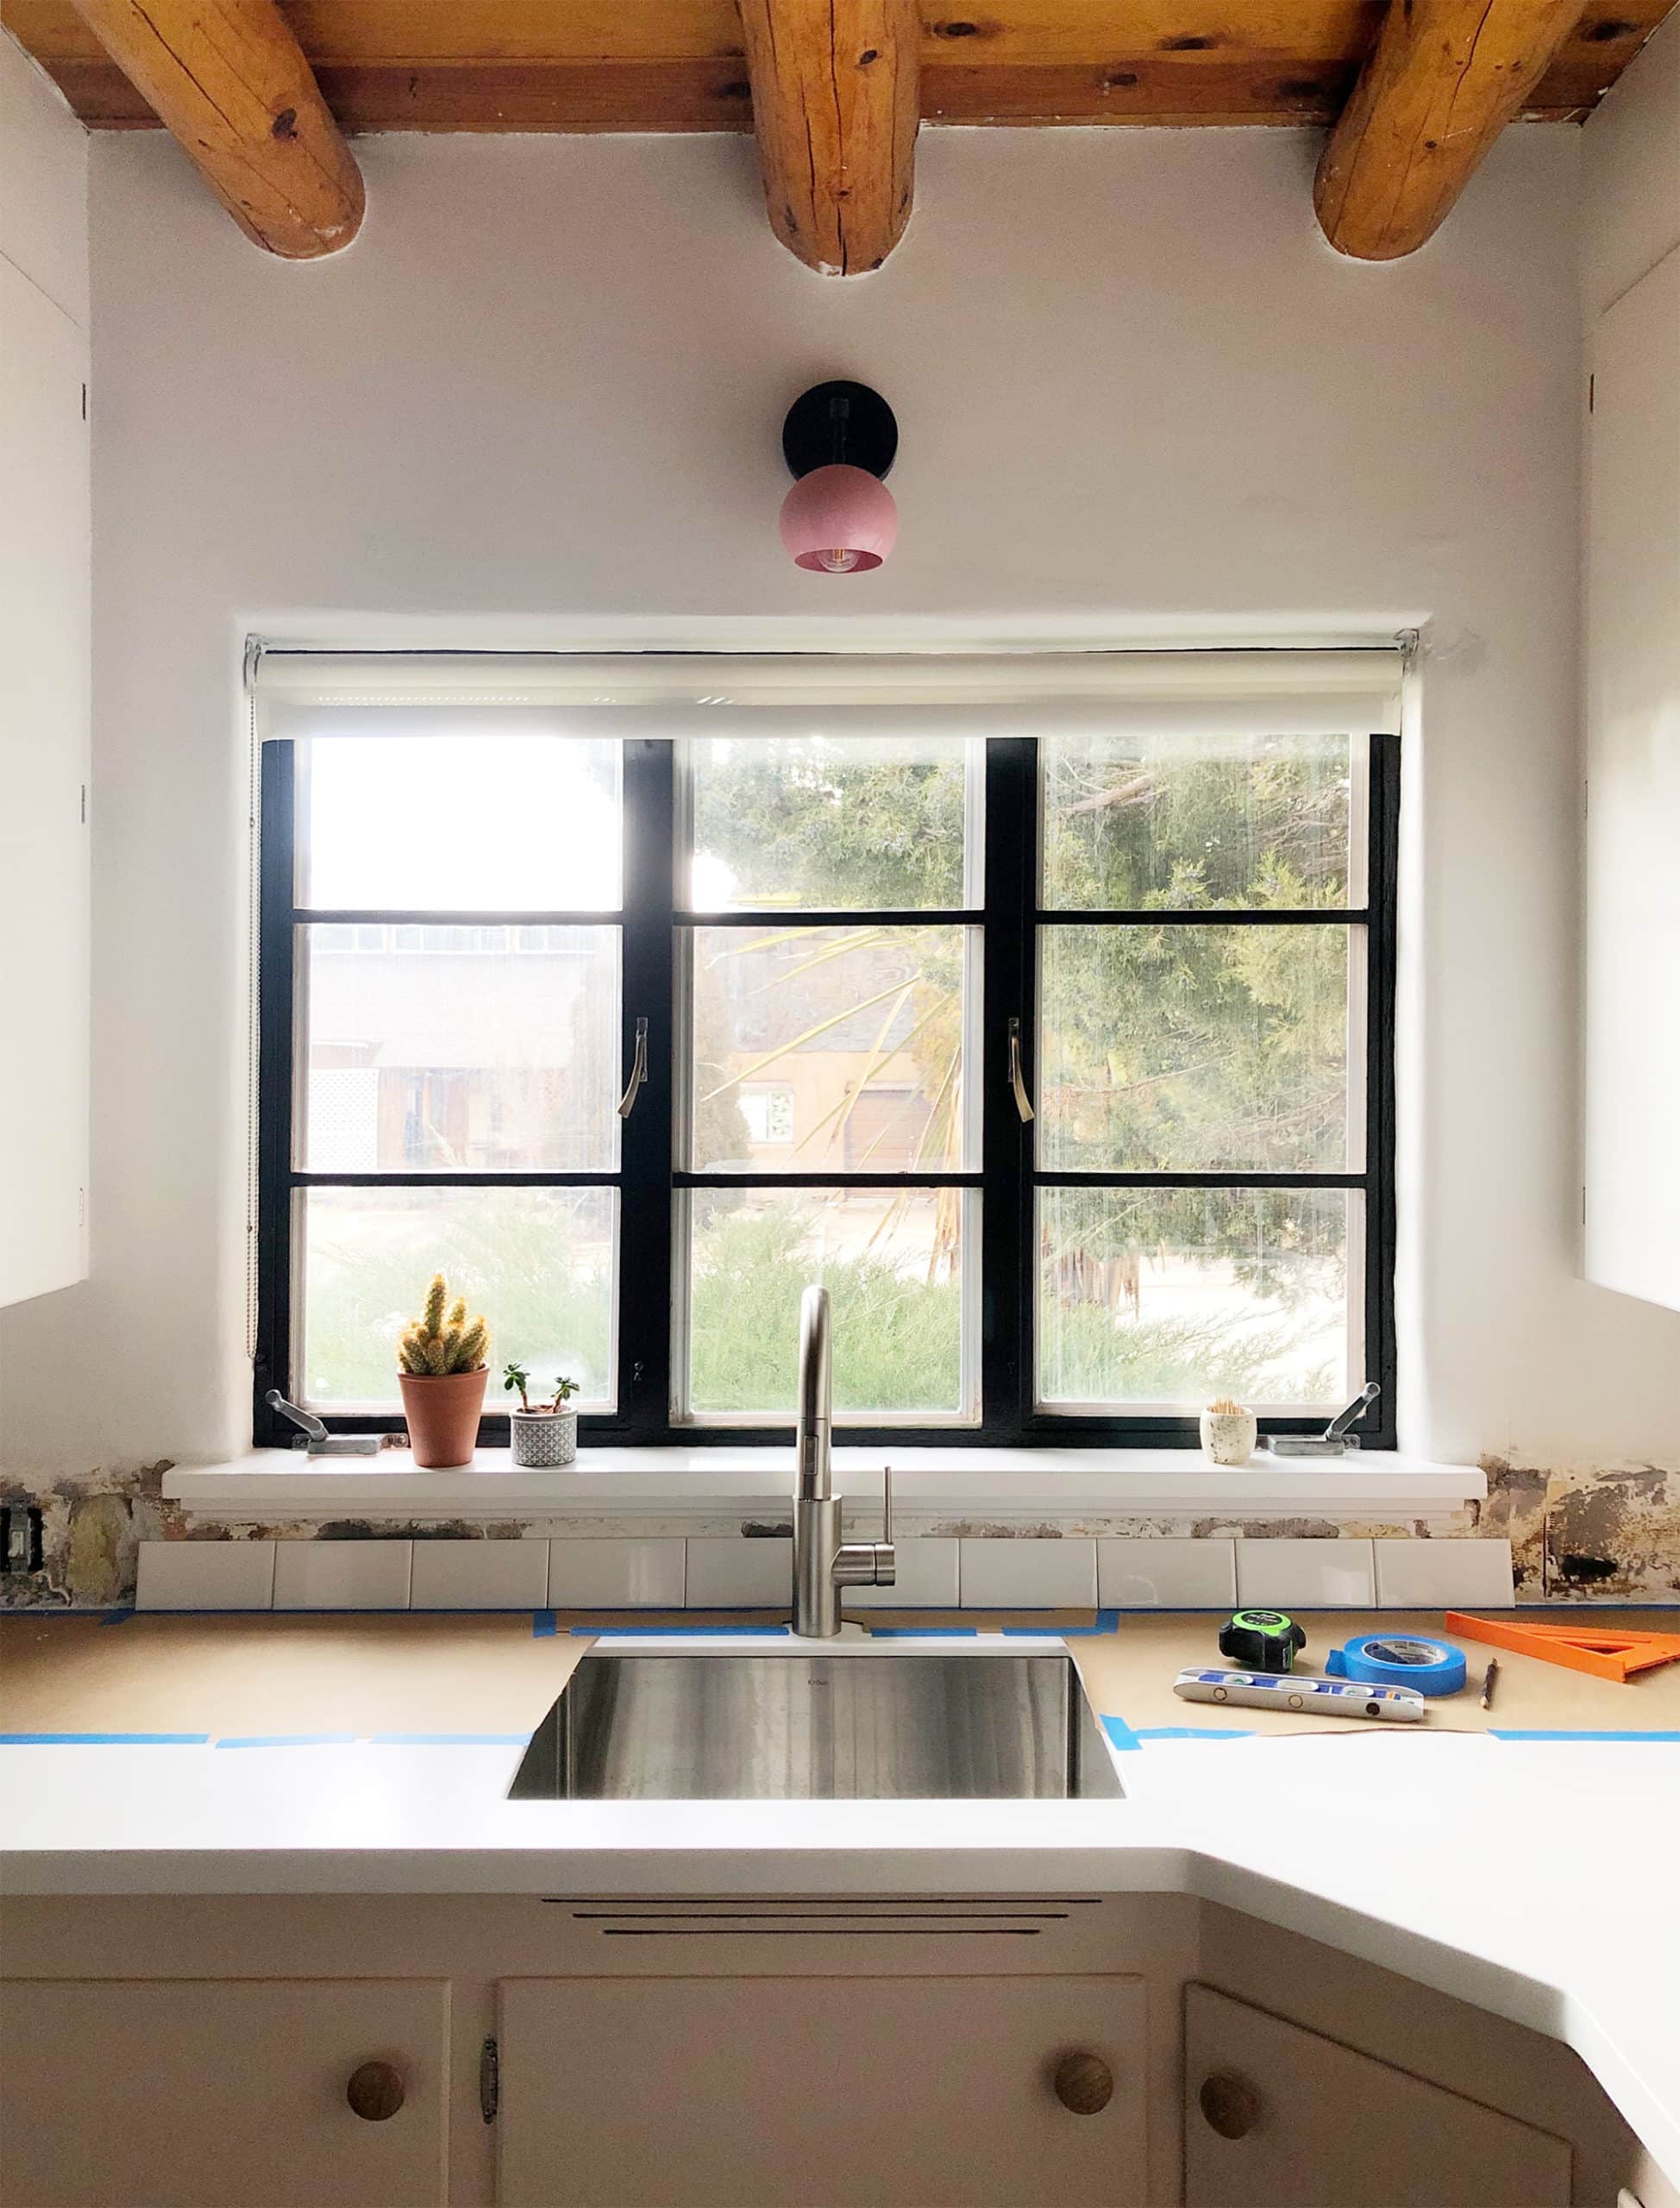
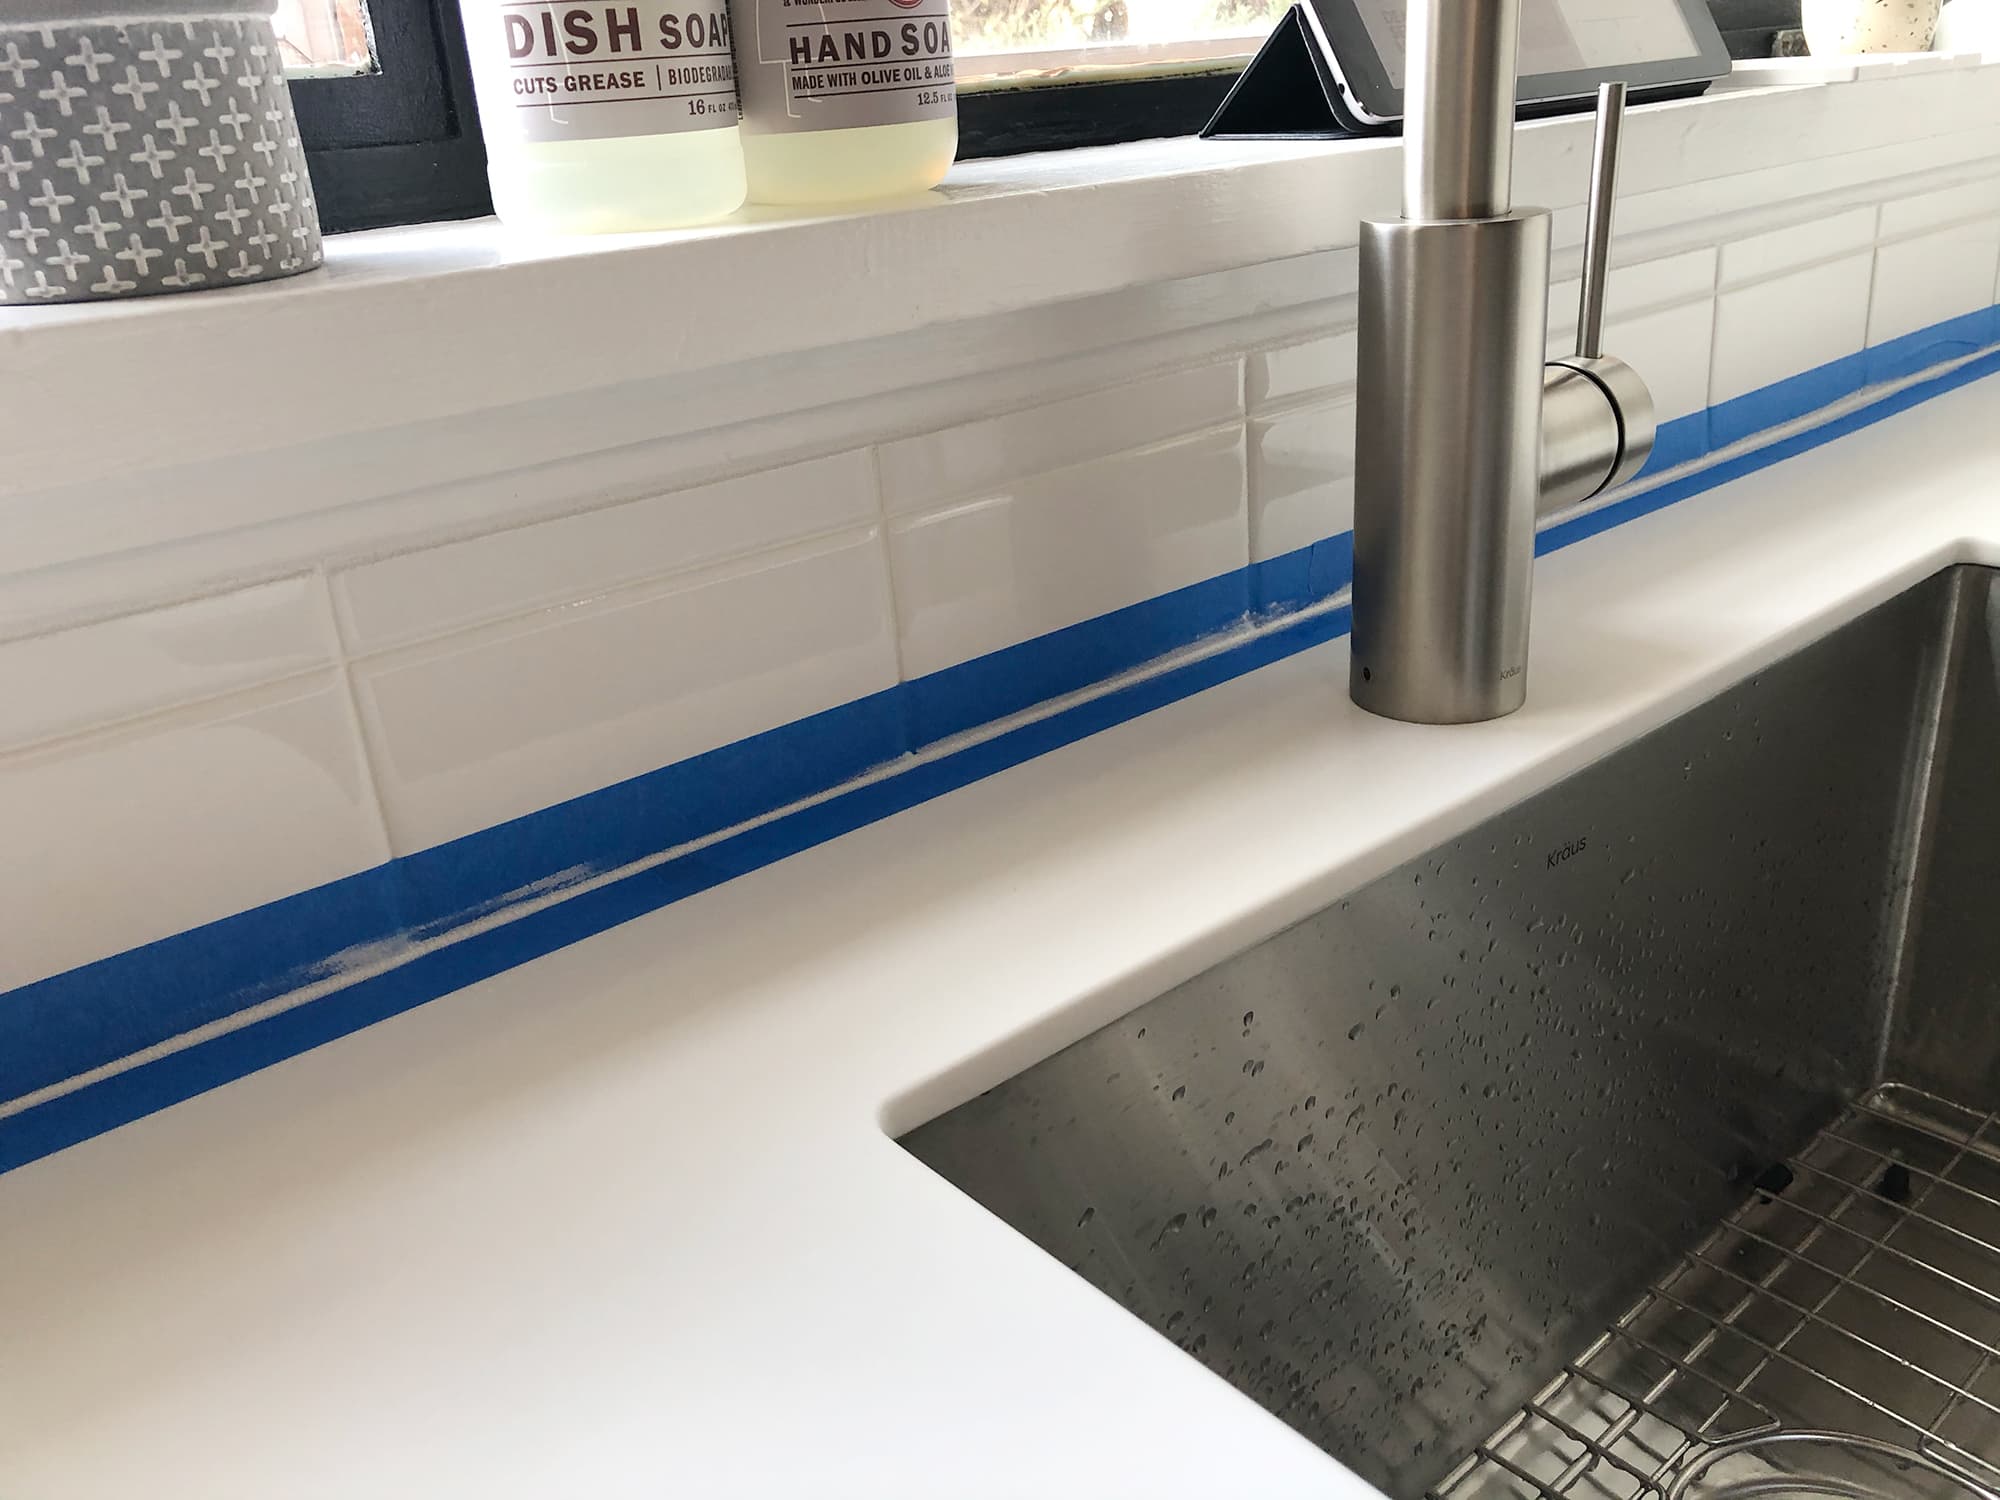
After diligently covering the brand new countertop with paper, I started planning the tile layout. I used basic Daltile Restore tiles (extremely affordable at $1.20/sf), which are self-spacing. That just means they have a little ridge around the outer edge that creates just enough of a gap for grout, with no need to use plastic spacers. I almost always like the tightest grout line possible.
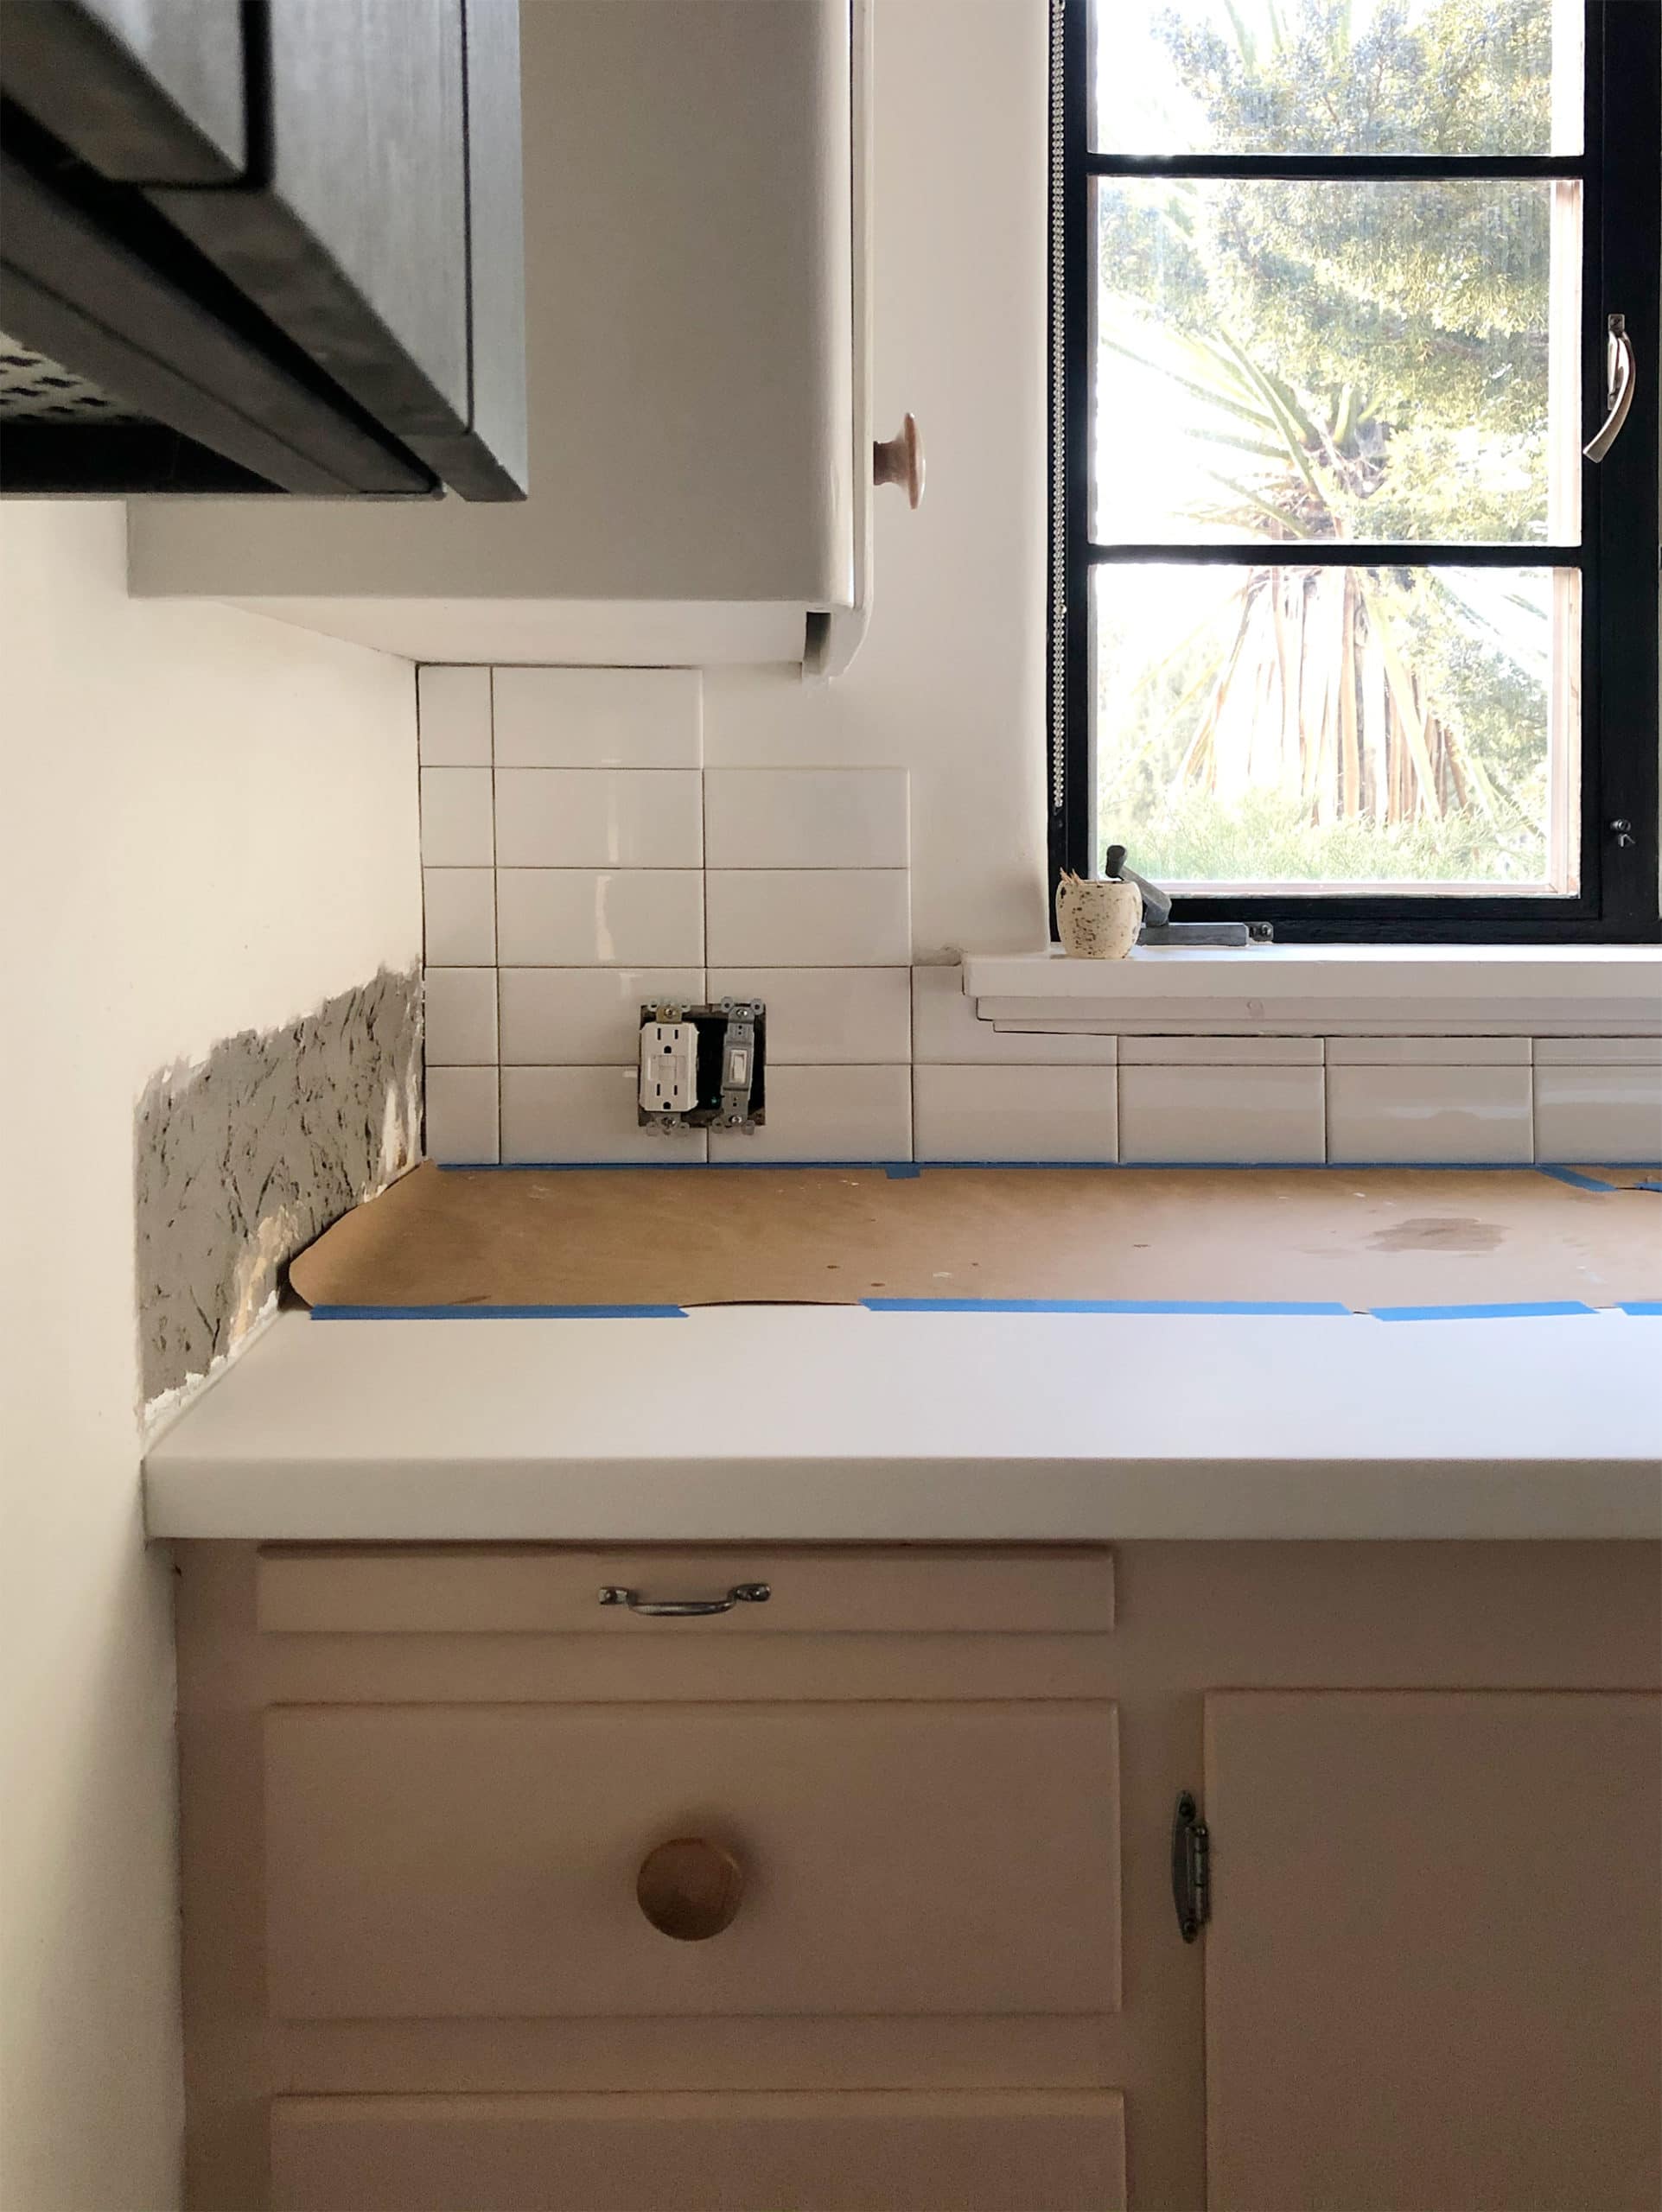
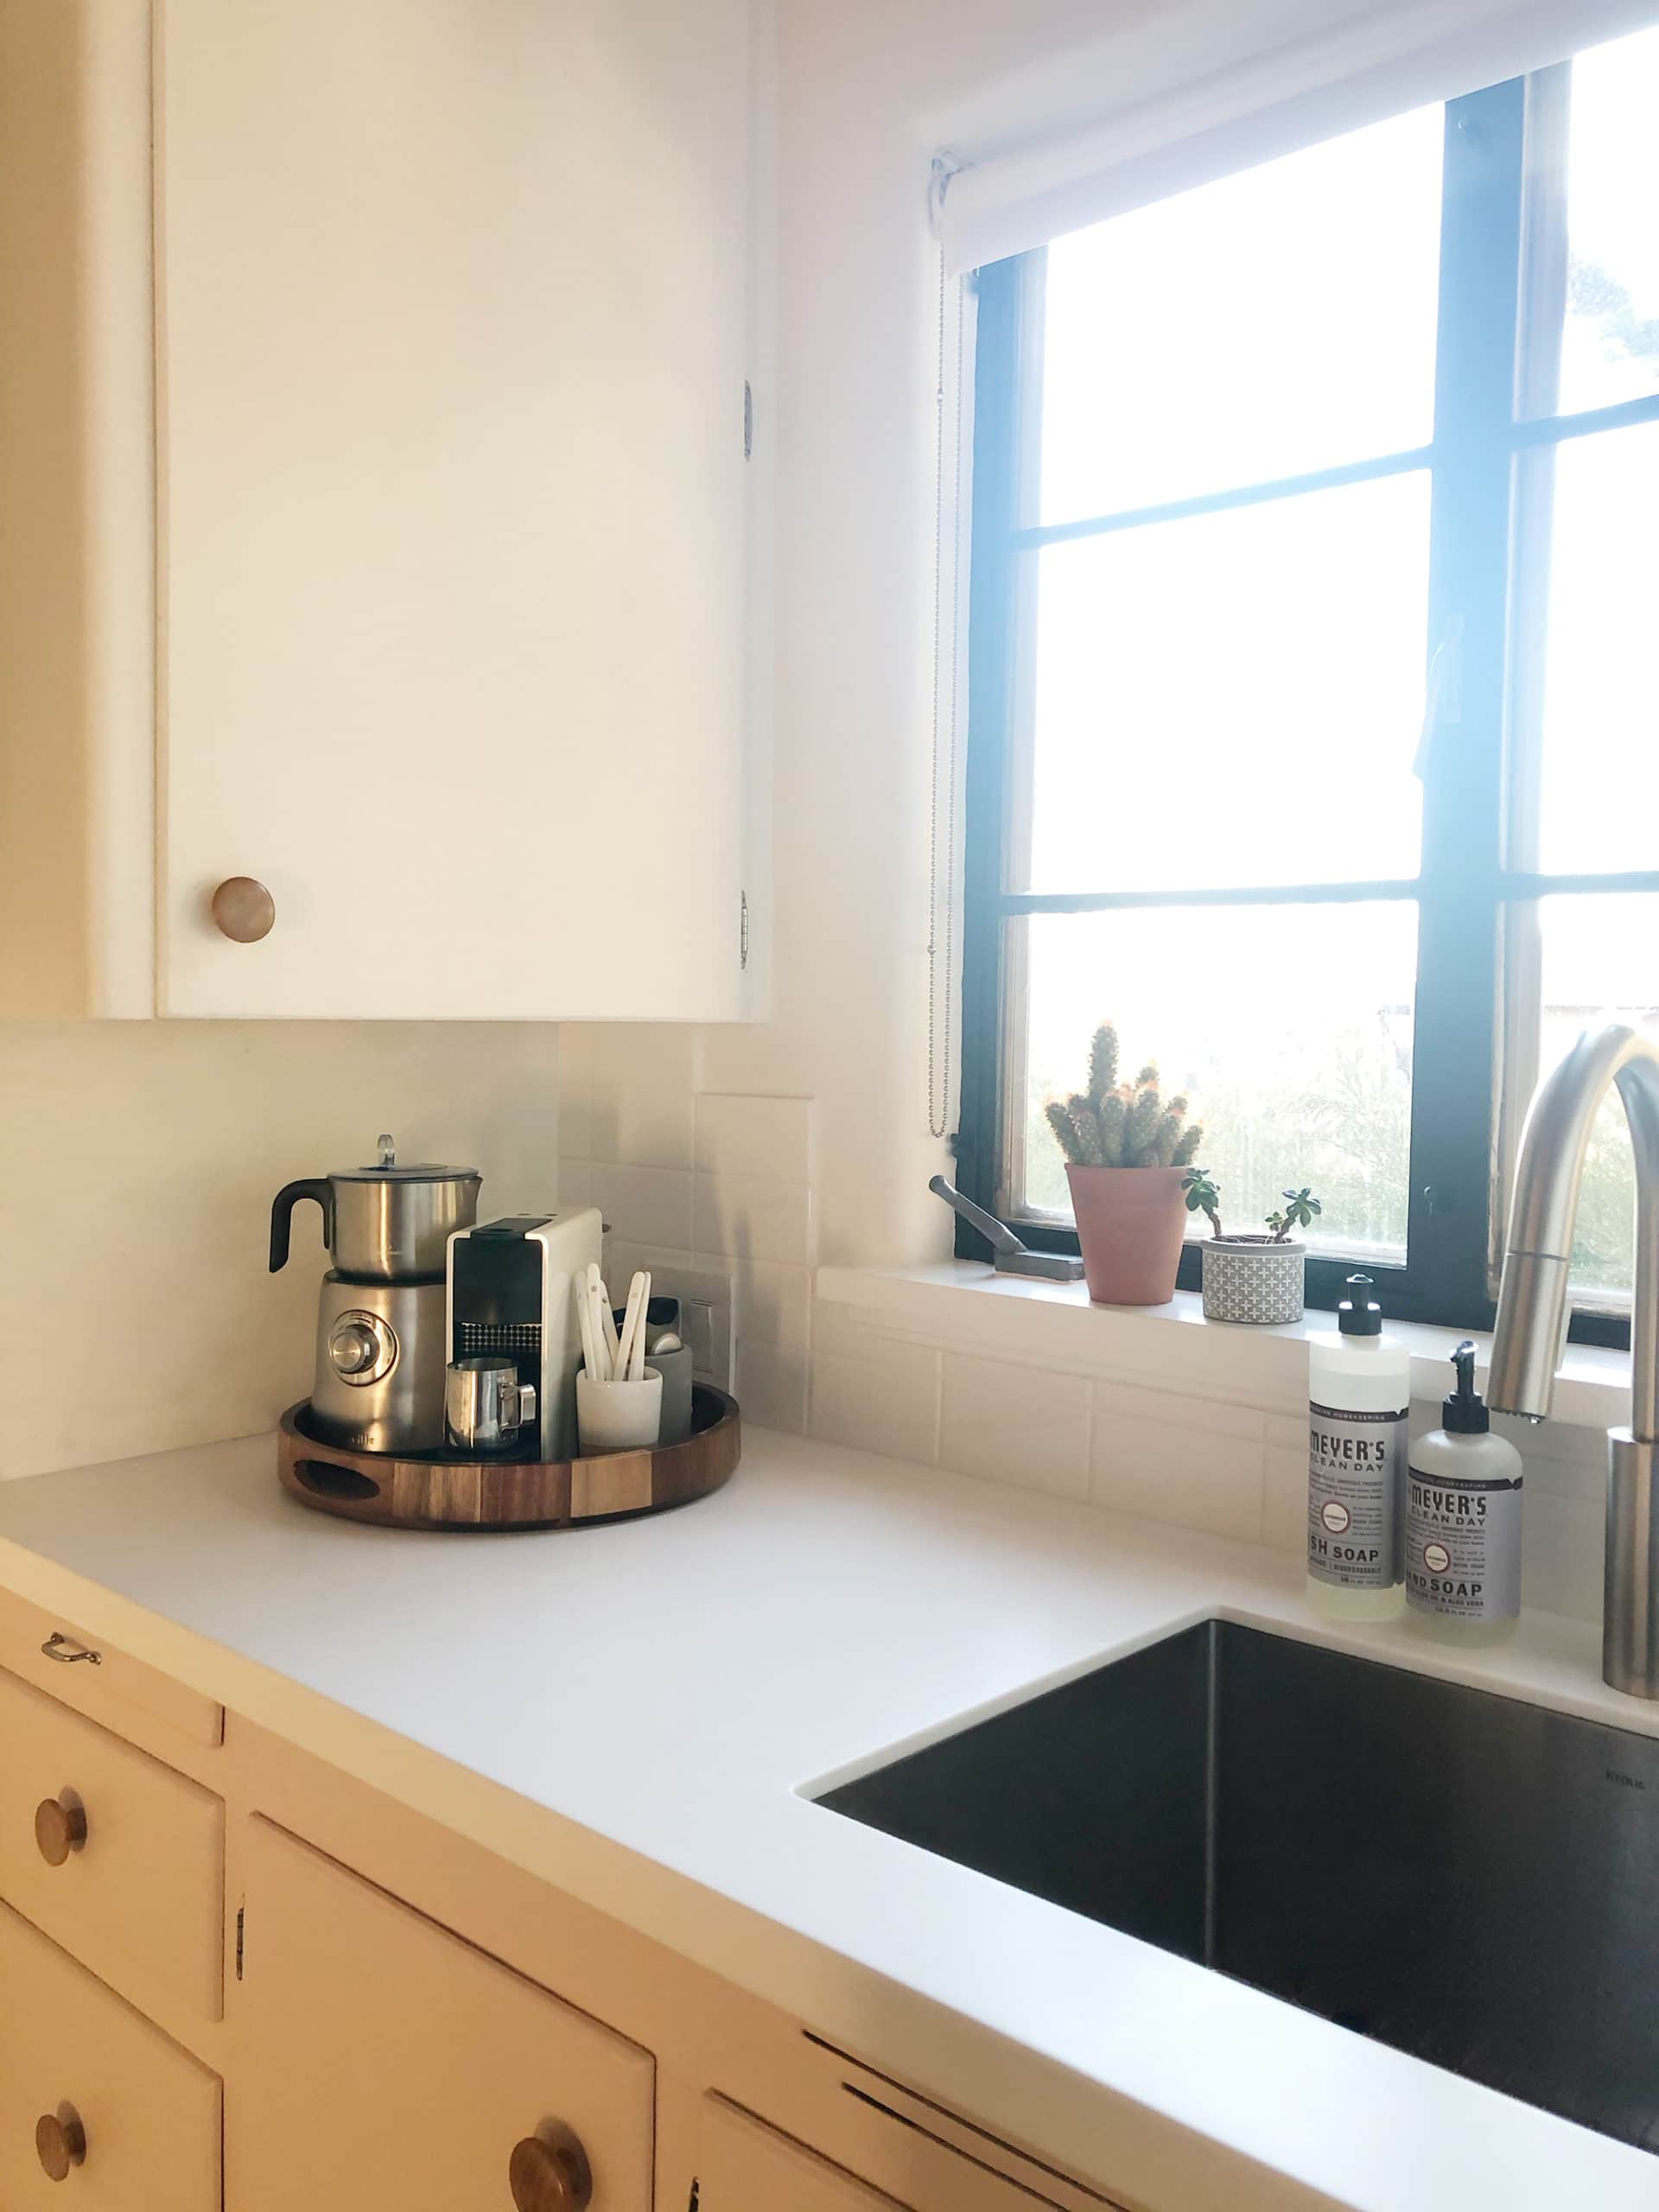
When planning a tile layout, it’s really important to think about center lines. Always plan from the middle out. If you’re tiling around a window or doorway, you really want to try to have the same tile cuts on either side. Symmetry, baby! It matters! Plan your layout so you don’t have little slivers of tile at the end of a row, too—as a general rule, you want to have no less than half a tile where a row ends. In my case, I had to break that rule by a tiny smidge on the left side because it was more important to be able to have balanced cuts on both sides of the window. I don’t love that I had to make that call, but that goes back to my choice to use white grout—it’s a lot more forgiving than colored grout, and now that the kitchen is done (and my pick-me-up coffee station is in that corner), I don’t even notice that there’s only about 1/3 of a tile in that column. Anyway, the point I’m making is this: PLAN YOUR TILE LAYOUT. And not just on paper, if possible! Make conscious choices when it comes to placement and cuts.
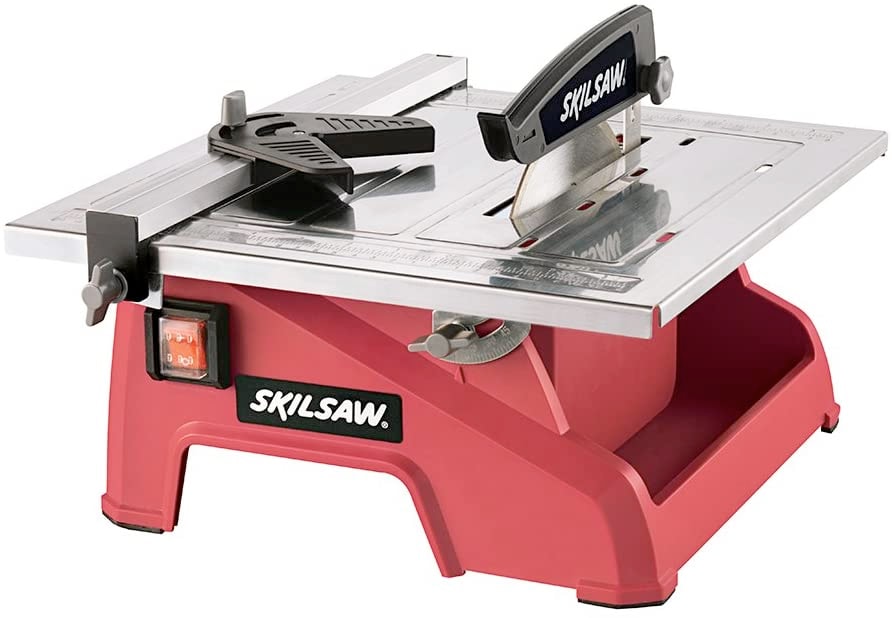
Sadly, I don’t have any photos of my tile-cutting setup. I was in must tile as fast as possible-mode the whole time, and I just didn’t snap a pic. It was winter, which is a less-than-ideal time to use a wet tile saw (a messy endeavor that really needs to happen outdoors), and my main goals were to not get frostbite or slice my fingers open. For what it’s worth, though, I used this sweet little SKIL 7-inch wet tabletop tile saw (also available on Amazon, but Lowe’s has a better price), and it was a DREAM to use. Believe the positive reviews! This is a great little saw, and honestly not scary at all to use once I’d made a few cuts.
A few things, before I go any further: Yes, I tiled right over all of that concrete patch, mastic, spray foam insulation, joint compound, and Bondo. I’ve done enough tiling in my life to know what I can get away with by building up thinset (that’s the mortar you use to adhere the tile to the substrate), and while I would NEVER EVER do this in, say, a shower enclosure, the rules of tiling are a bit more flexible when it comes to a backsplash that’s not in constant contact with water. If this were my first tiling project, I would DEFINITELY have removed the damaged wall and put up new cement board or greenboard and tiled over that. Instead, I got the damaged wall patched up to a point where it was relatively even/level (though definitely not smooth), and completely solid…and then I back-buttered each individual tile rather than spreading the thinset directly onto the wall. This may be one of those situations where you do as I say and not as I do, but hey, I’m nothing if not honest when it comes to renovation projects. ¯\_(ツ)_/¯
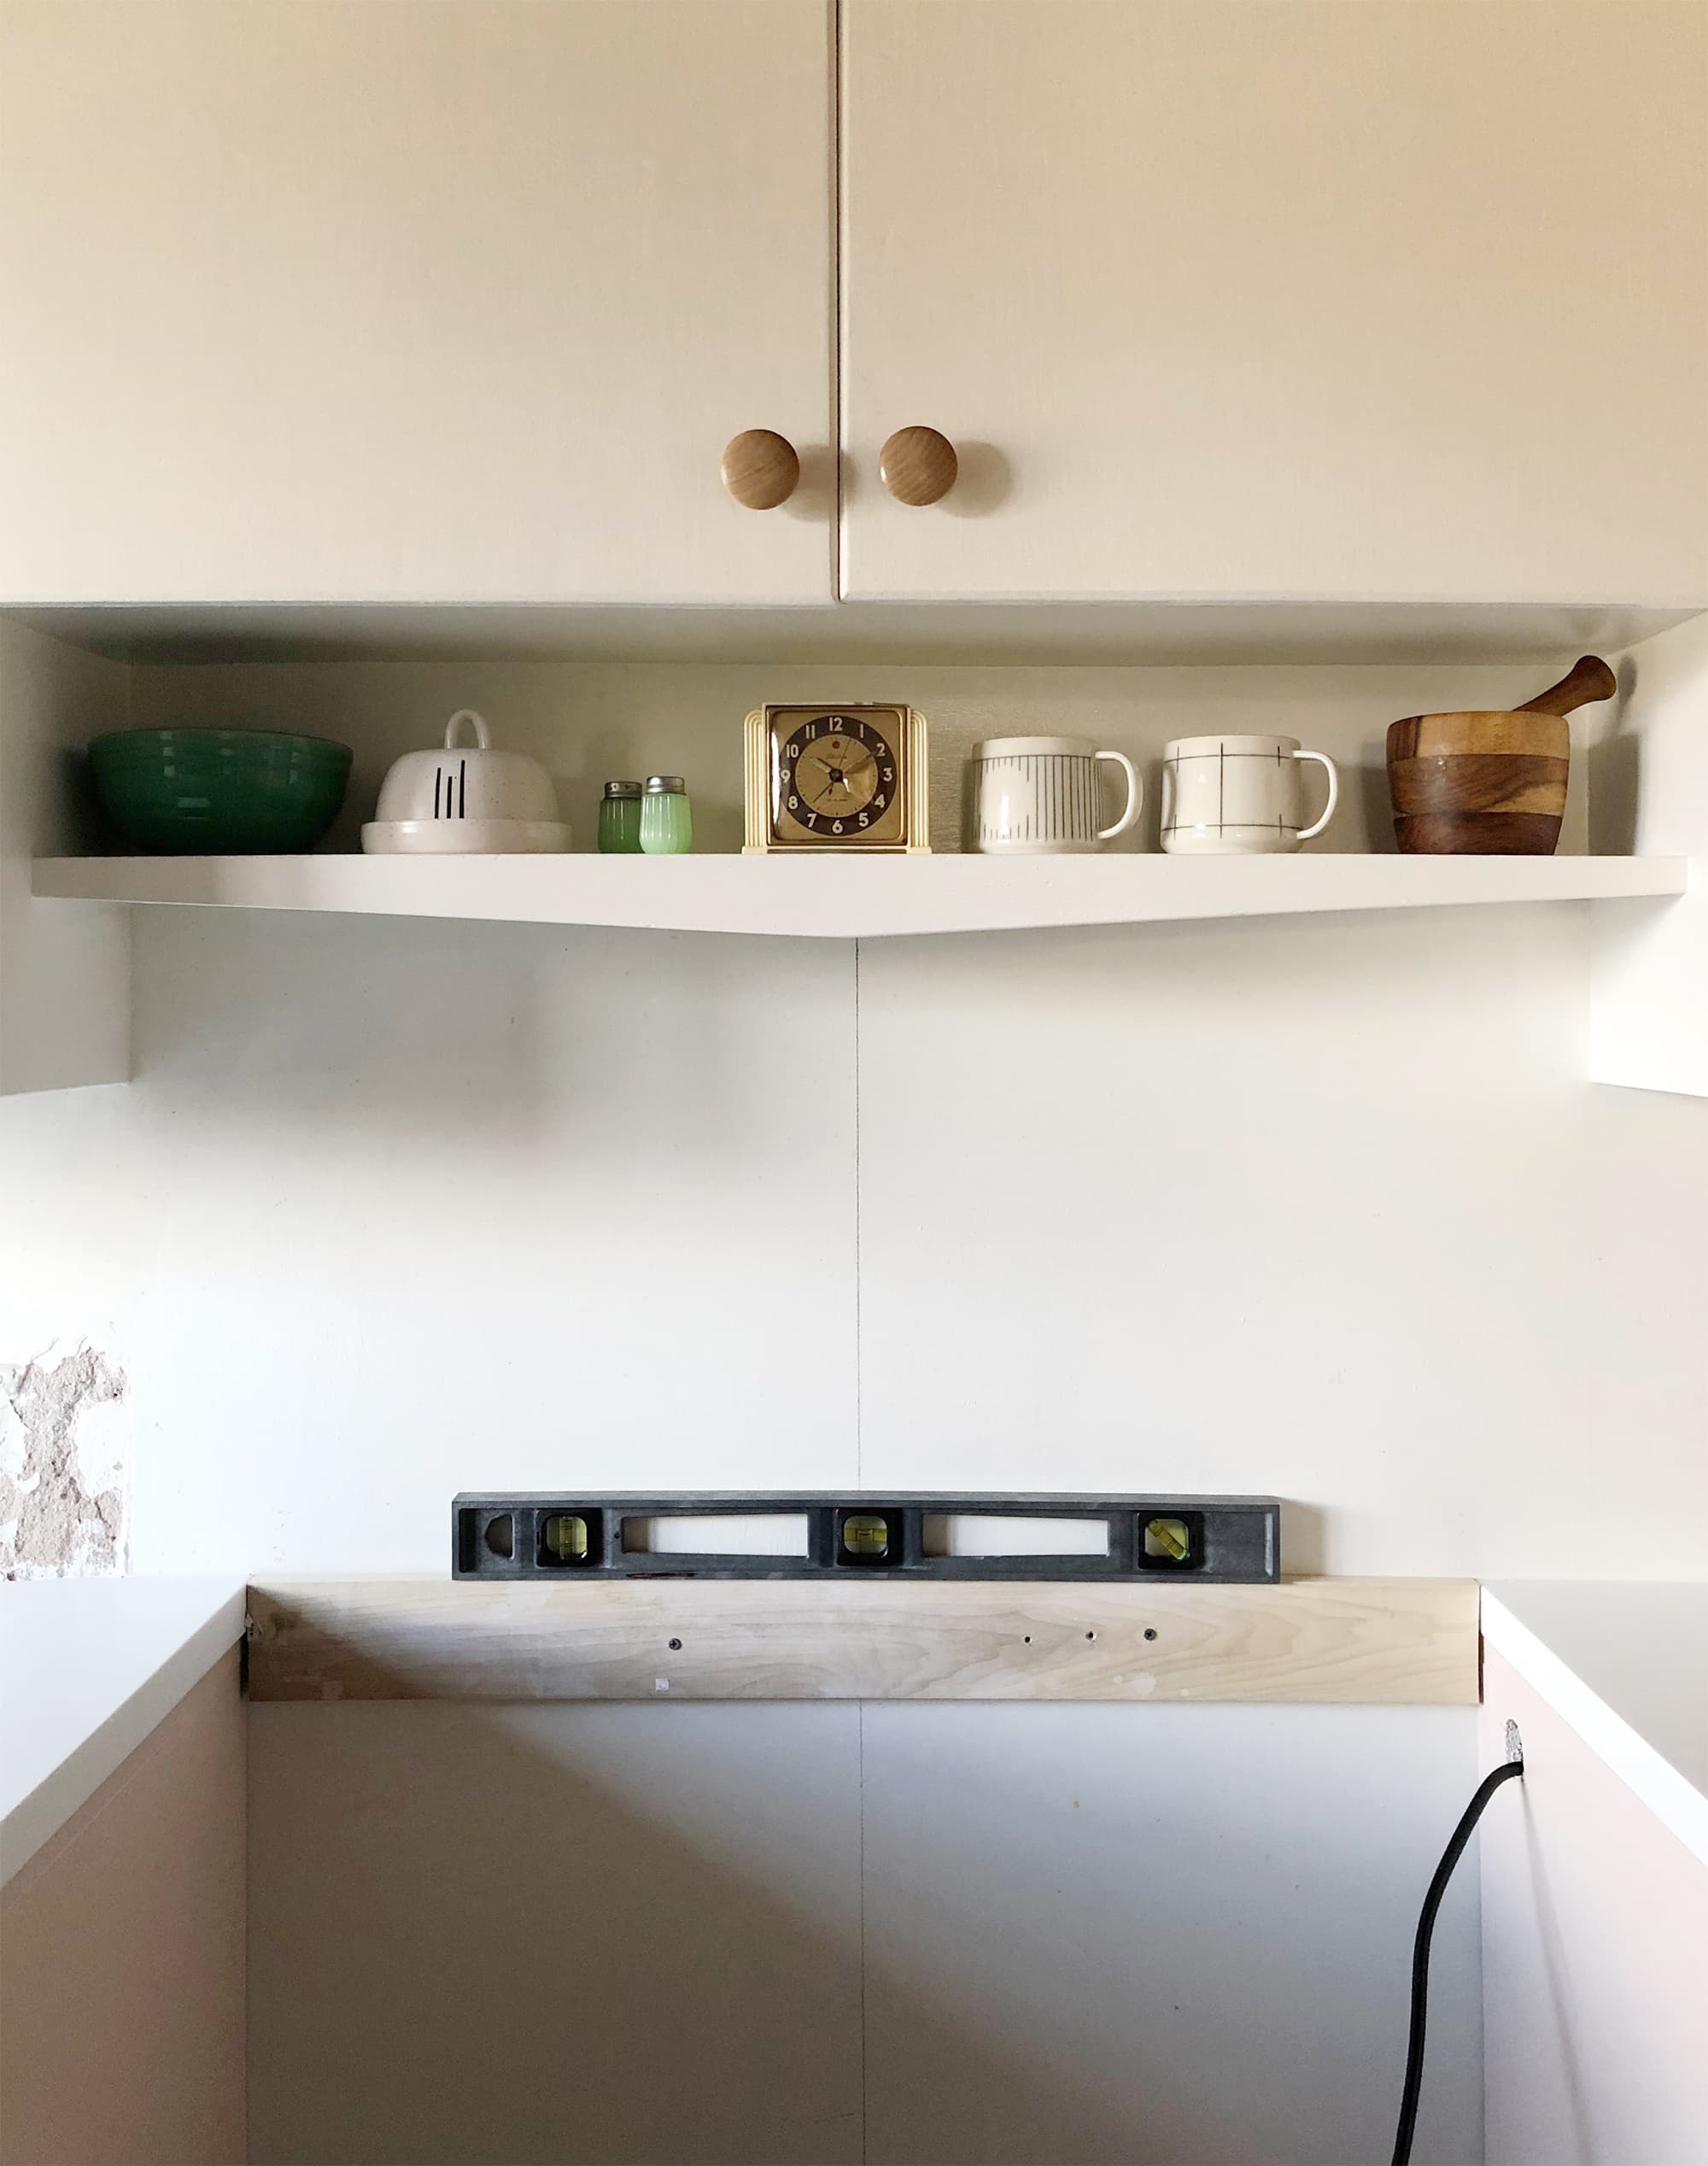
With the sink wall tile completed, I moved on to the wall behind the range. Again, starting from a center point and working outward is the way to go. In this case, the range (and the shelf above the range) determined the center line. Because there’s no countertop behind the range, I screwed a ledger board to the wall so the first row of tile would be supported while the thinset dried. Later (not pictured, but I promise it happened), I moved the ledger board down to allow for an additional lower row of tiles behind the range, because I didn’t want any of the wall to be visible.

As I made my way out and up, I checked each row with a level to make sure things were staying, well, level. Tiles—even machine-made ones—are imperfect, so every now and then I had to make up the difference the tiniest bit with a little piece of toothpick. If you have to make adjustments like that when you’re tiling a wall, it’s a good idea to add bits of painter’s tape just to make extra-sure that nothing shifts.
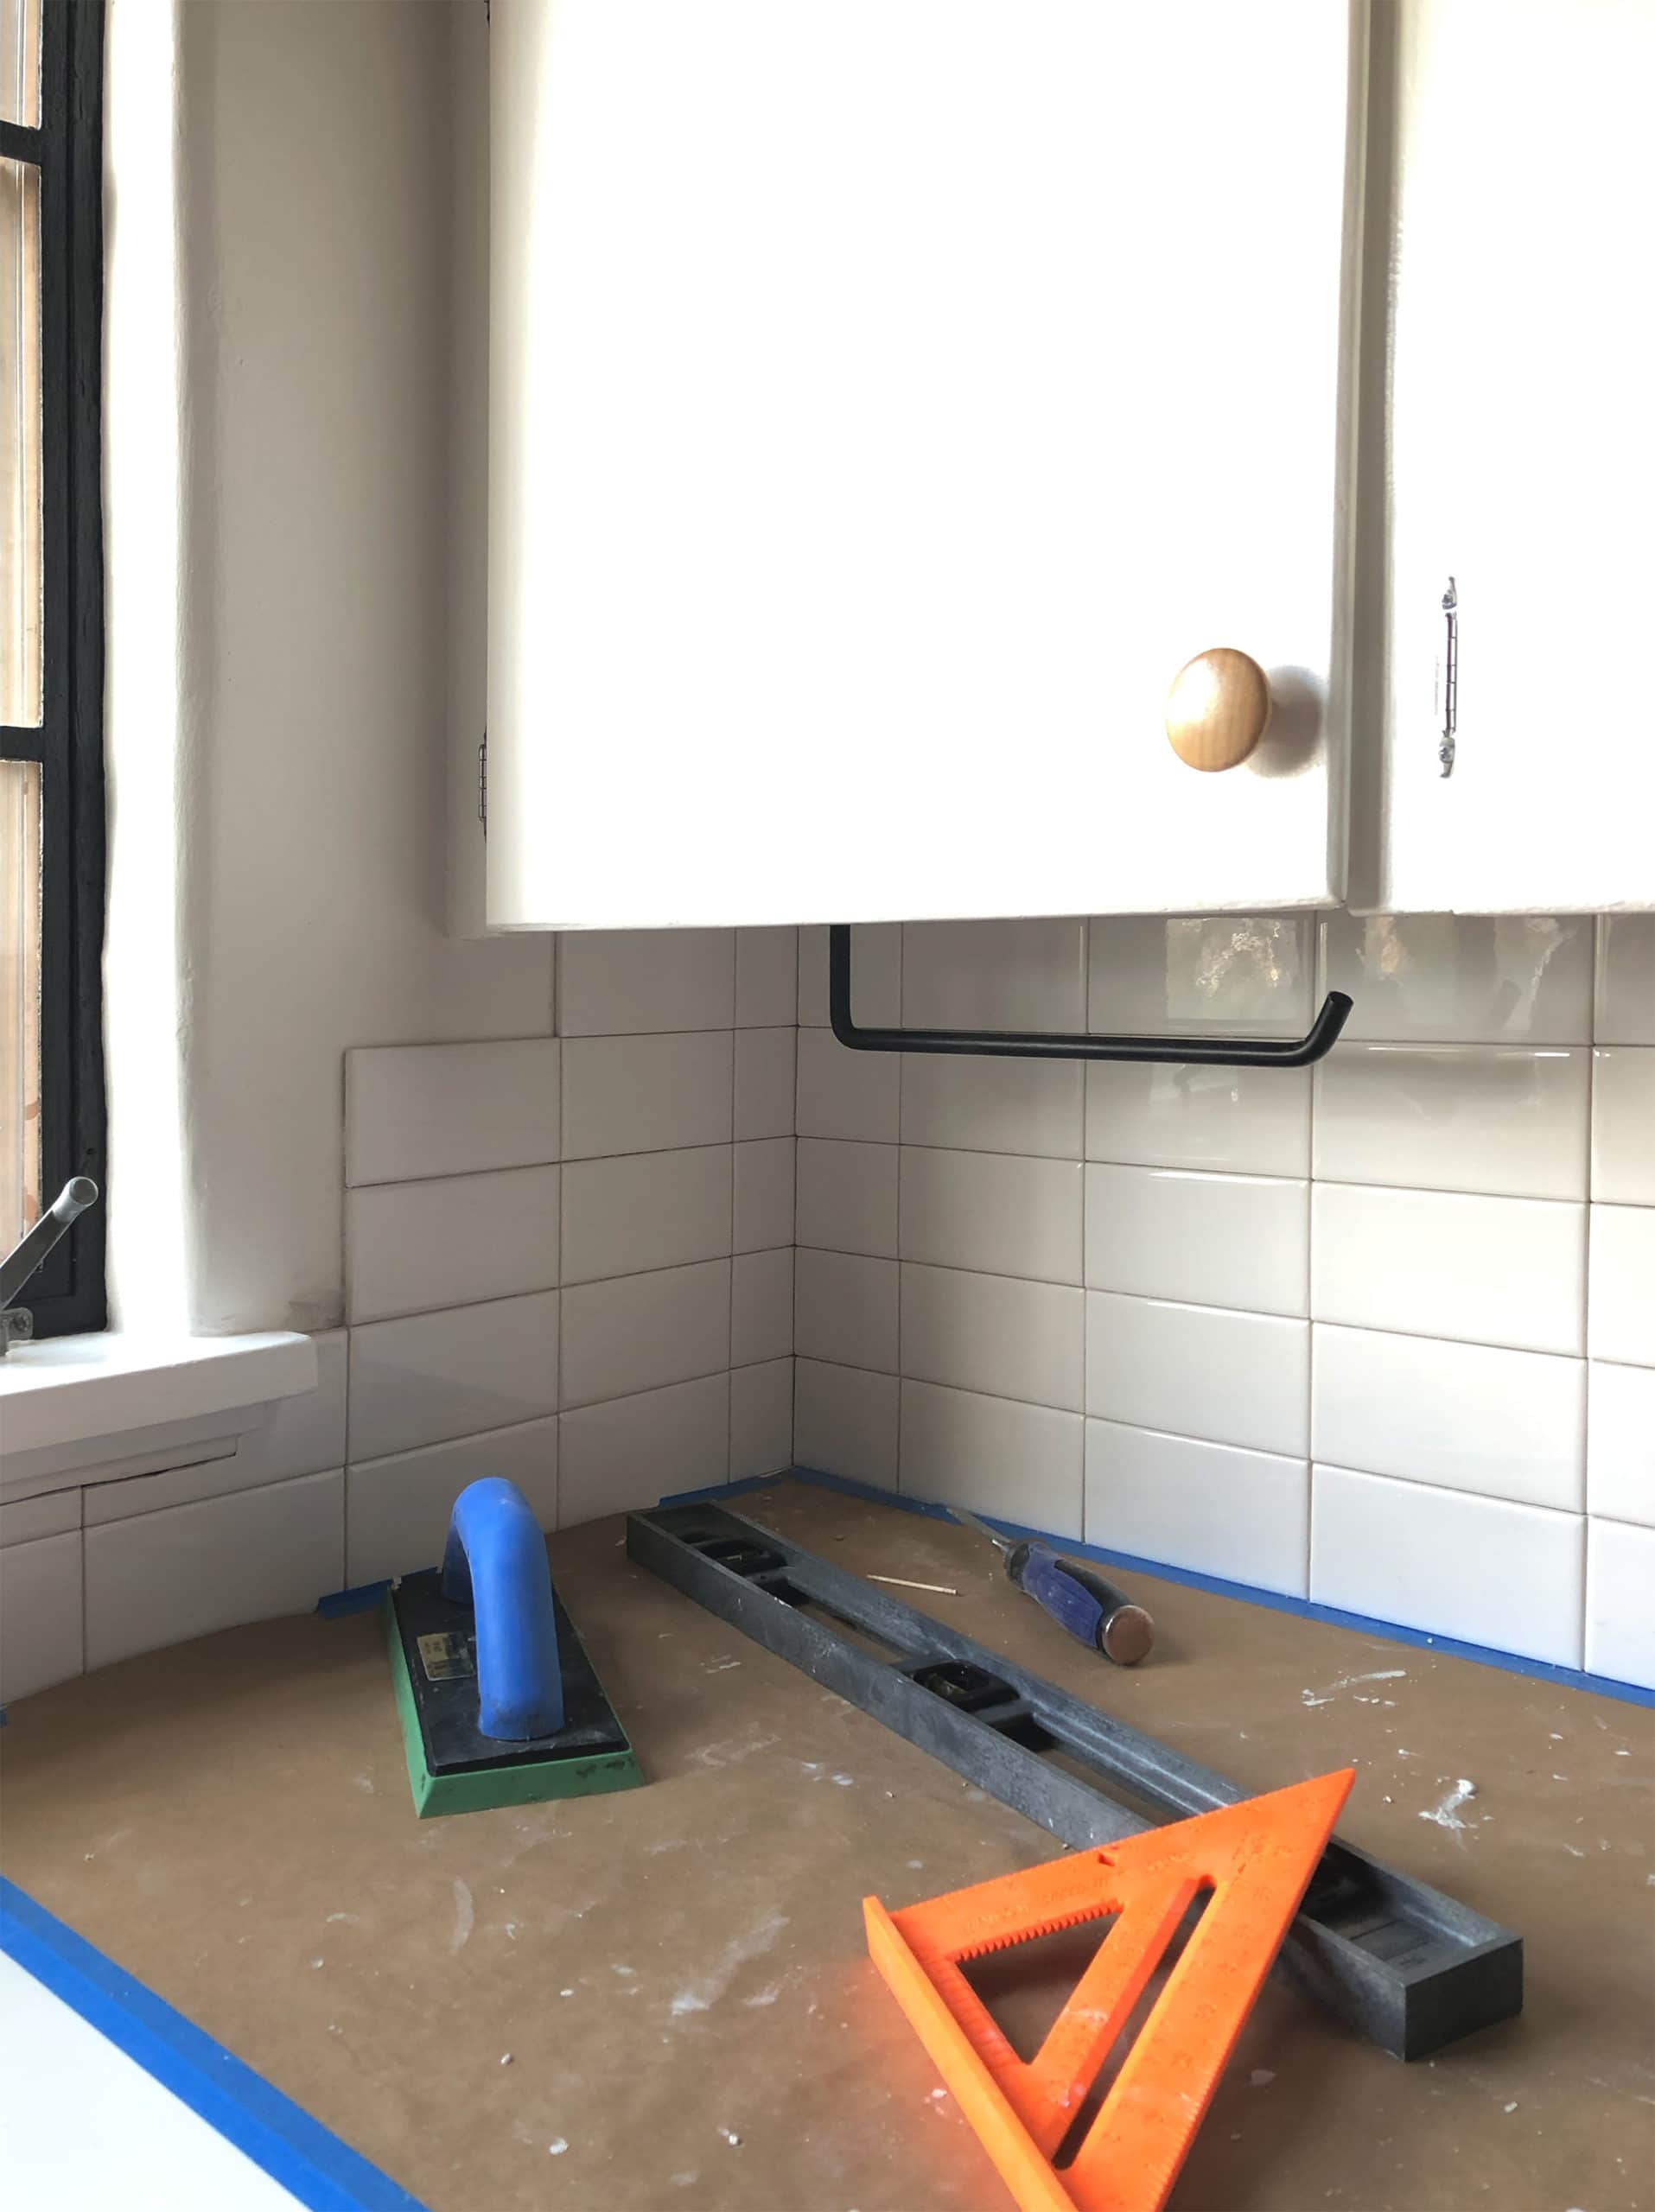
Making my way into the corner, I was starting to feel really, really good about this whole thing. There’s something about getting to a place where planes meet and having it all line up right that is extremely reassuring. And again, I had to break my rule of using less than 1/2 of a tile, but it helps when the abutting pieces at least add up to the size of a full tile. Also, see that thing with the blue handle? That’s called a float, and it’s really important to use one to press your tiles flush and firm against the wall as you go. No matter how good you think you are at getting the tile to sit flat with your hands, you still need a float. Especially if you’re being reckless like me and tiling over a surface similar to the Taconic Parkway after an especially grueling winter. Use a float.
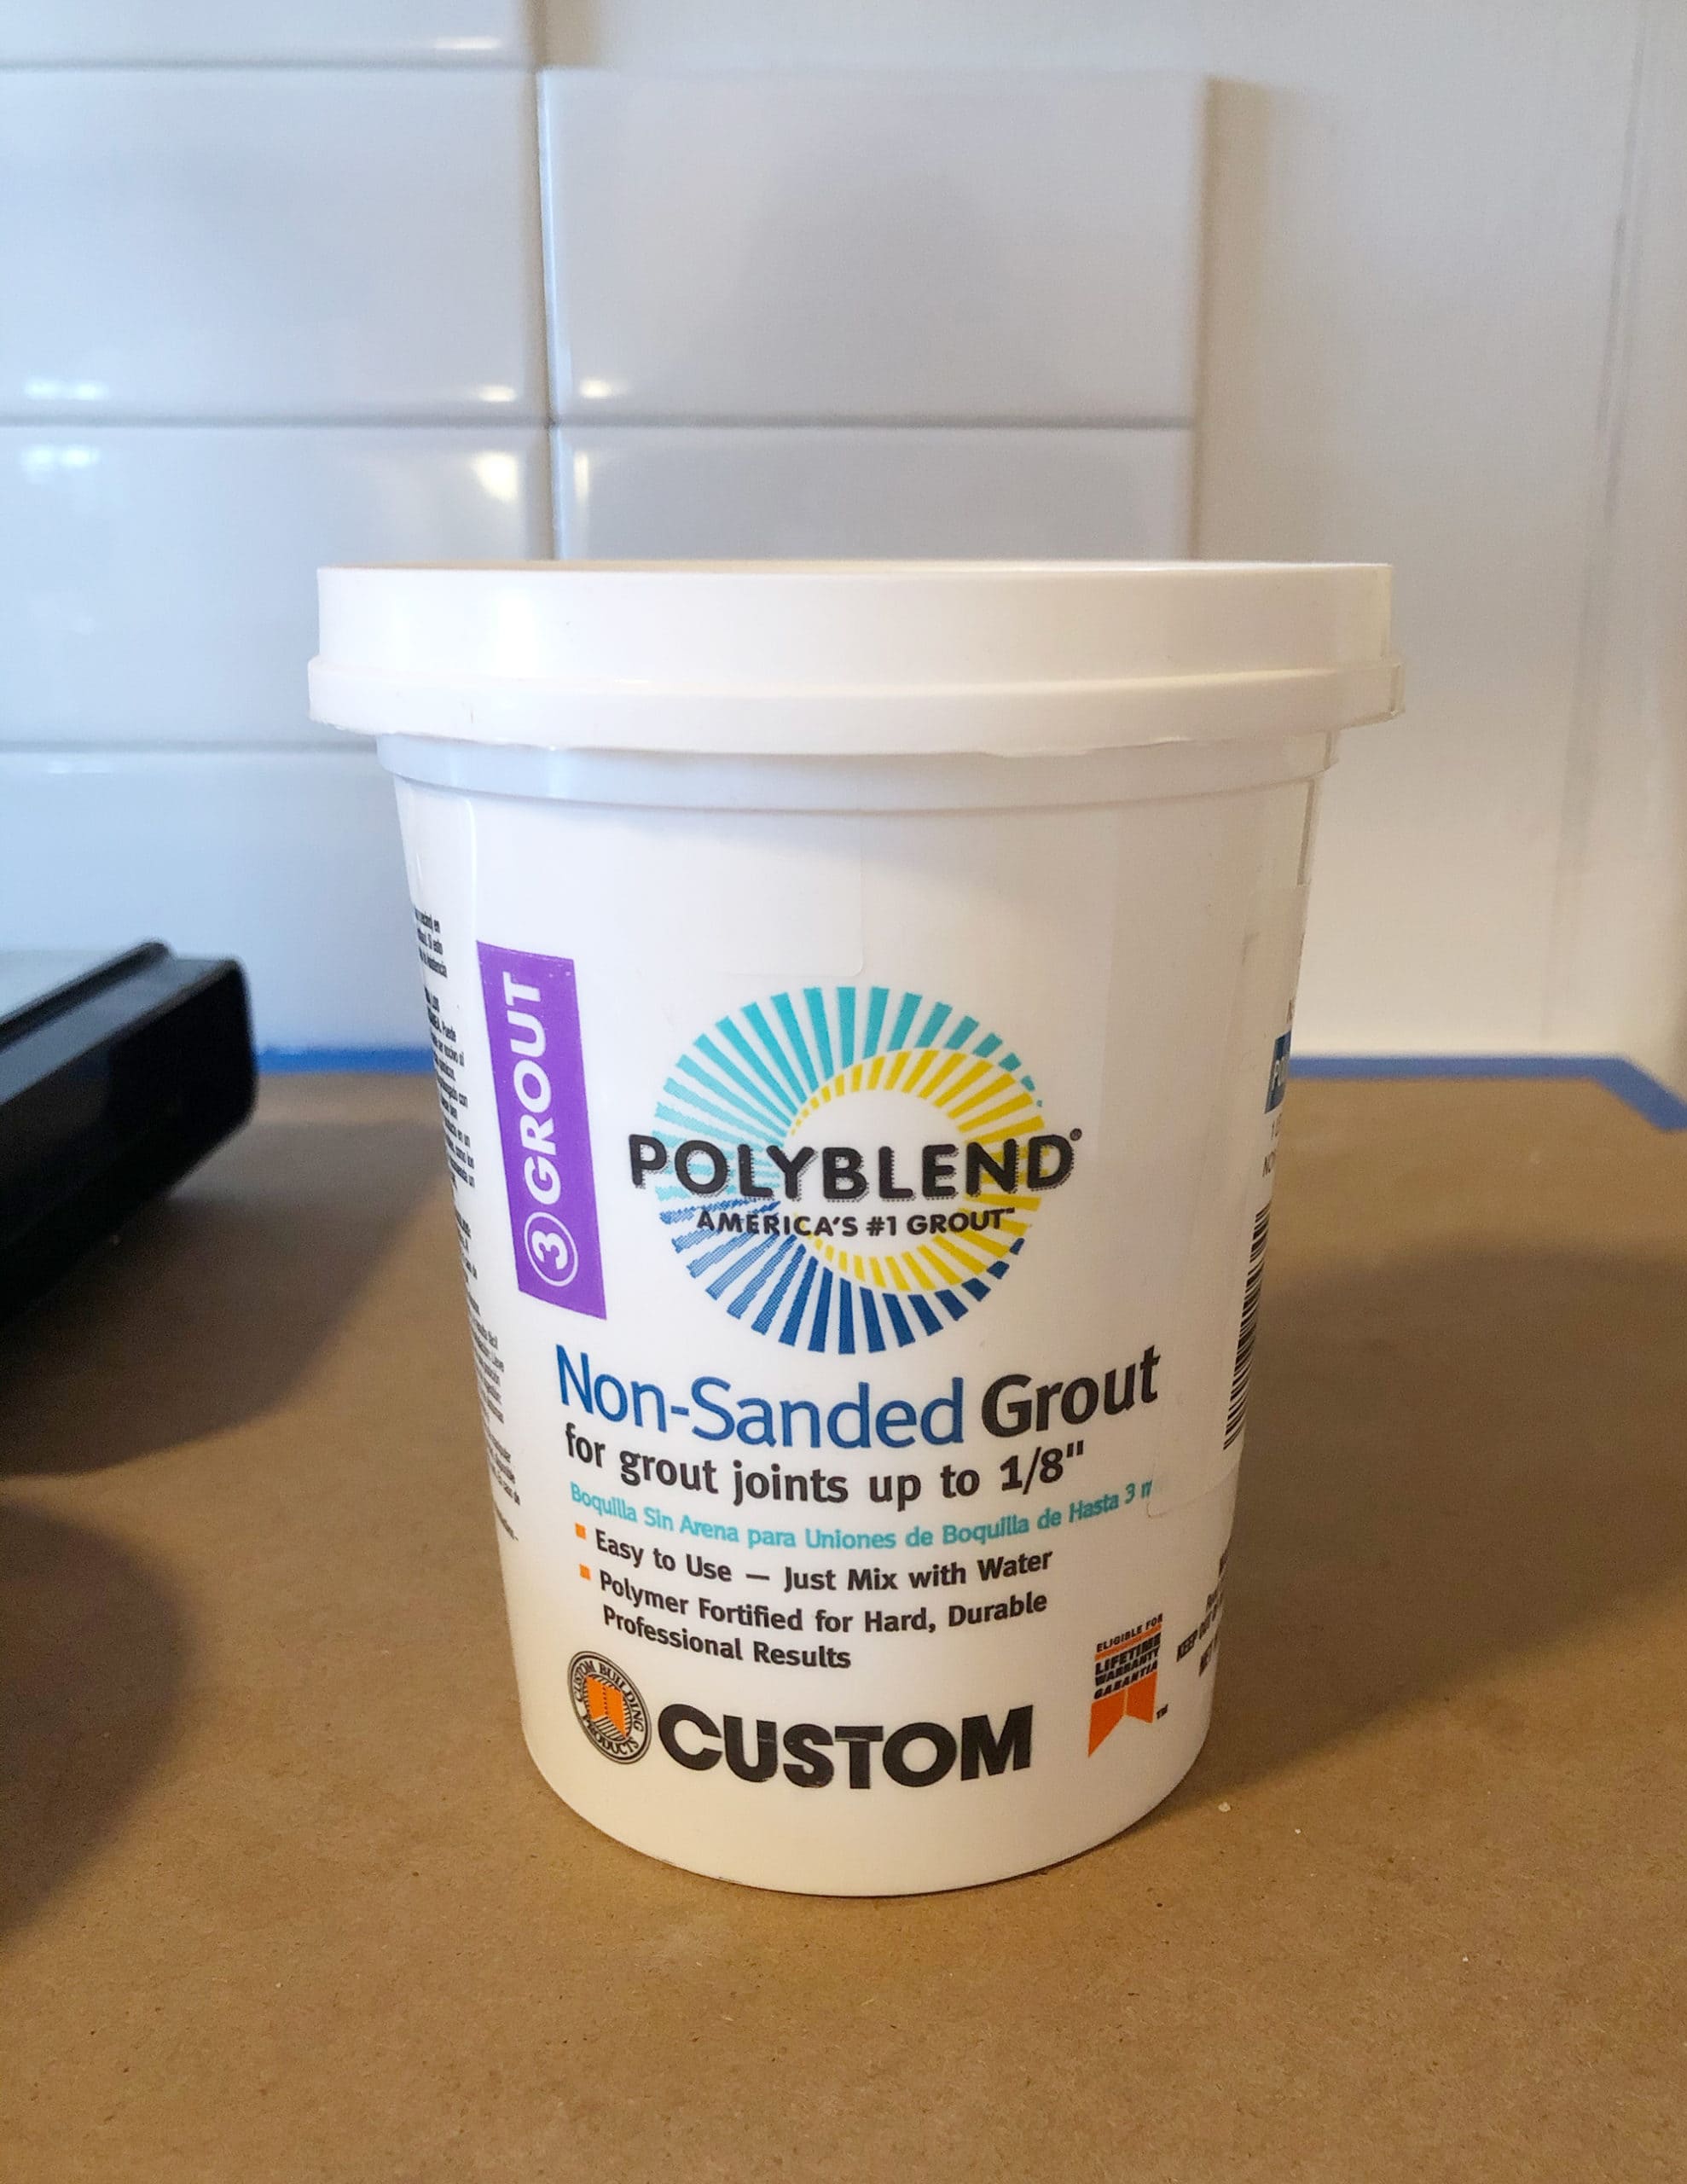
Look at this cute little tub of grout! I’ve relaxed my standards over the years when it comes to premixed grout, but I couldn’t find premixed unsanded grout anywhere. I’m not actually sure it exists? Sanded grout is too coarse for tight grout lines, so I bought this small container of Polyblend Non-Sanded Grout (the color is Bright White). It’s the perfect size for a small project like a backsplash. I bought two to be on the safe side, but one was plenty—and it was great to not wind up with 5 pounds of leftover grout. The nice thing about these is that you can just add your water directly to the container, mix, and go. That’s great if you’re working on a small project that’s going to be done all at once and with relative speed. However, it’s not great if you’re working on a job that can’t be grouted all at once, since there’s a limited window of time before the grout dries after you’ve mixed it. I realize this is common sense stuff, but it’s worth mentioning.
Grouting is inherently messier than setting tile because of the amount of water involved with cleaning off the excess grout, so I switched from paper to plastic protection for the countertops. I like to grout in small sections at a time. First I use my float to scrape the grout firmly into the joints, then I remove the excess with a flexible plastic joint knife. Then I use a CLEAN finger to smooth every grout line. Yes, for real. Yes, I wind up with wrecked fingers. This is how I get a super-clean line with no excess grout and no bubbles. One of the biggest tells of a shoddy grouting job is too much grout in the joint! It looks especially bad with darker grout, since it translates to uneven-looking lines that are really obvious.
After finger-tooling the joints, I use a barely-damp tile sponge to clean off the excess. Then I rinse that sponge really, really well. I use a small rinse bucket (don’t rinse your tiling equipment in the sink unless you want to clog your pipes) and dump the dirty water outside often. Grouting is messy business, but cleaning as you go makes all the difference. It’s OK to work in small sections! Obviously if you’re tiling a massive room you’ll want to cover more ground at once, but on a backsplash? Contain yourself. Better to clean as you go than try to remove all of the excess grout at the end and discover it’s already too dry to get a clean line.
I should mention that these are just my tips—this isn’t meant to be a concise guide to tiling. For that kind of thing, I highly recommend spending some time over at the John Bridge website. Tons of advice, tutorials, and most importantly, the world’s friendliest DIY forum. I’ve never had a tiling question that a pro on the John Bridge forum wasn’t happy to help out with.
After the grout had dried for 24 hours, I was ready to caulk! If you’ve been reading Door Sixteen for a while, you know how passionate I am about a good caulk job—and how much I hate sloppy caulking. Whenever I’m caulking tile joints (and you should never be using grout where two planes meet, by the way—those joints need to be able to expand and contract, so that’s where you want to use caulk), I use painter’s tape to get a nice, crisp line. It takes some time to do the taping, but the results are worth it. Tape, run a bead of caulk, and smooth with a damp finger. Use less caulk than you think you need to, but make sure you aren’t leaving any gaps or holes as you run your finger along the bead. BEFORE the caulk starts to dry, carefully peel off the tape. Admire your work!
(By the way, if you’re doing something like regrouting your shower or recaulking your tub, check out my post about dealing with that kind of situation. It’s an easy way to make a gross bathroom look a helluva lot better, and you can definitely do it yourself.)

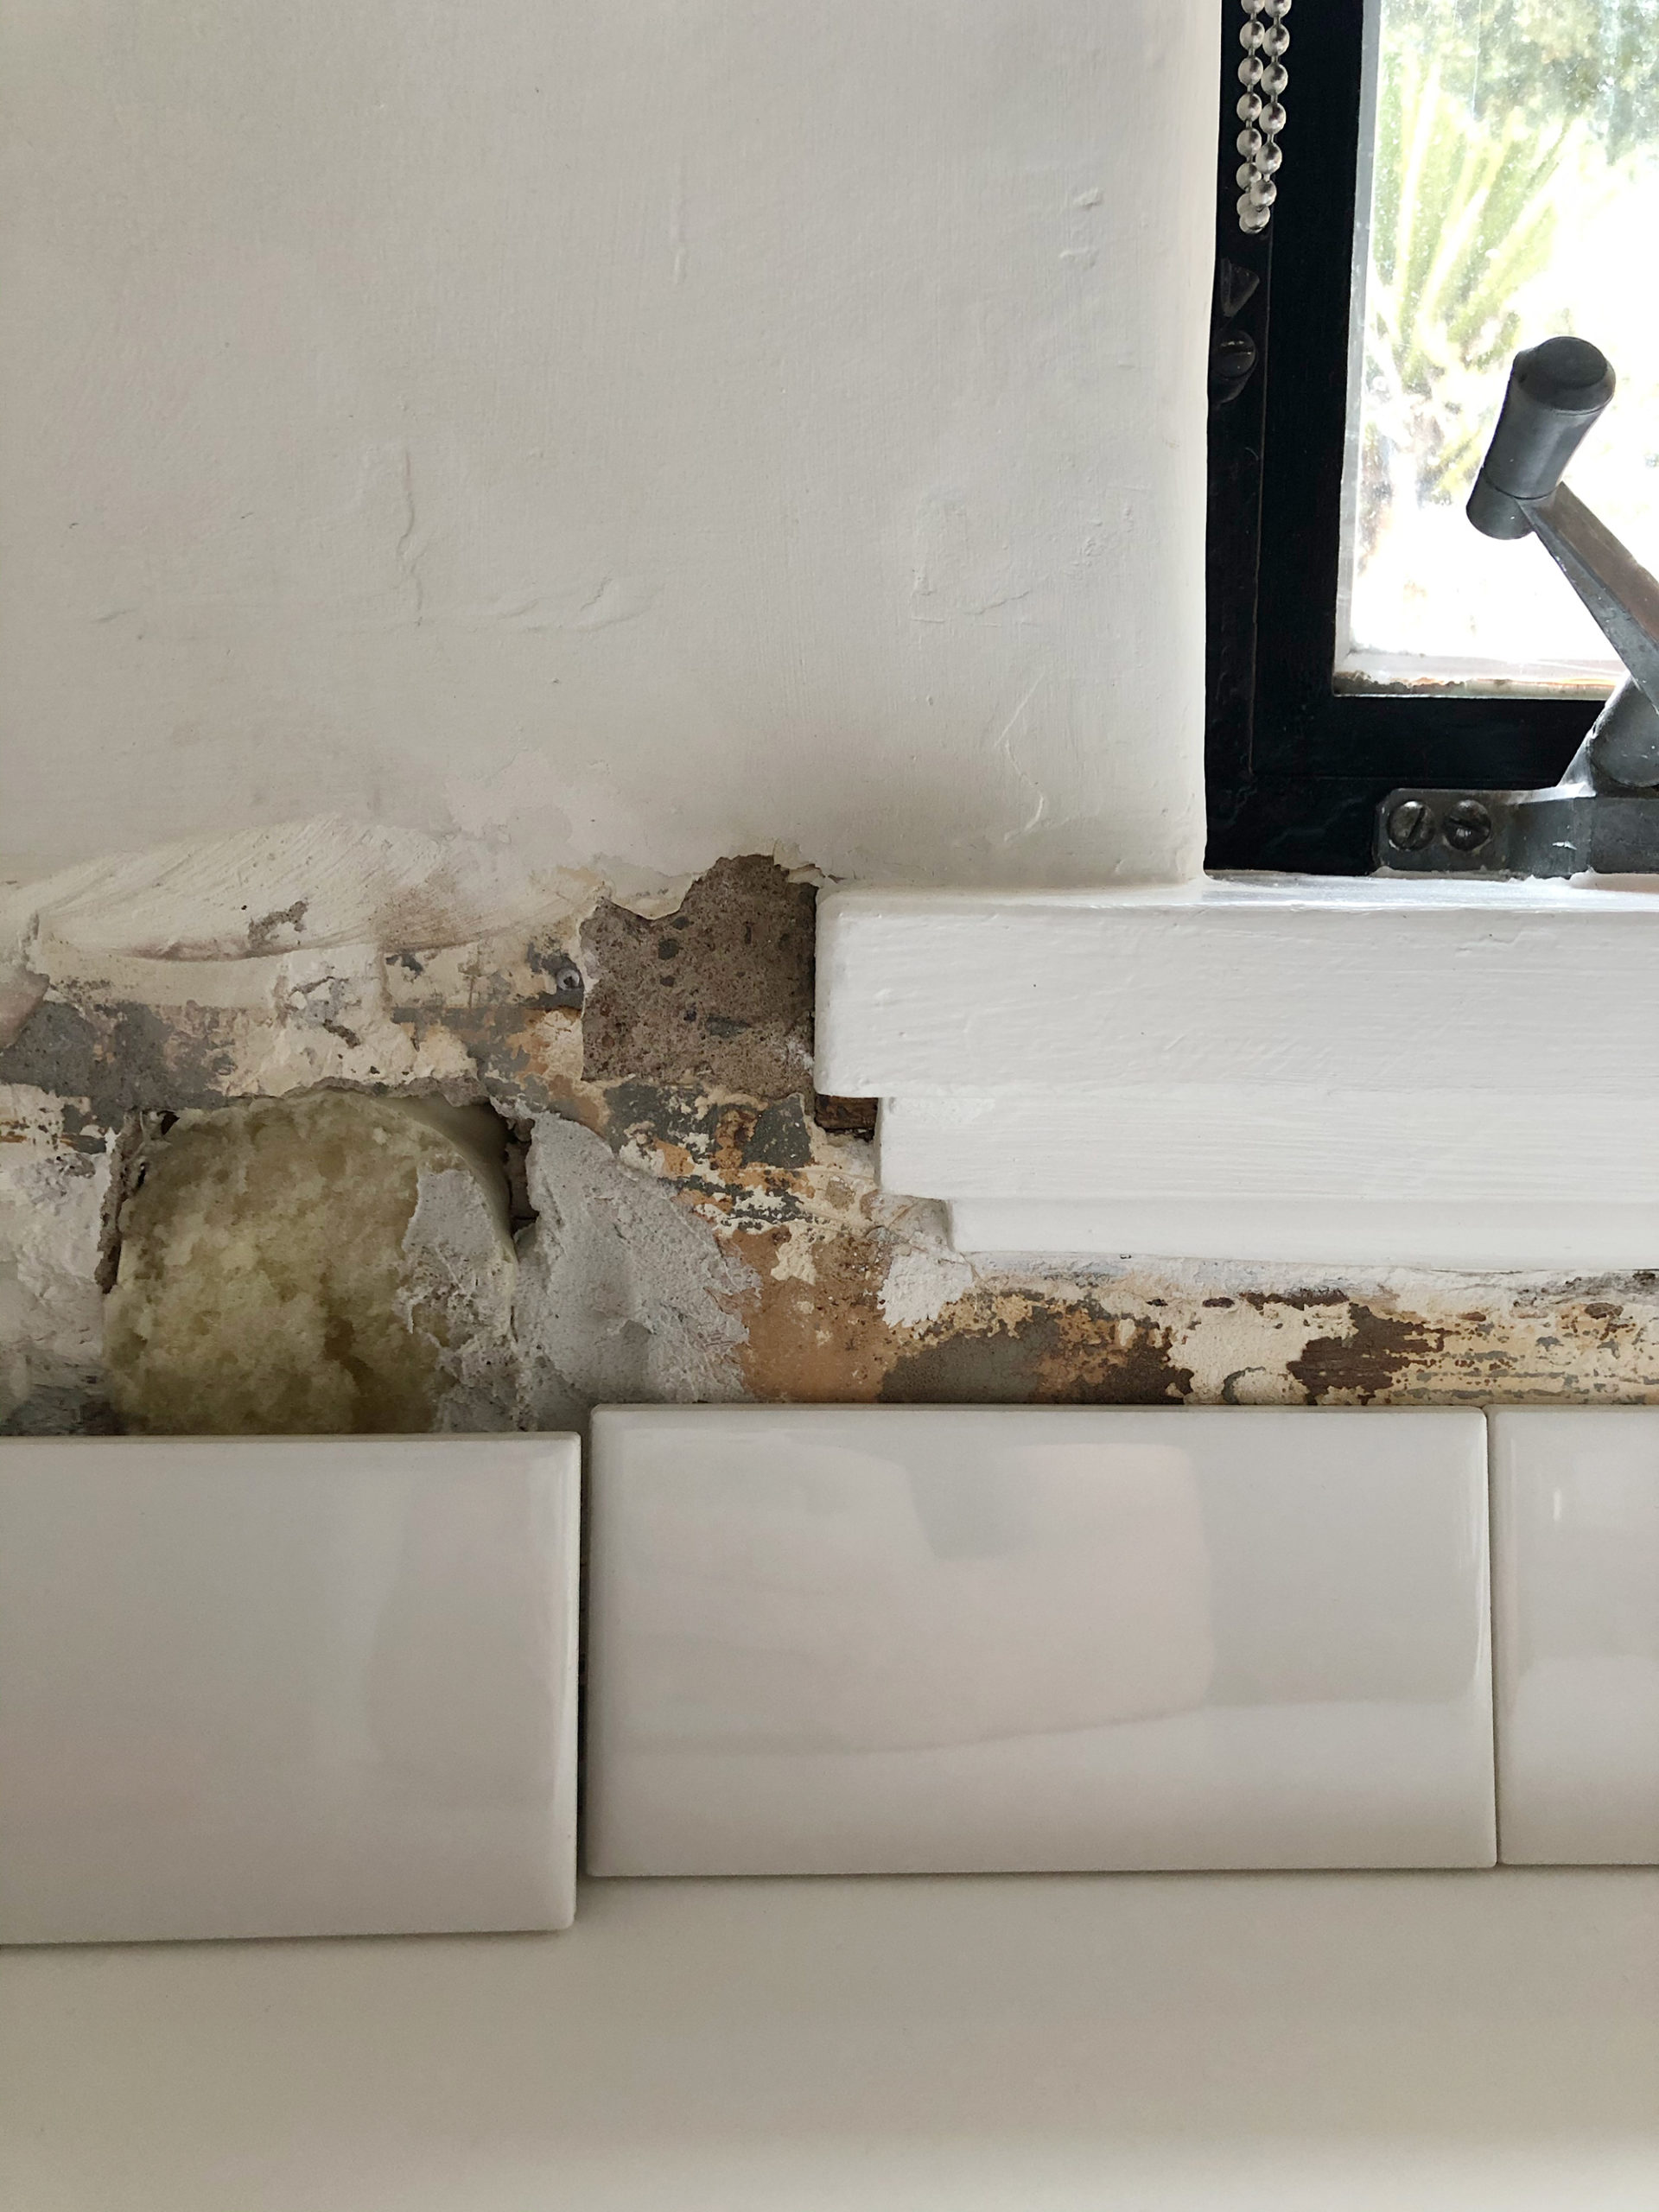
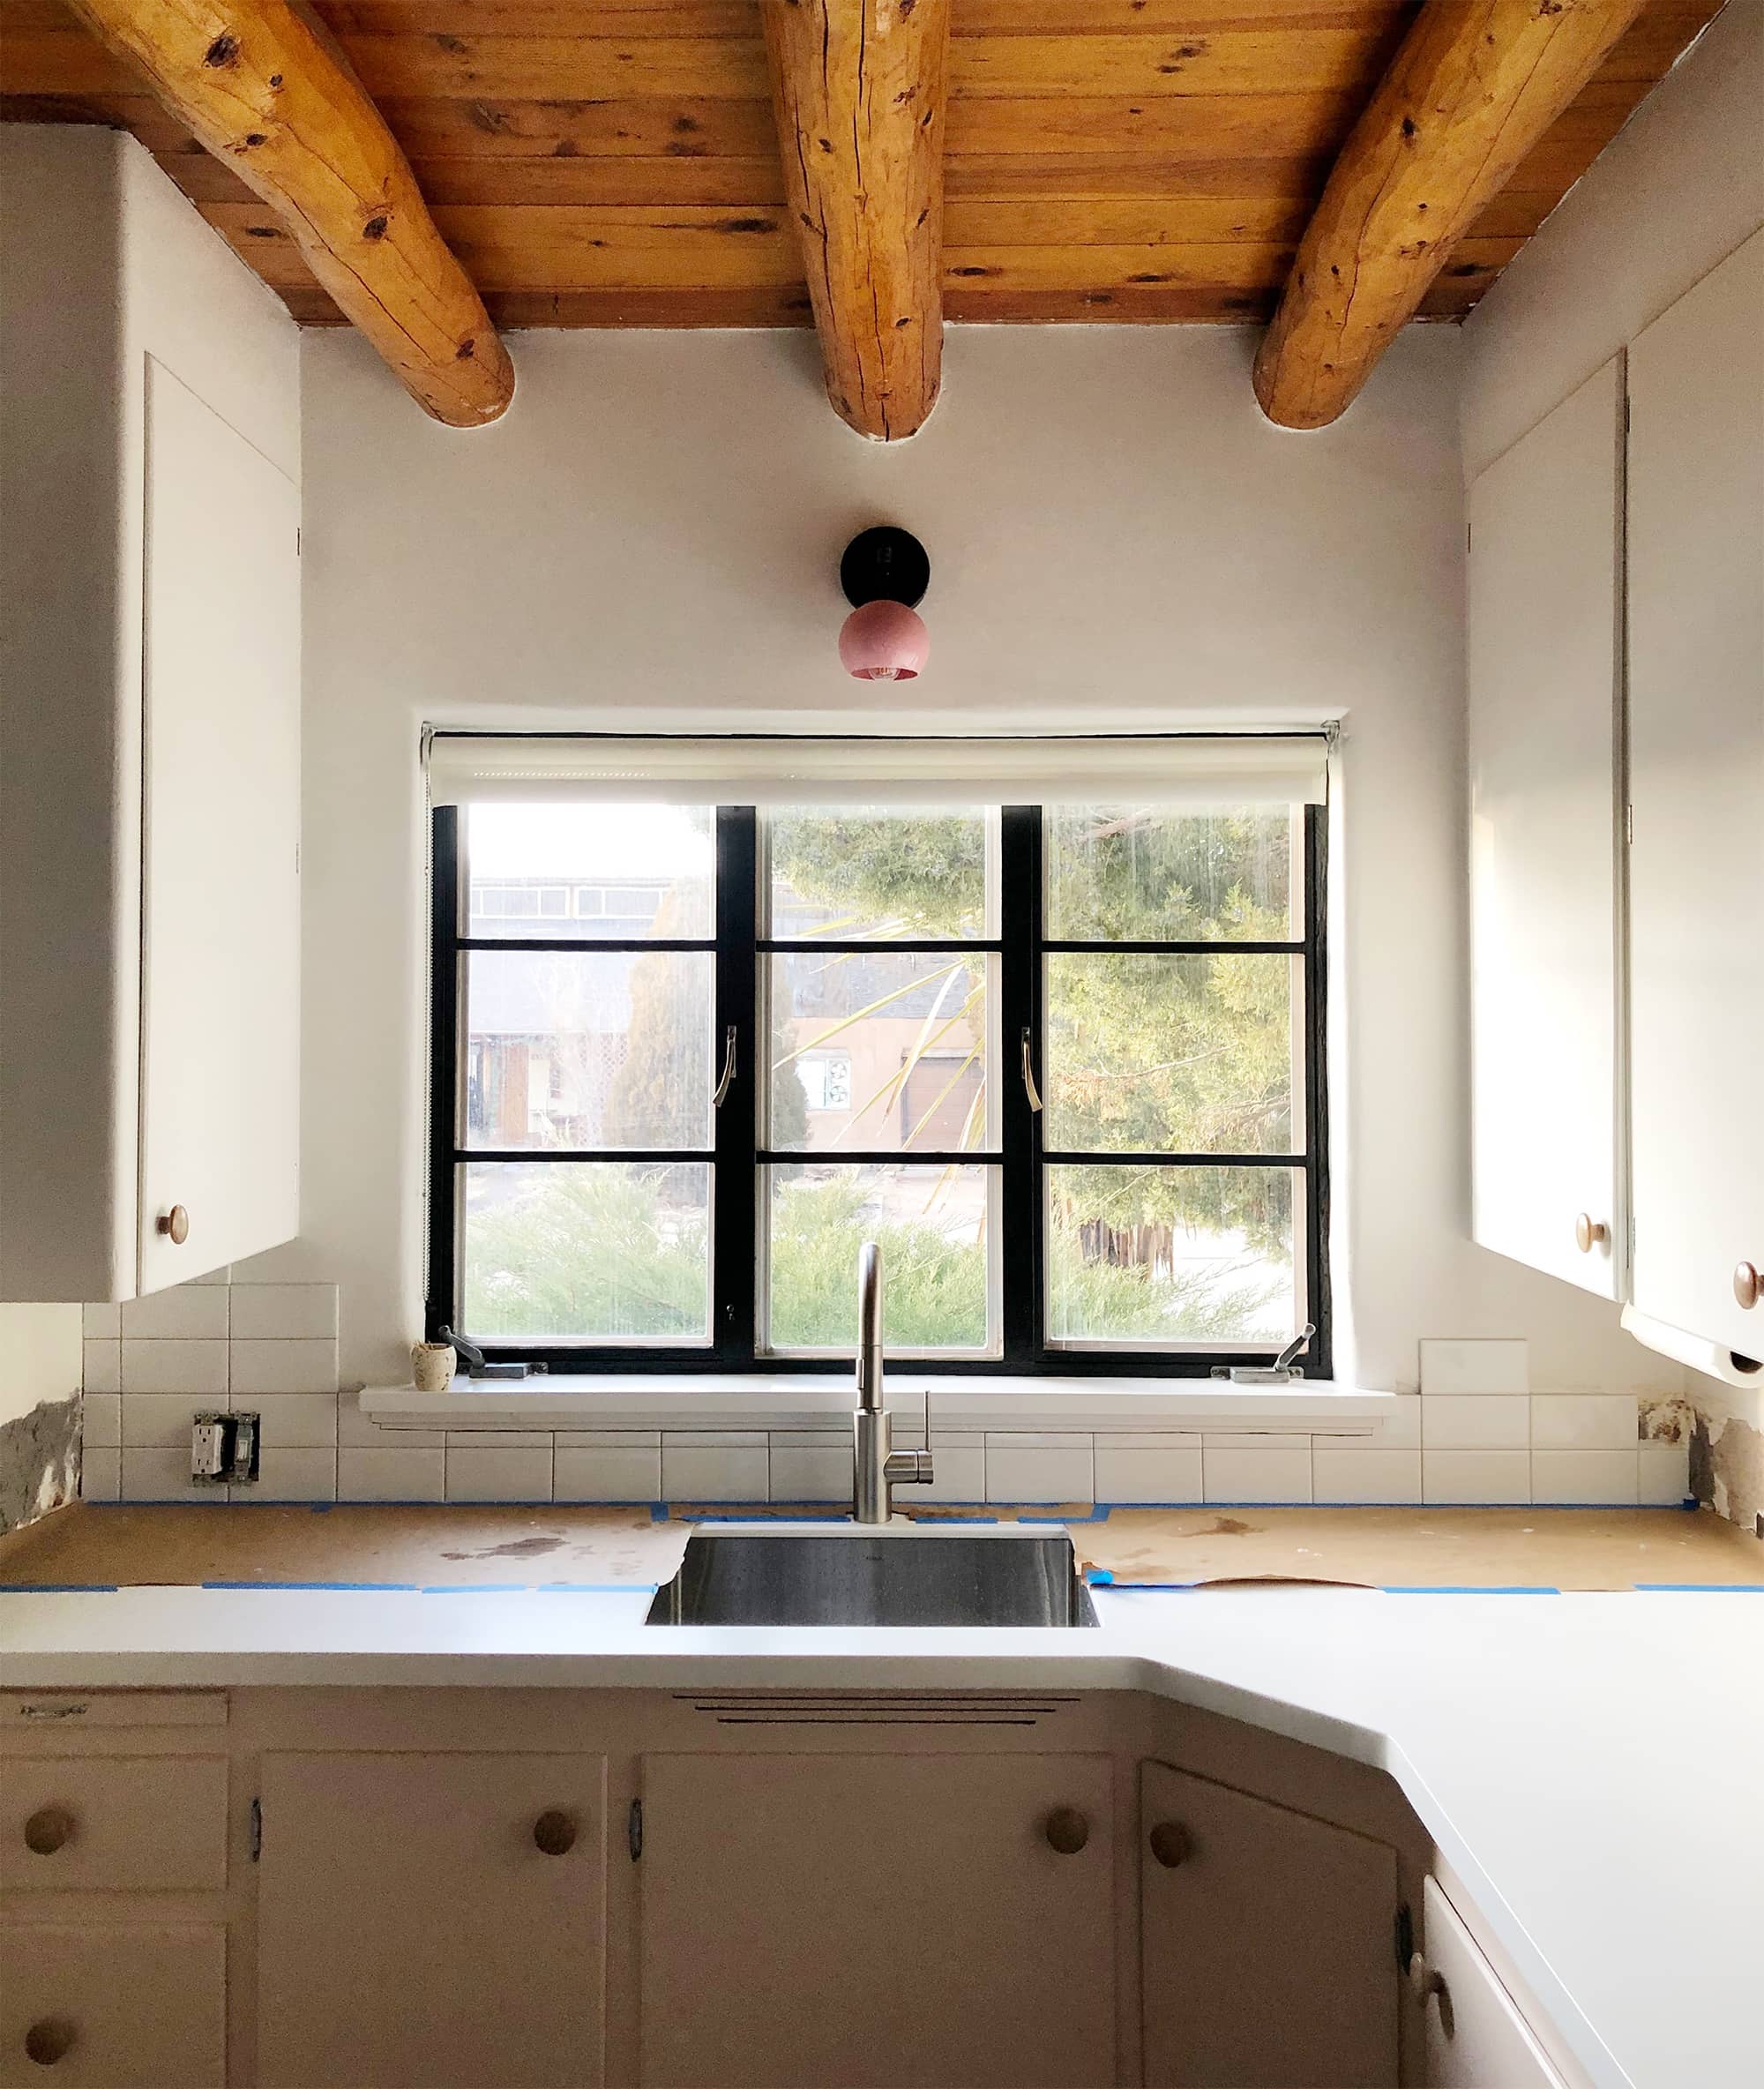
I went back and forth about how to deal with the tiles on either side of the window up until the day I caulked. Ultimately, I opted to repeat that New Mexico-happy stepped pattern that I used on the storage cubbies rather than notch out a full tile to make a squared corner. It’s also worth noting that I chose not to use any designated edge pieces, which are usually a different proportion (often 1×6″). That would have detracted from the grid, and given how casual this kitchen is, I honestly don’t think they were needed to make the tiles look “finished.” Tiles in New Mexico are often embedded into the surface of the walls, so it’s common to see a stuccoed edge where tiles end rather than a glazed edging piece. Rather than just leaving the edge of the tiles completely bare, though, I did make a little bevel with paintable sanded caulk. This photo was taking pre-painting so it looks a little grimy, but when I painted that wall, I just ran the paint right up over the caulk all the way to the face of the tile. It looks like an intentional choice and not a mistake, I swear. And I love it.
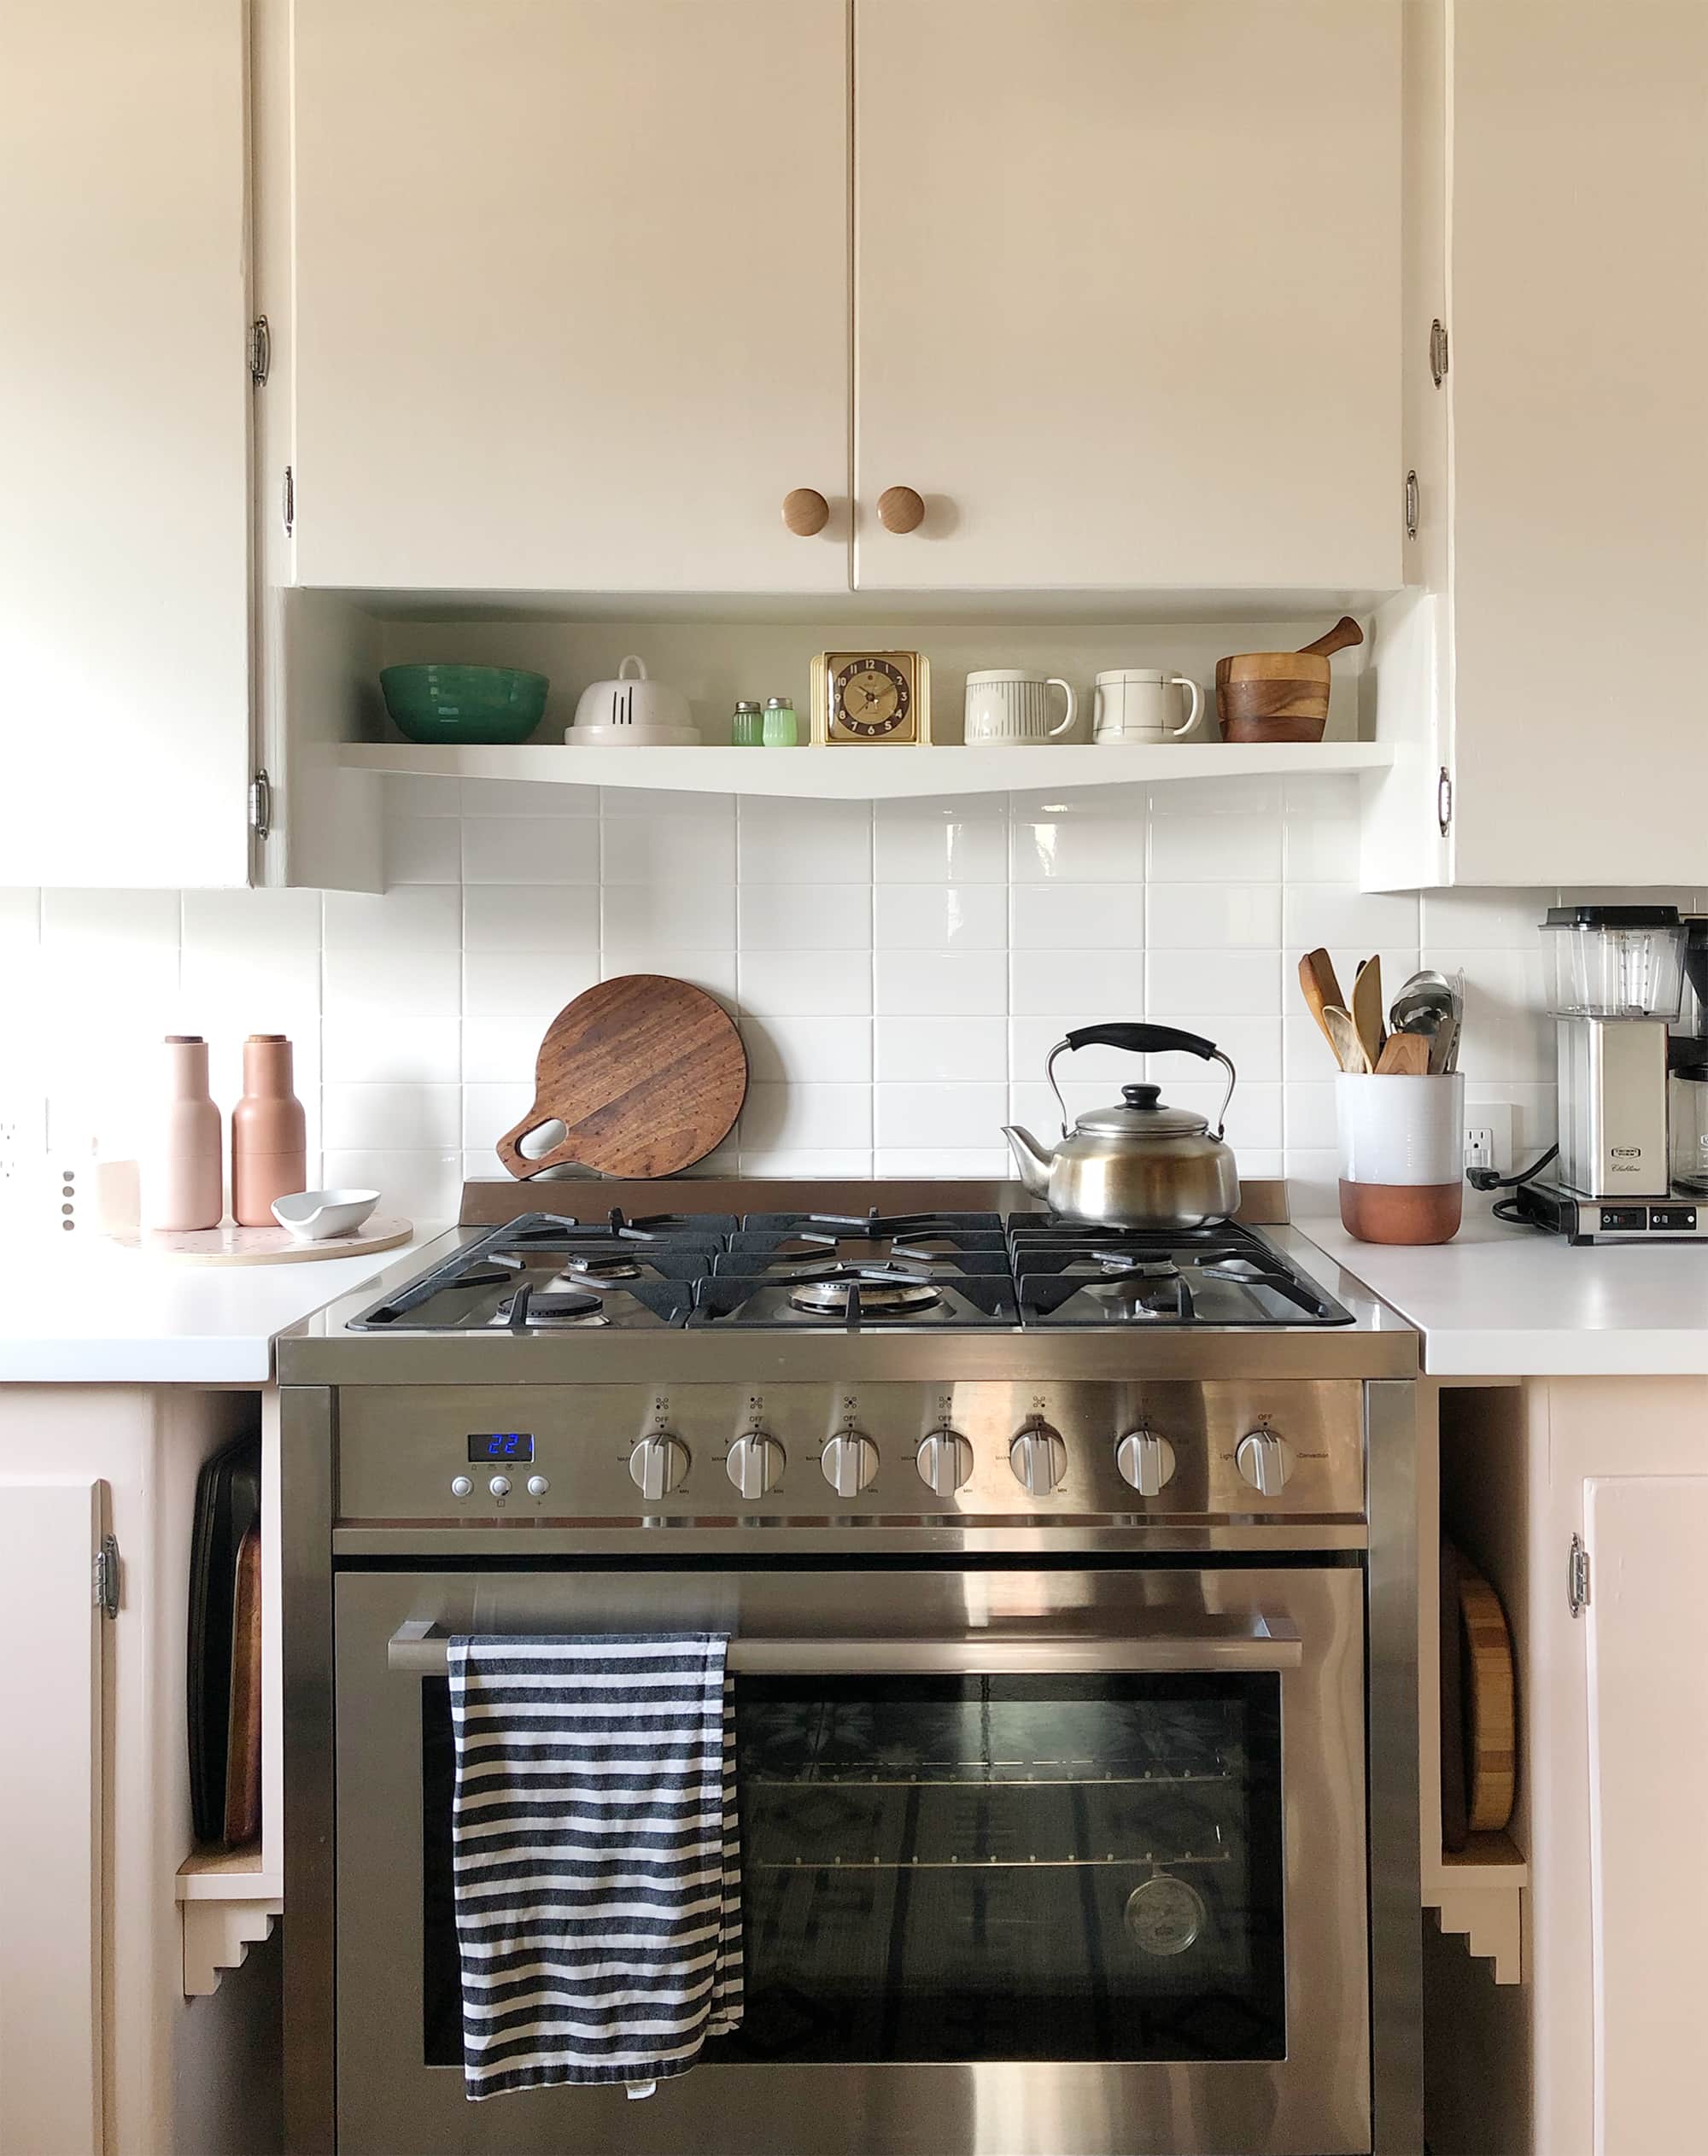
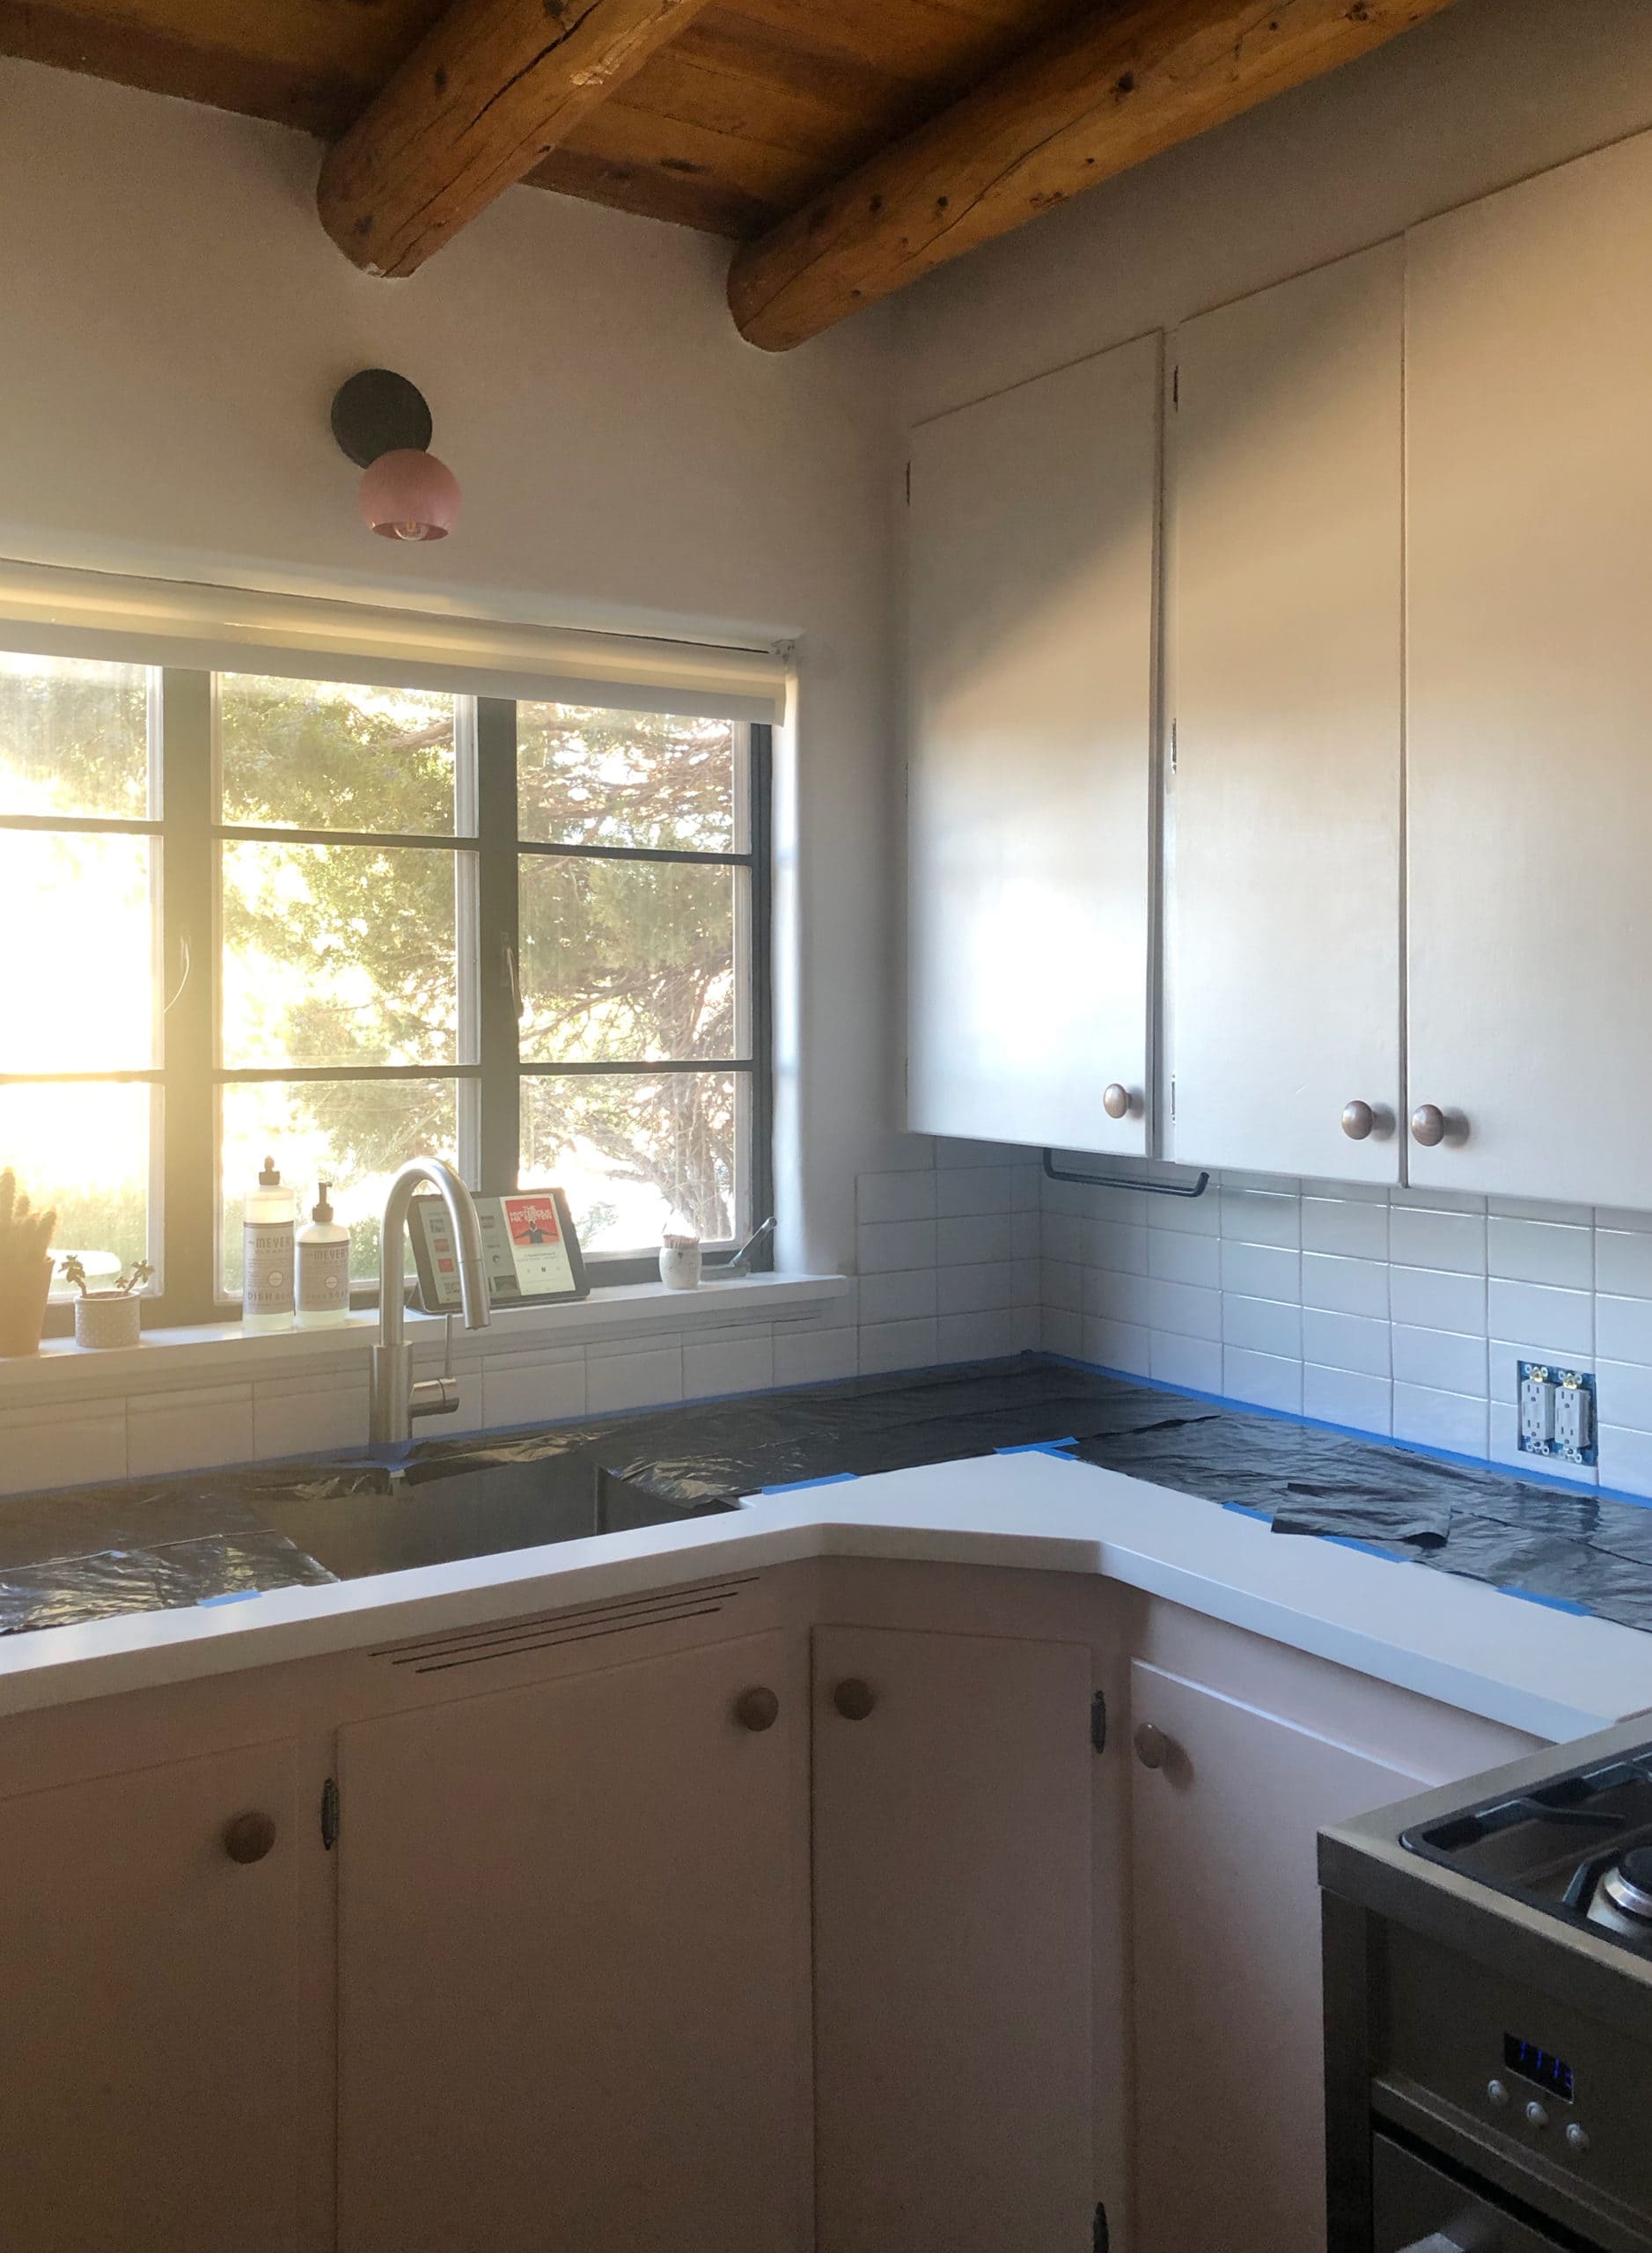
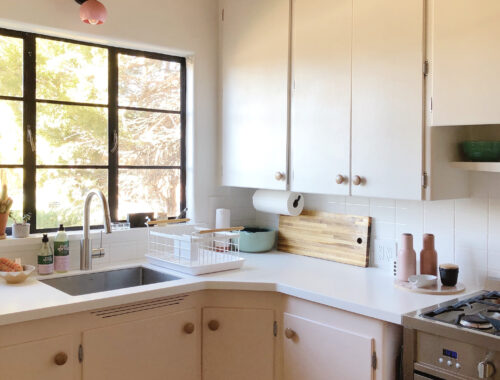
I’m so very pleased with how the tile came out! It’s a very subtle look, and this kitchen truly did not need more than that. Between the wood ceiling/vigas, the patterned floor, and the pink cabinets, there’s enough going on in the room already. I’m so glad the backsplash is understated. It’s also a testament to versatility of basic subway tiles. This space with its stacked bond tile and white grout looks completely different from my Newburgh kitchen, where I used a running bond pattern and black grout. I don’t buy into the whole “subway tile is played out blah blah blah” thing. There’s a reason this tile proportion has endured for more than a century in different incarnations. It’s highly adaptable!
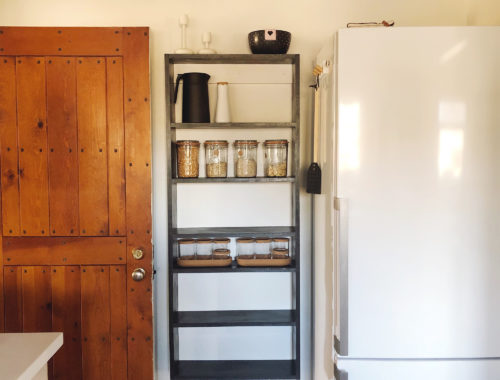
Next up? It’s time for a new refrigerator and some shelving at the other end of the room! Meanwhile, if you want to get caught up on the kitchen renovation so far…
Kitchen recap:
✚ It’s time to meet the kitchen!
✚ Kitchen planning!
✚ Kitchen cabinets: Prep + painting.
✚ Painting and stenciling the kitchen floor.
✚ Kitchen countertop demolition.
✚ Painting the kitchen’s steel casement window.
✚ Let’s add some cabinets!
✚ Building cabinet cubbies for extra storage.
✚ It’s time for the kitchen to get some countertops!
37 Comments
Understated and gorgeous! I used the same pattern in my 2017 kitchen rehab and did not know about not using grout where the countertop meets. It’s time for a good cleaning, prep, taping and caulk!
Thanks for sharing all you do — I’m a long time reader and will gladly join you on Patreon. (Daniel, too!)
I’ll tell you a secret, Michele: I think a lot of tiling contractors use grout in places where they really should be caulking (like in the corners of showers) because they don’t want to have to wait 24 hours for the grout to fully dry and then come back again to caulk. Unfortunately, that can lead to water seeping into tiny cracks that can form in the grout over time. That’s less of a critical issue in a kitchen, but it’ll stay looking a lot nicer for a lot longer if you use caulk in those areas. You’re going to feel so good when it’s done!
(And thank you SO MUCH for the Patreon support!! It helps more than I can say.)
Great job! I really enjoyed the whole process.
Oh so that’s why our contractors used grout I scraped it out and caulked a few years ago I think based on your and/or Daniel’s instructions. Just redid it recently. It is indeed so easy and satisfying.
Your tea kettle is so cute.
Thank you! It’s a Sori Yanagi kettle. I wanted one for years and years, and finally treated myself when I moved to Santa Fe. It’s a delight to use.
Good taste! I love Sori Yanagi’s work. Your kitchen is beautiful and your attention to detail makes the whole process work. Thanks for sharing.
SO gorgeous. You did an amazing job with this.
Thank you, Cheryl!
This looks fantastic. I love the step detail around the windows.
I just noticed how the trim under the window steps down in a similar step motif as those cubby supports! Tiny detail that just made me grin. I love it so much. I’m so enjoying this series on the kitchen. 🙂
Hi Anna, I’m loving your blog posts and am sooo jealous of this darling kitchen. You mentioned (either here or on instagram) that your design business has slowed down and I was wondering if you’d ever consider writing a book directed to women about home repairs and remodeling. I’m needing to replace the guts of my toilet and since the coronavirus I’m hesitant to invite anyone in my house. Anyway, I’d buy a copy! Best wishes from Colorado
Cynthia, there are a lot of reasons why I’ve never had any interest in writing a book, but the biggest one is that that’s what this blog is for. 😉 I’ve always shared the things I want to share. I don’t think I have anything to offer in terms of renovation as it pertains to women, but please do think of this blog as a really disorganized book. (Also, my best advice is always to google what you’re trying to do and seek out the advice of pros!)
Amazing! Question: did you consider adding a dishwasher to the space?
Nope! I like washing dishes by hand, and the cost/space trade-off of adding one wouldn’t have been worth it for me.
Love it, especially the charming happy steps! With so many white surfaces how do you pick the right shade(s)?
Before we finalized our countertop order, we checked to make sure the sample looked OK with a piece of the tile.
Thanks! That makes sense, and here I was thinking there was a more complicated process for coordinating whites, ha ha. Can’t argue with the results – your kitchen is an absolutely lovely space, inviting and practical.
You’re amazing! Your kitchen is so beautiful and organized! Can’t wait to spend time with you in there again! And I enjoy your posts MUCHO! 🙂
Looks so amazing Anna. the kitchen is so cute… started following you most likeley 9 years now… remember the door 16 in burbs…loved that house
great choices! It looks excellent and right for the space.
Literally made a happy little gasp sound when I saw the close up of that window trim and realized it was the same step pattern as the cubbies you built! So smart, so well designed and thought out. Great work!
I recently bought some peel and stick tile for a kitchen backsplash and am now 100% rethinking putting it up and doing this instead. Our kitchen is SMALL and this would be a small but super high-impact project…but we’re hoping to gut renovate this house in 5-8 years and the kitchen layout will change drastically, so I’m struggling to commit time, energy, and money to projects like that when I know we won’t be able to remove and reuse the majority of the materials elsewhere.
5-8 years isn’t a small amount of time! You’re not talking about 6 months. Assuming the substrate is in good condition (which it would have to be for peel-and-stick, anyway), using inexpensive tiles like these is pretty low-commitment across the board…ESPECIALLY if your backsplash area doesn’t require a bunch of weird cuts that would necessitate you buying/renting a tile saw, etc.
I love that your choices are so intentional, and that you take care to center things(!!) and do the job right. It’s all in the details!
Wow, this looks AMAZING! It sounds a bit silly but thanks so much for inspiring me to start undertaking some renovation projects that I would never have thought I could do. I’ve just dug up a whole section of the backyard to prep it for turf and while it is not finished yet, I’m just so damn happy I started it and believed that I could do it!
When I started reading, I was wondering if you’d tile under the sideways cabinet to the left of the sink. It looks like you decided to repair the wall instead. Since your designs are always so intentional, I’d love to hear your thinking on that :).
Generally speaking, I’m not a fan of side-splashes. Unless the whole wall is getting tiled beyond the cabinets, I think it looks really awkward to have a little square patch of tile at the end of the countertop. This blog post sums it up well!
I also prefer to minimize edges, although your grout bevel looks great.
I’m probably doing something stupid, but I can’t get the hyperlink to work ^^.
Oopsie! Sorry about that! I fixed it. 🙂
I love how you have 2 coffee machines that live on the counter!
All the coffee, all the time!
You’re a magician! Wow!
this is simply the best!
Love love love!! My husband and I just picked up some Daltile subway tiles as well ($15/box?! Yes!). This will be our first tiling job. I’m a little concerned because we did get sanded grout (the bagged kind you have to mix yourself), so I’ll have to do a little more research on it. But this is a great start for us, especially the tips on caulking. Love the stacked look!
Amanda, if you’re using the self-spacing tiles (which have a really tight grout line), you definitely want unsanded grout. The sanded stuff won’t get deeply enough into the crevices!
I love your creative/cost-effective solutions, and the overall effect is so charming and personal!
Are these 3×6 tiles?
Yes.